
[Photo by Dulcey Lima on Unsplash, modified(crop)]
The first installment of this series we just built a phony Python app and deployed it to DO App Platform.
Today we will lay the foundations of what is to follow.
Plan of Action
As the man-month story teaches, I had some time (Christmas Holidays), and we have a project to develop. I needed a plan!
This is what happened, faithfully reported... more or less!
This was what I thought:
Well... we do not know as yet what we are building at the end, leave alone a plan!
OK, the project sounds like this: we will create a bot (in this case a Twitter Bot to keep focused just on one platform, but we could port it as well). This bot is Geography oriented, that is, it should produce maps.
The basic functioning is this: you mention the bot in Twitter, and the bot answers your tweet with a tweet of an image containing the map.
The basics is this, we can extend it at will (and we WILL).
As for the plan (roughly):
Build a server API with the same characteristics of the BOT (both to test the functionalities apart from the BOT, and to allow for composition)
Add a BOT to the server (or more than one)
We will use an incremental functions development methodology, such as that from today onward we will have always a usable server and a usable BOT at least, adding functionalities as we go.
It doesn't matter that we do not show images as yet, but it is important that we keep paired the server-BOT interface.
We need a BOT (and a Twitter Developer Account)
As per the above, we have a server that shows us a message: we need a BOT that does the same.
Let's create a new repo for this, with the usual:
mkdir geobotshow
cd geobotshow
python3 -m venv venv
curl -L -o .gitignore https://raw.githubusercontent.com/github/gitignore/master/Python.gitignore
git init
We will use tweepy for this project. First let's activate, then we install all that is needed
source venv/bin/activate
pip install tweepy requests
pip freeze > requirements.txt
Tweepy uses OAuth to authenticate to Twitter. You need up to 4 keys in order to use it. Time to get those!
To create a new twitter app for your bot, go to the twitter developer page and Apply (top right).

Then, I chose in the welcome page the hobbyist reason that... I'm building a bot!

It then asks if it's me! Well, duh!

OK, kidding, just select the country, and other options (if applicable). Next it will ask you to explain what you need the account for.
"How will you use the Twitter API or Twitter data?"
Go ahead and write your reasons!
Mine were kind of: "Create a useful geography bot" (okay, maybe I spent some few additional words for the concept to be accepted, at least 200 char!).
OK, go ahead and answer all questions. Switch off those that do not apply (such as showing tweets outside Twitter & the sharing with government entities... unless you are from the Gov, following this: in that case, I declare I have nothing to do with everything is written in this post series!!!)
After this you have to review, and to accept the agreement and submit.
At the end you should get an email confirmation to activate the developer's account.
When you do, you'll be redirected to the app creation page:

Now thou can finally Get the Keys Yeahhh!
Now you have to copy them. I suggest you create a .env file in your project, with the following:
TWITTER_API_KEY=***
TWITTER_API_SECRET_KEY=***
TWITTER_BEARER_TOKEN=***
The bearer token is better saved somewhere, even though we are not going to use it.
If you copied the .gitignore as I showed in the first tutorial, it is already ignored by git, otherwise you should add .env to your .gitignore
Now go to the app page, and edit the "App Permissions"
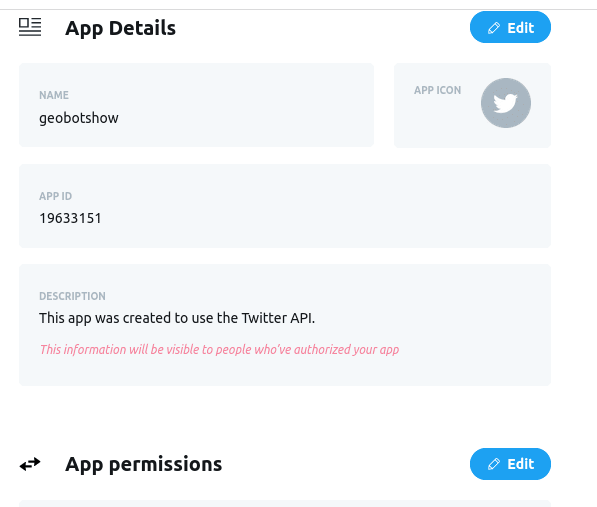
Set it to both Read&Write. Then save.
We need to go to the app Keys and tokens

At the bottom, we need to generate the Access token & secret.

Now we can update our .env with 2 new fields:
TWITTER_ACCESS_TOKEN=***
TWITTER_ACCESS_SECRET=***
Finally we need these variables available in the virtual environment.
We first deactivate the environment (if active), then append the load commands to the activate file itself
deactivate
echo "set -a; source $(pwd)/.env; set +a" >> venv/bin/activate
Now we can re-activate the environment and check if the variables were set
source venv/bin/activate
echo $TWITTER_API_KEY
***
You should get your API KEY printed out
Test the Tweepy Communications
We should check that everything is going well.
On the terminal get a Python shell:
python
Python 3.8.6 (default, Sep 25 2020, 09:36:53)
[GCC 10.2.0] on linux
Type "help", "copyright", "credits" or "license" for more information.
>>>
Now we can import Tweepy and test the access:
>>> import tweepy
>>> auth = tweepy.OAuthHandler(TWITTER_API_KEY, TWITTER_API_SECRET_KEY)
>>> auth.set_access_token(TWITTER_ACCESS_TOKEN, TWITTER_ACCESS_SECRET)
>>> api = tweepy.API(auth)
>>> api.verify_credentials()
In the above, substitute the key names with the actual values (or import them from the .env).
Basically we first create a authorization object, then we set for it the access tokens.
We pass the keys to an API object, and then we use the verify_credentials() method to verify that it is working as expected.
You should see the terminal flooded with info, and that means that it is working. Towards the beginning you should get info on the real name and the screen name, but if you do not spot them among all the rest, try the following:
>>> user = api.get_user('<your-twitter-name>')
>>> print(user.screen_name)
<your-twitter-name>
>>> print(user.name)
<Your Real Name>
Substitute in the above your twitter handle inside api.get_user(), and you should see the correct info printed.
Now you can quit() the Python shell (just write that function name and press enter).
We Can Implement the BOT Now
We need a configuration file to load configurations for the Twitter bot; we call it config_tweepy.py
import tweepy
import logging
import os

logger = logging.getLogger()

def get_api():
    api_key = os.getenv("TWITTER_API_KEY")
    api_secret = os.getenv("TWITTER_API_SECRET_KEY")
    access_token = os.getenv("TWITTER_ACCESS_TOKEN")
    access_secret = os.getenv("TWITTER_ACCESS_SECRET")

    auth = tweepy.OAuthHandler(api_key, api_secret)
    auth.set_access_token(access_token, access_secret)
    # Set some useful alerts
    api = tweepy.API(auth, wait_on_rate_limit=True,
        wait_on_rate_limit_notify=True)
    try:
        api.verify_credentials()
    except Exception as e:
        logger.error("Error connecting to the Account", exc_info=True)
        raise e
    logger.info("Connected to the API")
    return api
Now we will put it to use inside a bot called tweet.bot.py:
import time
import os
import logging
import tweepy
import requests

from config_tweepy import get_api

logging.basicConfig(level=logging.INFO)
logger = logging.getLogger()

def check_mentions(api, since_id):
    logger.info("Retrieving mentions")
    new_since_id = since_id
    for tweet in tweepy.Cursor(api.mentions_timeline,
        since_id=since_id).items():
        new_since_id = max(tweet.id, new_since_id)
        if tweet.in_reply_to_status_id is not None:
            continue
        logger.info(f"Answering to {tweet.user.name}")
        logger.info(f"{tweet.text}")

        # getting the API response
        response = requests.get(os.getenv("API_HTTPS"))

        # reply to mention
        api.update_status(
            status=f"@{tweet.user.screen_name} {response.text}",
            in_reply_to_status_id=tweet.id,
        )
        logger.info(f"Since_id: {new_since_id}")
    return new_since_id

def main():
    api = get_api()
    since_id = int(os.getenv("BOT_SINCEID"))
    while True:
        since_id = check_mentions(api, since_id)
        logger.info("Waiting...")
        time.sleep(30)

if __name__ == "__main__":
    main()
As you can infer from the above, we need two additional env variables,
API_HTTPS=https://<appname-id>.ondigitalocean.app/
BOT_SINCEID=1
The first holds the URL of your service, to retrieve the data from (you can check that easily underneath the name of your DO App Service).
The second holds a sort of pagination of the tweets id, so that it keeps track of what it has already answered to, in order not to start always to answer from the beginning. We start with 1, and it will get automatically updated. Also check on it, since it goes on the logs: this way if the app crashes, or gets updated, we can resume from the last one, and not start back from the beginning
Time to run:
python3 tweet.bot.py
We can tweet something mentioning our bot, in order to test if it works
@geobotshow test
And after a while we should see in the console the logging of the action:
INFO:root:Retrieving mentions
INFO:root:Answering to Davide Del Papa
INFO:root:@geobotshow test 4
INFO:root:Since_id: 1342897400902508546
INFO:root:Waiting...
And it should show also in your timeline

I suggest to save the Since_id and to substitute to the script's own one, so that each time it starts again the script will not attempt to answer to old mentions-
I suggest also to cancel some of the logger.info(), since in production we will not need them. Moreover, we need to log on a file with:
logging.basicConfig(filename='tweet.bot.log', level=logging.INFO)
That should be enough for the following.
Deploy it
When we are satisfied that everything works correctly, we can deploy it to DO App Platform
First let's commit
git add -A
git commit -m 'First Commit'
In order to deploy, we need to go to the main page of our app and select the Components tab:
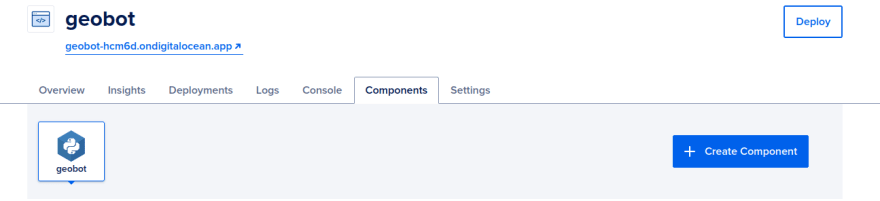
We need to Create a New Component, and we select Worker
You need again to select the repository (if it does not show, just refresh the permissions, clicking on the link below the repository selection dropdown: change it, change it back and save)
Then you'll pick again the branch and the region of deploy.
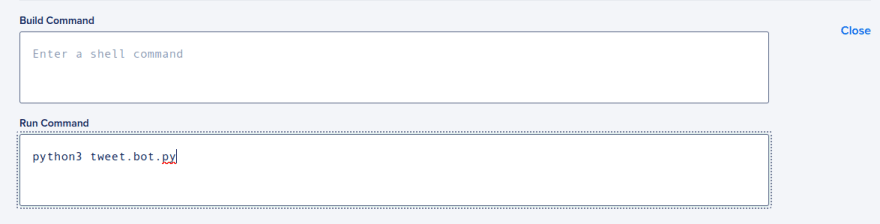
After this, it will have detected a python service, but will be unable to detect the running command: just edit the run command as before:
python3 tweet.bot.py
Moreover, we will need to insert the ENVIRONMENT variables!
As there is not a way to load a file, we have to add them manually

Make sure to select [x] Encrypt where appropriate, so that it will add a security layer.
It is time to select a plan, and again we can select the smallest size.
Then we have to wait for the deploy
Now, we can try it online and see everything running smooth

We can also check the log file in the console
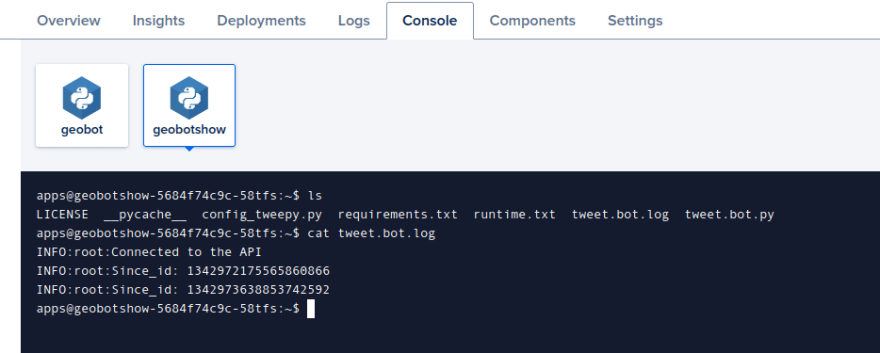
Conclusions
We have set up a worker to run as a bot
The only problem we have with this configuration is that it will occupy two DigitalOcean Containers: one for the service, and one for the worker.
However, this configuration is quite flexible.
Stay tuned for the following episodes.

Top comments (0)