Introduction
In part I and part II of this blog series we built an Azure Search Results Viewer in Vue, inspired by the demo application of Evan Boyle's AzSearch.js project. As a final step in the process we will now publish our application to an Azure Storage static site using an Azure DevOps project and pipeline.
Azure DevOps is Microsoft's cloud offering in the CI/CD and team collaboration space. It evolved out of the Visual Studio Team Services Platform and includes code repositories, kanban boards, CI/CD pipelines, test plans and artifact repositories. It is a complete environment for agile software development and deployment automation, and also allows for gradual adoption by teams with existing workflows and tools.
Prerequisites
If you want to follow along with this blog post, you will need the following prerequisites:
- access to an Azure DevOps organisation with the ability to create projects.
- access to an Azure Subscription that can hold the storage account.
For those who don't yet have access to an Azure DevOps organisation, you can get up and running for free in no time by heading over to the Azure DevOps landing page. Let's start by setting up our Azure DevOps project.
Step 1 — Setting up an Azure DevOps Project
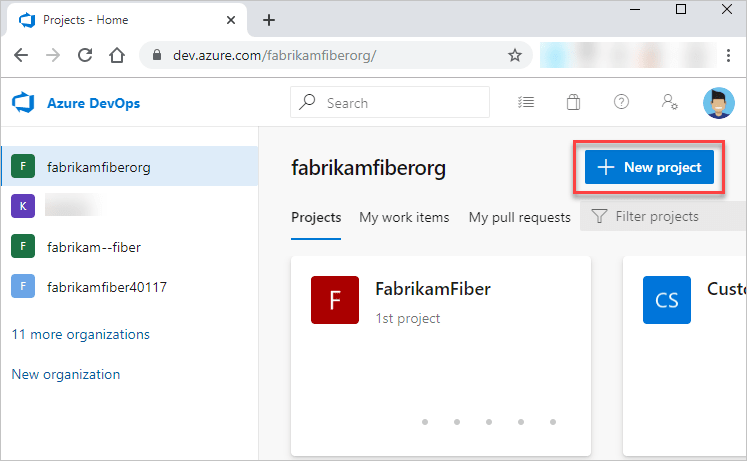
Log in to your Azure DevOps organisation and create a new project.
Enter a name for the project into the form provided. Choose the visibility, and set the initial source control type to Git, and work item process to Basic in the Advanced section.
When we find ourselves on the welcome page for our new project, our first step will be setting up a source control repository to hold the application source code. To do this click on Repos in the left-hand sidebar. You'll see the starter screen for your project's default repository. We have 2 options for getting the starter code into our repo. In either case you should start by browsing to the git repo for our sample applicaton.
Once there you can get the code by either forking the repo (if you'd like to keep the commit history) or by downloading the code and setting up your own repository. We will choose the latter option.
Start by opening a terminal and changing into your working directory. We will create a folder for our project
mkdir azure-search-vuex
cd azure-search-vuex
git init
Back in the browser, on the top right side of the page, select Download as Zip from the dropdown menu
Extract the contents of the zip file into your working directory and execute the commands as indicated on your DevOps project's starter page.
git remote add origin https://<your organisation>@dev.azure.com/<organisation>/azure%20search%20results%20viewer/_git/azure%20search%20results%20viewer
git add .
git commit -m "initial commit"
git push -u origin --all
Refreshing the repository page now you should see it filled up with the source files. In the next section we'll get started on the release pipeline.
Step 2 — Setting up a Starter Pipeline
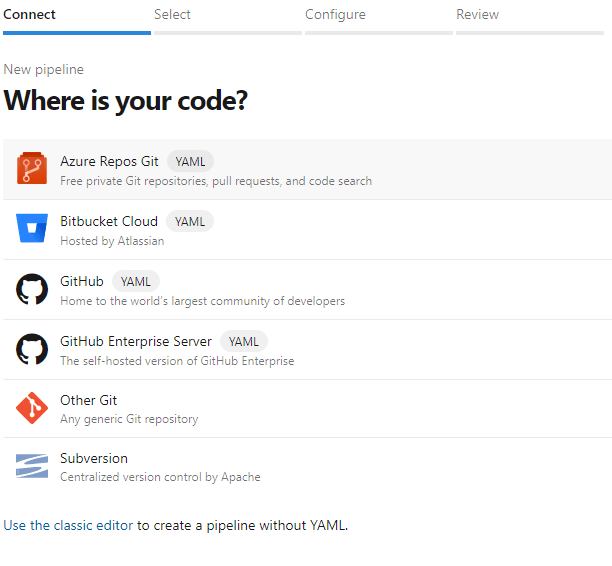
Thanks to Microsoft providing an excellent onboarding experience, setting up our initial pipeline is a straight forward process. After clicking on the Pipelines option in the sidebar menu we are greeted with a landing page where we can easily create our first pipeline. We first identify the source code repository we'll be using.
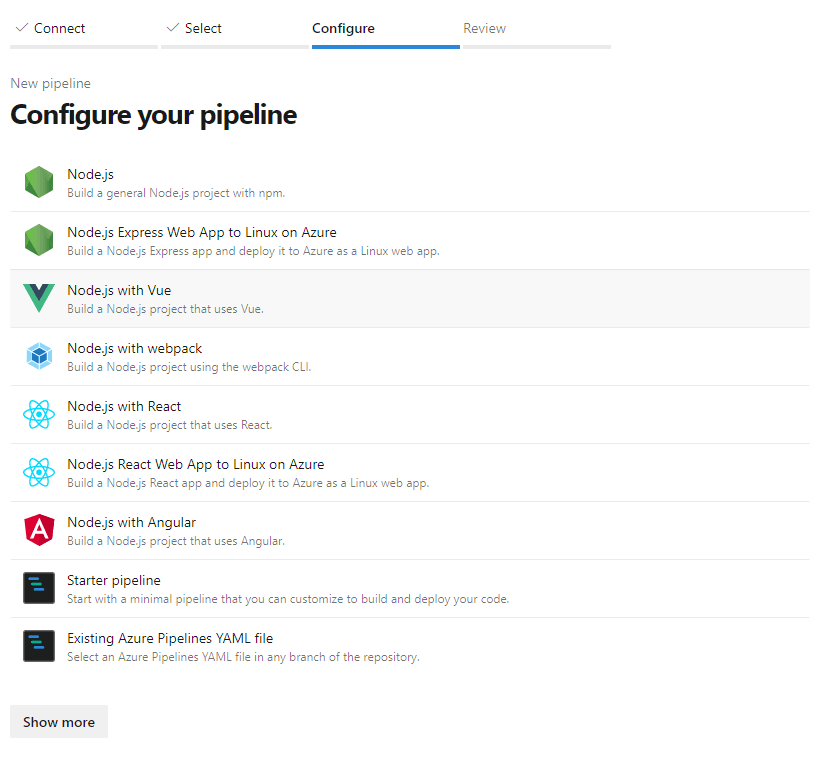
Next we select a starter template for the pipline. The folks at Microsoft were actually kind enough to provide a Node.js with Vue template, excellent!
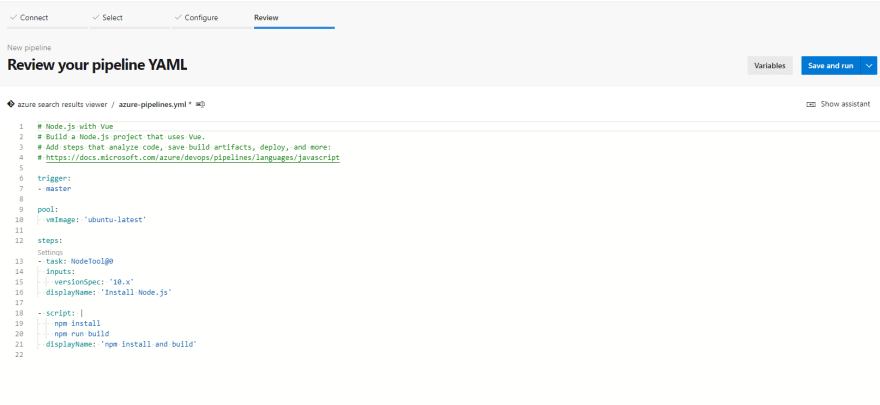
And that's it! Just four clicks and we have a starter template in place that will build our Vue application. The initial steps are quite self-explanatory, installing node.js and building our Vue app. Also notice how saving the pipeline results in the addition of an azure-pipelines.yml file to our repo. This is the file that contains all the steps we set up.
Step 3 — Defining Environment Variables for Build
In order to successfully build our application we will need the to have 2 environment variables available on the pipeline agent during build. To provide these can use pipeline variables as they are made available as environment variables in the agent runtime.
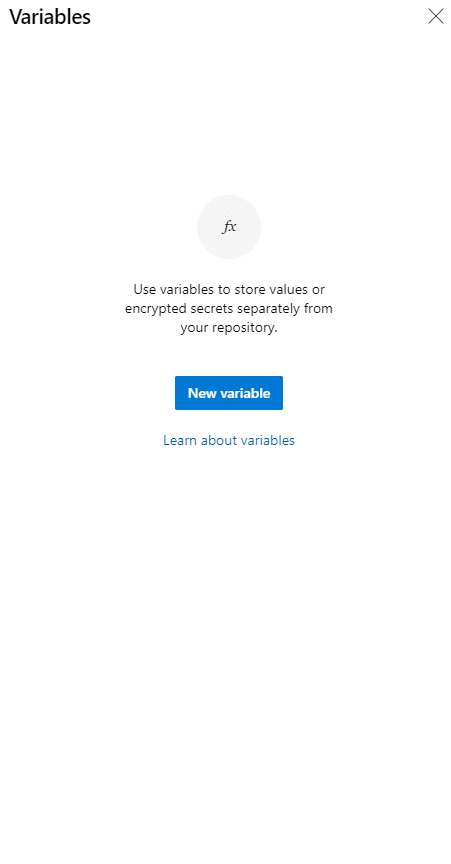
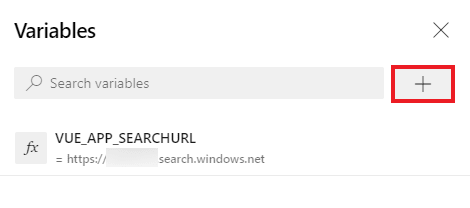
Click the Variables button on the top right of the pipeline editor. A popup will appear allowing you to define a first variable. name it VUE_APP_SEARCHURL and give it the value https://<search service>.search.windows.net
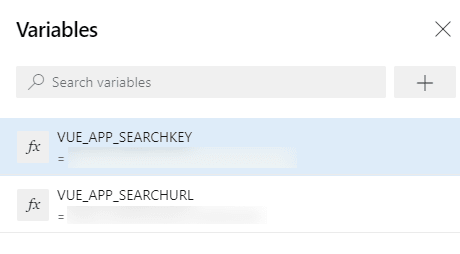
Add another variable called VUE_APP_SEARCHKEY to hold your query key, you might want to check the Keep this value secret checkbox.
This will allow us to build the application, let's now add some extra steps to the process.
Step 4 — Adding Testing and Artifact Publication to the Pipeline
Let's take a moment to make a mental model of the tasks we want to include in our Continuous Integration pipeline.
- clone the git repository
- run the unit tests
- build the application
- zip up the dist folder
- publish the .zip as an artifact
Steps 1 and 3 are already covered by our existing pipeline. We will add steps for testing and creating the artifact. The testing step is actually a variation of the existing steps. Modify the pipelie code to contain the following:
# Node.js with Vue
# Build a Node.js project that uses Vue.
# Add steps that analyze code, save build artifacts, deploy, and more:
# https://docs.microsoft.com/azure/devops/pipelines/languages/javascript

trigger:
- master

pool:
  vmImage: 'ubuntu-latest'

steps:
- task: NodeTool@0
  inputs:
    versionSpec: '10.x'
  displayName: 'Install Node.js'

- script: npm install
  displayName: 'npm install'

- script: npm run test:unit
  displayName: 'npm test'

- script: npm run build
  displayName: 'npm build'
To add the step to zip up the resulting build, search for the Archive files task on the right side of the pipeline editor and fill it out as shown below. We will deselect the Prepend root folder name.. option because we want the contents of the dist/ folder in the root of our archive.
This will result in the following addition to our pipeline
...
- task: ArchiveFiles@2
  inputs:
    rootFolderOrFile: 'dist/'
    includeRootFolder: true
    archiveType: 'zip'
    archiveFile: '$(Build.ArtifactStagingDirectory)/$(Build.BuildId).zip'
    replaceExistingArchive: true
Notice how standard tasks available from the tasks library are defined by a unique name and version number combination, ArchiveFiles@2 in this case, and receive the appropriate inputs for execution.
Similarly add another step to the pipeline by searching for the Publish build artifacts task. Leave the options default, which will result in the following addition
- task: PublishBuildArtifacts@1
  inputs:
    PathtoPublish: '$(Build.ArtifactStagingDirectory)'
    ArtifactName: 'drop'
    publishLocation: 'Container'
That's it, the pipeline now executes all the tasks we had envisioned in our initial outline. Save the pipeline, resulting in a new commit on the repository's master branch. This will automatically trigger an execution of the pipeline too.
Step 5 — Deploying to Azure Storage
We're almost there. The final step in the process is to publish our newly built website project to an Azure Storage static site. We will add a Release pipeline to our Azure DevOps project for this purpose.
Setting up the Azure storage account for static site hosting
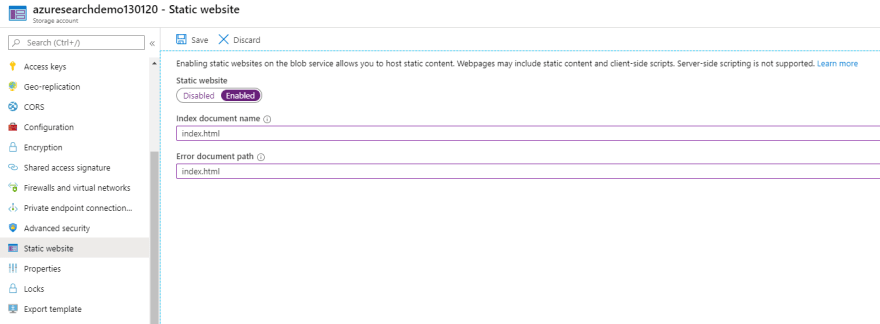
First things first. In the Azure Portal, browse to the storage account you have prepared and navigate to the Static website blade via the sidebar menu. Make sure the option is enabled here and save your changes. Make a note of the Primary endpoint URL. As you can read on the page, enabling this option has created a storage container named $web which will hold the files we built earlier.
Adding a Release Pipeline in Azure DevOps
Heading back to our Azure DevOps project, navigate to the Releases submenu under Pipelines and add new pipeline. When prompted to select a template, go for the 'start with an Empty job' option at the top. Give the stage an appropriate name like 'Deploy'.
As we will need to use the artifact that resulted from the Build pipeline we created and ran earlier, let's start by hooking this up. Click on Add an artifact in the Artifacts block of the release pipeline and select your project. The artifact we're looking to use should be automatically selected.
Moving on to the Deploy stage, clicking on the 1 job, 0 task link brings up the designer. Again starting with our mental model of the deployment pipeline, the 2 tasks we want to accomplish are
- extract the zip file from the artifact
- publish the resulting files to the
$webcontainer of our storage account
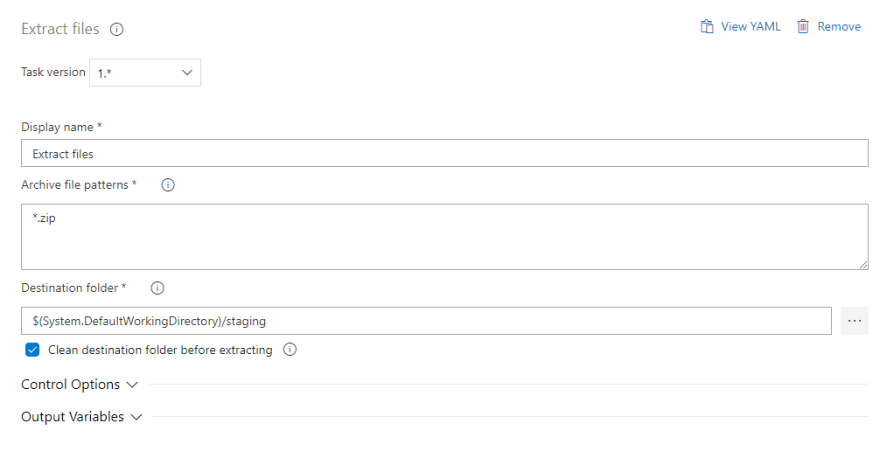
Luckily we can make use of standard tasks for both these steps. For the first step, add a task to the Agent job by clicking the + on the side, and looking for Extract files. Fill out the task's details as follows
Add another task to the Agent job, this time looking for Azure file copy. Under Source select the folder where we extracted our .zip file like you can see below, and pick your subscription. At this point you will possibly have to authorize the creation of an Azure service principal to gain access to the Azure resources. Subsequently fill out the rest of the fields, choosing Azure Blob as the destination type, selecting your storage account and filling in $web as the container name. At this point you can save the release pipeline.
The very last step of this process will be to ensure that every time a new artifact gets created by our build pipeline, it will automatically start the deployment of the site to our Azure storage static website. To achieve this, in the editor of the release pipeline, click on the little lightning bolt icon at the top right of the Artifacts step, and simple switch the toggle to enable automatic deployment.
All that's left to do now is saving the release pipeline and triggering a new release by either manually queueing an execution of our build pipeline, or by commiting some changes to the code of our results viewer, it's all hands-off from there and we end up with a static site showing us some nice real estate! :)
Series Conclusion and Where to Go from Here
At the end of this series, we ran an end-to-end pipeline that builds our results viewer and deploys our website! Let's take a moment to list our achievements here:
- we built a website from scratch leveraging the Azure Cognitive Search service
- we used the Vue.js framework to get the search results on the page
- we added a number of nice features such as search faceting, pagination and sorting
- we set up continuous deployment of our code using Azure DevOps pipelines
What this means is, whenever we change our results viewer website and commit the code to the Azure DevOps Repository, about a minute and a half later, our updated site will be available online!
The goal of this third part of the blogs series was to give an idea of the wide range of possible scenario's that can be supported by Azure DevOps pipelines. We've really only scratched the surface, but if you're excited about the possibilities, be sure to head over to the Azure Documentation to learn more! And if you want to experiment, I'll leave you with these 2 links to check out:
- Azure Devops Labs: fun labs to try out some real-life scenario's
- Azure DevOps Demo Generator: one-click deployment of sample Azure Devops projects!
Good luck, Have fun!











Top comments (0)