
If you’ve tried to develop a more or less complex software product, you should’ve encountered the situations when, for some reason, it is impossible to automate the End-to-End (E2E) tests for your software. These reasons are many, let’s name a couple of them:
- The software doesn’t have (or just can’t have, for security reasons) an API you can hook up with.
- The software is legacy and was developed back in times when no one bothered with the tests’ automation.
- The software’s testing involves some third-party software (antivirus, for instance).
- The software must be tested under numerous target operating systems.
- You can’t test the software without a complex heterogeneous test bench with intermediate network nodes.
All these and many other obstacles lead to the worst nightmare of any developer – manual testing. But the worst part of it is that you can’t just test the software one time and leave it be. No, before each release (maybe even more often) you have to deploy your virtual machines, upload another software build, and do the same testing routine again and again, checking for possible regressions.
Well, I have a solution for you. Right here, in this article. It’s called Testo Framework. And it's free to use.
You see, a lot of E2E testing actually happens inside virtual machines. And any test run on a virtual machine can be automated with the sequence of simple actions, such as mouse movements and pressings of the keyboard buttons. These are the exact same actions that a QA engineer performs when manual testing a software product. Such tests could be represented, roughly speaking, as such:
mouse_click_on_button_with_text "Save"
type_on_the_keyboard "Hello world"
wait_for_the_text_to_appear "Complete"
And it doesn’t matter whether you’re testing a XAML-app, Qt-app, Electron-app, a web page or even a console application. You just click on the virtual machine’s screen and you don’t really care about the app’s internal design. Sounds convenient? Sure!
There’s only one catch: it’s not so easy to understand where the "Save" button is located on the screen, or whether the "Complete" text is present on the screen. I assume that’s one of the possible reasons why we don’t see the abundance of testing tools based on such concept.
On the other hand, the computer vision technology has made great steps forward recently, thanks to machine learning. Artificial neural networks (NN) handle even such difficult tasks as, for instance, driving cars. Surely, they can handle the much easier task of detection GUI objects on the screen, now can’t they?
As you could’ve guessed, the answer is yes. And you can see it for yourself when using Testo - a new system tests automation framework. Testo is essentially an interpreter, allowing you to run test scripts written in specially designed Testo-lang language. The scripts look somewhat like this:
mouse click "Save"
type "Hello world"
wait "Complete"
That’s all you need to write in Testo-lang to:
- Click the "Save" text on the screen.
- Type the "Hello world" text on the keyboard.
- Wait for the "Complete" text to appear on the screen.
However, I don’t want you to get the impression that Testo is just another Autoit or Sikuli look-alike. No, it’s not just any automation tool – it’s a whole framework designed for system tests automation. Testo takes care of numerous subtasks that a QA engineer may encounter: checking which tests should be re-run, the virtual test bench deployment, keeping track and reporting which tests failed or passed (and how exactly) and so on.
Ok, I'm listening

So, let’s talk E2E tests. E2E tests imply that the System Under Test (SUT) is not a standalone software product, but a software placed in some kind of surrounding. The "surrounding" could mean a lot of things: a particular OS version, presence or absence of some apps/drivers, network interaction, Internet connections, lack of disk space or RAM… A lot of options.
The easiest way to place a software in a specific surrounding – is to install this software inside a virtual machine. But first, you’d have to create the virtual machine and install an operating system on it. Let’s take a look at how you can automate these steps with Testo.
In Testo-lang you can easily define virtual infrastructure’ elements, building up your test bench. For instance, the following snippet can be used to declare a "blank" virtual machine:
machine my_super_vm {
    ram: 2Gb
    cpus: 2
    iso: "ubuntu_server.iso"
    disk main: {
        size: 5Gb
    }
}
This snippet instructs Testo to create a virtual machine with 2Gb RAM, 2 CPU cores and 5Gb of disk space. The ISO "ubuntu_server.iso" is inserted in the virtual DVD-drive of the virtual machine, so when the machine is powered on, the Ubuntu Server installation pops up.
This may seem counter-intuitive at first, because we consider the OS installation is just yet another test, on a line with any other regular software-checking tests. But it gets more reasonable if you imagine that you might develop the actual OS itself! Maybe you’re developing some custom OS (another Linux-based distribution, for example), or it’s just a simple just-for-fun toy OS. In any case, the OS installation itself also must be tested, and Testo is suited for this task like nothing else, because with its approach it doesn’t matter what exactly are you testing: the whole OS or just a simple app.
So, we’ve got ourselves a blank virtual machine, but what can we do with it? Of course, to make any reasonable use of it, we should install the OS first. Let’s see how the OS-installing test could’ve looked like:
test my_super_test {
    my_super_vm {
        start
        wait "Language"
        press Enter
        wait "Choose the language"
        press Enter
        # And so on
        …
    }
}
Here we can see a new Testo-lang statement - a test declaration. Our first test my_super_test involves only one virtual machine: my_super_vm. The test begins with the virtual machine being powered on. After that, the test waits for the "Language" text to show up on the screen, then presses Enter. As you can see, the whole test would look like the set of such actions: wait for an event to happen and then type something on the keyboard.
Of course, you don’t always want to bother with the OS installation and its initial setup. That’s why in Testo-lang you can just import an existing virtual disk image into test scripts:
machine my_super_vm {
    ram: 2Gb
    cpus: 2
    iso: "ubuntu_server.iso"
    disk main: {
        source: "prepared_vm.qcow2"
    }
}
Which means that you can manually prepare a virtual machine, install the OS on it, prepare some applications, disable the firewall (and so on) and then just use its virtual disk image as the initial state for a Testo-created virtual machine (inside a script).
Well, virtual machine creation and OS installation are good and all, but where are the actual tests for my application I’ve been developing? Ok, let’s assume we want to test the installer for your super awesome app. Let’s also assume that we’ve already manually prepared a Windows 10 virtual machine and we’ve already copied the installer on the Windows 10 Desktop. Then the entire script would look somewhat like this:
machine my_win_vm {
    ram: 2Gb
    cpus: 2
    disk main: {
        source: "my_windows_10.qcow2"
    }
}

test my_installer_test {
    my_win_vm {
        #Power on the virtual machine
        start
        #Wait for the Desktop to show up
        wait "Recycle Bin"

        mouse dclick "my_super_installer"
        wait "Welcome"
        mouse click "Next"

        wait "Destination folder"
        mouse click "Next"

        wait "Complete" timeout 10m
        mouse click "Finish"
    }
}
Looks easy, doesn’t it? Well, we’re just getting started…
What is that "wait" of yours and how does it work?

Let’s take a little break and talk about how does it all actually work. A test mainly consists of two things:
- Interaction with virtual machines (mouse move/click, type, press, start/stop, plug flash and many more).
- Analyzing the screen contents (wait).
Wait actions are the main tool to implement visual checks in Testo-lang. This action instructs Testo to wait for a graphical object (text or image) to arrear on the screen for the specified time interval (1 minute by default). If the object doesn’t show up before the timeout is triggered, an error is generated. Just like a real person waiting for the "Complete" text to appear until he runs out of patience.
Typically, if you want to find a text on the virtual machine’s screen (i.e., on a screenshot), then the seemingly obvious solution would be an OCR (Optical Character Recognition) system (Tesseract, for instance). However, this is not the best possible approach. The thing is that OCR systems are built with the following concepts kept in mind:
- It is assumed that the OCR system doesn’t know anything about the actual screen contents. It doesn’t know what text should or shouldn’t be displayed at the moment.
- The system’s objective is to collect as much information from the screenshot as possible.
But when you’re dealing with automated testing, the picture changes dramatically:
- You know for sure what text should be displayed on the screen at the moment.
- Your objective is much simpler: just tell if the expected text is displayed on the screen or not. If the text is on the screen, then collect the information about its placement (extract its coordinates, basically).
Testo has the Neural Network (NN) to do this kind of job. The NN takes a screenshot and the expected text as the input. The NN just needs to tell us if there is anything displayed on the screenshot that at least looks like the expected text.
This new approach gave Testo both acceptable detect precision and great performance even on a CPU (with the GPU acceleration the performance is astonishingly good).
"Wait" actions are not everything you might need
Developing long tests with just the wait + click combination may be quite tedious, especially when there’s no test recorder available. Visual checks should be considered as the last resort, when every other way to do a check is not sufficient. Normally you’d rather prefer performing checks with something more like a bash-script.
And Testo-lang gives you the opportunity to do just that. All you need to do is to install Testo guest additions (come with the Testo interpreter) inside your virtual machine. After that you’ll be able to use new actions like this:
test my_super_test {
    my_super_vm {
        exec bash "echo Hello world from bash"
        exec python """
            print("Hello from python")
        """
    }
}
If any command of the exec bash script fails, then the whole test is considered failed. Likewise, if the python script returns non-zero value, then the test is also failed.
Basically, the majority of test cases look like this: first you need to install the testo guest additions using the wait + click combination, then you try to do as much work as possible using these additions. At the same time, you can always switch back to visual checks anytime you want.
With the guest additions you can also simplify file transferring between the virtual machine and the Host:
test copyto_demo {
    my_super_vm {
        copyto "/file/on/host" "/file/on/guest"
        copyfrom "/file/on/guest" "file/on/host"
    }
}
But why bother with the whole new language?

I believe, some of you might think: "Guys, are you serious? A whole new language? Just for tests? Why don’t you just do a python library or something – every sane person would do that instead."
As a matter of fact, we’ve had quite a lot of reasons to create the new language. Here are just some of them:
- We’d wanted for Testo to be as easy as possible, so that even non-programmers could use it.
- We’d wanted to get rid of all the unnecessary overcomplicated stuff that you can usually see in a general-purpose programming language. We’ve kept only the tests-related things.
- Some concepts we’ve implemented just can’t be easily put into a python library!
For instance, Testo has an elaborate tests caching technology. Thanks to this technology, you can run tests incrementally – i.e., only when necessary (just like with the incremental application compilation).
Let’s assume you have the following test:
test run_installer {
    my_super_vm {
        copyto "/path/on/host.msi" "C:\\Users\\Testo\\Desktop\\setup.msi"
        mouse dclick "setup"
        …
    }
}
Let’s also assume that you’ve run it successfully. If you immediately try to run it again one more time, the test will complete instantly (there won’t be any actual running at all). Indeed, what’s the point to run the test second time if:
- The test itself hasn’t changed.
- The installer’s build hasn’t changed.
But if you try to run the test after you’ve created another installer’s build, the test will actually run again. Testo keeps track of all the files involved in the test, so when those files are changed, the test cache is invalidated. And yes, this caching technology is entirely transparent, so you don’t need to do anything to get the benefits from it.
Wow, cool. What else can Testo do?

One virtual machine sounds kind of boring. The fun begins when you add more virtual machines and they start to interact with each other. With Testo you can create as many virtual machines as you want and link them up with networks (you can even add the Internet access):
# Network to link up virtual machines
network net1 {
    mode: "internal"
}

# Network for the Internet access
network internet {
    mode: "nat"
}

machine my_super_client {
    …
    nic server_side: {
        attached_to: "net1"
    }
    nic internet: {
        attached_to: "internet"
    }
}

machine my_super_server {
    …
    nic client_side: {
        attached_to: "net1"
    }
}
You want to add a virtual USB stick to your test bench? No problem, just a couple of lines of code and you’ve got yourself one. You can even copy some folder on it from the Host:
flash my_super_flash {
    fs: "ntfs"
    size: 2048Mb
    # The folder on the Host to copy
    folder: "/path/on/host"
}
Maybe you want to create a whole bunch of tests? No problem, just put them into a hierarchy. Let’s assume you want to automate the following tests:
- OS installation.
- Testo guest additions installation.
- Copying the application that you want to test inside the virtual machine and its installation.
- Feature 1 testing.
- Feature 2 testing.
Obviously, each test must run only after the previous test is completed successfully (except for the last 2 tests – they can be run independently). So, naturally, we have to build up the following tests tree:

It looks not much harder in Testo-lang than on the picture:
test install_os {
    …
}

test install_guest_additions: install_os {
    …
}

test install_app: install_guest_additions {
    …
}

test test_feature_1: install_app {
    …
}

test test_feature_2: install_app {
    …
}
First time, all the tests are going to be run (from the beginning). If there’s no errors and all the tests are successful, Testo will create a cache for them so they won’t unnecessarily run again:

If you start the tests now, they just won’t run, because since the last successful run nothing significant has changed. But when you create a new build for your app, Testo will invalidate the cache for the tests 3, 4 and 5:

However, the OS installation test and guest additions installation test are to be remain cached. Nothing’s changed for them, right? The OS is the same, the guest additions are the same, the test script is the same. So these 2 tests won’t run. Instead, Testo will roll back the virtual machine into the state it was at the end of the install_guest_additions test.
A simple, yet quite real example
It can take several articles to describe all the things that Testo can do. So, I don’t want to overcomplicate this paper and I’d rather demonstrate a basic, real example of testing a simple custom standalone app MySuperApp.
This app is written in C++ with the ImGui library. It doesn’t have any hooks suitable for tests automation, but, nonetheless, we want to test every build: we want to make sure that MySuperApp can be started on Windows 10 and displays a window with the text "MySuperApp is working!".
Well, first of all we’d need a virtual machine. We’re going to create a virtual machine based on the existing and manually prepared one, on which we’ve pre-installed Windows 10:
machine my_vm {
    cpus: 2
    ram: 4Gb
    disk main: {
        source: "${QEMU_DISK_DIR}/win10.qcow2"
    }
}
We’d also need a virtual USB stick to copy the MySuperApp build into the virtual machine:
flash my_super_flash {
    fs: "ntfs"
    size: 16Mb
    folder: "./dist"
}
On the Host, all we need to do is to put the MySuperApp build inside "./dest", and Testo will take care of the rest.
Now let’s create a blank test:
test launch_my_simple_app {
    my_vm {

    }
}
But… what do we put inside the test? Well, it’s quite simple: just write down all the actions you would do manually! For starters, let’s start the machine:
start
What’s next? Let’s wait for the desktop to appear:
wait "Recycle Bin" timeout 10m

Plug in the USB stick:
plug flash my_super_flash

Click on the "USB Drive (E:)" text:
mouse click "USB Drive (E:)"

Open the file manager:
mouse click "Open folder to view files"
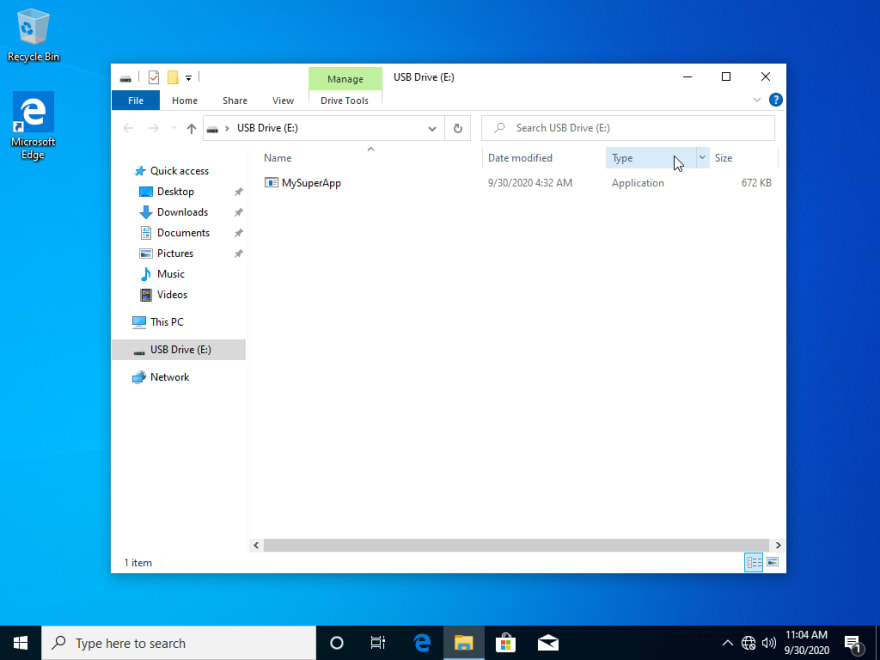
Double click on the app:
mouse dclick "MySuperApp"

And now, how do we know that MySuperApp actually started? Well, we know that our app must display the text "Hello world". So, therefore, if the "Hello world" text appeared on the screen, it most likely indicates that the app started and everything is fine. So that’s going to be our main check in the test:
wait "Hello world"
Don’t forget to unplug the USB stick at the end of the test and you’ll get the complete automated test script:
test launch_my_simple_app {
    my_vm {
        start
        wait "Recycle Bin" timeout 10m
        plug flash my_super_flash
        mouse click "USB Drive (E:)"
        mouse click "Open folder to view files"
        mouse dclick "MySuperApp"
        wait "Hello world"
        unplug flash my_super_flash
    }
}
That’s it – our test is ready. How do we start it? It’s easy as can be (just don’t forget to specify the QEMU_DISK_DIR path):
sudo testo run my_script.testo –param QEMU_DISK_DIR /var/lib/libvirt/qemu/images
We’ve prepared a little video clip to show you how it works:
And, finally, let’s demonstrate what would happen if we got a bug inside our app.
For instance, let’s assume that for some inexplicable reason we’ve build the app with the C++ library dynamic linking instead of static. If the app is built this way, then the guest system must have Microsoft Visual C++ Redistributable package installed. Since MySuperApp is supposed to be a standalone application, it shouldn’t have any dependencies. You (as the developer) can easily miss this kind of bug, because, of course, you have the Microsoft C++ Redistributable installed on your computer, and MySuperApp launches pretty well on your system.
Now, let’s copy the ill-built MySuperApp inside ./dist folder and run the test again. That’s what we’ re going to see:

In the Testo output you can see which test failed and the exact line of the script where it happened:

The test failed, and so the bug has been caught!
Conclusions
End-to-End tests are never easy, but always pay back. We hope, that with Testo you can conveniently test your applications in the most various surroundings. Now you can make sure that your apps work just as well on the customer’s side, as on yours.
You can download and use Testo here. It’s for free!
You can also check out our Youtube channel for more examples:
You can find the MySuperApp distrib here (in case you want to test it yourself)

Top comments (0)