Hello and Greetings Everyone 👋
I hope you would have loved reading and experimenting with creating your Auto-Tag application using Amazon Rekognition, AWS Lambda and S3 here.
It's a new day, and we don't want to leave everything hanging. Right? 😀 As promised, in this article we are going to discuss:
- Uploading a Test Image to S3
- View Results in CloudWatch Logs
- Save Tags in a JSON file in S3
Without wasting much of our time, Let's go 🚀!
Uploading a Test Image to S3
Since we have already created our basic pipeline with S3 Bucket, Lambda Function and Rekognition Pipeline, it's time to put everything to the test. We are now going to upload a sample image, and pray that our system detects and logs the labels, automatically 😁
Choose a Test Image
If you remember clearly, we added the suffixes in our system, so we now have to be careful about the extension of our images. We can pick any .jpg, .jpeg or .png image. You can either pick a photo from your phone/computer, get a sample image from the internet or any other source, but remember to keep it small and simple for quick processing since we are still on the testing phase.
Upload via AWS Console
Now that we have selected the image, we are going to upload it on our S3 bucket, using AWS Console. I hope you haven't logged out of the AWS Portal (If yes, sign in again...)
- Go to your S3 Bucket (for me,
image-tagger-mursal-april-five) - Click the Upload button and click Add files.
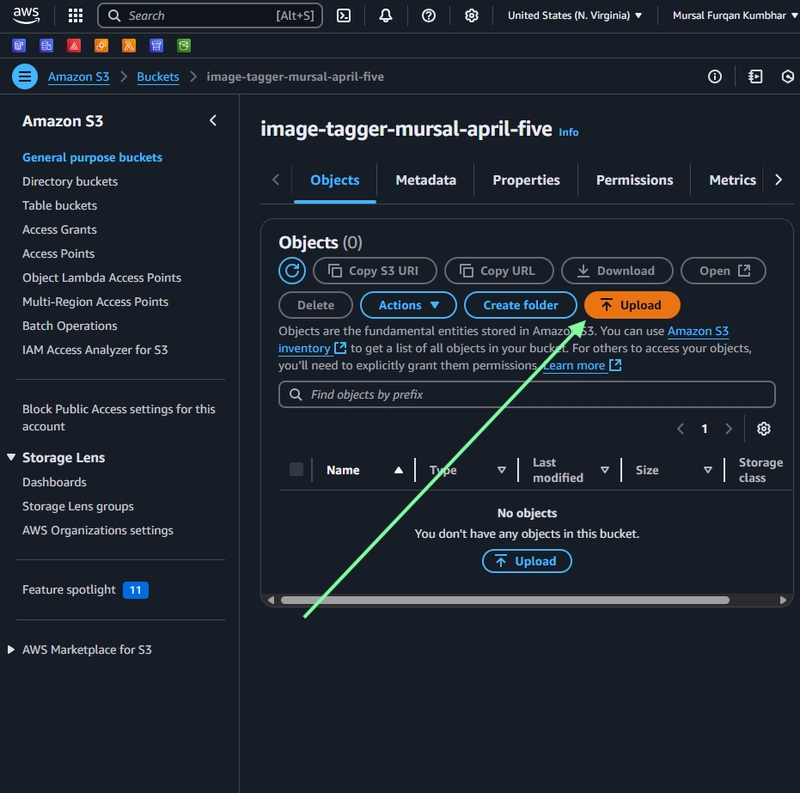
- Browse to your image in your mobile phone/computer and choose it. You will see your uploaded image in the directory.
- Leave all the other settings as default and directly click Upload.
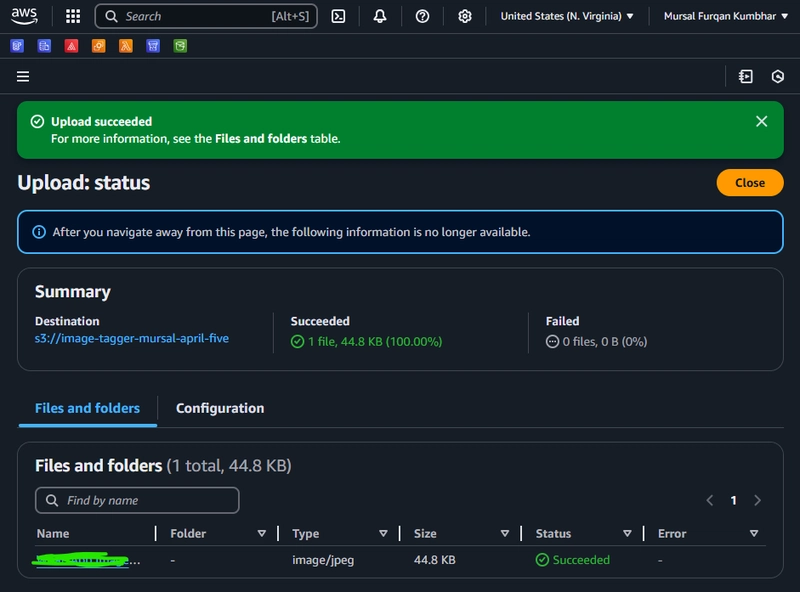
- Once it's done, click Close
Doing this will immediately trigger ou lambda function behind the scenes. Once the image is uploaded, Lambda will Pick up the image from S3 and send it to Amazon Rekognition to detect objects and scenes. It will also log everything to CloudWatch in the end. Let's see what's bee logged for our image (Excited? 😜)
View Detected Labels in CloudWatch Logs
Now that our image is uploaded, we need to see how and what Rekognition detected. Well, that's where Amazon CloudWatch Logs jumps in. Everytime Lambda runs, it will log the entire output, including the labels, to CloudWatch. Let's see that.
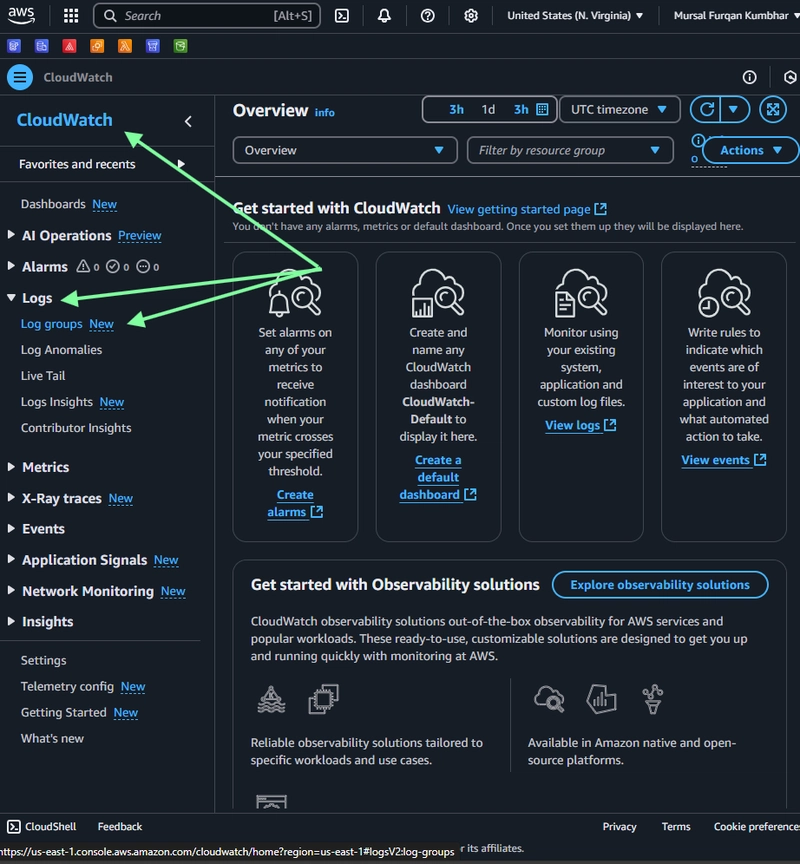
Navigate to CloudWatch Logs
In our AWS Console, search for CloudWatch in the services menu and open it and click Logs in the left sidebar, followed by Log groups. We will be looking for a log group named something like:
/aws/lambda/AutoTagImageFunction
Once inside, click that log group and click the most recent log stream (Check for your upload timestamp). Once inside the log stream, we will find logs like:
Received event: {
  "Records": [
    {
      ...
      "s3": {
        "bucket": {
          "name": "image-tagger-mursal-april-five"
        },
        "object": {
          "key": "sample.jpg"
        }
      }
    }
  ]
}
Followed by the recognition output:
2025-04-03T05:30:46.444Z
Labels detected for WhatsApp Image 2025-03-23 at 16.28.43_45962656.jpg:
2025-04-03T05:30:46.444Z
- Adult (99.23%)
2025-04-03T05:30:46.444Z
- Male (99.23%)
2025-04-03T05:30:46.444Z
- Man (99.23%)
2025-04-03T05:30:46.444Z
- Person (99.23%)
2025-04-03T05:30:46.444Z
- Standing (98.34%)
2025-04-03T05:30:46.444Z
- Head (98.21%)
2025-04-03T05:30:46.444Z
- Face (97.73%)
2025-04-03T05:30:46.444Z
- Smile (97.26%)
2025-04-03T05:30:46.444Z
- Jacket (96.45%)
2025-04-03T05:30:46.444Z
- Portrait (95.66%)
Save Detected Labels as a JSON File in S3
At the current moment, we are logging all the labels to CloudWatch, but we are going to store those labels in a tags/ folder in our existing S3 bucket since we need to record each image. This is going to be our intended folder structure:
image-tagger-mursal-april-five/
├── WhatsApp Image 2025-03-23 at 16.28.43_45962656.jpg
└── tags/
    └── WhatsApp Image 2025-03-23 at 16.28.43_45962656.json
Remember: Create your tags folder before moving forward.
For that, we need to update our Lambda Code:
import json
import boto3
import urllib.parse

rekognition = boto3.client('rekognition')
s3 = boto3.client('s3')

def lambda_handler(event, context):
    print("Received event:", json.dumps(event, indent=2))

    bucket = event['Records'][0]['s3']['bucket']['name']
    key = urllib.parse.unquote_plus(event['Records'][0]['s3']['object']['key'])

    try:
        # Step 1: Detect labels
        response = rekognition.detect_labels(
            Image={
                'S3Object': {
                    'Bucket': bucket,
                    'Name': key
                }
            },
            MaxLabels=10,
            MinConfidence=80
        )

        print(f"Labels detected for {key}:")
        label_data = []
        for label in response['Labels']:
            label_data.append({
                'Name': label['Name'],
                'Confidence': round(label['Confidence'], 2)
            })
            print(f" - {label['Name']} ({label['Confidence']:.2f}%)")

        # Step 2: Save labels as JSON to /tags/
        tags_key = f"tags/{key.rsplit('/', 1)[-1].rsplit('.', 1)[0]}.json"
        s3.put_object(
            Bucket=bucket,
            Key=tags_key,
            Body=json.dumps(label_data, indent=2),
            ContentType='application/json'
        )
        print(f"Saved tags JSON to {tags_key}")

        return {
            'statusCode': 200,
            'body': json.dumps('Labels detected and saved to S3!')
        }

    except Exception as e:
        print(f"Error processing {key}: {str(e)}")
        raise e
Once done, test and Deploy the new code in our Lambda Function. Let's test it.
- Upload a new Image to S3
- Make sure the image is either
.jpg,.jpegor.pngformat. - This will trigger the Lambda Function
- Lambda Function will have Amazon Rekognition detect the labels
- All the data will be saved in a
JSONfile inside thetagsfolder that you created earlier
Now your tags folder looks like this:
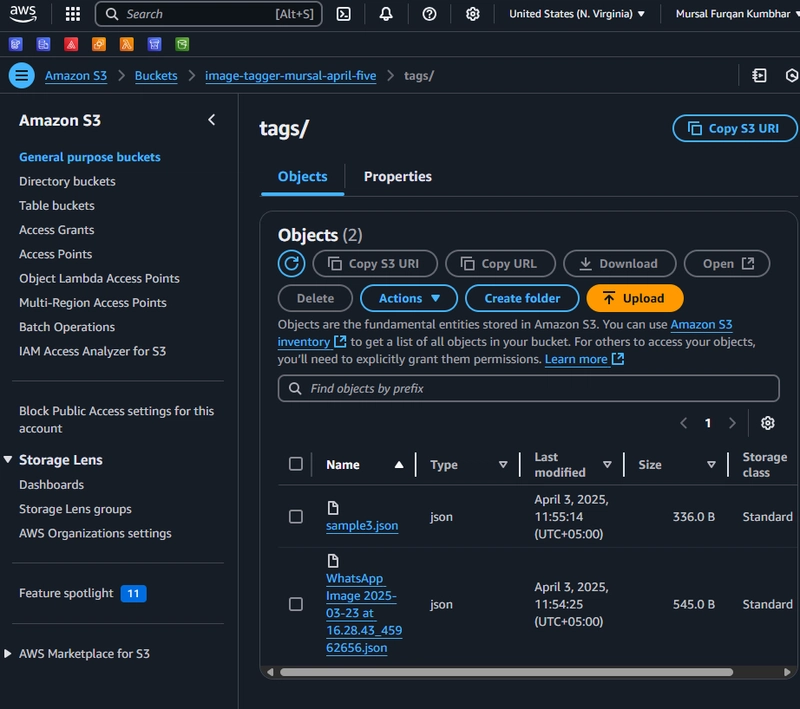
Click on your relevant .json file to see the results. Here you will find all the data of your uploaded file.
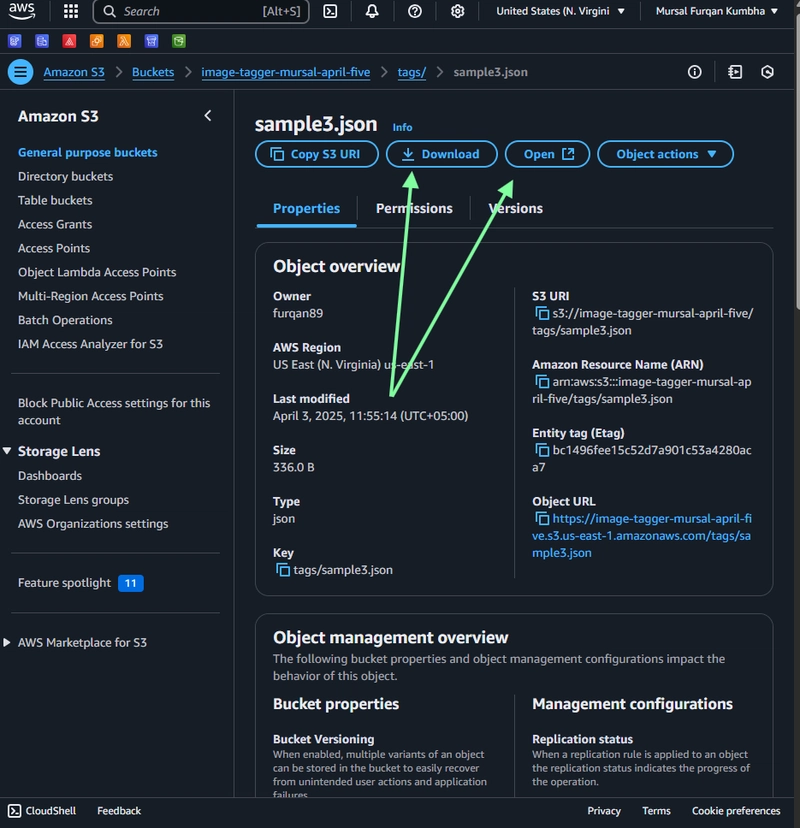
Click on Open or Download to access the file. Your JSON file have an output similar to the one below:
[
  {
    "Name": "Bag",
    "Confidence": 95.62
  },
  {
    "Name": "Document",
    "Confidence": 85.53
  },
  {
    "Name": "Receipt",
    "Confidence": 85.53
  },
  {
    "Name": "Text",
    "Confidence": 85.53
  },
  {
    "Name": "Plastic",
    "Confidence": 81.17
  },
  {
    "Name": "Plastic Bag",
    "Confidence": 81.17
  }
]
BONUS: You can also try to see your JSON file from the terminal with the following command:
aws s3 cp s3://<bucket-name>/tags/<file-name>.json .
cat <file-name>.json
Remember: Don't forget to replace s3:///tags/ and with the relevant names.

You did it!
Still hanging in there? You’re a legend! 😎
That wraps up Part 2 of our Smart Serverless Image Tagging on AWS series. This time, we went beyond the basics — tested the full automation flow, explored CloudWatch logs, and even saved our Rekognition results as structured .json files directly in S3. Clean. Serverless. Smart. 💡
In the next part, we’ll level it up with some bonus magic:
- Email notifications via SNS 📬
- Code modularization 🧩
- Maybe even a simple front-end to display your tagged images 👀
Until then, keep building cool stuff — and as always, hit me up in the comments if you have any ambiguity! 😜


Top comments (0)