It's been a lengthy process since you took the initial step in this series by obtaining a custom domain. You may read the article here, if you missed it.
In this article, you'll look at how to configure your GitHub repository to host your project on your custom domain using GitHub Pages.
To configure GitHub pages, follow the instructions below. More on GitHub Pages can be found here. You may learn how to set up a custom domain here.
Configuration Steps
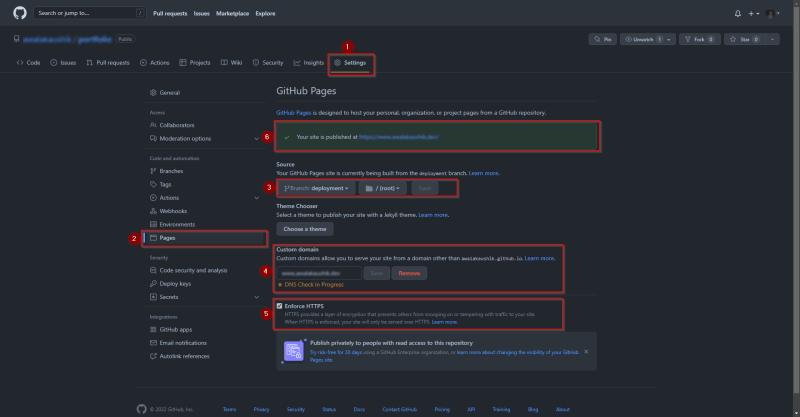
- Go to your repository settings page and click
PagesunderCode and automation.
- To begin building your website with GitHub Pages, choose your source branch. I'm using a new branch called
deploymentfor this. Many tutorials you'll find on the internet use the branch namegh-pages. - You can enter the subdomain
www.<your-domain-name>.<domain-name-ending>in thecustom domainarea.www.testsite.net,for example. - Make sure HTTPS is enabled on your domain to offer a layer of encryption that prevents tampering with traffic to your site. Your website will only be served via HTTPS if this is enforced. More details can be found here.
Okay, we're finished with the GitHub configuration. Then, follow the steps below to configure your DNS settings in Google Domains.
Note: If you used a different domain provider, make sure to configure your DNS records for your website according to the instructions provided by your DNS provider.
Configuring DNS records on Google Domains
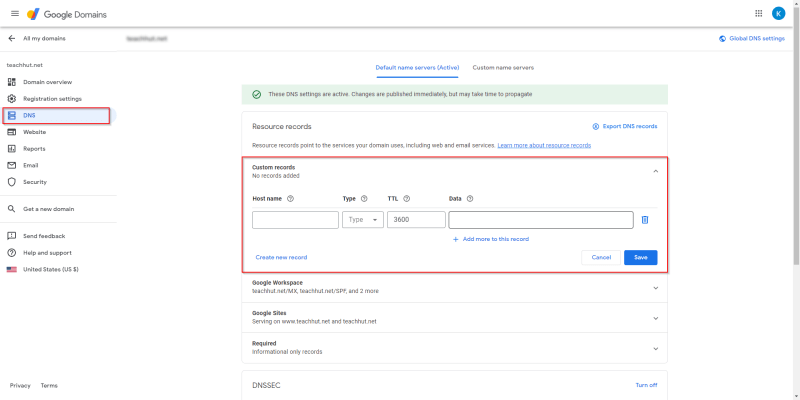
- To manage your custom domain, log in to your Google Domains account.
- Select DNS from the left menu to access the DNS settings page, where you can configure custom records for GitHub pages.

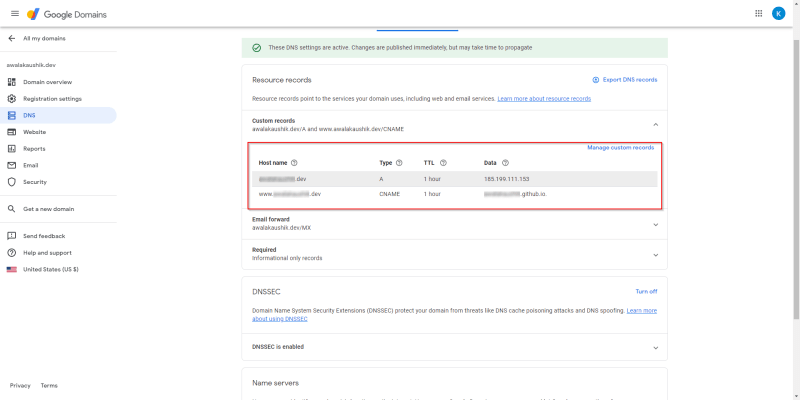
- Create a CNAME record for your subdomain that points to your GitHub pages. For example,
Host name: www.testsite.com
Type: CNAME
Data: <your-username>.github.io.
- Create an A Name record for your apex-domain that points to your github pages. For example,
Host name: testsite.com
Type: A
Data: 185.199.111.153
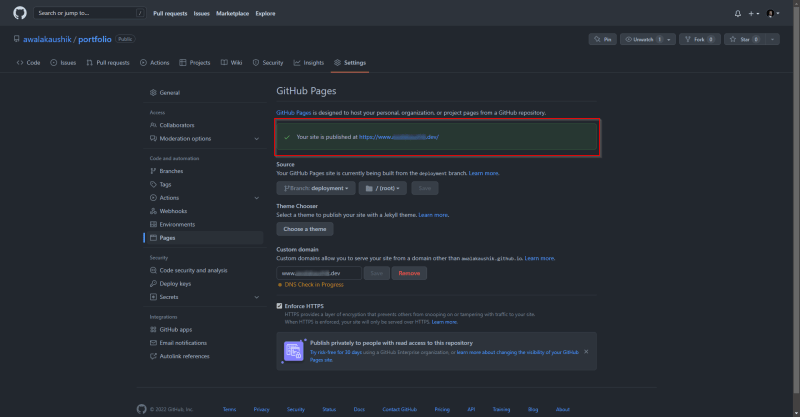
- Return to GitHub to validate your custom domain. If everything goes well, you should see the following.


Alright then, let us move on to the final step to automate your deployment, here.


Top comments (0)