Personalization in customer service is the practice of tailoring interactions with customers to their individual needs and preferences. This can be achieved through the use of customer data and technology such as machine learning and artificial intelligence.
One way that personalization can be used in customer service is to provide tailored responses to customer inquiries. For example, a customer service agent can use information about a customer's previous interactions and purchases to provide more personalized and relevant answers to their questions. This can help to improve the customer's overall experience and make them feel valued and respected.
Another way that personalization can be used in customer service is to provide personalized recommendations and suggestions to customers. For example, a customer service agent can use information about a customer's interests and preferences to recommend products or services that they might be interested in. This can help to increase customer satisfaction and loyalty, as well as boost sales and revenue.
Personalization can also be used to improve the efficiency of customer service operations. By using customer data and technology, customer service agents can more easily and quickly access the information they need to resolve customer issues. This can help to reduce response times and improve overall customer satisfaction.
So far, I've already written two parts on Azure Personalizer. The first one talks about building your own library. The second one talks about building a simulator for your learning loop. This will help you train your model ahead of production deployment. This is going to be my last post on this topic. In this post, we're going to see how we make use of Azure Personalizer into a chat bot.
What do we need?
As we're going to use the Azure Personalizer into a chat bot, we have to choose the right platform for that. Whilst there are many options in the market, I decided to go with the Microsoft Power Platform. There were two reasons to choose this platform over others.
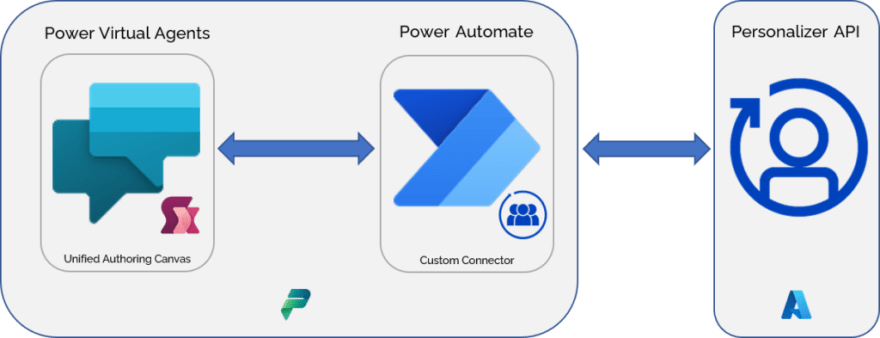
One is that Power Platform allows you to easily create a chat bot using Power Virtual Agents (PVA) and integrate the Azure Personalizer APIs using Power Automate. Both without any code, even with the custom connector 🤘. The second reason is the recent update we witnessed about the Power Virtual Agents around unified authoring canvas. I was quite excited about it so thought to use it in one of our bots.
It totally depends upon you as how you want to secure Power Platform environment. It can be your sandbox, your trial instance or also a Developer Plan. I have got a M365 Developer Plan and I will be using that. My complete solution (Custom Connector + Power Virtual Agents) is available on my usual GitHub repo for the AI for Every Developer series. You can play with it.
The YUM Bot
The overall idea is to create a Power Virtual Agents bot for the customers to suggest the best dessert based upon the occasion and variety. This best action will be delivered by the Personalizer API via Power Automate and displayed it as an Adaptive Card back to the customer / user.
Custom Connector
In our previous posts, we worked on the library well as the simulator based on .NET and how you can easily use Personalizer SDK to train your learning loop. This time, we're going to use a Personalizer endpoint to interact with the service. Initially, I looked at the Power Automate to find out if there was any connector available for Azure Personalizer. Unfortunately, I did not find one, so I thought to create a custom connector with the name of Azure Personalizer (Community). If that's something new to you then you may want to check out some of our awesome Microsoft Business Applications MVPs on YouTube. They've explained this topic quite well.
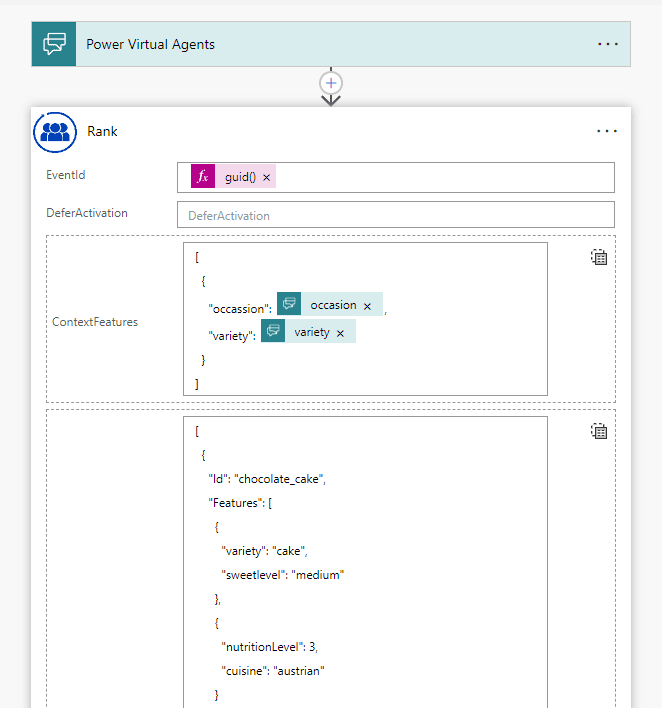
Azure Personalizer (Community) connector has got two actions, Rank and Reward. It needs an API key of your Personalizer resource in the Azure to create the valid connection.
Rank Action
This action expects the same inputs as it receives from our .NET library i.e. Context Features, Actions, EventId and more. I've kept it as generalised as possible and that's why, all you have to do is to switch the layout of the input to entire array and paste your JSON.
Our first post about Azure Personalizer has all the details about Rank and Reward API. Both of the actions are dependent upon the same API.
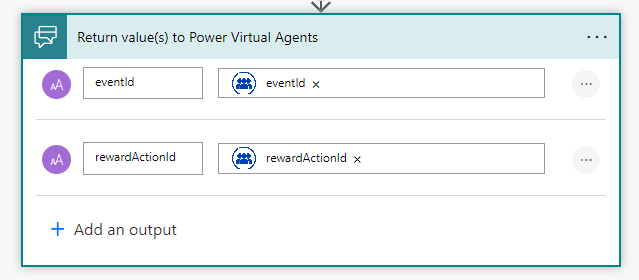
It sends back the eventId and the best action in the form of rewardActionId
Reward Action
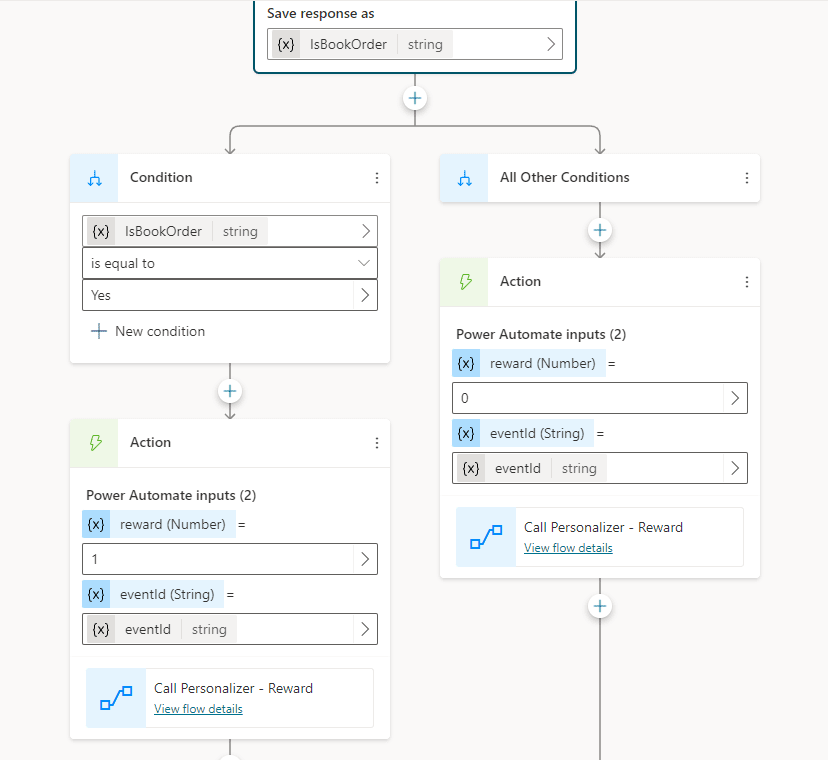
This action expects the eventId and reward value. The reward can be anything between 0 and 1. For the simplicity, we will be sending 0 (bad) or 1 (good).
As the independent publisher certification process requires a good time and effort for the submission therefore, it's not my focus for now but will surely visit later.
Chat bot
Now, let's talk about the Power Virtual Agents. We are going to use the public preview of the latest unified authoring canvas. They have got a bunch of new features and I've already covered some of them earlier. The idea over here is to enquire about two sets of information which is required by the Rank Action, Occasion and Variety. For the simplicity of this use case, we'll create a simple bot and switch off all the Custom Topics except Greeting. It is not mandatory but just saying!
Entities
After this, let's create two entities as a ClosedList. Start with Occasion and add synonyms for smart matching.
Do the same for Variety as well.
Topic (Book Order)
Just add at least 5 phrases to train the BookOrder topic. The more phrases you add, the better but 5 are also OK. As an example, you can add I want to place an order.
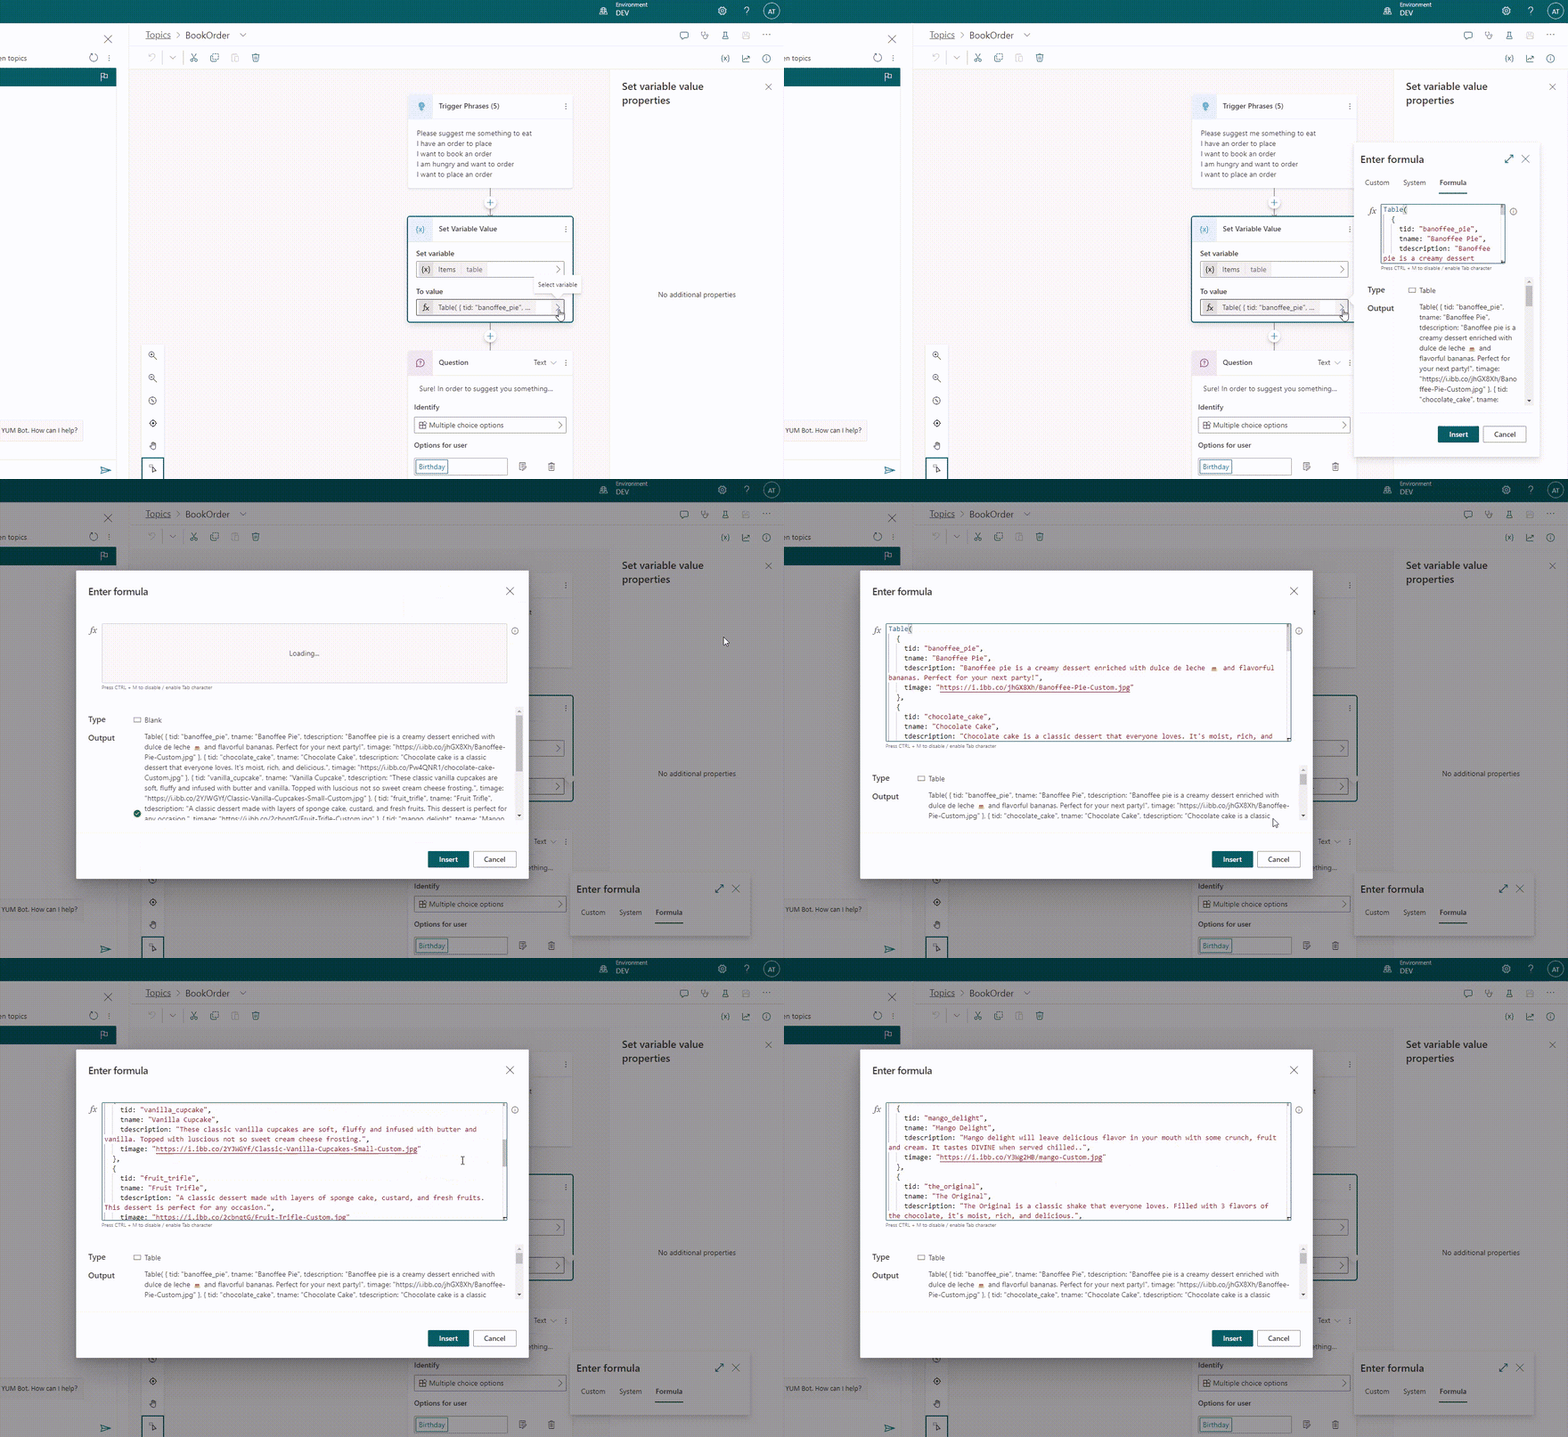
Before asking a question about the Occasion and Variety, let's add a variable and set its value as a table of items. You can do this by using the latest capabilities of PowerFx. This will be used later in our bot.
Later on, just add two questions with multiple choice options to ask about the Occasion and Variety and store each of them into variables. Once we get these two values, we call our custom connector we created above, specifically Rank Action.
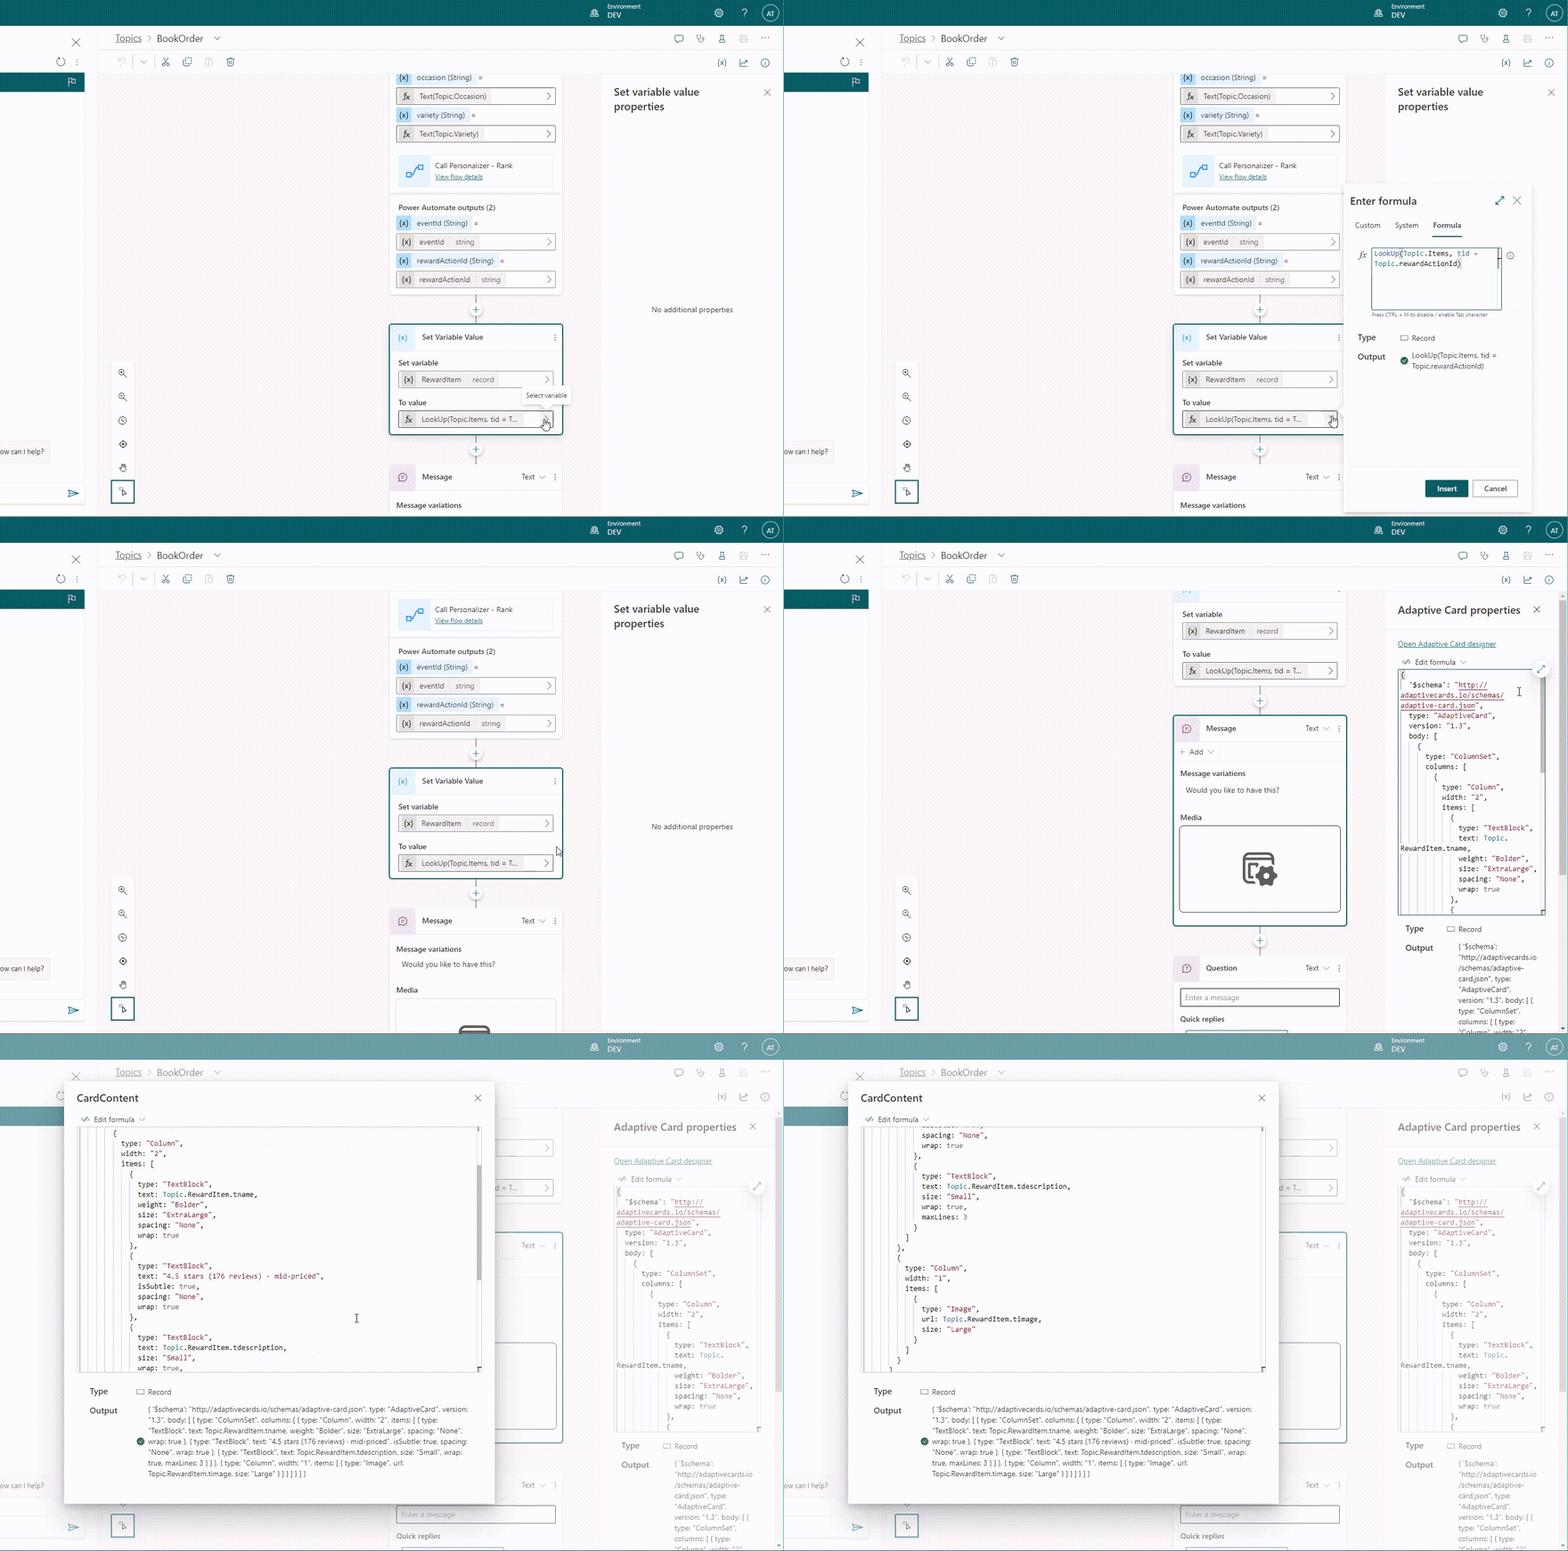
After its processing, we get a response in eventId and rewardActionId. Our concern is more about rewardActionId as this is an action (choice of a dessert) suggested by the Personalizer. So, what we do is, we create another variable and we apply LookUp on the table of items we created above to get the information about the specific rewardActionId.
The reason we do this LookUp and set it up in a separate variable is because we want to populate the Adaptive Card dynamically right within the Power Virtual Agents canvas not in Power Automate.
Customer or user can choose yes or no depending upon their preferred choice. This submission is also handled by Adaptive Cards (I know it's not common yet). However, the data property inside Action.Submit can only contain string to work properly for now. Otherwise, it won't send an event back to PVA and you may wonder what you did wrong. 🤷♂️
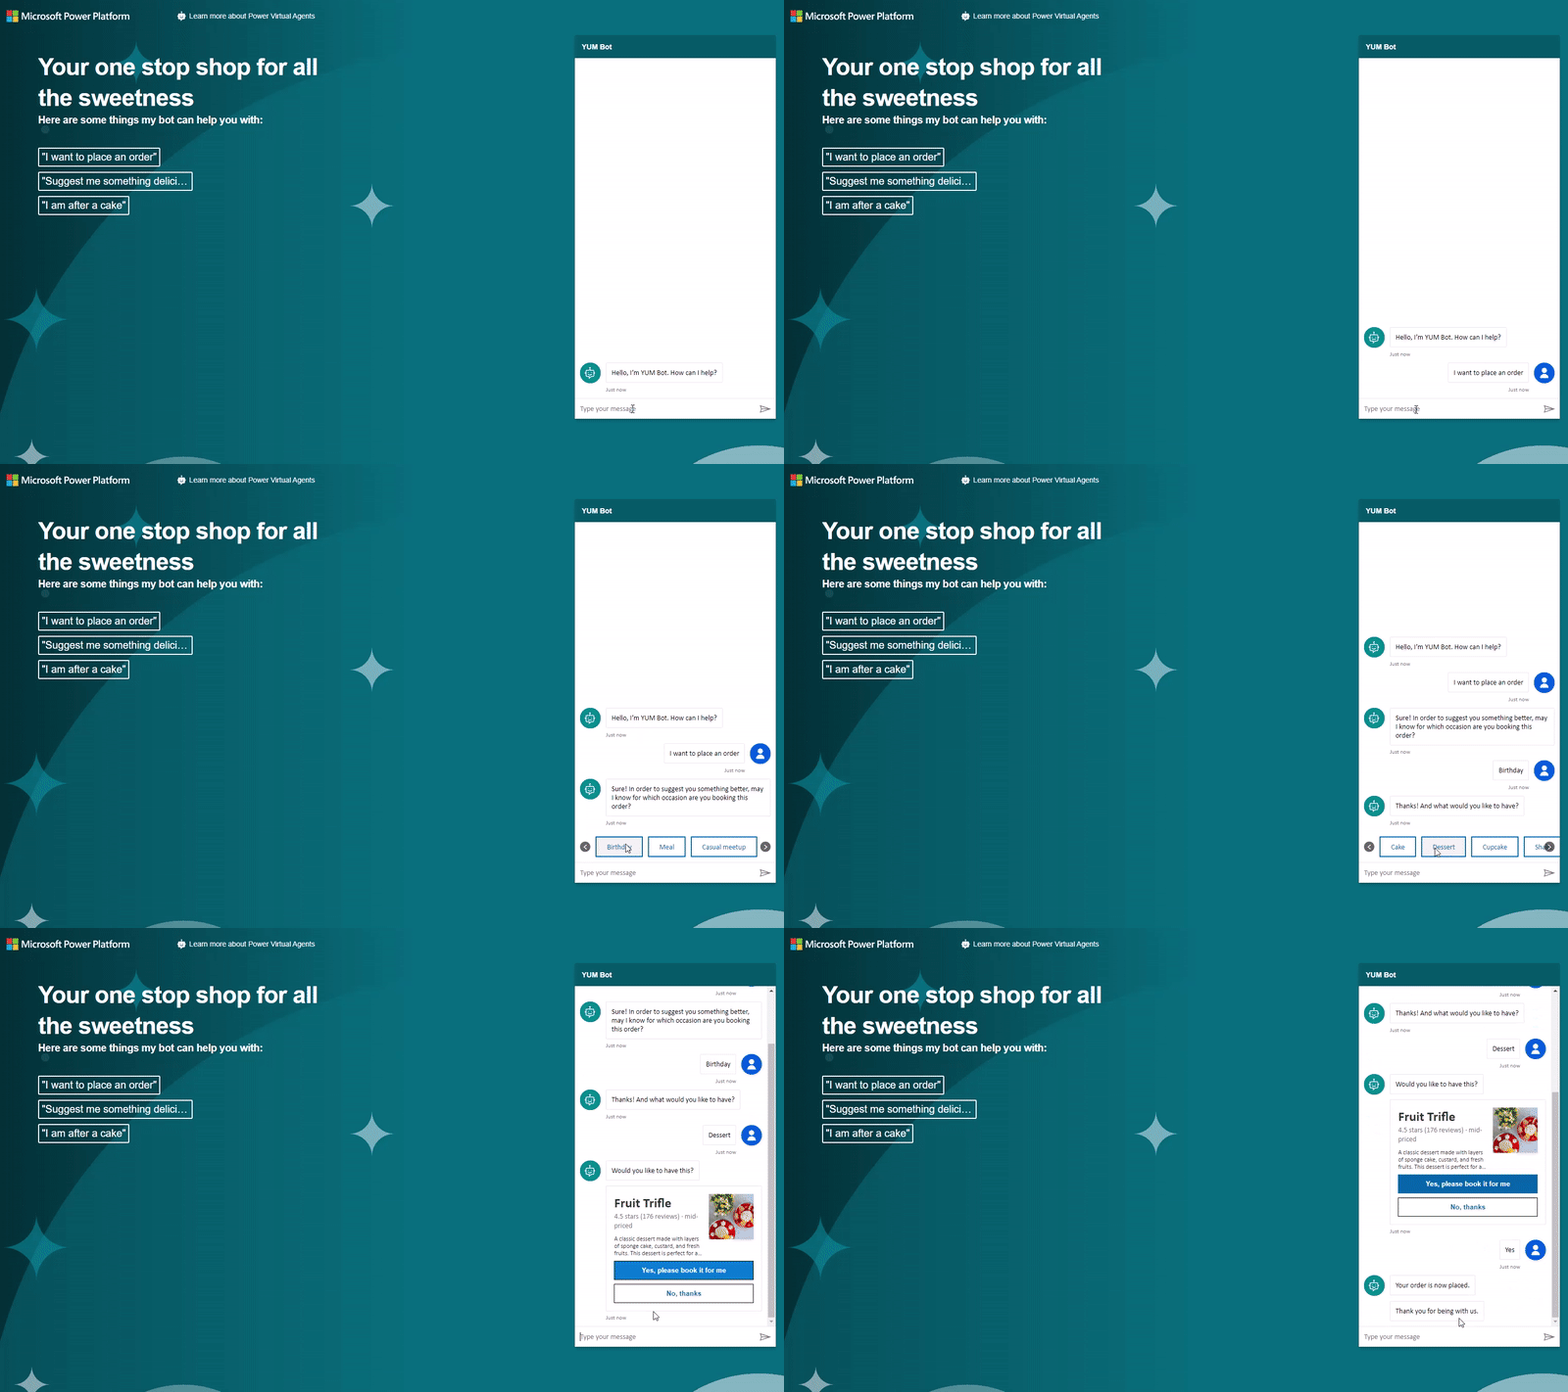
So that's a wrap of a bot. Now if you run it, it should behave in a similar way as this one below. Bonus takeaway for you is the proactive slot filling in Power Virtual Agents. This means that if you provide an entity's name (birthday, meal or cake) already in your question, it will skip that entity's question to speed up the process, automatically. Super cool, isn't it?
In conclusion, personalization in customer service has many potential applications. It can be used to improve customer experiences, increase customer satisfaction, and improve the efficiency of customer service operations. By using customer data and technologies like Azure Personalizer, you can provide more personalised and relevant interactions for your customers, which can help to build stronger and more lasting relationships.
Until next time.
P.S: The introductory 3 paragraphs and the conclusion except for the highlighted text of this blog post is purely written by ChatGPT. I could have made it better or added more of my thoughts but word on the street compelled me to keep the way it is. 🙂




Top comments (0)