
As we all know, Git is a Distributed Version Control System (DVCS). In this article, let’s have a look at how we can push our code to a remote repo, so that others can pull our code and work simultaneously.
This is the continuation of my previous article Getting Started with Git Basics. If you haven’t read that, please read that article at first and comeback here.
Let’s create a repo in Github. Most people prefer to use Github as it is open and free. Github offers us to create unlimited public and private repositories for free. Gitlab is an alternative for Github, which is specifically developed for private repositories (but also supports creating public repositories).
Create a Github repository
Signup for Github
Navigate to Github Dashboard
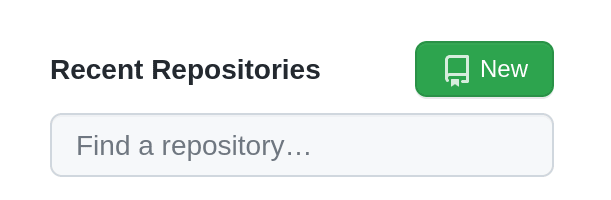
Click on New button on side panel
Enter the repository name
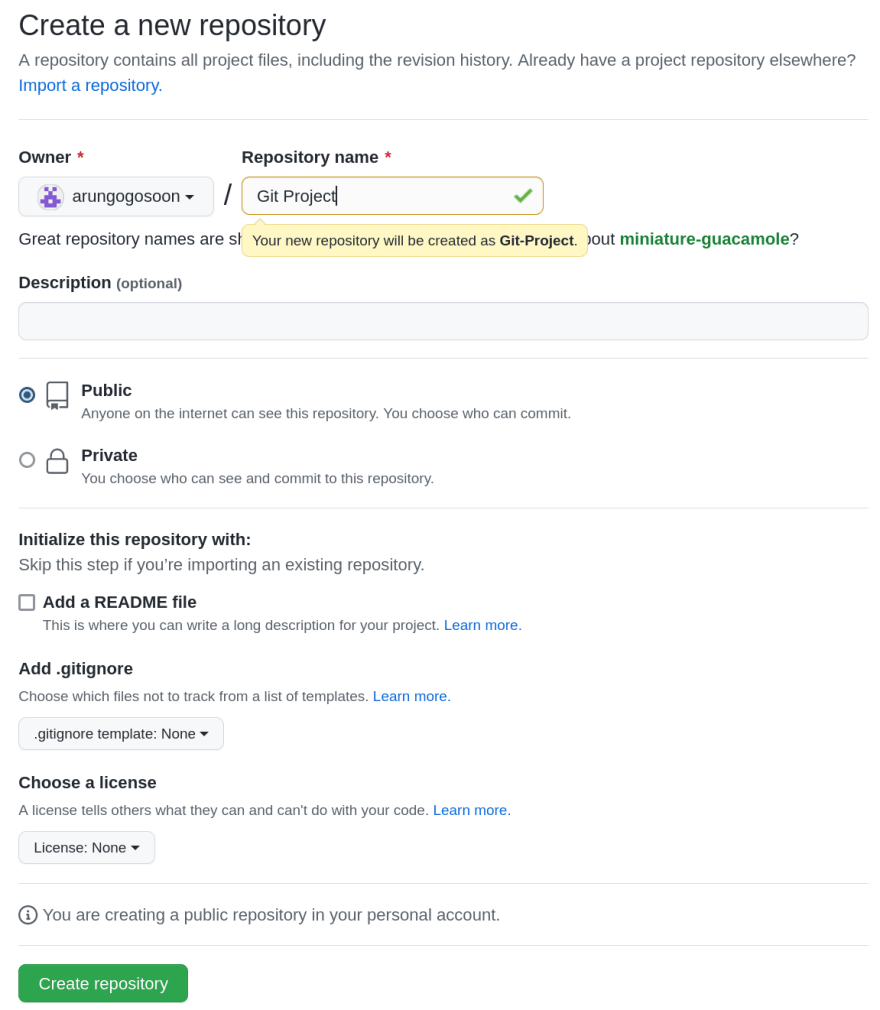
- Click on Create repository button (Leave the rest of the inputs to default. We’ll learn about them later)
SSH
SSH stands for Secure SHell
SSH is authenticated and encrypted secure network protocol which is used for remote communication between machines on an unsecured open network. SSH is used for remote file transfer, network management, etc.
We need to create an SSH key and add it to Github to communicate securely to our server.
Github provides an awesome documentation for Generating an SSH Key and Add SSH Key to your Github account.
Before reading further, please add SSH key to your Github account
Connect Local repository with remote repository
Let’s find the current state of our repository by git config -l command
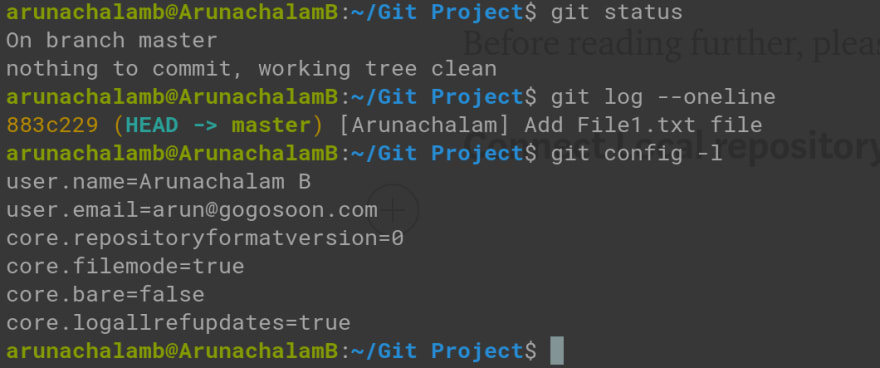
You can find that there are no remote repositories attached to this project.
Select SSH option at top
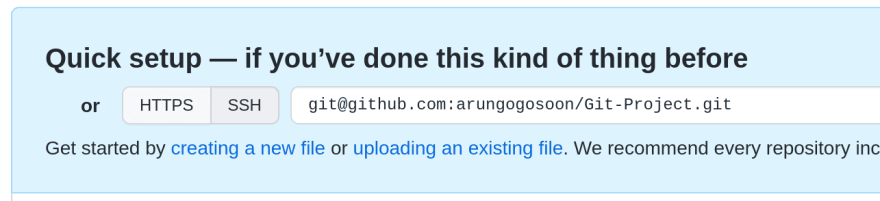
We need to follow **Push an existing repository from the command line **steps after we create the remote repository

The command to connect to remote repository is git remote
Run the following command to connect our local repository to remote repository
We don’t need the 2nd command. The initial branch is Git will be master which was later changed to main . You can read more about this here. But master branch is left to be backward compatible. I prefer to stick to master branch.
Push the code to remote repository
The push command is used to sync our local changes with remote repository.
Run the following command to push your code to remote repository
git push -u origin master

When you prompted to verify the authenticity of github.com, type yes

Success!!! Your code is now synced with remote repository.
Reload your Github repo page, you’ll be able to see your contents there.

The -u option in git push command is used to set upstream branch for all push and pull operations. This will let Git use master branch by default for all push and pull operations.
Connecting your remote repository is the one time process. Use just git push command to push your commits to remote repository next time.
Pull the code from remote repository
Next time, when you begin your work, never forget to run git pull command to sync the changes done by your team mates into your local machine.
Subscribe to our newsletter to receive more such insightful articles that get delivered straight to your inbox.

Top comments (0)