
In this post, I will show you how to make Hasura graphql subscription in the photo displayer application used to display images of a photographer added to show his/her work to the people. The subscription feature makes it to be realtime that we don’t have to refresh the site to see the new updating data there. We can directly see on the site when there is any change from the database.
First Thing is First!
Part 1: Creating Hasura Account and new project
Step 1: Creating Hasura Account
First, let us go to Hasura Cloud and create our new account.!
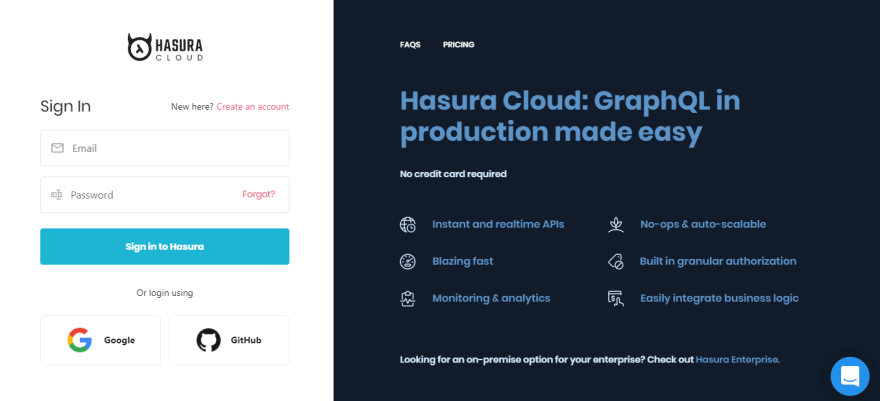
Click on the Create an Account button at the top.

After filling out all the necessary information click on the Create my account button at the bottom.
If it is completed successfully you will get a message like this.

Then go to your email and verify your account there.
You will get the following page after verifying your account.

Step 2: Creating database and project
In this section, we have two options for adding a database to our project. The first is to copy the URL link of our previous database from Heroku if we already had a database created.
But because I don’t have any I have to create new.
So click on the Try a free database with Heroku button at the bottom so that it will create the Postgres database in the Heroku and it will bring back the database URL to the Hasura project.
Note that for creating the database you should have a Heroku account first!
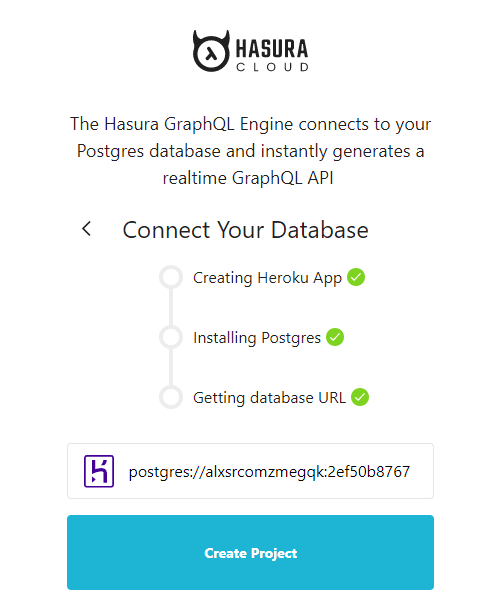
Finally, click on the Create Project button at the bottom so that our project will be created.
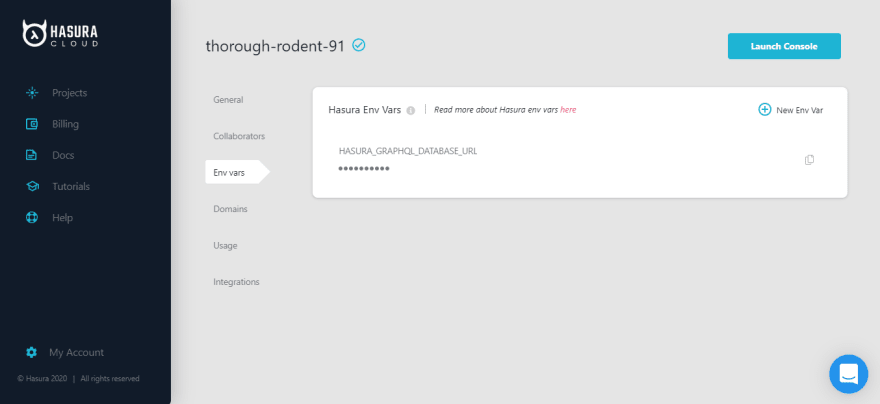
This is our project dashboard click on the Launch Console button at the top and it will let us to the Hasura console home page.

Step 3: Creating a table in Hasura console.
from the above table go to the data section.
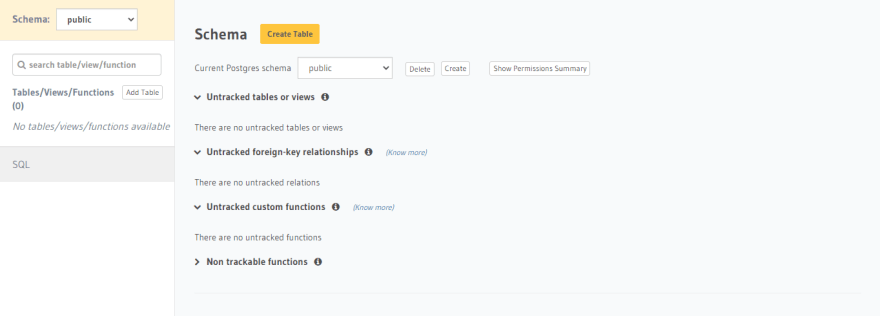
Click on the Create Table button in the schema.
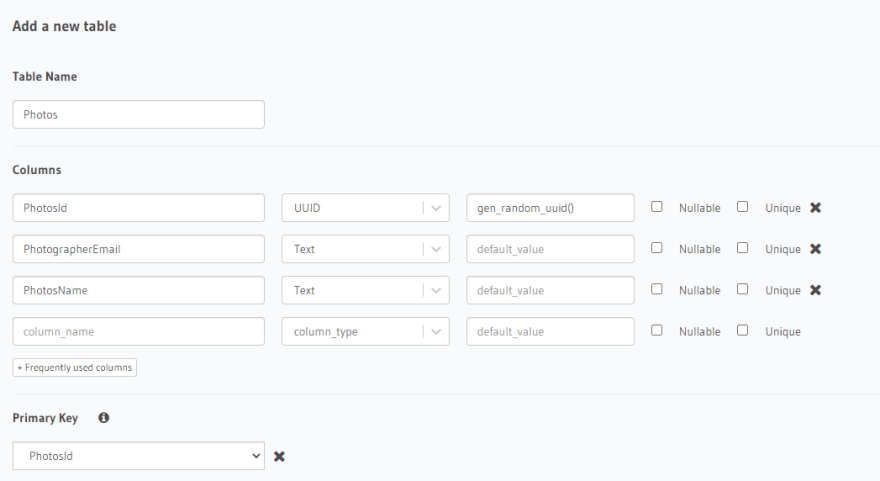
Fill out all the table information with the same data as the above table image. then click on Create Table
Part 2 : Connection to React js code
we are now one step forward. we have finished setting up our database and project on the Hasura console. the next step will be connecting our Hasura project to our react js code.
we have a photo displayer application done using react js(Get The Code). We will modify it by adding a subscription feature on the image add option. So that the application will listen to any change in the database and display it.
Step 1: Installing Dependencies.
npm install @apollo/client graphql
npm install react-apollo
npm install apollo-link-ws
npm i react-router-dom
Step 2: Importing Dependencies in src/index.js file.
import { ApolloProvider } from 'react-apollo';
import {

  ApolloClient,
  HttpLink,
  InMemoryCache,
  split,
} from "@apollo/client";
import { getMainDefinition } from "@apollo/client/utilities";
import { WebSocketLink } from "@apollo/link-ws";
The above react dependencies are used for connecting our application to the Hasura project.
we need to import the react-router too because we will use a router in our application.
import { Switch, Route, Link, BrowserRouter } from 'react-router-dom'
Step 3: Importing Components
The next is importing the signUp, login, and home component to the src/index.js file to add them to the routing.
There will be nothing we will do with the signUp and login component here in this post. I imported them just to add to the router so no fear towards that. you don't have to know them. our main focus will be on the home component. The subscription will be implemented on this component.
import Home from './App'
import Login from './Components/SignIn';
import SignUp from './Components/SignUp';
so we have done with the imports. the overall import will look like this.
import React from 'react'
import ReactDOM from 'react-dom'
import './index.css'
import { Switch, Route, Link, BrowserRouter } from 'react-router-dom'

import Home from './App'
import Login from './Components/SignIn';
import SignUp from './Components/SignUp';

import { ApolloProvider } from 'react-apollo';
import {

  ApolloClient,
  HttpLink,
  InMemoryCache,
  split,
} from "@apollo/client";
import { getMainDefinition } from "@apollo/client/utilities";
Step 4: Copy Graphql EndPoint
Now let us go back to our Hasura console and copy our Graphql endpoint.

then in our index.js file, we will declare this endpoint globally to use it by different connection.
const GRAPHQL_ENDPOINT = 'gentle-ghost-74.hasura.app/v1/graphql';
Now let us take a break and know some important things!
We are going to use two types of connections for this photo displaying application. HTTP and Web socket connection
What is the difference between the two? and where we will use HTTP and Websocket?
HTTP is unidirectional where the client sends the request and the server sends the response. Let’s take an example when a user sends a request to the server this request goes in the form of HTTP or HTTPS, after receiving a request server send the response to the client, each request is associated with a corresponding response, after sending the response the connection gets closed, each HTTP or HTTPS request establish the new connection to the server every time and after getting the response the connection gets terminated by itself.
WebSocket is bidirectional, a full-duplex protocol that is used in the same scenario of client-server communication, unlike HTTP it starts from ws:// or wss://. It is a stateful protocol, which means the connection between client and server will keep alive until it is terminated by either party (client or server). after closing the connection by either of the client and server, the connection is terminated from both the end.
we use a WebSocket connection for the subscription because it needs a live connection between server and client. any change in the database will show up in our application because of the subscription. and the thing behind this subscription is the WebSocket connection.
and we use HTTP connection for the mutation and query.
Step 5:Create HTTP and WebSocket connection
const httpLink = new HttpLink({
  uri: `https://${GRAPHQL_ENDPOINT}`,
});
const wsLink = new WebSocketLink({
  uri: `ws://${GRAPHQL_ENDPOINT}`,
  options: {
    reconnect: true,
  }
});
how can we use both in one application?
Step 6:Add split function
const splitLink = split(
  ({ query }) => {
    const definition = getMainDefinition(query);
    return (
      definition.kind === "OperationDefinition" &&
      definition.operation === "subscription"
    );
  },
  httpLink,
  wsLink
);
so this splitLink constant will hold the URL that returned from the split function depending on the coming connection. if it is a subscription it will return the second constant(wsLink) and if it is like mutation or query it will return the first constant(httpLink).
Step 7:creating a client
const client = new ApolloClient({
  cache: new InMemoryCache(),
  link: splitLink,
});
Step 8:Creating routing class.
class Routing extends React.Component {
  render() {
    return (
      <div className="center w85">

        <div className="ph3 pv1 background-gray">
          <Switch>
            <Route exact path="/home" component={Home} />
            <Route exact path="/login" component={Login} />
            <Route exact path="/signUp" component={SignUp} />
          </Switch>
        </div>
      </div>
    )
  }
}
Step 9:Render.
Then finally we will pass this routing class and the client we created in the above to the render function.
ReactDOM.render(
  <BrowserRouter>
    <ApolloProvider client={client}>
      <Routing />
    </ApolloProvider>
  </BrowserRouter>,
  document.getElementById('root')
)
That is all about connection!
the whole index.js file will look like this.
import React from 'react'
import ReactDOM from 'react-dom'
import './index.css'
import { Switch, Route, Link, BrowserRouter } from 'react-router-dom'
import Home from './App'
import Login from './Components/SignIn';
import SignUp from './Components/SignUp';
import { ApolloProvider } from 'react-apollo';
import {
  ApolloClient,
  HttpLink,
  InMemoryCache,
  split,
} from "@apollo/client";
import { getMainDefinition } from "@apollo/client/utilities";
import { WebSocketLink } from "@apollo/link-ws";

const GRAPHQL_ENDPOINT = 'gentle-ghost-74.hasura.app/v1/graphql';

const httpLink = new HttpLink({
  uri: `https://${GRAPHQL_ENDPOINT}`,
});

const wsLink = new WebSocketLink({
  uri: `ws://${GRAPHQL_ENDPOINT}`,
  options: {
    reconnect: true,
  }
});

const splitLink = split(
  ({ query }) => {
    const definition = getMainDefinition(query);
    return (
      definition.kind === "OperationDefinition" &&
      definition.operation === "subscription"
    );
  },
  httpLink,
  wsLink
);

const client = new ApolloClient({
  cache: new InMemoryCache(),
  link: splitLink,
});

class Routing extends React.Component {
  render() {
    return (
      <div className="center w85">

        <div className="ph3 pv1 background-gray">
          <Switch>
            <Route exact path="/home" component={Home} />
            <Route exact path="/login" component={Login} />
            <Route exact path="/signUp" component={SignUp} />
          </Switch>
        </div>
      </div>
    )
  }
}


ReactDOM.render(
  <BrowserRouter>
    <ApolloProvider client={client}>
      <Routing />
    </ApolloProvider>
  </BrowserRouter>,
  document.getElementById('root')
)
Part 3: Implementation of subscription
we are going to implement the subscription in the home component. the file name is Album.js you can find the full code here.
in this part, we will implement image add functionality and rendering images from the database with a subscription.
so let us follow some steps!
Step 1:Import necessary dependencies
import { gql } from '@apollo/client';
import { withApollo, Subscription } from 'react-apollo'
Step 2:Implementing the image add function
handleUpload = async () => {
    const { loading, error, data } = await
     this.props.client.mutate({
        mutation: gql`

        mutation {
            insert_Photos(objects: {
                 PhotographerEmail: "${this.state.email}",
                 PhotosName: "${this.state.photosToUpload}"

                }) {
              affected_rows
              returning {
                PhotosId
              }
            }
          }

    `, variables: null,})
    if (error) {

        return (<div>
            Error : error.toString();
        </div>)
    }
    await this.setState({
        sucess: 'Sccessfully uploaded...'
    })

}
Then we will pass this function to the Upload button.
 <Grid className="addIMage" container spacing={2} justify="center">
     <div className="button_upload">
         <input color="danger" type="file" name="file" onChange={(e) => this.onChange(e)} />
     </div>
     <Button onClick={this.handleUpload} variant="contained" color="primary">
         Upload
     </Button>
 </Grid>
Step 3:implemement Subscription
To do subscription because we started the project using class-based component, not functional component we can’t use any react Hocs inside the class component. So we will use something like tag which is imported from react-apollo to surround the rendering data.so any time when there is a change in the database these tags will recognize it and build the render again with the upcoming updated data. like the setState() method in the state management system. Simple that is all about it.
<Subscription subscription={gql`
        subscription{
            Photos(where: {PhotographerEmail: {_eq: "${this.state.email}"}}) {
              PhotosName
            }
          }

`}>
    {({ loading, error, data }) => {
        if (loading) {
            return (
                <div>
                    <h1>
                        Loading...
                    </h1>
                </div>
            );
        }
        if (error) {
            return (
                <div>
                    <h2>Error : {error.toString()}</h2>
                </div>
            );
        }
        if (data) {
            console.log("data", data);
        }
        return (
            data.Photos.map((photo) => (
                <Grid item key={photo} xs={12} sm={6} md={4}>
                    <Card className={classes.card}>
                        <CardMedia
                            className={classes.cardMedia}
                            image={photo.PhotosName}
                            title="profile"
                        />
                        <CardContent className={classes.cardContent}>
                            <Typography gutterBottom variant="h5" component="h2">
                                {/* {photographer.fName + " " + photographer.lName} */}
                            </Typography>
                            <Typography>
                                This is a media card. You can use this section to describe the content.
            </Typography>
                        </CardContent>
                        <CardActions>
                            <Button size="small" color="primary">
                                View
            </Button>
                            <Button size="small" color="primary">
                                Edit
            </Button>
                        </CardActions>
                    </Card>
                </Grid>
            ))
        );
    }}
</Subscription>
The last step is to export the class component and surround it with the withApollo high order function so that our component will use the client passed from the index.js file.
export default withApollo(withStyles(useStyles)(Album))

Top comments (0)