Introduction
In this tutorial, we will go through the process of setting up Emailjs with a React application built using the Vite build tool.
Emailjs is a software application that lets you "send email directly from your code". The benefit is that you do not have to build a complex server on the backend of your web application to handle emails. Let's begin.
Step 1: Scaffold React Project using Vite
On the Command Line Interface, navigate to where you want to keep your project on your device and run the following command:
npm create vite@latest
You will be presented with the following:
? Project name: > vite_project
For this tutorial, we will name our project ContactForm. (You can enter any name relevant to the project you are building)
Next, we will type the project name at the prompt and press Enter.
? Project name: > ContactForm
After this, we are presented with a selection of frameworks. Use the arrow keys to select React and press Enter. Then we are given a list of variants of React. Again use the arrow keys to select JavaScript and press Enter.
After you have done the above, Vite will give you the precise commands to follow to complete scaffolding the project. The commands are:
cd ContactForm
npm install
npm run dev
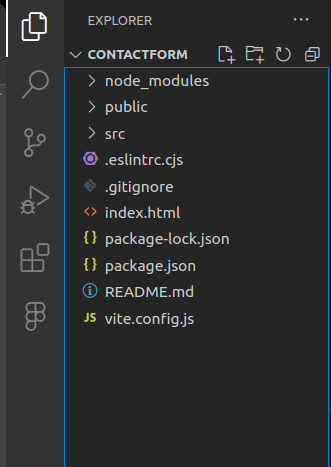
Run the commands above and wait for Vite to finish scaffolding the project. Once this process has run its course you should have a React project with a file structure similar to what we have below in your favorite code editor. Note that we are using VS Code for this tutorial.
If you want to learn more about the Vite build tool here is a link to the documentation.
Step 2: Build ContactForm
Now let us go ahead and build a simple contact form. The form will have only 3 fields.
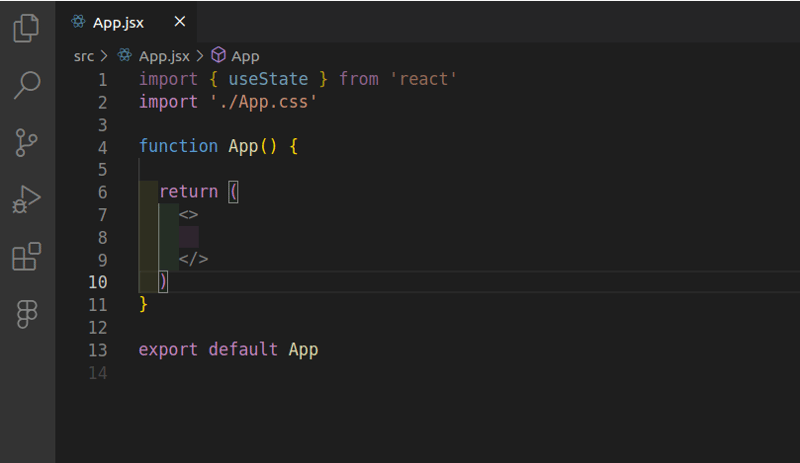
Look for App.jsx in the project structure and delete all the redundant code in the file until you are left with something like this:
We can now write the code for our form.
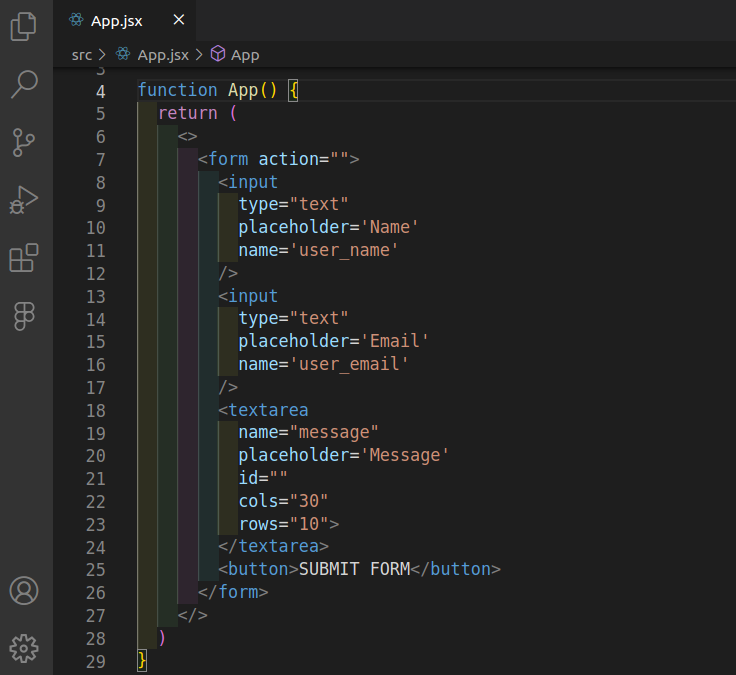
Things to note from the code above:
- We have created 3 form inputs: 2 text inputs and a textarea.
- We have also added an optional placeholder identifying what each input does for our users.
- We have also created a "name" attribute. Take special note of this attribute because we will need it to set up our Emailjs templates.
Speaking of which let us now navigate to Emailjs.
Step 3: Configure Emailjs
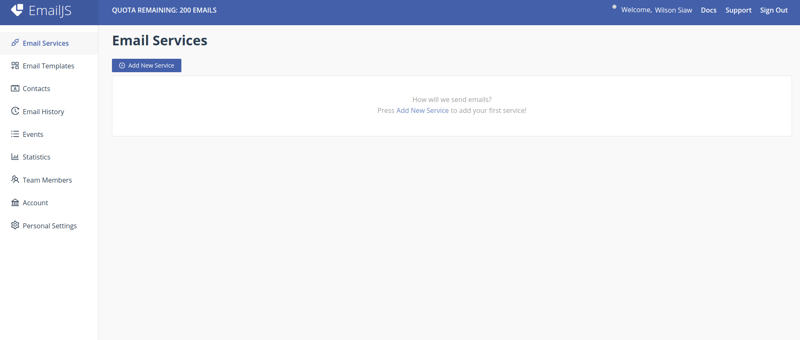
On the Emailjs homepage sign up for a free account. Once you have signed in you will be presented with a page like the below below.
Follow these steps:
a. Click on Add New Service
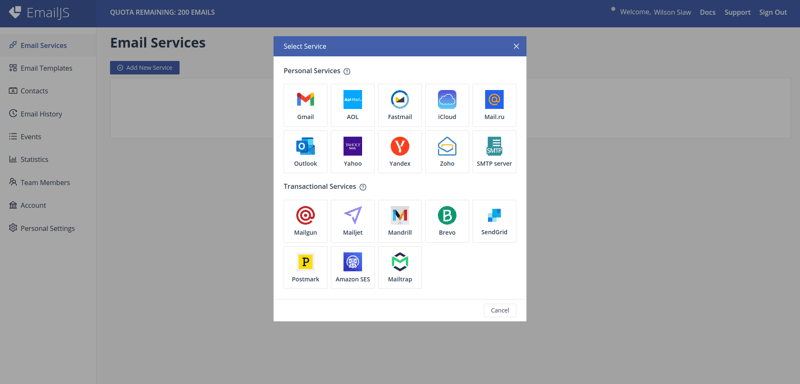
b. In this tutorial, we will use Gmail. After selecting the service, you should have the following on your screen:
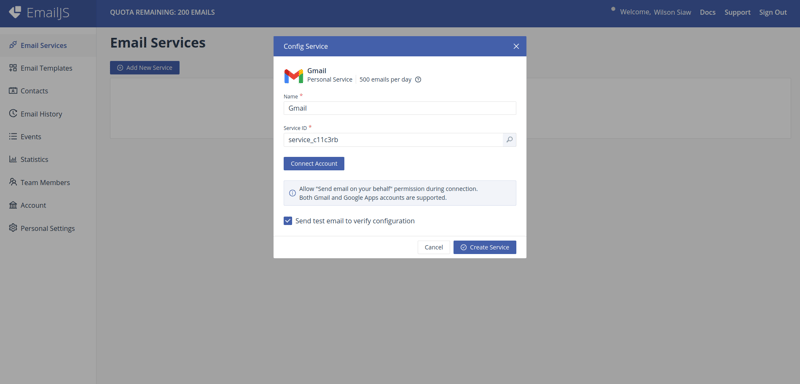
c. Click "Connect Account" and connect your email to Emailjs. Take note of the service ID. We will need it later. Now click "Create Service". Once the service has been connected successfully, you will get the following screen:
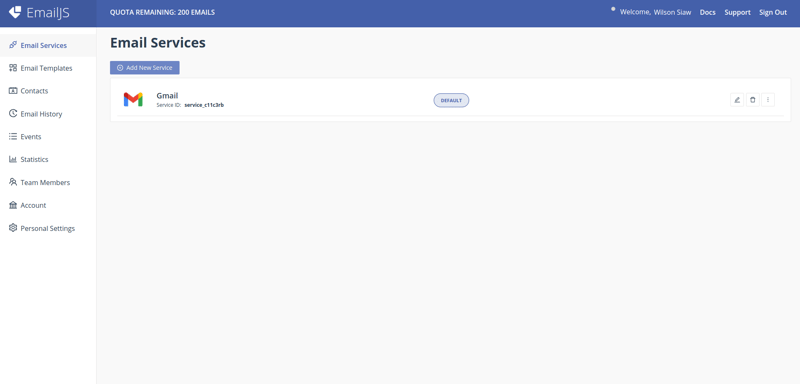
Take note of the Service ID.
The next thing to do is create an email template.
d. Select Email Templates. Click "Create New Template". Note how variables are defined in Emailjs. In this instance "from_name" is a variable

e. Remember the name attributes we created in our code earlier? Let's replace the variables in Emailjs with those attributes like this:
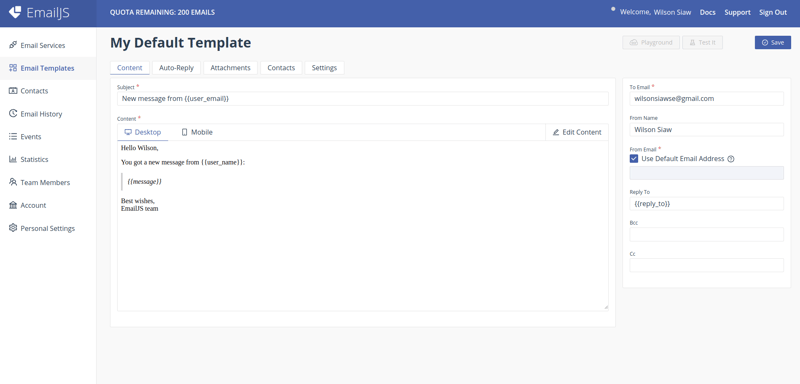
Note: to edit the content of the email, click "Edit Content" and select Design Editor from the pop-up menu. Then save the template.
f. Let us change the name of our template before we return to our code editor. Go to Settings and change the template name to "Contact Form". For this tutorial, we will keep the Template ID as it is but you can change it if you want to. Save the template and go back to the Email Templates page.
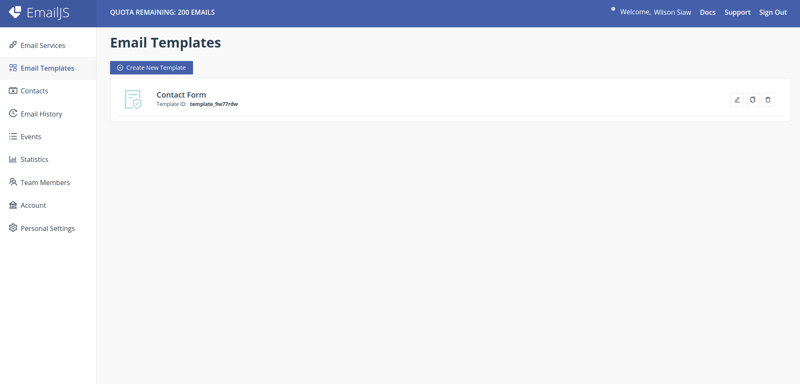
The page should now look like this. Take note of the Template ID
Let us go back to our code editor.
Step 4: Configure the .env File
We will put our Emailjs environment variables in a dotenv (.env) file. To read more about the purpose of this file click here.
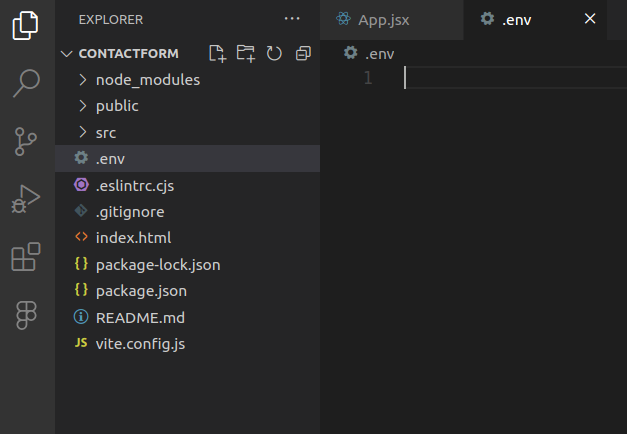
Navigate to the root of the folder structure in your project and create a .env file.
Let's add our variables to this file. The variables we'll need from Emailjs are Service ID, Template ID, and Public Key. You can find the Public Key in the Accounts tab of Emailjs.
Now create these variables in the .env file.
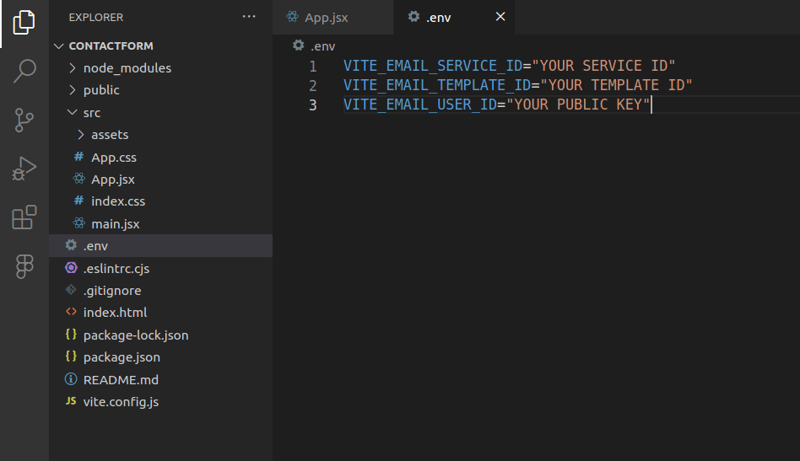
Replace "YOUR SERVICE ID", "YOUR TEMPLATE ID" and "YOUR PUBLIC ID" with your IDs and key from Emailjs.
Step 5: Write the Send Email Function
We will now go into App.jsx and write the function responsible for getting the data from the form inputs and sending it to Emailjs.
But before we do this, we need to install the Emailjs dependency or SDK in our project. Open the terminal and make sure you are in the project folder. Run this command in the terminal.
npm install emailjs-com
This command will install email-js as a dependency in your project. To confirm that it has been installed open the package.json file in your project and check that "emailjs-com" is listed in the dependencies.
After confirming Emailjs has been installed successfully, go ahead and import it into your project and write the function mentioned above.
The function can be written like this:
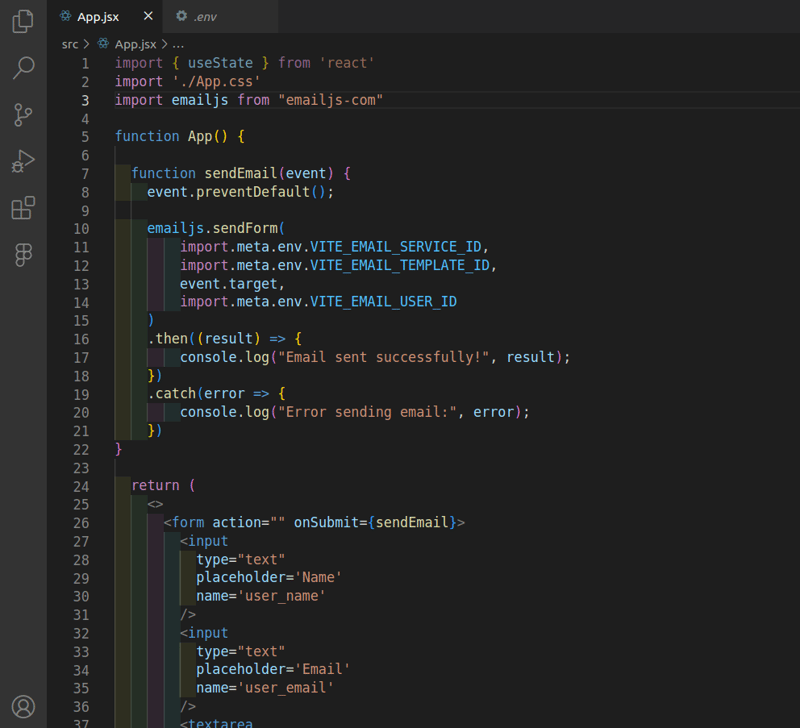
Things to note from the code above:
- See how we import the environment variables from the .env file into our function.
- Notice how we prevent the default behavior when the button is submitted.
- Also notice how the onSubmit event handler is used.
This is a brief tutorial on using Emailjs in a React project using Vite. For a more in-depth look at Emailjs, you can visit the documentation.
Happy coding!!!


Top comments (1)
Thanks for the article.
Please note the emailjs-com package is deprecated.