
Background
With the hotness of ChatGPT, many developers responded quickly with a spurt of AI applications applied to different scenarios, and basically focused on web domain applications, and behind the rapid development, we can see that developers mostly choose Next.js or Nuxt.js full-stack frameworks to develop in order to quickly validate their products. The main reasons behind this selection, I think, are
The importance of
SEO
Foreign countries pay more attention to the importance of SEO, domestic search engines mostly rely on money to buy search traffic, including small programs, App such as the demand for SEO is not much-
The rise of
Edge FunctionServerless enables front-end development to quickly develop full-stack applications and conveniently host their own back-end services without paying too much attention to deployment, however, his disadvantage is that most Serverless are using containerized solutions, so the cold start time is long, if the request is forwarded in their own cloud function OpenAI interface, it may happen that the request time is very long. Nowadays, vendors such as Vercel, CloudFlare, Supabase, etc. have Edge Function capability, which allows the function to run in some edge nodes closer to the user. For faster cold start time to respond to users quickly, this solution generally also adds some restrictions, but still favored by many developers
-
Diversity of Cloud Service Vendors
Cloud service vendors provide many basic services, and when hosting projects with services such as Vercel, they can integrate with Github for continuous deployment and also assign a domain name. Many other vendors also offer a number of free back-end storage services, such as:
- Redis provided by Upsatsh
- PostgreSQL from Supabase
- MySQL provided by PlantScale
- User authentication and user management from Clerk
These vendors' free plans are perfectly adequate for personal development, but you can of course use paid plans depending on the size of the product
And the purpose of this article is to try to develop a simple navigation page to satisfy my own collection fetish for freeing my favorites, to learn Next.js development, and to experience the ease of developing full-stack applications brought by Next.js.
Initialize the project
With the emergence of atomized CSS solutions like tailwindcss and unocss, there are many UI component libraries derived from them, such as Radix, daisyUI, flowbite, of which the RadixUI component library pays much attention to web accessibility, and the components follow the WAI-ARIA standard, which makes it easier for developers to build accessible UI interfaces, and because it focuses on accessibility and belongs to Headless UI which means no specific style class name code, shadcnThe author of shadcn/ui developed a component library, which is based on the RadixUI component library and gives a simple and beautiful style, which is favored by many developers.
Here is a direct clone of the author's Nextjs template initialization project
git clone https://github.com/shadcn/next-template
The project uses the latest app router version of Next.js and has integrated tailwindcss and shadcn/ui component libraries. Here we choose to do the navigation site also because it is simple enough, the key style is for the sidebar, because tailwindcss is mobile first, so here set the default hidden, when the screen width is larger than sm show.
<div className="fixed z-20 hidden min-h-screen sm:block">
    ...
</div>
And for the list area, use grid layout, default mobile priority one column, depending on the screen size to display 2 or 3 columns
<div className="grid grid-cols-1 gap-3 md:grid-cols-2 md:gap-6 lg:grid-cols-3">
   ...
</div>
Other styles can be borrowed from other people's website design simply beautify the next, for not familiar with css and lack of aesthetic I spent a lot of time in adjusting, always feel that the site is not beautiful enough, but do not know how to beautify.
Database integration
Define the model
Database integration here I chose Prisma, similar to the more popular and Drizzle, for Prisma specific concepts, use and its advantages, you can refer to my organized record of notes.
npx prisma init
will create the prisma/schema.prisma file, creating the model as follows
generator client {
  provider = "prisma-client-js"
}

datasource db {
  provider = "mysql"
  url = env("DATABASE_URL")
}

model Category {
  id String @id @default(cuid())
  icon String
  title String
  description String
  rank Int?
  createdAt DateTime @default(now()) @map(name: "created_at")
  updatedAt DateTime @default(now()) @map(name: "updated_at")
  links Link[]

  @@map(name: "category")
}

model Link {
  id          String   @id @default(cuid())
  icon        String
  url         String
  title       String
  description String
  rank        Int?
  public      Boolean  @default(true)
  status      Int      @default(1) @db.TinyInt
  createdAt   DateTime @default(now()) @map(name: "created_at")
  updatedAt   DateTime @default(now()) @map(name: "updated_at")
  cid         String
  catagory    Category @relation(fields: [cid], references: [id])

  @@map(name: "link")
}
Where DATABASE_URL is the remote database address, here I used MySQL from PlantScale. Of course you can also use PostgreSQL from Supabase or other databases, create a .env file and fill in the service address

DATABASE_URL='mysql://user:password@aws.connect.psdb.cloud/dev?sslaccept=strict'
The relationship diagram can be seen in this visualization Prisma model website as follows, representing category instances and web link instances respectively

Table Sync
Then execute the command to synchronize the local model to the database table
npx prisma db push
Then you may encounter the following error

After checking the website, I found that the official website in documentation that the MySQL database of PlanetScale does not support foreign keys, you need to specify relationMode specially
datasource db {
  provider     = "mysql"
  url          = env("DATABASE_URL")
  relationMode = "prisma"
}
The default value of relationMode is foreignKeys, this option should be enabled when using the MySQL connector of the PlanetScale database to simulate relationships in the Prisma Client. Execute the db push command again to synchronize the model to the database

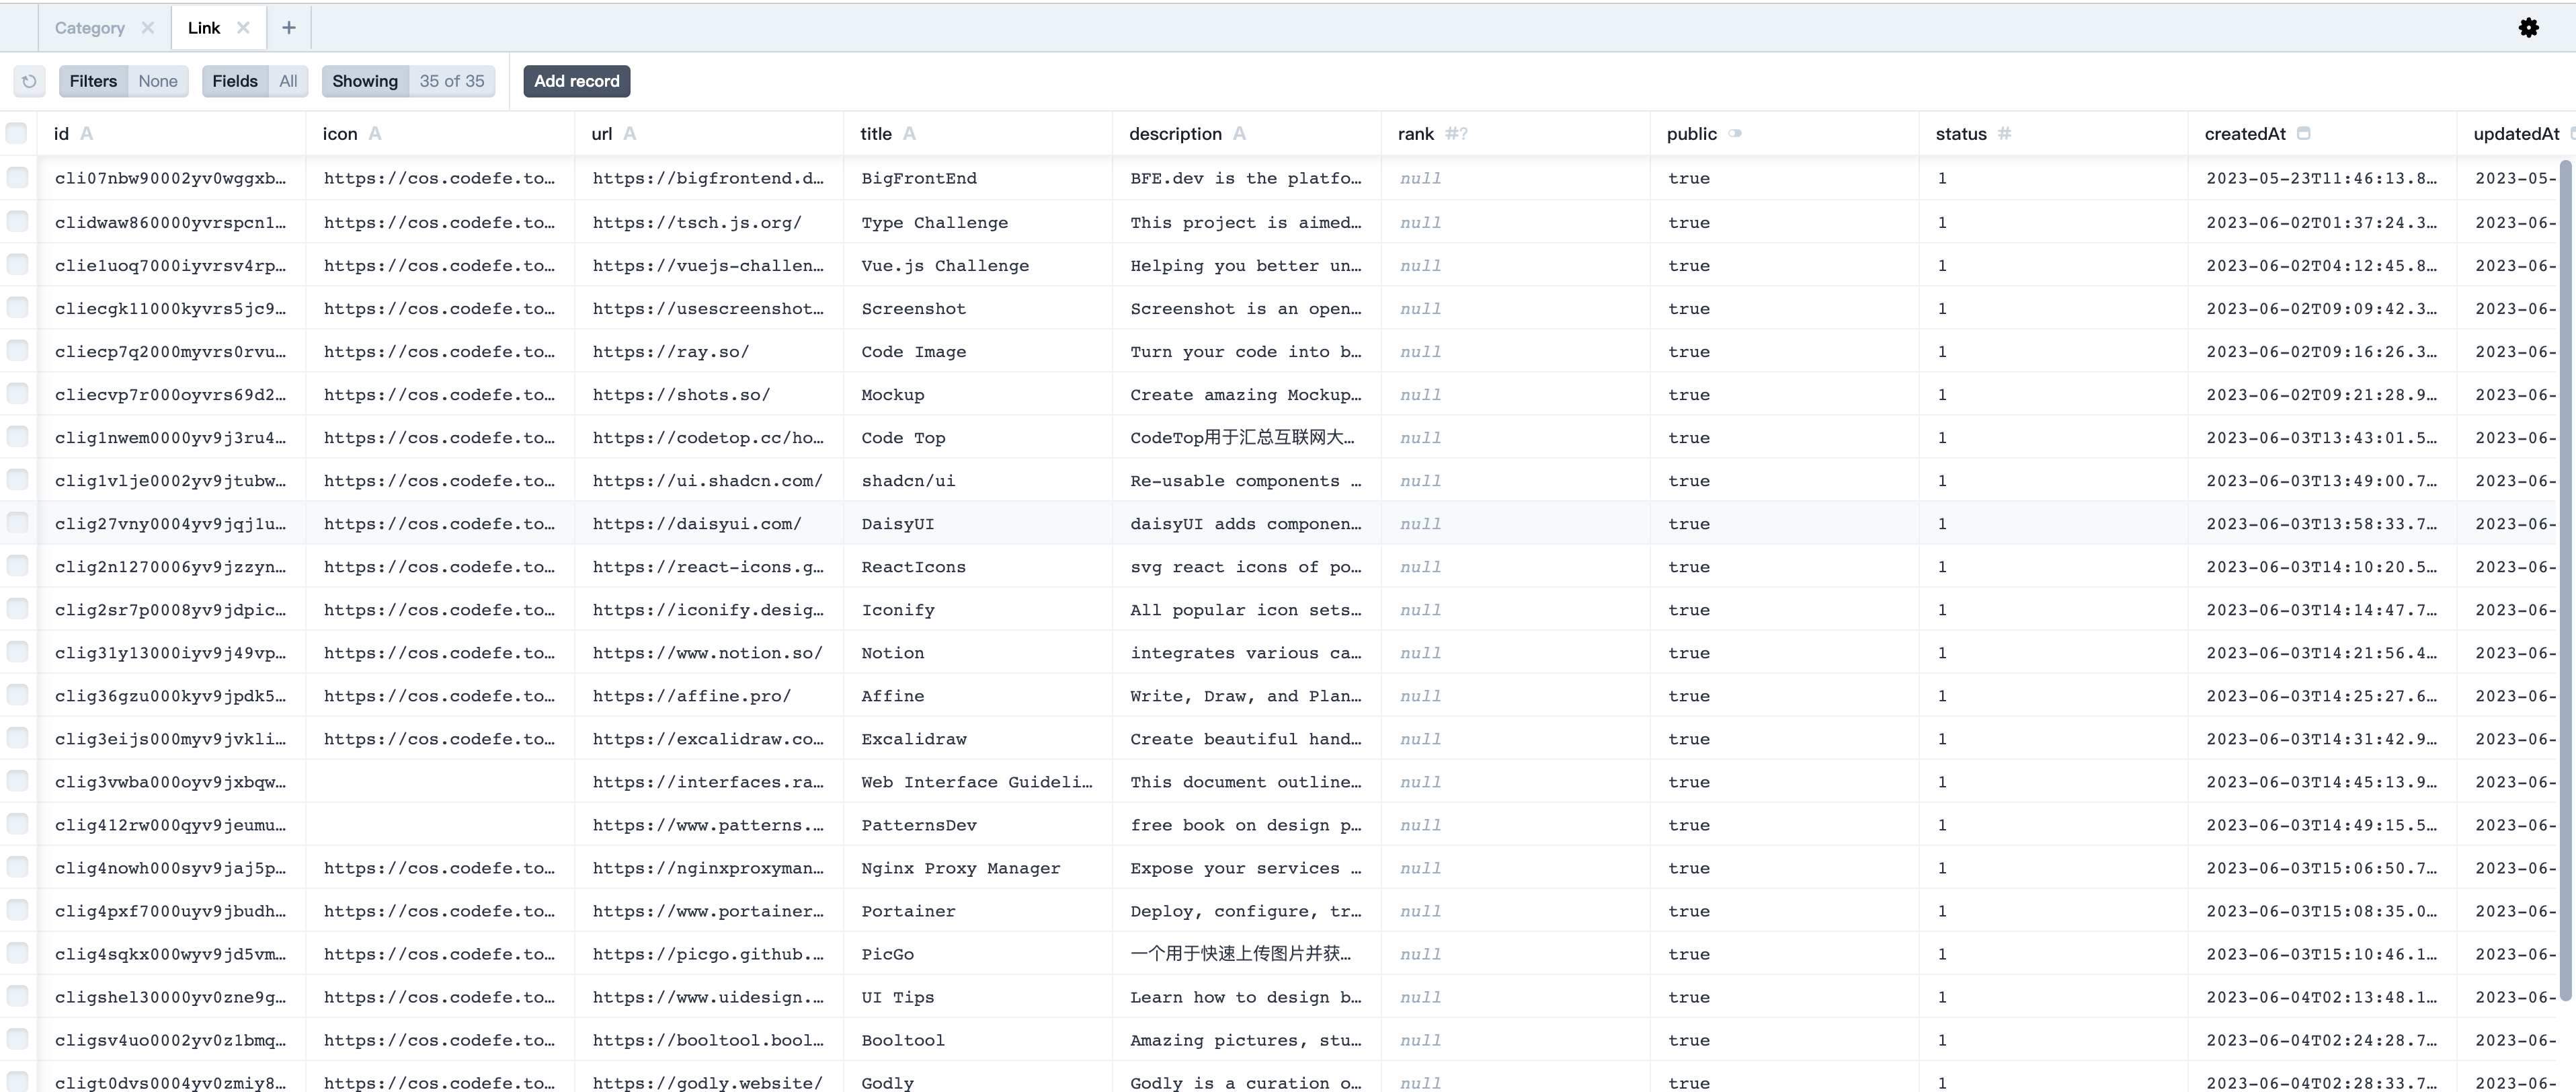
Insert and query data
Then execute
npx prisma studio
Open the table editor to add your own data
! https://cos.codefe.top/images/frontend-studio.png
Execute the command to generate the PrismaClient instance
pnpm install @prisma/client
npx prisma generate
Then you can query the data by relation at once
import prisma from '@/lib/db';
import type { Prisma } from '@prisma/client';

export default async function getNavLinks() {
  const res = await prisma.category.findMany({
    orderBy: [
      {
        rank: 'asc',
      }
    ],
    include: {
      links: {
        orderBy: {
          rank: 'asc',
        },
        where: {
          public: true,
          status: 1,
        },
      },
    },
  });
  return res;
}

export type CategoryWithLinks = Prisma.PromiseReturnType<typeof getNavLinks>
User Authentication
Integrating user authentication in Next.js is very simple and can be done directly using NextAuth
NextAuth
NextAuth is an open source authentication solution for Next.js applications. By default, NextAuth uses JSON Web Tokens (JWT) to save user sessions. nextAuth supports popular login services such as Google, Facebook, Auth0, Apple, email, and OAuth 1.0 and 2.0 services, among others, and is a flexible and configurable authentication solution.
First install the required dependencies
pnpm install next-auth @next-auth/prisma-adapter
Add user-related models according to the official documentation guidelines
model Account {
  id                 String  @id @default(cuid())
  userId             String
  type               String
  provider           String
  providerAccountId  String
  refresh_token      String?  @db.Text
  access_token       String?  @db.Text
  expires_at         Int?
  token_type         String?
  scope              String?
  id_token           String?  @db.Text
  session_state      String?

  user User @relation(fields: [userId], references: [id], onDelete: Cascade)

  @@unique([provider, providerAccountId])
}

model Session {
  id           String   @id @default(cuid())
  sessionToken String   @unique
  userId       String
  expires      DateTime
  user         User     @relation(fields: [userId], references: [id], onDelete: Cascade)
}

model User {
  id            String    @id @default(cuid())
  name          String?
  email         String?   @unique
  emailVerified DateTime?
  image         String?
  accounts      Account[]
  sessions      Session[]
}

model VerificationToken {
  identifier String
  token      String   @unique
  expires    DateTime

  @@unique([identifier, token])
}
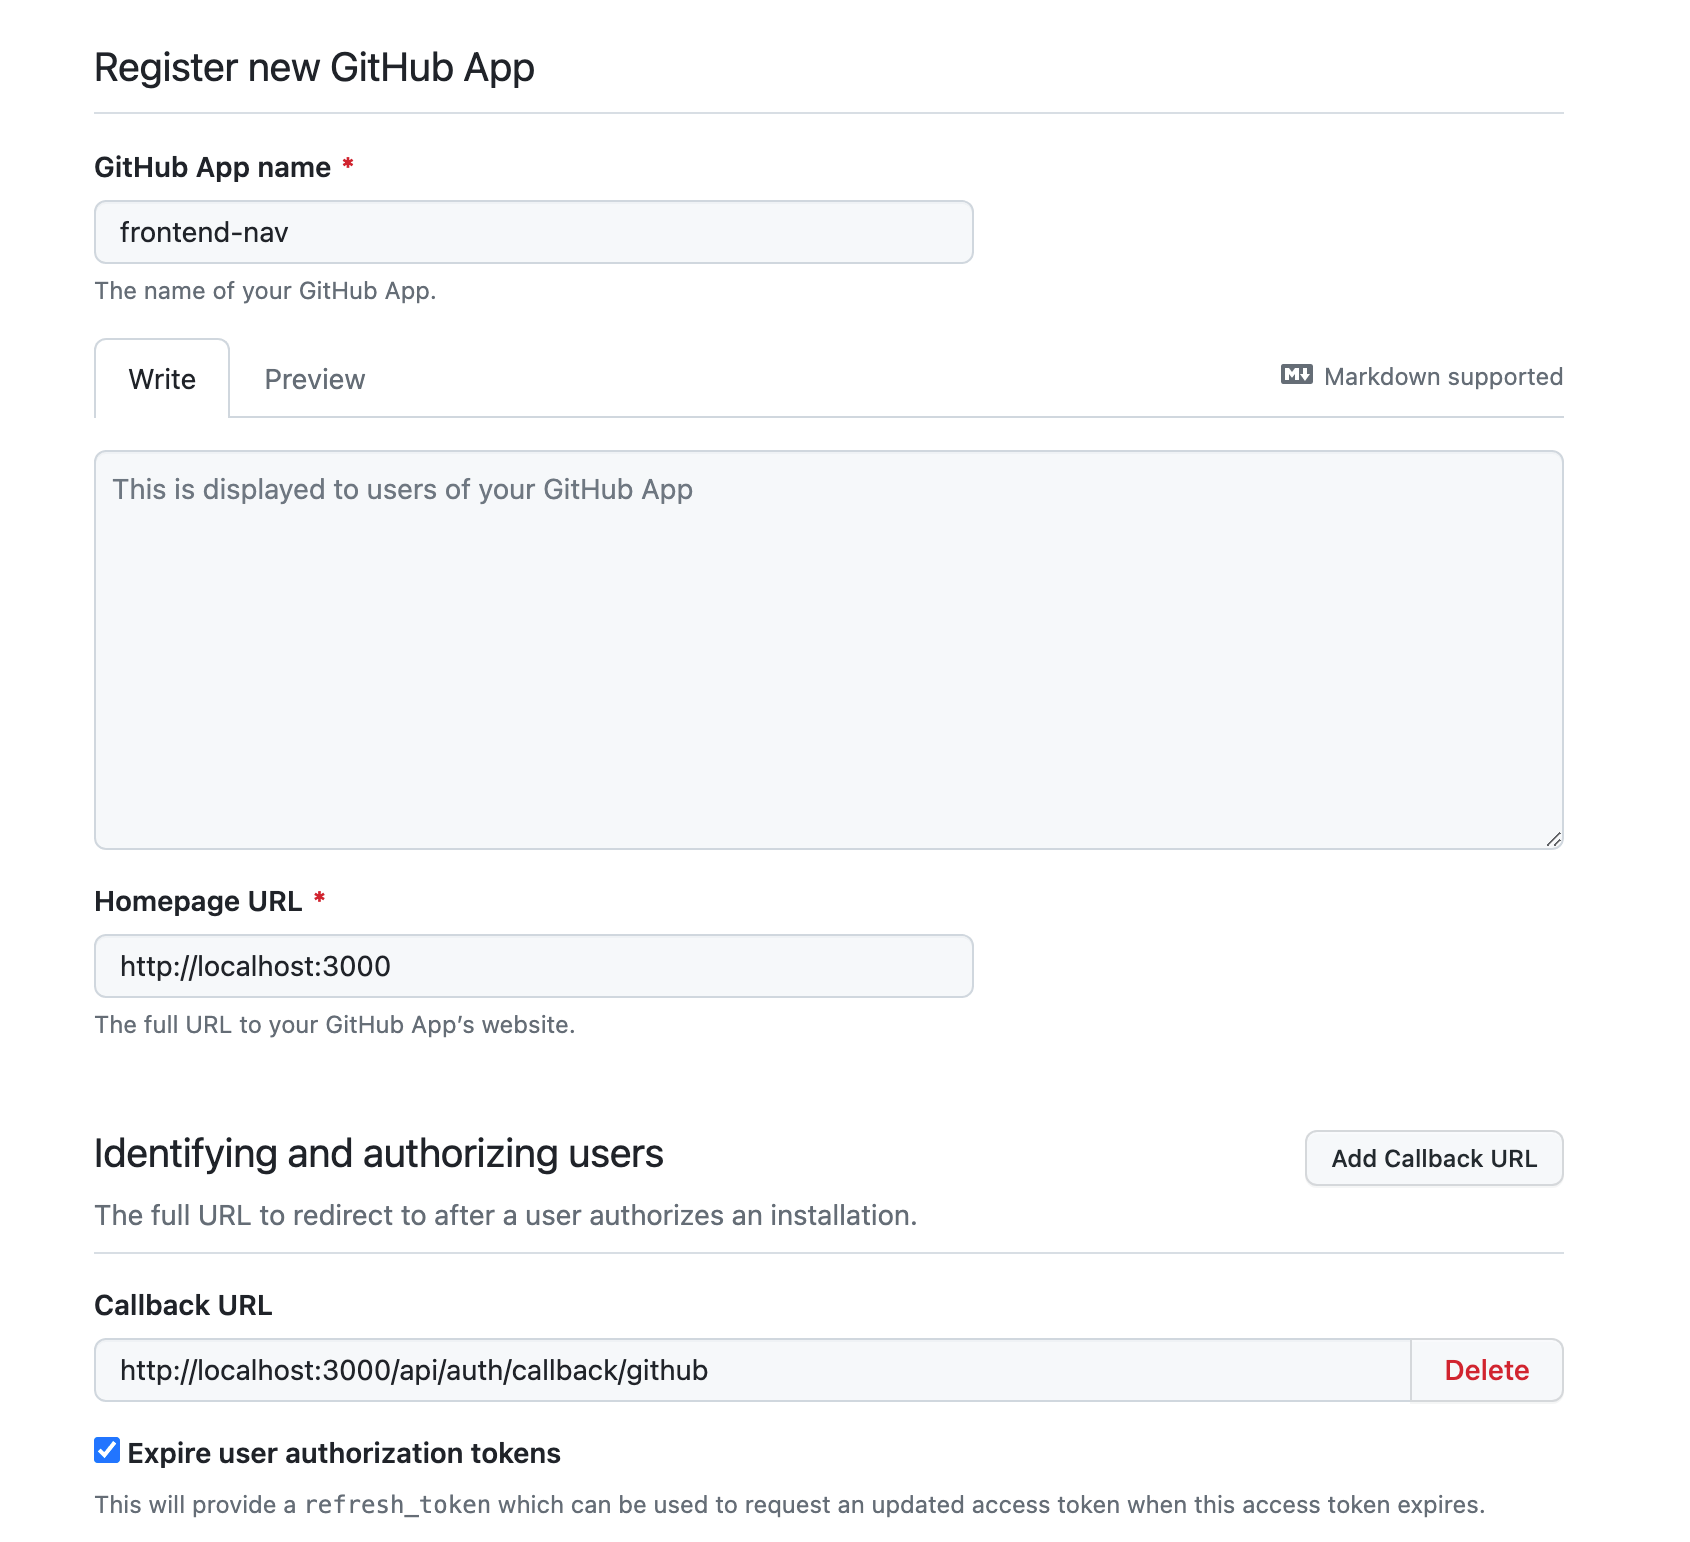
*GitHub*
Obtain the Github client ID, reference document, which contains the following steps:
-
Open the
GitHubapplication page and click CreateGithubapplication. -
Enter the name, homepage, and callback address after authorization. Here, fill in
localhost:3000for the development environment, and switch to your own online domain name when you go live.! https://cos.codefe.top/images/github_setting_newapp_dev.png
-
Click "Generate" and save
Client IDandClient Secret.
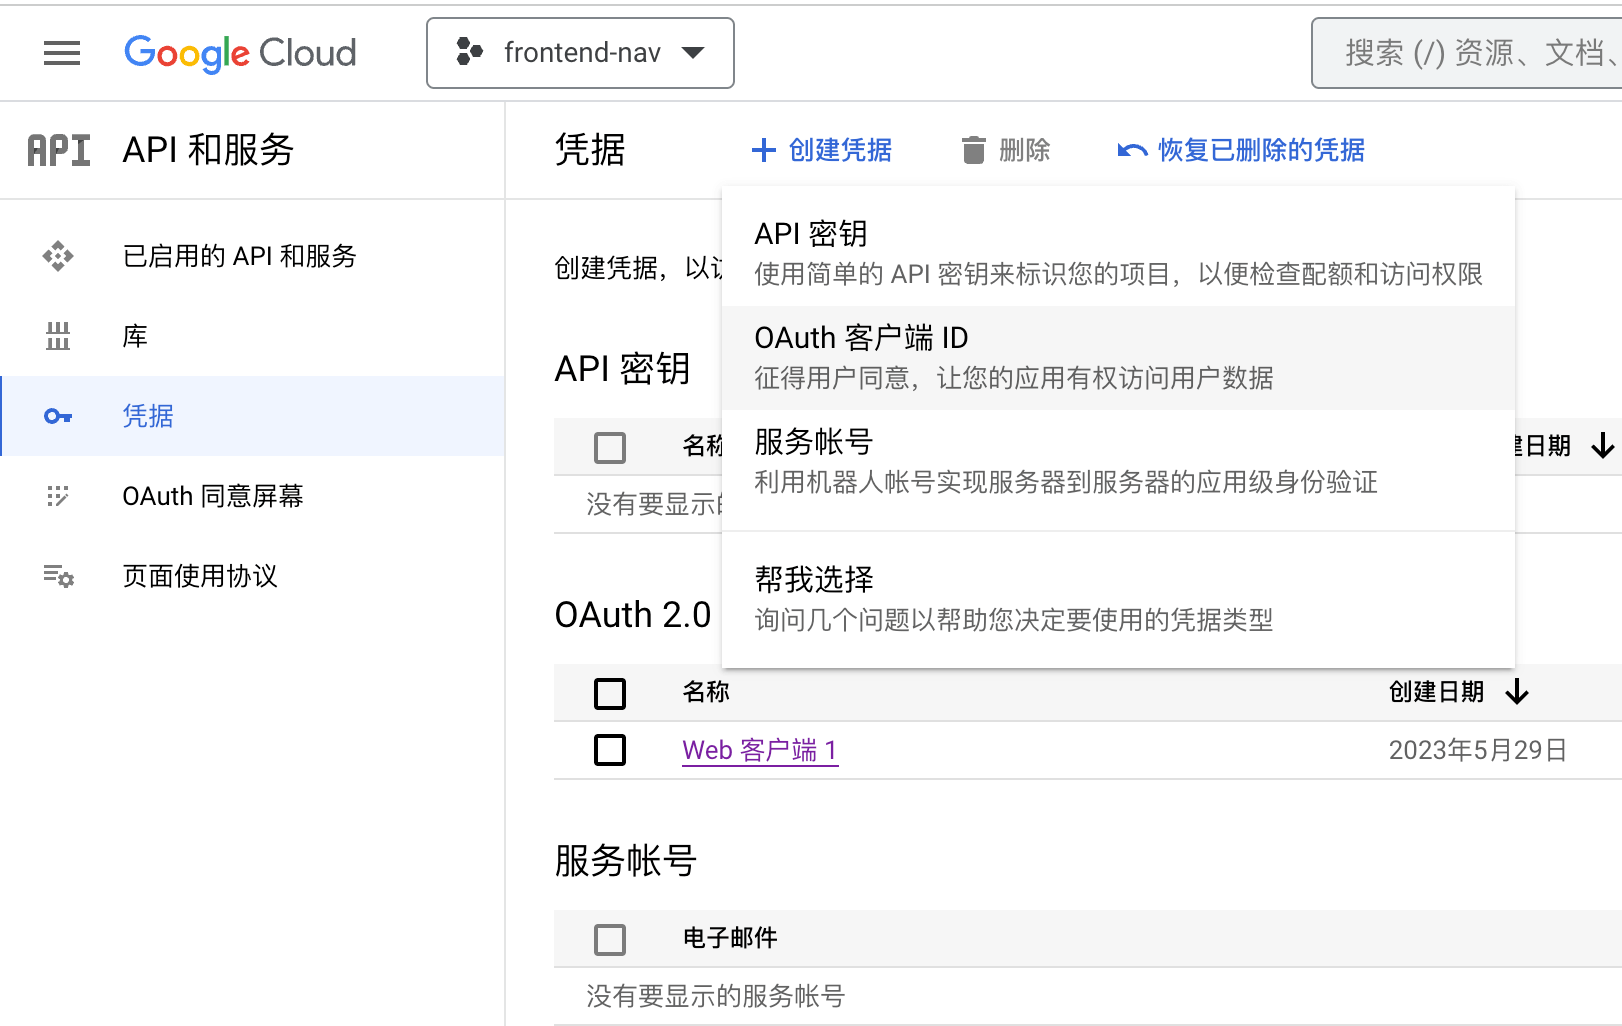
Google
Refer to the NextAuth documentation guidelines at Google developer site Register the application and select the api service
! https://cos.codefe.top/images/google-oauth-demo.png
Select Web application for the application type, similar to Github fill in the trusted domain name and callback address to confirm

Create API Routing
First add the authentication-related keys saved above to the .env file, where NEXTAUTH_SECRET is the user's key for generating JWT
# google login
GOOGLE_CLIENT_ID="GOOGLE_CLIENT_ID"
GOOGLE_CLIENT_SECRET="GOOGLE_CLIENT_SECRET"

# github登录
GITHUB_CLIENT_ID="GITHUB_CLIENT_ID"
GITHUB_CLIENT_SECRET="GITHUB_CLIENT_SECRET"

NEXTAUTH_URL="http://localhost:3000"
NEXTAUTH_SECRET="webnav"
You can see that the API callbacks above are /api/auth/github and /api/auth/google respectively. Create the app/api/auth/[...nestauth]/route.ts file, and add the following code:
import NextAuth, { type NextAuthOptions } from "next-auth";
import GoogleProvider from "next-auth/providers/google";
import GitHubProvider from "next-auth/providers/github";
import CredentialsProvider from "next-auth/providers/credentials";
import { PrismaAdapter } from "@next-auth/prisma-adapter";
import { PrismaClient } from "@prisma/client";
import { compare } from "bcrypt";

const prisma = new PrismaClient();

export const authOptions: NextAuthOptions = {
  adapter: PrismaAdapter(prisma),
  providers: [
    GitHubProvider({
      clientId: process.env.GITHUB_CLIENT_ID!,
      clientSecret: process.env.GITHUB_CLIENT_SECRET!,
    }),
    GoogleProvider({
      clientId: process.env.GOOGLE_CLIENT_ID!,
      clientSecret: process.env.GOOGLE_CLIENT_SECRET!,
    }),
    CredentialsProvider({
      name: "Credentials",
      credentials: {
        email: { label: "Email", type: "email" },
        password: { label: "Password", type: "password" },
      },
      async authorize(credentials) {
        const { email, password } = credentials ?? {}
        if (!email || !password) {
          throw new Error("Missing username or password");
        }
        const user = await prisma.user.findUnique({
          where: {
            email: credentials?.email,
          },
        });
        // if user doesn't exist or password doesn't match
        if (!user || !(await compare(password, user.password!))) {
          throw new Error("Invalid username or password");
        }
        return user;
      },
    })
  ],
  session: {
    strategy: "jwt",
  },
  debug: process.env.NODE_ENV !== "production",
};

const handler = NextAuth(authOptions);

export { handler as GET, handler as POST };
Among them, GitHubProvider user Github login, GoogleProvider for Google login, CredentialsProvider for custom login, here will check the email password, match it and return the user information.
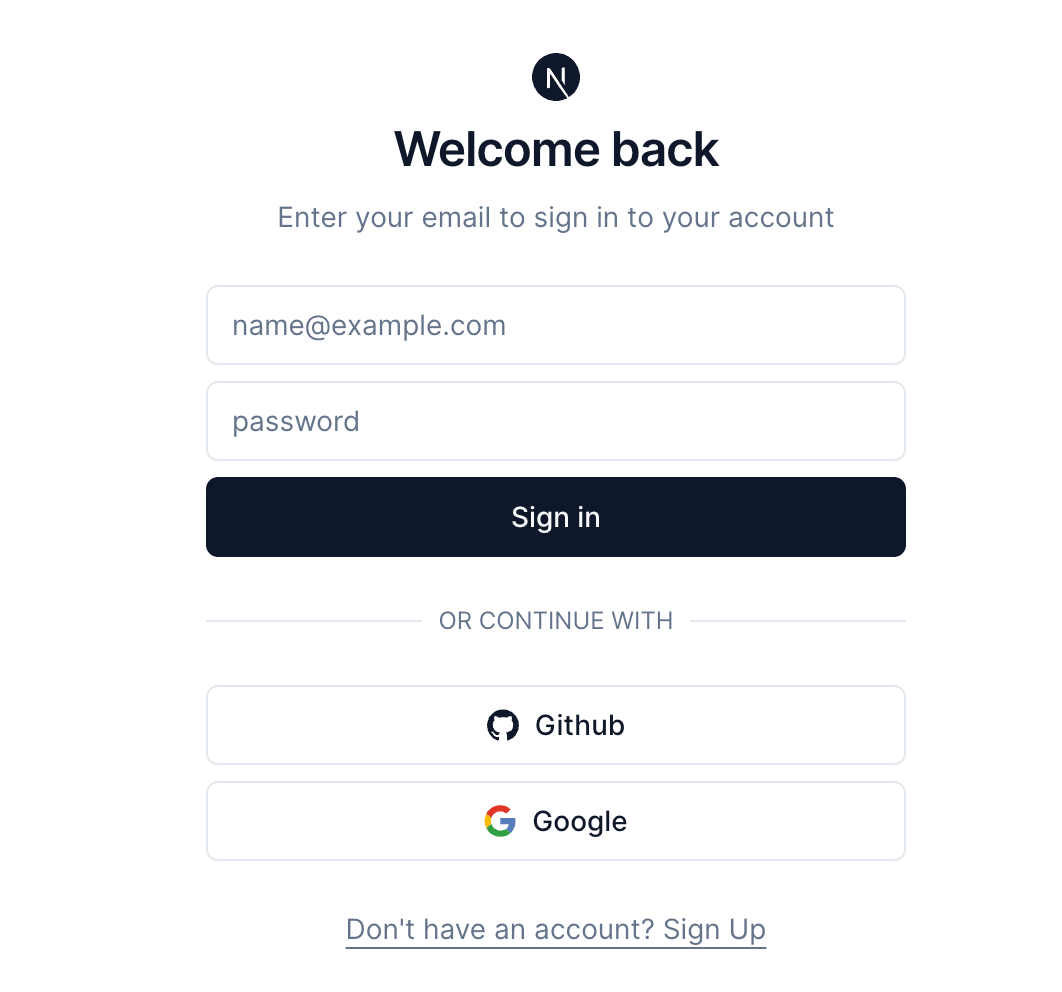
Also need to create the registration page, create app/login/page.tsx file and app/register/page.tsx file, page directly copied from taxonomy page style, own Add google login button, the effect is as shown
! https://cos.codefe.top/images/wennav-login-shot.png
On the page by
import { signIn, signOut } from "next-auth/react"
The signIn method allows logging in with a Google or GitHub account. signOut allows logging out of a user session, see the official documentation for this section
Deployment
Import the project directly from [Vercel](https://vercel.com/) and modify the build command to
npx prisma generate && next build
before build, otherwise the compilation will fail due to type error, and add the required environment variables in .env

At the same time, because our data source is in the database, and Nextjs is by default build-time page generation which is SSG mode, we need to update the page content when the database has data updates, so we need to use its Incremental Static Generation ISR (Incremental Static Regeneration) mode, refer to official documentation (https://nextjs.org/docs/app/building-your-application/data-fetching/revalidating#background-revalidation), add the export in page.tsx, here the update The timeliness requirement is not high, so set it to 1 day
export const revalidate = 24 * 60 * 60.
You can see from the build log that it has taken effect

After successful deployment, bind the custom domain name and finish sprinkling.
Summary
This article to a simple navigation site for example, combined with Next.js, Prisma, NextAuth, shadcn/ui to learn how to build full-stack applications, you can open final website page, you can also in this project open source address to view the full code, wrir article is not easy, welcome star, thanks.

Top comments (0)