
This series of tutorials will explore the Vonage Video API (formerly TokBox OpenTok) and what you can build with it. The Video API is very robust and highly customizable, and in each post we’ll show how to implement a specific feature using the API, starting with the most basic audio-video chat.
As this application will require some server-side code, we will use Glitch for ease of setup. You can also download the code from this Glitch project and deploy it on your server or hosting platform of choice (may probably require some configuration tweaking based on the requirements of your platform).
We will not be using any frontend frameworks for this series, just vanilla Javascript to keep the focus on the Video API itself. At the end of this tutorial, you should be able to start an audio-video chat with a friend by sharing a link with them.

All the code for this application can be found in this GitHub repository or remixed on Glitch.
Prerequisites
Before we get started, you will need a Vonage Video API account, which you can create for free here. You will also need Node.js installed (if you are not using Glitch).
Create an API Project
After you log into your account, you will see your dashboard interface. You can create a new project by selecting Create New Project from the left sidebar.
You will be presented with 2 options, Embed or API. Choose the API option by clicking the Create Custom Project button.
The next step will ask for your project name and preferred codec. Name your project as you like, and go with the suggested codec option of VP8 for now. Details on the difference between VP8 and H.264 are detailed here.
Once your project is created, you will have access to your API key and secret. Each project will have its own API key and secret.
Setting up on Glitch
If you chose not to use Glitch, you can skip this portion and go straight to the code walkthrough and explanation in the next section.
On the Glitch home page, select New Project from the top right corner of the page, and choose the hello-express option, which gives you a Node application with Express installed.

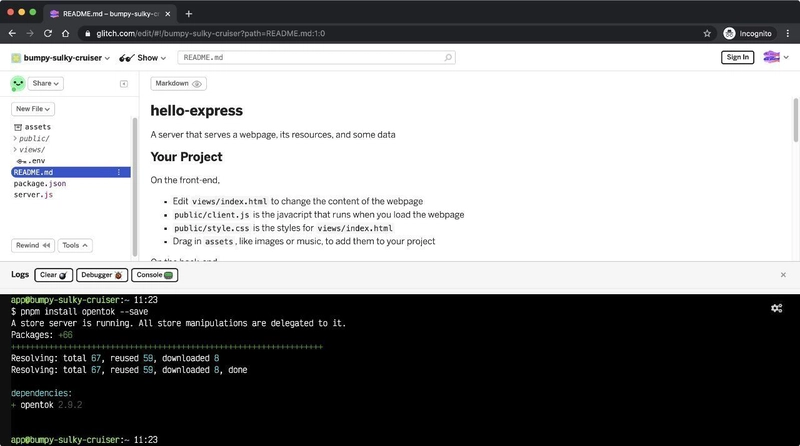
You can install additional libraries via the command line by bringing up the console. Click on the Tools button at the bottom of the left sidebar, then click on Logs.

Install the Vonage Video API Server SDK via the following command:
pnpm install opentok --save
Note the use of pnpm instead of npm, which is the package manager of choice on Glitch. It does the same thing as npm.
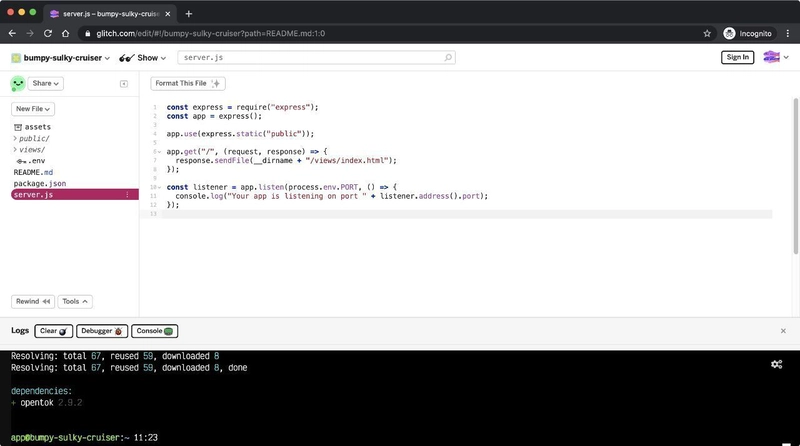
Once that is done, go ahead and clean out the server.js file to remove the unnecessary placeholder code.
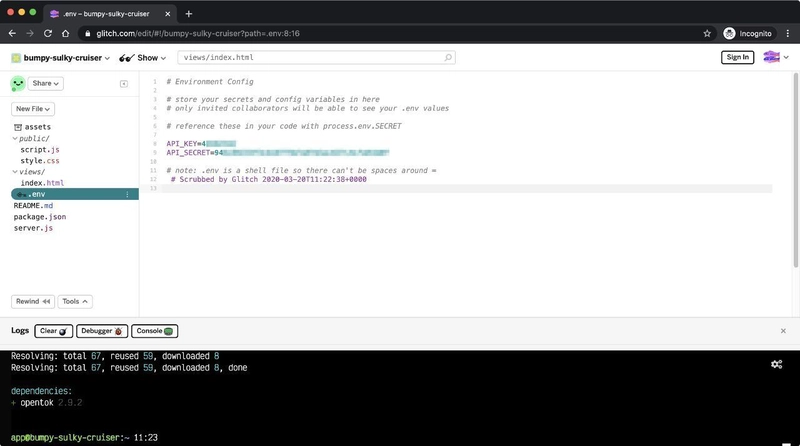
Go to the .env file and add your API key and secret from your Vonage Video API project.
Basic Project Structure
This is what the folder structure looks like when you start up a new Glitch hello-express project:

Our application will be made up of two pages: a landing page for users to create a session (we'll call this a "Room" and subsequent participants can join that same "Room"), and then the actual video chat page.
Let's add a landing.html file to the views folder by clicking the New File button in the left sidebar. Name the file views/landing.html and paste the following markup into the page. The page will have a simple form element with an input that allows users to submit a room name. You can use the following markup if you don't want to write your own from scratch.
<!DOCTYPE html>
<html lang="en">
  <head>
    <title>Basic Video Chat</title>
    <meta name="description" content="A basic audio-video chat application" />
    <link
      id="favicon"
      rel="icon"
      href="https://tokbox.com/developer/favicon.ico"
      type="image/x-icon"
    />
    <meta charset="utf-8" />
    <meta http-equiv="X-UA-Compatible" content="IE=edge" />
    <meta name="viewport" content="width=device-width, initial-scale=1" />

    <link rel="stylesheet" href="/style.css" />
  </head>

  <body>
    <header>
      <h1>The most basic video chat</h1>
    </header>

    <main>
      <form id="registration" class="registration">
        <label>
          <span>Room</span>
          <input
            type="text"
            name="room-name"
            placeholder="Enter room name"
            required
          />
        </label>
        <button>Enter</button>
      </form>
    </main>
  </body>
</html>

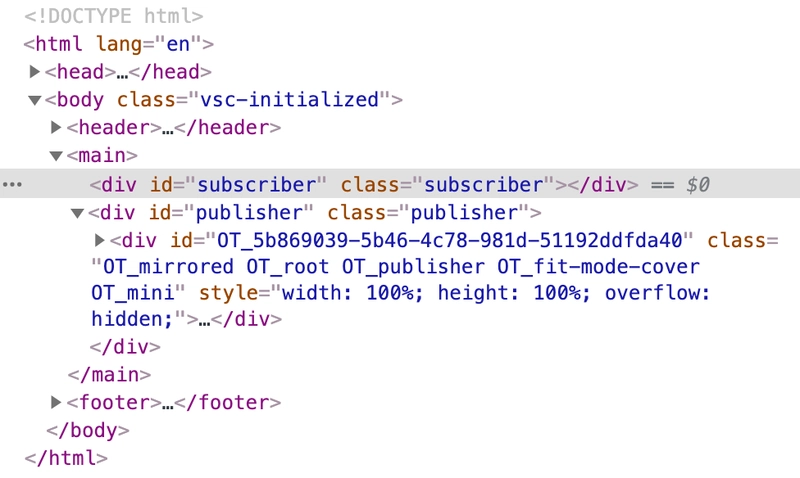
The index.html page will also be relatively sparse for now, a page with two div elements, one for subscriber and one for publisher. We will go through what these terms mean when we get to the Vonage Video API section of this tutorial.
<!DOCTYPE html>
<html lang="en">
  <head>
    <title>Basic Video Chat</title>
    <meta name="description" content="A basic audio-video chat application" />
    <link
      id="favicon"
      rel="icon"
      href="https://tokbox.com/developer/favicon.ico"
      type="image/x-icon"
    />
    <meta charset="utf-8" />
    <meta http-equiv="X-UA-Compatible" content="IE=edge" />
    <meta name="viewport" content="width=device-width, initial-scale=1" />

    <link rel="stylesheet" href="/style.css" />
  </head>

  <body>
    <header>
      <h1>The most basic video chat</h1>
    </header>

    <main>
      <div id="subscriber" class="subscriber"></div>
      <div id="publisher" class="publisher"></div>
    </main>

    <script src="https://static.opentok.com/v2/js/opentok.min.js"></script>
    <script src="/client.js"></script>
  </body>
</html>
For the server.js file, let's clean out the unnecessary placeholder code. You should be left with something like this:
const express = require("express");
const app = express();

app.use(express.static("public"));

app.get("/", (request, response) => {
  response.sendFile(__dirname + "/views/index.html");
});

const listener = app.listen(process.env.PORT, () => {
  console.log("Your app is listening on port " + listener.address().port);
});
Lastly, let's also clear out the existing styles inside the style.css file so we can replace them with our own once we have wired everything up.
The general overview of how the Vonage Video API works to connect people and allow them to have a video chat is as follows:
- Step 1: The session is created by your app server
- Step 2: A client loads the app and the server creates a token
- Step 3: The client connects and begins streaming to the session
- Step 4: A new client connects to the session
- Step 5: The clients subscribe to each other’s streams
A complete introduction with animated GIFs showing the entire flow is available on the Vonage Video API documentation site.
Initializing a Session
As mentioned at the start, TokBox OpenTok is now Vonage Video API. We haven’t made any changes to our package names, so you will still reference OpenTok in your code. Start off by instantiating an OpenTok object with your API key and secret in the server.js file.
const OpenTok = require("opentok");
const OT = new OpenTok(process.env.API_KEY, process.env.API_SECRET);
Let's modify the routes for our two pages so that users see the landing page on first load, which allows them to enter a room name to start a session. Once that is successful, they will be redirected to the main application page where the video will be rendered.
app.get("/", (request, response) => {
  response.sendFile(__dirname + "/views/landing.html");
});

app.get("/session/:room", (request, response) => {
  response.sendFile(__dirname + "/views/index.html");
});
On our landing.html file, let's add an event handler for form submission which will POST the room name to our server. Because it is four lines of code, let's add it as a script tag at the bottom of the page.
const form = document.getElementById("registration");
form.addEventListener("submit", event => {
  event.preventDefault();
  location.pathname = `/session/${form.elements["room-name"].value}`;
});
This means we will have to handle the POST route in the server.js file. The following chunk of code is fairly long, so explanations are included as comments in the code. The gist of it is, this will check for an existing session or create a new one if needed, based on the room name entered from the landing page. Every session has a unique session ID, which allows other people to join the session.
This code will then generate the credentials needed for the client to connect to the session. They comprise of the session ID, a token, and the API key. These credentials will be passed back to the client as a response.
let sessions = {};

app.post("/session/:room", (request, response) => {
  const roomName = request.params.room;
  // Check if the session already exists
  if (sessions[roomName]) {
    // Generate the token
    generateToken(roomName, response);
  } else {
    // If the session does not exist, create one
    OT.createSession((error, session) => {
      if (error) {
        console.log("Error creating session:", error);
      } else {
        // Store the session in the sessions object
        sessions[roomName] = session.sessionId;
        // Generate the token
        generateToken(roomName, response);
      }
    });
  }
});

function generateToken(roomName, response) {
  // Configure token options
  const tokenOptions = {
    role: "publisher",
    data: `roomname=${roomName}`
  };
  // Generate token with the OpenTok SDK
  let token = OT.generateToken(
    sessions[roomName],
    tokenOptions
  );
  // Send the required credentials back to to the client
  // as a response from the fetch request
  response.status(200);
  response.send({
    sessionId: sessions[roomName],
    token: token,
    apiKey: process.env.API_KEY
  });
}
Connecting to the Session, Subscribing and Publishing
Over on the client side, we first create a session object with the API key and session ID from the response. We also need to create a publisher object, which will replace the div element with the id=publisher with the your video feed.
We'll connect to the session with the session.connect() method, and if successful, we will publish our video stream with the session.publish() method.
We will also listen for the streamCreated event so we can subscribe to users who join the session after we have connected to the session.
// Create a session object with the session ID
const session = OT.initSession(apiKey, sessionId);

// Create a publisher
const publisher = OT.initPublisher(
  "publisher", // should match the ID of an element in your HTML
  {
    insertMode: "append",
    width: "100%",
    height: "100%"
  },
  handleCallback
);

// Connect to the session
session.connect(token, error => {
  // If the connection is successful, initialize the publisher and publish to the session
  if (error) {
    handleCallback(error);
  } else {
    session.publish(publisher, handleCallback);
  }
});

// Subscribe to a newly created stream
session.on("streamCreated", event => {
  session.subscribe(
    event.stream,
    "subscriber",
    {
      insertMode: "append",
      width: "100%",
      height: "100%"
    },
    handleCallback
  );
});

// Callback handler
function handleCallback(error) {
  if (error) {
    console.log("error: " + error.message);
  } else {
    console.log("callback success");
  }
}
When the room name form is submitted, we will make a POST request to the /session/:room route and use the data from the response to run the functionality detailed above. To do that, we will wrap it all up in a function called initializeSession() like so:
fetch(location.pathname, { method: "POST" })
  .then(res => {
    return res.json();
  })
  .then(res => {
    const apiKey = res.apiKey;
    const sessionId = res.sessionId;
    const token = res.token;
    initializeSession(apiKey, sessionId, token);
  })
  .catch(handleCallback);

function initializeSession(apiKey, sessionId, token) {
  // Create a session object with the sessionId
  const session = OT.initSession(apiKey, sessionId);

  // Create a publisher
  const publisher = OT.initPublisher(
    "publisher",
    {
      insertMode: "append",
      width: "100%",
      height: "100%"
    },
    handleCallback
  );

  // Connect to the session
  session.connect(token, error => {
    // If the connection is successful, initialize the publisher and publish to the session
    if (error) {
      handleCallback(error);
    } else {
      session.publish(publisher, handleCallback);
    }
  });

  // Subscribe to a newly created stream
  session.on("streamCreated", event => {
    session.subscribe(
      event.stream,
      "subscriber",
      {
        insertMode: "append",
        width: "100%",
        height: "100%"
      },
      handleCallback
    );
  });
}
Some Styling to Tidy Things Up
The general functionality of our video chat is done, so the only thing left is to add some styles to adjust the layout. The original two div elements (for subscriber and publisher) will have their contents replaced by their respective video feeds.
This is the most barebones layout style to get your publisher video stream to display on the bottom-left corner of the page, while the other people on the stream take up the full background of the page.
html {
  box-sizing: border-box;
  height: 100%;
}

*,
*::before,
*::after {
  box-sizing: inherit;
  margin: 0;
  padding: 0;
}

body {
  height: 100%;
  display: flex;
  flex-direction: column;
}

header {
  text-align: center;
  padding: 0.5em;
}

main {
  flex: 1;
  display: flex;
  position: relative;
}

input,
button {
  font-size: inherit;
  padding: 0.5em;
}

.registration {
  display: flex;
  flex-direction: column;
  margin: auto;
}

.registration input[type="text"] {
  display: block;
  margin-bottom: 1em;
}

.subscriber {
  width: 100%;
  height: 100%;
  display: flex;
}

.publisher {
  position: absolute;
  width: 25vmin;
  height: 25vmin;
  min-width: 8em;
  min-height: 8em;
  align-self: flex-end;
}
Those styles will give you the most basic video chat with the most basic layout, which you already saw at the beginning of this tutorial.

You can then proceed to add whatever visual styling like fonts, colours and even logo images if you like, to spruce things up.
What’s Next?
There are additional functionalities we can build with the Vonage Video API which will be covered in future tutorials, but in the meantime, you can find out more at our comprehensive documentation site. If you run into any issues or have questions, reach out to us on our Community Slack. Thanks for reading!

Top comments (0)