
Are you ready to bid farewell to mediocre captions on your social media posts? OpenAI has just introduced its Vision API, and it’s a game-changer for those of us looking to add a spark to our online presence.
This piece draws from my journey in developing captioncue.com, a platform that automatically generates captions using OpenAI’s vision API. I encourage you to give it a try and share your feedback in the comments. Now, let’s dive into constructing a streamlined version of captioncue.com 🚀🌟
Problem Statement
In this article, we’ll walk through creating a dazzling application that crafts captions as stunning as your photos, using the power of AI. If you’re someone who learns by doing, you’ll want to roll up your sleeves for this one.
This is what it would look like

Tech
Our tool of choice is a neat stack combining Next.js for our front end and OpenAI’s Vision API for the heavy lifting. So, let’s get the ball rolling!
Setting Up Your Dev Environment: A Breeze with Node.js
Before diving into the code, ensure you have Node v18 ready to go. Node’s environment will be the backbone of our application, providing all the necessary tools and libraries at our fingertips.
To get Node.js installed on your system, you can follow the step-by-step instructions provided in this article: Node.js Installation Guide via Node Version Manager (NVM).
Frontend Magic with Next.js
We’ll kick things off with a fresh Next.js project, woven with the grace of Tailwind CSS for styling and ESLint to keep our code clean. Here’s how to conjure this setup:
npx create-next-app@latest caption-generator-ai --tailwind --eslint

Once you’ve got the repository setup, change directories with a simple cd command
cd caption-generator-ai
For our UI wizardry, we’ll enlist the help of Shadcn UI, which will lend us its ready-to-use component library. Install it with:
npx shadcn-ui@latest init

Backend with Serverless Functions
Next.js isn’t just for show; it’s got the brawn for backend operations too. We’ll create a serverless function that will handle our caption generation logic inside pages/api/caption.js
Get the gears moving by installing the OpenAI package:
npm install openai
Now, for the main act, we’ll write a function that takes an image URL as input and employs OpenAI’s Vision API to generate a caption that’ll make your followers stop and stare.
import OpenAI from "openai";

const openai = new OpenAI({
  apiKey: process.env.OPENAI_API_KEY, // This is also the default, can be omitted
});

const handler = async (req, res) => {
  const { imageUrl } = req.body;
  try {
    const response = await openai.chat.completions.create({
      model: "gpt-4-vision-preview",
      messages: [
        {
          role: "user",
          content: [
            {
              type: "text",
              text: `Write a catchy instagram caption for this image`,
            },
            {
              type: "image_url",
              image_url: imageUrl,
            },
          ],
        },
      ],
      max_tokens: 300,
    });
    res.status(200).json(response.choices[0].message.content);
  } catch (error) {
    res.status(500).json({
      error: {
        message: "An error occurred during the request.",
      },
    });
  }
};

export default handler;
That wraps up all the necessary backend code. Simple and enjoyable, isn’t it?
Frontend Logic for API Integration
We will concentrate on the functionality of the Generate button and the API calls in our UI, rather than delving into detailed UI aspects.
To start, let’s create a component in the src/components directory, naming it Caption.jsx
import React from "react";

export const Caption = () => {
  return (
    <main className="w-full p-4 py-20">
      <div className="max-w-md mx-auto space-y-4">
        <div className="space-y-2">
          <Label htmlFor="image-upload">Image URL</Label>
          <Input type="text" id="image-upload" value={imageUrl} onChange={handleImageChange} />
        </div>

        <div className="relative space-y-2">
          <Label htmlFor="caption">Generated Caption</Label>
          <Textarea
            className="w-full h-20 px-3 py-2 border border-gray-300 rounded-md focus:outline-none focus:border-indigo-500"
            id="caption"
            disabled
          />
        </div>
        <Button
          className="w-full"
          onClick={handleCaptionGeneration}
          disabled={false}
        >
          Generate Caption
        </Button>
      </div>
    </main>
  )
}
In our UI, we need to include components such as Button, Label, Input, and TextArea from Shad CN. To do this, we’ll begin by installing these components using the following commands:
npx shadcn-ui@latest add button
npx shadcn-ui@latest add input
npx shadcn-ui@latest add textarea
npx shadcn-ui@latest add label
Next, we’ll import these components into our project:
import React, { useState } from "react";
import { Button } from "@/components/ui/button";
import { Label } from "@/components/ui/label";
import { Input } from "@/components/ui/input";
import { Textarea } from "@/components/ui/textarea";
Then, to manage the value for the image URL input, we’ll set up a useState hook:
const [imageUrl, setImageUrl] = useState("");
Following that, we’ll create a handler for image change event and the ‘Generate Caption’ button click.
const handleImageChange = (e) => {
  const value = e.currentTarget.value;
  setImageUrl(value);
};

const handleCaptionGeneration = async () => {
  try {
    // Call the api here

  } catch (error) {
    console.error(error);
  }
};
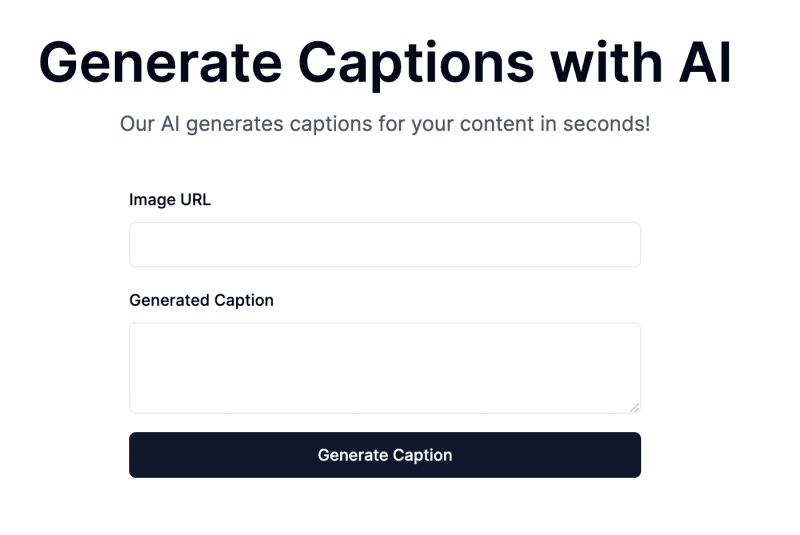
Up to this point, the UI will look something like this.

When calling an API, it’s essential to provide visual feedback such as displaying loaders on the button during processing, presenting any errors that occur, and resetting the state upon receiving new data. For these functionalities, we will utilize React Query. This choice over the plain useState from React offers several advantages, which are well-explained in the article Why You Want React Query
First, we’ll install React Query:
npm install react-query
Next, we import the mutation function necessary for making a POST call:
import { useMutation} from "react-query";
We then set up a mutation to post data to our backend API:
const captionMutation = useMutation(
  async (formData) => {
    const response = await fetch("/api/caption", {
      method: "POST",
      headers: {
        "Content-Type": "application/json",
      },
      body: JSON.stringify(formData),
    });

    if (!response.ok) {
      throw new Error(`Request failed with status ${response.status}`);
    }

    const data = await response.json();
    return data;
  }
);
Finally we call this mutation from our handleCaptionGeneration function:
const handleCaptionGeneration = async () => {
  try {
    // Call the mutation with your form data
    await captionMutation.mutateAsync({
      imageUrl: imageUrl
    });
  } catch (error) {
    console.error(error);
  }
};
React Query also provides helpers to detect loading states and errors:
let isCaptionLoading = captionMutation.isLoading;
let generatedCaption = captionMutation.isSuccess && captionMutation.data;
Finally to show the loader icon, we need to install @radix-ui/react-icons
npm install @radix-ui/react-icons
Our final frontend code for caption.jsx would look like this:
import React, { useState } from "react";
import { ReloadIcon } from "@radix-ui/react-icons";
import { Button } from "@/components/ui/button";
import { Label } from "@/components/ui/label";
import { Input } from "@/components/ui/input";
import { Textarea } from "@/components/ui/textarea";

import { useMutation } from "react-query";

export const Caption = () => {
  const [imageUrl, setImageUrl] = useState("");

  const captionMutation = useMutation(
    async (formData) => {
      const response = await fetch("/api/caption", {
        method: "POST",
        headers: {
          "Content-Type": "application/json",
        },
        body: JSON.stringify(formData),
      });

      if (!response.ok) {
        throw new Error(`Request failed with status ${response.status}`);
      }

      const data = await response.json();
      return data;
    }
  );

  const handleCaptionGeneration = async () => {
    try {
      // Call the mutation with your form data
      await captionMutation.mutateAsync({
        imageUrl: imageUrl
      });
    } catch (error) {
      console.error(error);
    }
  };

  const handleImageChange = (e) => {
    const value = e.currentTarget.value;
    setImageUrl(value);
  };

  let isCaptionLoading = captionMutation.isLoading;
  let generatedCaption = captionMutation.isSuccess && captionMutation.data;

  return (
    <main className="w-full p-4 py-20">
      <section className="text-center pb-10 flex justify-center flex-col items-center">
        <h1 className="text-2xl md:text-5xl font-semibold mb-4">
          Generate Captions with AI
        </h1>
        <p className="text-lg text-gray-600 dark:text-gray-300">
          Our AI generates captions for your content in seconds!
        </p>
      </section>
      <div className="max-w-md mx-auto space-y-4">
        <div className="space-y-2">
          <Label htmlFor="image-upload">Image URL</Label>
          <Input type="text" id="image-upload" value={imageUrl} onChange={handleImageChange} />
        </div>

        <div className="relative space-y-2">
          <Label htmlFor="caption">Generated Caption</Label>
          <Textarea
            className="w-full h-20 px-3 py-2 border border-gray-300 rounded-md focus:outline-none focus:border-indigo-500"
            id="caption"
            disabled
            value={generatedCaption?generatedCaption:""}
          />
        </div>
        <Button
          className="w-full"
          onClick={handleCaptionGeneration}
          disabled={isCaptionLoading}
        >
          {isCaptionLoading?<ReloadIcon />: null}
          Generate Caption
        </Button>
      </div>
    </main>
  );
}
To incorporate the caption component into our homepage, navigate to pages/index.js. Clear out any unnecessary default code provided by Next.js and replace it with the following content:
import { Inter } from "next/font/google";
import { Caption } from "@/components/caption";
import { QueryClient, QueryClientProvider } from "react-query";

const inter = Inter({ subsets: ["latin"] });
const queryClient = new QueryClient();

export default function Home() {
  return (
    <div className={`flex flex-col min-h-screen ${inter.className}`}>
      <QueryClientProvider client={queryClient}>
        <Caption />
      </QueryClientProvider>
    </div>
  );
}
With these steps, we complete the front end setup of our app.
Finally, to get the app up and running, we must create a .env file to store the OpenAI key.
OPENAI_API_KEY=<your open ai key>
Ready, Set, Launch! 🚀
Conclusion
With your environment set, your front end styled, and your backend ready to deploy AI-powered captions, you’re all set to revolutionize how you post online. Say goodbye to caption fatigue and hello to a stream of compliments on your witty and engaging post descriptions. Let the likes (and envy) roll in!
Links
Open AI Vision API: https://platform.openai.com/docs/guides/vision?lang=node
Github Repo: https://github.com/vivek12345/caption-generation-ai-demo
You can follow me on twitter @VivekNayyar09 for more updates.
Also please don’t forget to like, share and subscribe to the youtube channel local lo baat. I continue to post videos around Open AI, langchain and Next JS

Top comments (0)