Table Of Contents
- Introduction
- Using GitHub
-
Contributing to Open Source Projects
- Step 1: Finding the repository to contribute to
- Step 2: Forking the repository
- Step 3: Cloning the fork
- Step 4: Navigating to local repository
- Step 5: Checking the "origin" remote
- Step 6: Adding the "upstream" remote
- Step 7: Pulling the latest changes
- Step 8: Creating a new branch
- Step 9: Making changes
- Step 10: Committing changes
- Step 11: Pushing changes to fork
- Step 12: Creating a pull request
- Step 13: Discussing the pull request
- Step 14: Adding more commits to the existing pull request
- Step 15: Discussing the pull request again
- Step 16: Deleting branch from the fork
- Step 17: Deleting branch from the local repository
- Step 18: Synchronizing the fork with the project repository
Introduction
Mike: Hey VT, you taught me about git over here. Since then, I am having a good time working with git.
I recently heard about the terms GitHub and Open Source Software. I am curious to know about them. Can you tell me something about them?
VT: Yeah, sure.
💡 GitHub is basically a cloud-based website where you can host git repositories and collaborate with other people.
💡 Open Source Software is a type of software that has freely accessible source code and is distributed under a license that allows you to examine, modify, and use the code without restriction.
Mike: Could you please explain how I can use GitHub?
VT: Ok, let's get into it.
Using GitHub
VT: Let's create a git repository and push it onto GitHub.
Mike: Ok, I'm excited.
📌 Make sure you have
gitinstalled before moving forward.
Creating a local git repository
1. Initialize a new git repository
VT: First, we have to create a git repository on our computer.
Open a terminal (or command prompt) in an empty folder or a project folder and run the following command:
$ git init
2. Create a file
VT: We now have a git repository set up. Let's create a new file.
Create a new file (or modify an existing one) in the folder where we set up the git repository.
Let's call our file index.html and add the following code to it:
<!DOCTYPE html>
<html lang="en">
  <head>
    <meta charset="UTF-8" />
    <meta name="viewport" content="width=device-width, initial-scale=1.0" />
    <title>GitHub Guide</title>
  </head>
  <body>
    <h1>Hello GitHub!</h1>
  </body>
</html>
Save the file.
VT: Now, we can run this command to see our changes tracked by git.
$ git status
3. Commit changes
VT: Let's commit our change.
Run the following commands:
$ git add index.html
$ git commit -m "added index.html"
Mike: Ok, I have successfully committed my changes. What's next?
VT: Next, the exciting part, we will create a repository on GitHub.
Creating a repository on GitHub
1. Log in to GitHub
VT: First step, log in to GitHub.
📌 If you are new to GitHub, create a new account on GitHub.
📌 For security purposes, GitHub provides a PAT (Personal Access Token) to use in place of a password while pushing code to GitHub. Please generate your PAT as soon as you log in to GitHub for the first time. You can generate your PAT by following this guide.
2. Create a repository on GitHub
VT: Click the + icon in the upper right corner of the GitHub homepage.
Select New repository.
A page will open to create a new repository.
Enter the name and description (optional) for the new repository.
Choose whether to make the repository Public or Private.
Click the Create repository button at the bottom of the page.
VT: We now have a GitHub repository set up. Let's see how we can push our code to the GitHub repository.
Pushing code to the GitHub repository
1. Add remote to the local git repository
Mike: What do you mean by adding remote?
VT: Connecting our local git repository to a remote (online) repository, such as a GitHub repository, is what adding remote means.
It enables us to pull updates and push our changes to the remote repository.
We can add remote to our local git repository by running the following command:
$ git remote add origin URL_OF_GITHUB_REPOSITORY
📌 Make sure to replace
URL_OF_GITHUB_REPOSITORYwith the URL of your own GitHub repository with.gitadded at the end.
2. Rename the branch from master to main
VT: Before we can push our git repository to GitHub, we must rename the branch master to main.
Mike: Why do we have to rename the git branch?
VT: It's because GitHub uses main as its default branch, whereas git uses master.
Run the following command to rename the current branch to main:
$ git branch -M main
3. Push code to GitHub
VT: Now, it's time to push our code to GitHub.
Run the following command:
$ git push -u origin main
When prompted, enter your GitHub username and password.
📌 Use your PAT (Personal Access Token) in place of the password.
Congratulations! We now have a complete GitHub repository.🎉🎉
Contributing to Open Source Projects
Step 1: Finding the repository to contribute to
VT: To contribute to an open-source project, we must first navigate to the project's GitHub repository.
But, for practice, I've set up a GitHub repository called github-playground. You can find it here.
📌 I recommend that you follow this guide and contribute to the GitHub repository (
github-playground).
VT: Go to https://github.com/vishwast03/github-playground
Step 2: Forking the repository
Mike: What do you mean by 'forking'?
VT: Here, 'forking' means copying the original repository to our own account.
To Fork the repository, click on the Fork button in the upper-right corner of the repository.
On next page, click Create fork button at the bottom.
Step 3: Cloning the fork
VT: Now, we have to clone the forked repository to our local machine using git.
Cloning means copying a remote repository to our local machine. It is done to be able to work on the project.
To clone:
- First click the
Codebutton on the forked project on your GitHub.
- Copy the URL from the tab opened.
- Run the following command to clone the forked repository.
$ git clone URL_OF_FORK
📌 Make sure to replace
URL_OF_FORKof with the URL you have copied in the previous step.
Step 4: Navigating to local repository
VT: Use the following command to navigate to the local repository:
$ cd NAME_OF_REPOSITORY
Step 5: Checking the "origin" remote
VT: Now, we will check if our fork is added as remote origin or not.
Use the following command to list all the remotes:
$ git remote -v
The output of above command should look like this:

📌 If your fork was not added correctly as
origin, you can use the following command to add it manually:
$ git remote add origin URL_OF_FORK
📌 Make sure to replace
URL_OF_FORKwith the URL of your fork on GitHub.
Step 6: Adding the "upstream" remote
VT: Before we start working on the project, we have to add the original project repository as remote upstream in our local repository.
It enables us to pull updates from the main project.
Use the following command to add remote upstream to our local repository:
$ git remote add upstream URL_OF_PROJECT
📌 Make sure to replace
URL_OF_PROJECTwith the URL of the original project (not fork).
You can check if the remote was added or not by running the following command:
$ git remote -v
The output should look like this:

Step 7: Pulling the latest changes
VT: It is the best practise to always download the most recent changes from upstream before beginning work on a project.
Run the following command to pull the latest changes from upstream into our local repository:
$ git pull upstream main
Step 8: Creating a new branch
VT: Let's create a new branch to begin our work.
💡 Always create a new branch before working on the project.
Run the following command:
$ git checkout -b BRANCH_NAME
📌 Make sure to replace
BRANCH_NAMEwith the name you want to give to your branch (e.g.feature).
You can list all your branches by running the following command:
$ git branch
Step 9: Making changes
VT: It's time to make some change to our project.
If you are working on github-playground project then, open Players.md file in your favourite text editor.
Add the following line to Players.md file:
- [YOUR_NAME](YOUR_PROFILE_URL)
📌 Make sure to replace
YOUR_NAMEwith your real name andYOUR_PROFILE_URLwith your profile URL (you can share any profile that you want, e.g. GitHub, Twitter, dev.to, etc.).📌 If you don't want to share your profile, write your name like this:
- YOUR_NAME
Save the file.
Step 10: Committing changes
VT: Let's now make a commit to the repository.
Run the following command to add the change to staging area and make a commit to the repository:
$ git add .
$ git commit -m "DESCRIPTION_OF_CHANGES"
📌 Make sure to replace
DESCRIPTION_OF_CHANGESwith the actual description.
Step 11: Pushing changes to fork
VT: We will now push our changes to our forked repository.
Mike: Why do we have to push the changes to the forked repository? Can't we just push to the original repository?
VT: We can't push the changes directly to the original repository. We don't have access to that repository.
We must first push the changes to the forked repository, then we will make a pull request from there.
Run the following command to push the changes to the forked repository:
$ git push origin BRANCH_NAME
📌 Make sure to replace
BRANCH_NAMEwith the name of the branch you are working with.
When prompted, enter your GitHub username and password.
📌 Use your PAT (Personal Access Token) in place of the password.
Step 12: Creating a pull request
VT: Now it's time to make a pull request.
Navigate to the forked repository on GitHub.
A prompt to make a pull requset must have appeared.
Click the button labelled Compare & pull request.
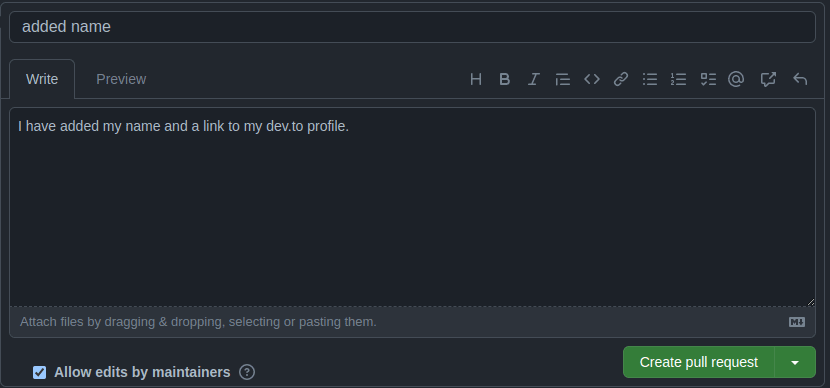
On the next page, add the Title and Description to your pull request.
Now, click Create pull request button at the bottom.
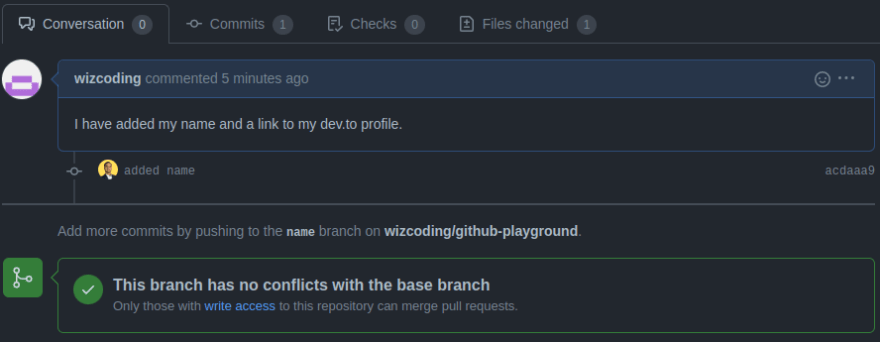
We have successfully created a pull request. Cheers!
Mike: Oh! Great! What do we have to do next?
VT: Now we must discuss the pull request with the maintainer of the repository and, if necessary, make additional changes.
Step 13: Discussing the pull request
VT: Now that we've made a pull request, the repository's owner/maintainer will be notified about it.
The maintainers may initiate a discussion about the pull request and, if necessary, suggest changes.
If they are satisfied with the changes we have made, they will either merge the changes back into the original repository or suggest some changes.
If they have suggested any changes, we must implement them and make another commit to the existing pull request.
Step 14: Adding more commits to the existing pull request
VT: If we need to make changes after submitting a pull request, we must go to our local git repository and make the changes there.
To do so, we must switch to the branch on which we were previously working.
Run the following commands to check and switch the branch:
$ git branch
$ git checkout BRANCH_NAME
📌 Make sure to replace
BRANCH_NAMEwith the name of the branch you were working with.
Now that we've switched to the branch with which we'll be working, we simply need to repeat steps 9 through step 11.
Step 15: Discussing the pull request again
VT: We must now re-discuss the pull request with the repository's maintainers.
If the maintainers approve and merge your changes, you will have made your first contribution to open source. It's time to celebrate.🎉🎉
Mike: Yay!!
Step 16: Deleting branch from the fork
VT: We now need to do some cleanup.
We have to delete the branch from our fork on GitHub.
To do so, we must first navigate to our forked repository page and open the dropdown labeled with the branch name main.
Click View all branches at the bottom of the dropdown menu.
Click the delete button corresponding to the branch with which we were working.
Click Delete from the popup which will appear.
Step 17: Deleting branch from the local repository
VT: Now, we will delete the branch from our local repository.
First switch to the main branch by running the following command:
$ git checkout main
Now, run the following command to delete the branch from local git repository:
$ git branch -D BRANCH_NAME
📌 Make sure to replace
BRANCH_NAMEwith the name of the branch you were working with.
Step 18: Synchronizing the fork with the project repository
VT: Finally, if we intend to contribute to this project in the future, we must synchronise our fork with the project repository.
Just run the following command to do so:
$ git pull upstream main
$ git push origin main
Enter the username and password when prompted.
📌 Use your PAT (Personal Access Token) in place of the password.
These commands will pull the most recent changes from the project repository and push them to our fork.
Congratulations on your first contribution to open source!🎉🎉
I hope you found something helpful in this post. You can also follow me on LinkedIn and Twitter.
Cheers and see you in the next one! ✌️


Top comments (0)