
Overview
MongoDB is the most popular NoSQL database and is an open-source document-oriented database. The term ‘NoSQL’ means non-relational. MongoDB doesn't follow the table-like relational database structure rather MongoDB provides us the different mechanisms for storage and retrieval of data.
Format: BSON ( similar to JSON format)
MongoDB Atlas provides an easy way to host and manage your data in the cloud. This tutorial guides you through creating an Atlas cluster, set up the environment, connecting to it, and importing data in CSV format.
1 - Example of Document Model in MongoDB [Just take a look]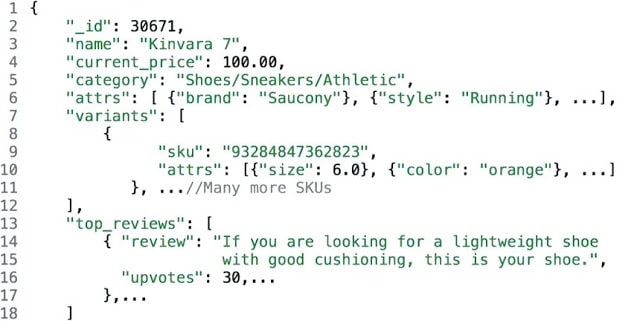
2 - Creating an Atlas Free-Tier Cluster
step 1
- Signup on https://www.mongodb.com/cloud/atlas
- Sign in, select the free pack, and select version 4.4 - give project name and cluster name (Note: Cluster name cannot be changed once deployed) respectively. (ps: wait for a min while the server is setting up)
step 2
- Add a new database user as shown below { select MongoDB Roles as atlasAdmin@admin }

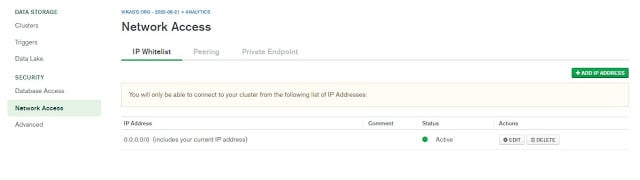
step 3
- goto NETWORK ACCESS > select ADD IP ADDRESS > select ALLOW ACCESS FROM ANYWHERE > CONFIRM (without doing any changes)
For reference:
My project name = analytics
My cluster name = mflix
My collection name = movies
3 - Installing mongoDB
step 1 - Download Enterprise version -Download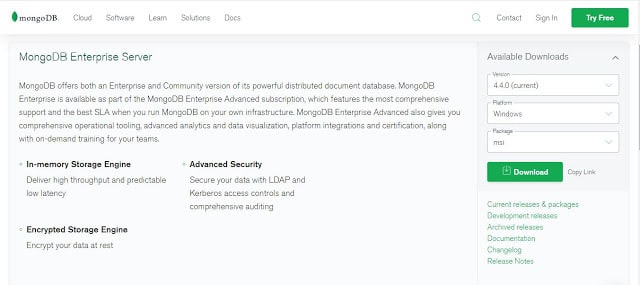
Note: As we are downloading MongoDB version 4.4.0 it has database tools explicitly.
step 2 - we have to download it from Download Tools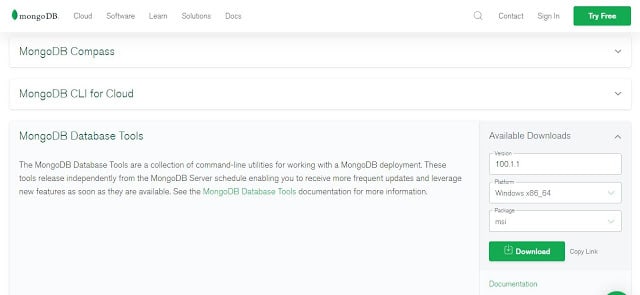
Once Installed you will see the interface in the MongoDB folder as shown below -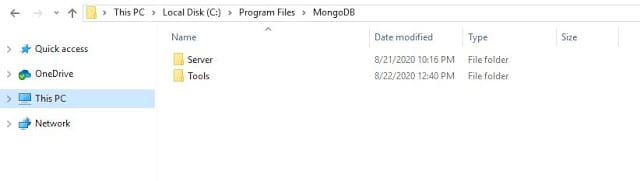
step 3 -
1) goto C:\Program Files\MongoDB\Server\4.4\bin and copy the path
2) Open Control Panel\All Control Panel Items\System on your computer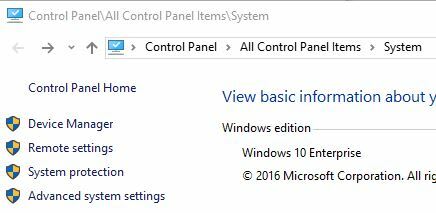
3) goto Advanced system settings > select Advanced tab > select Environment Variables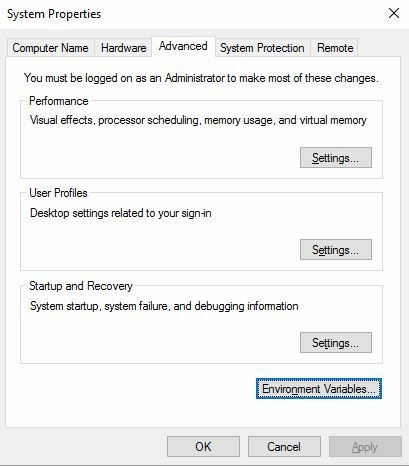
4) Under system variables > select path > New > add C:\Program Files\MongoDB\Server\4.4\bin to path [Note : give it highest priority]
5) Repeat same for Tools and add it to environment variables C:\Program Files\MongoDB\Tools\100\bin 
step 4 - create data folder in C drive and in data folder create one db folder - C:\data\db 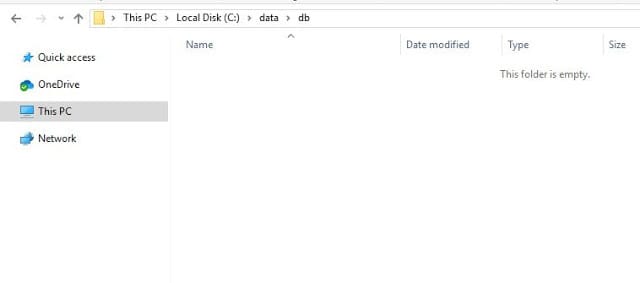
Once you are done with the above things
step 5 -
1) open command prompt and execute mongod.exe [keep that command prompt window as it is and open new command prompt window]
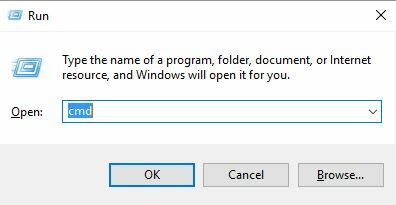
- To open new command prompt click - [Windows + R ] and write cmd > enter
2) In that new command prompt execute mongo.exe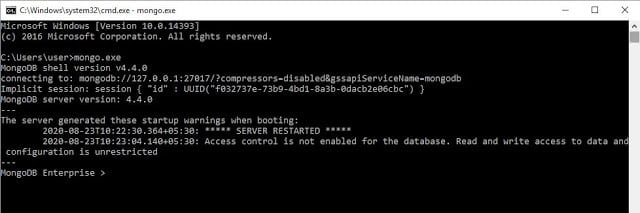
Hurray,🙌 we are all set and now we can run mongoimport.exe and mongoexport.exe to play with the data !!
4 - Importing Data
step 1 - Download dummy data from https://sample-videos.com/download-sample-csv.php or use your own data with .csv extension.
step 2 - Connect cluster to MongoDB compass
1) Sign in - https://account.mongodb.com/account/login and open Clusters under DATA STORAGE as shown below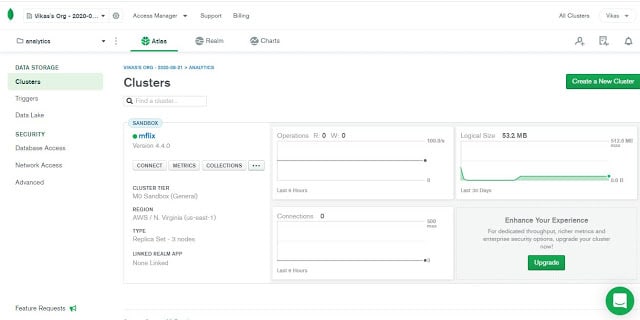
2) Click on connect > select Connect using MongoDB Compass > copy the string 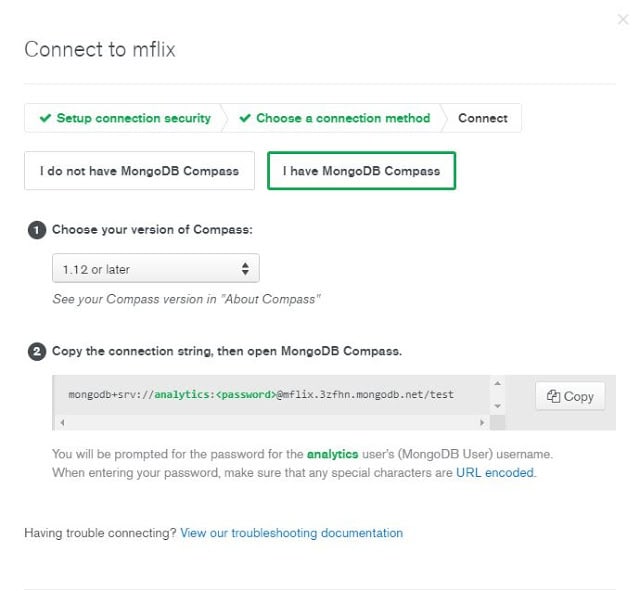
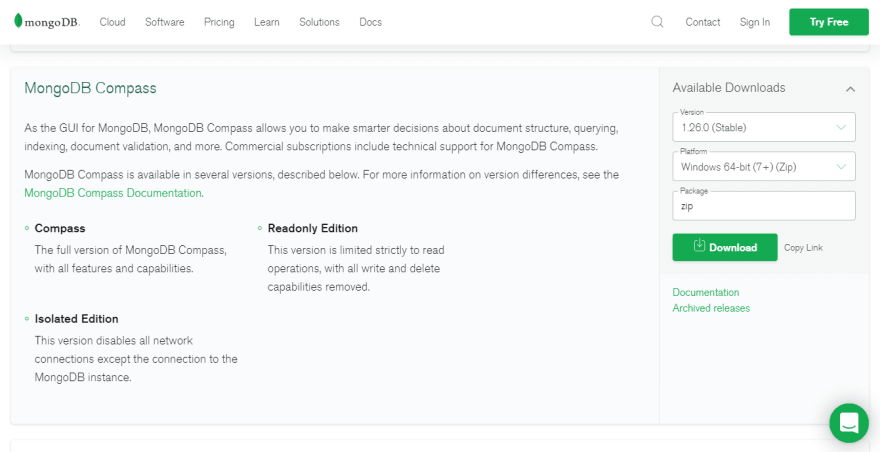
3) Download MongoDB compass - https://www.mongodb.com/try/download/compass
4) Open your MongoDB compass and paste the string in the section and replace with your respective password which you kept while creating Database User > click on CONNECT.
step 3 - goto clusters under DATA STORAGE and click on 3 dots beside collections > select command-line tools > under DATA IMPORT AND EXPORT TOOLS - copy the URI string under mongoimport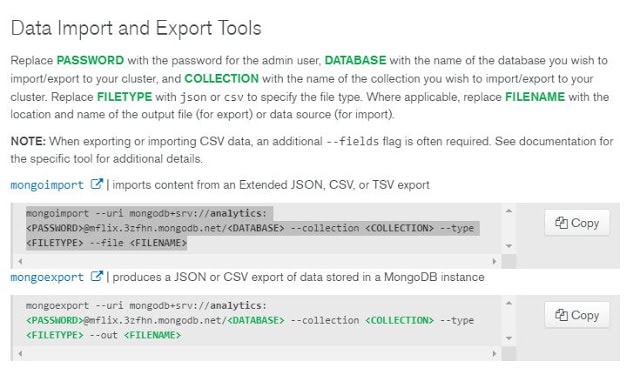
step 4 -
1) open the command prompt with the path where your data resides (where you downloaded the dummy CSV file) and paste the copied string.
2) change password, database name, and collection name[Note: At the first time of creation you can give any name you want, to database and collection] respectively.
3) put as csv and as yourfilename.csv and then add --headerline in that string .
NOTE: When exporting or importing CSV data, an additional --fields flag is often required. Therefore, we are adding --headerline to the string
so your final string will look like 👇
mongoimport --uri mongodb+srv://<Here your project name will come bydefault>:<Enter your password>@mflix.3zfhn.mongodb.net/<Enter your database name> --collection <Enter your collection name> --type csv --headerline --file yourfilename.csv
Now hit the enter and your data will get imported which you can check in MongoDB compass as well on Atlas.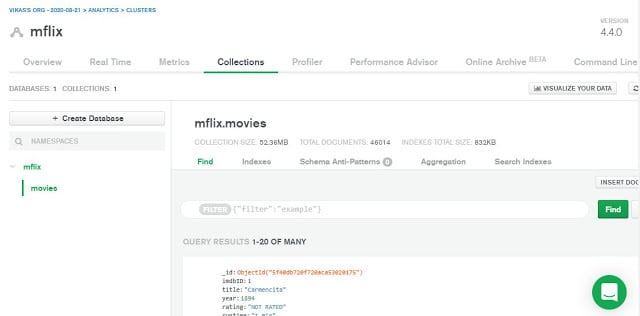
Wrapping up
So, we have discussed how to download the required tools & set up the environment to import the data and access the same in MongoDB Compass or Atlas.
I hope you enjoyed this article…Thanks for reading!
If you have any queries regarding this tutorial, feel free to leave comments in the discussion section below or contact me on LinkedIn.
See you guys in the next article! ❤️ ✌🏼


Top comments (0)