
This article was first published on our open-source platform, SimpleAsWater.com. If you are interested in IPFS, Libp2p, Ethereum, Zero-knowledge Proofs, Defi, CryptoEconomics, IPLD, Multi formats, and other Web 3.0 projects, concepts and interactive tutorials, then be sure to check out SimpleAsWater.
Till now, we have explored a number of fun examples using InterPlanetary File System (IPFS), InterPlanetary Linked Data (IPLD) & Libp2p. We have built Websites on IPFS, Youtube on IPFS, Online Publication on IPLD & Chat Application on Libp2p.
In this tutorial we are going to build a Twitter Bot(or a Pinbot) using IPFS
Cluster.
You can see our Twitter bot in action!

You can try it out yourself.
- Follow the @simpleaswater_ twitter account so that bot can filter your tweets out.
- Tweet a photo, gif, video or any media, and mention “@simpleaswater_” in your tweet. Just like below:

The bot will reply with the links to your content stored on the IPFS Cluster Network.
Cool, right? Let’s see how you can build your own twitter pinbot!
In this tutorial, we are go through:
- An Intro to IPFS Cluster, its significance & use-cases.
- Setting up an IPFS Cluster Network.
- Setting up Twitter Developer Account.
- Building a Twitter bot.
You can find the full code implementation here.
If you get stuck in any part or have any queries/doubts, then feel free to reach us out on our discord channel.
Intro to IPFS Cluster
Before setting up our own IPFS Cluster network, it’s good to spend a few minutes to understand why do we need IPFS Cluster and what is it.
If you are new to InterPlanetary File System (IPFS) then we would recommend you to check out this post first.
If you are familiar with IPFS, then you already know that IPFS aims to make the internet decentralized using content addressing approach.
The way this works is similar to services like BitTorrent where every user does not just consume the data but also serves it to other people in the BitTorrent network. That means you can not only get the data(let’s say Star Wars movie) from anyone on the network who has it, but also share this data with anyone who asks for it on the network.
But if all the people who have the Star Wars movie go offline, then you are out of luck.
No movie for you 😔

Now to understand why do we need IPFS Cluster consider the following scenario:
Let’s suppose you want to store your collection of favorite songs on the IPFS Network. You upload your playlist on the IPFS network and the people who also love the same songs can get the songs from you.Now, you may also have other things on your device that you want to keep(your Movies, vacation photos, etc.). So, you decide to remove the playlist from your device. After all, you can get your playlist from the people who downloaded it from you earlier. So, you are not worried about your songs getting lost, and go to sleep happily.One fine day, you want to get your songs back for your long workout session but are devastated to see that you can’t find your playlist on the IPFS Network 😨But how can this happen? You saved it on the network, right?It turns out that all the people who saved the playlist are either offline or have deleted the songs, as they got bored with them.The problem was that our playlist was not stored redundantly on a number of nodes(or devices) so that we could be sure that it would not get lost in the oblivion.
So, how do we ensure data availability and redundancy on IPFS?
Enter IPFS Cluster.

The purpose of IPFS Cluster is to make it easy for you to orchestrate/manage data across several IPFS peers by allocating, replicating and tracking a global pinset(list of saved data) distributed among multiple peers.
This way you can build a network of IPFS peers which redundantly store data for us.
If you want to know more about IPFS Cluster and see how it works under the hood, then head here.
If you have any queries/doubts till now, then feel free to reach us out on our discord channel.
Now, as we have explored why we need IPFS Cluster let’s setup our own IPFS Cluster network, on which we will save our tweets.
Setting up Your IPFS Peer
As IPFS Cluster network is a collection of IPFS peers, first we need to install & run an IPFS peer.
You can follow this guide to install IPFS Peer on your device.
After installing the IPFS, you can test your installation using ipfs version
$ ipfs version
ipfs version <VERSION_NUMBER>

$ ipfs help
USAGE:

ipfs - Global p2p merkle-dag filesystem.
...
NOTE: Throughout this tutorial, we use the *$** character to indicate your terminal’s shell prompt. When following along, don’t type the $ character,or you’ll get some weird errors.*
Now, let’s initialize your IPFS peer using ipfs init
$ ipfs init

initializing IPFS node at /home/vasa/.ipfs
generating 2048-bit RSA keypair...done
peer identity: Qmcpo2iLBikrdf1d6QU6vXuNb6P7hwrbNPW9kLAH8eG67z
to get started, enter:

ipfs cat /ipfs/QmYwAPJzv5CZsnA625s3Xf2nemtYgPpHdWEz79ojWnPbdG/readme
Voila! Your IPFS peer setup is complete!
If you are having any problems while setting up your IPFS peer, then feel free to reach us out on our discord channel.
Setting up Your IPFS Cluster Peer
In order to run an IPFS Cluster peer we need to install ipfs-cluster-service.
- First, download the
ipfs-cluster-servicebinary for your Operating System. - Now, unzip/untar the downloaded binary and you will find a
ipfs-cluster-serviceexecutable inside the folder. Place this binary where it can be run by a system user(usuallyusr/local/bin). - Now run the following command to initialize generate the IPFS Cluster configuration file.
$ ipfs-cluster-service init
Viola! You have setup your IPFS Cluster Peer.
Making a few changes to IPFS Cluster Config
In order to make the twitter bot example work, we need to change the IPFS Cluster config a bit. If you want to know why we are doing these changes, then you can refer to this discussion thread.
To make the changes, first open your IPFS Cluster config located at $HOME/.ipfs-cluster/service.json.
Now, scroll down to the api JSON object. In the api section, you will find restapi JSON object. You need to add these 3 key-values: libp2p_listen_multiaddress, private_key and id as shown below.
{
...
"api": {
    "ipfsproxy": {
        ...
    },
    "restapi": {
      "libp2p_listen_multiaddress": "/ip4/127.0.0.1/tcp/9696",
      "private_key": "CAASqAkwggSkAgEAAoIBAQDLZZcGcbe4urMBVlcHgN0fpBymY+xcr14ewvamG70QZODJ1h9sljlExZ7byLiqRB3SjGbfpZ1FweznwNxWtWpjHkQjTVXeoM4EEgDSNO/Cg7KNlU0EJvgPJXeEPycAZX9qASbVJ6EECQ40VR/7+SuSqsdL1hrmG1phpIju+D64gLyWpw9WEALfzMpH5I/KvdYDW3N4g6zOD2mZNp5y1gHeXINHWzMF596O72/6cxwyiXV1eJ000k1NVnUyrPjXtqWdVLRk5IU1LFpoQoXZU5X1hKj1a2qt/lZfH5eOrF/ramHcwhrYYw1txf8JHXWO/bbNnyemTHAvutZpTNrsWATfAgMBAAECggEAQj0obPnVyjxLFZFnsFLgMHDCv9Fk5V5bOYtmxfvcm50us6ye+T8HEYWGUa9RrGmYiLweuJD34gLgwyzE1RwptHPj3tdNsr4NubefOtXwixlWqdNIjKSgPlaGULQ8YF2tm/kaC2rnfifwz0w1qVqhPReO5fypL+0ShyANVD3WN0Fo2ugzrniCXHUpR2sHXSg6K+2+qWdveyjNWog34b7CgpV73Ln96BWae6ElU8PR5AWdMnRaA9ucA+/HWWJIWB3Fb4+6uwlxhu2L50Ckq1gwYZCtGw63q5L4CglmXMfIKnQAuEzazq9T4YxEkp+XDnVZAOgnQGUBYpetlgMmkkh9qQKBgQDvsEs0ThzFLgnhtC2Jy//ZOrOvIAKAZZf/mS08AqWH3L0/Rjm8ZYbLsRcoWU78sl8UFFwAQhMRDBP9G+RPojWVahBL/B7emdKKnFR1NfwKjFdDVaoX5uNvZEKSl9UubbC4WZJ65u/cd5jEnj+w3ir9G8n+P1gp/0yBz02nZXFgSwKBgQDZPQr4HBxZL7Kx7D49ormIlB7CCn2i7mT11Cppn5ifUTrp7DbFJ2t9e8UNk6tgvbENgCKXvXWsmflSo9gmMxeEOD40AgAkO8Pn2R4OYhrwd89dECiKM34HrVNBzGoB5+YsAno6zGvOzLKbNwMG++2iuNXqXTk4uV9GcI8OnU5ZPQKBgCZUGrKSiyc85XeiSGXwqUkjifhHNh8yH8xPwlwGUFIZimnD4RevZI7OEtXw8iCWpX2gg9XGuyXOuKORAkF5vvfVriV4e7c9Ad4Igbj8mQFWz92EpV6NHXGCpuKqRPzXrZrNOA9PPqwSs+s9IxI1dMpk1zhBCOguWx2m+NP79NVhAoGBAI6WSoTfrpu7ewbdkVzTWgQTdLzYNe6jmxDf2ZbKclrf7lNr/+cYIK2Ud5qZunsdBwFdgVcnu/02czeS42TvVBgs8mcgiQc/Uy7yi4/VROlhOnJTEMjlU2umkGc3zLzDgYiRd7jwRDLQmMrYKNyEr02HFKFn3w8kXSzW5I8rISnhAoGBANhchHVtJd3VMYvxNcQb909FiwTnT9kl9pkjhwivx+f8/K8pDfYCjYSBYCfPTM5Pskv5dXzOdnNuCj6Y2H/9m2SsObukBwF0z5Qijgu1DsxvADVIKZ4rzrGb4uSEmM6200qjJ/9U98fVM7rvOraakrhcf9gRwuspguJQnSO9cLj6",
      "id": "QmcrQZ6RJdpYuGvZqD5QEHAv6qX4BrQLJLQPQUrTrzdcgm",
      ...
      }
  }
  ...
}
NOTE: The *
private_keythat we are using is just for the demo purpose. If you are building a production bot, you should create your own libp2pprivate_keyandid.*
Starting Your IPFS Cluster Network
Now, as we have installed IPFS and IPFS Cluster peers, we can start our Cluster network.
- Open a terminal window and start the IPFS peer using
ipfs daemon - Open **another terminal **and start the IPFS Cluster peer using
ipfs-cluster-service daemon

Running IPFS daemon
- Open **another terminal **and start the IPFS Cluster peer using
ipfs-cluster-service daemon
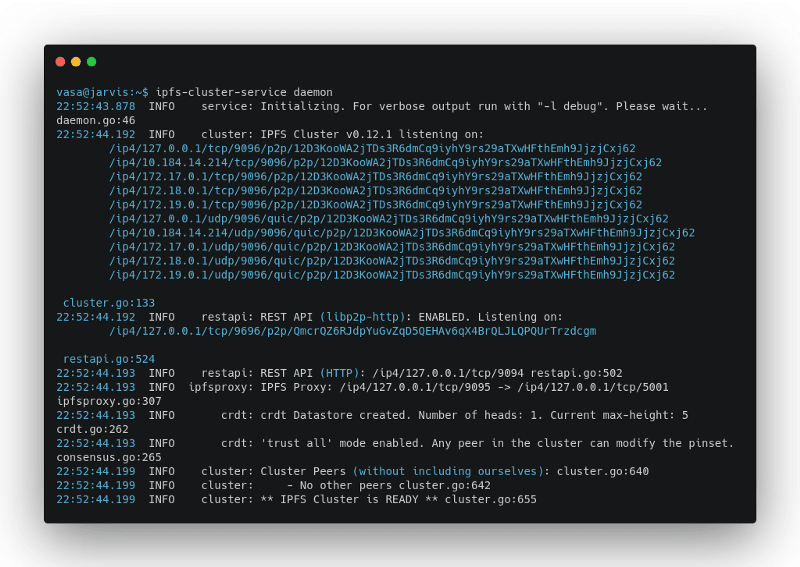
Running IPFS Cluster daemon
If you managed to reach here, then you deserve a pat on your back!
You are now running a IPFS Cluster network with 1 peer. For the purpose of this tutorial we will proceed with this setup. In case, you want to setup a more complex production infrastructure, then you can refer to IPFS Cluster docs.
If you have any queries/doubts, then feel free to reach us out on our **discord channel.**
Creating a Twitter Developer Account
To build a twitter bot, first we need to setup a developer account on twitter.
- Go to Twitter developers website. Click the “Create an app” button.

- You will be prompted to apply for the twitter developer account.

- Now, select the “Making a bot” option for your primary reason for using twitter developer tools, and click “Next”.

- In the next page, you will be asked some personal details. Fill them up and click “Next”.
- In the next page you will be asked a few more questions about how will you use twitter’s APIs. Fill up the answers by saying that you are creating a bot for fun 😉. After filling all the info, click “Next”.
- In the last page, you will be asked to confirm the details that you provided.
- You may have to confirm your email account. And wait for sometime to get your account approved.
After your account has been approved, you can go your twitter apps page, and click “Create an app”, fill the app details and hit “Create” button.
Congratulations! You now have a twitter app 🎉
Now, come back to the twitter apps page, where you can see your app. Click on the “details” button.

Navigate to the “keys and tokens” section, where you will find all the credentials we want. Copy the “API key”, “API secret key”, “Access token” & “Access token secret”.
Building the Twitter Bot 🤖
Now, as we have everything we need to build the Twitter Pinbot, let’s fire up our code editor!
Installing Golang
We are going to use Golang to build our Twitter bot. You can download Golang from here.
- First you need to download Golang.
- You will be redirected to a page with installation instructions. Follow these instructions to install Golang.
After installing Golang, we are ready to start with the twitter bot code.
Writing the Twitter Bot Code 👩💻👨💻
We are going to build a twitter bot which works in the following way:
- You need to follow the twitter bot account, so that the bot can filter out your tweets from all the tweets.
- Then you can “pin”, “unpin” or “add” data to the IPFS Cluster Network by tweeting to @botHandle with some specific text.
//To pin a CID with a name/label to IPFS Cluster Network
@botHandle !pin <cid> <name>

//To unpin a CID from IPFS Cluster Network
@botHandle !unpin <cid>

//To add a file(via URL) to IPFS Cluster Network
@botHandle !add <url-to-single-file>

//To check out what the bot can do
@botHandle !help

//Adding photos, memes, videos to IPFS Cluster Network
Tweet to @botHandle attaching photos, memes or videos
Now, let’s start by downloading some boilerplate code.
Clone the *boilerplate *branch of twitter-pinbot repo.
$ git clone --single-branch --branch boilerplate https://github.com/simpleaswater/twitter-pinbot
Now, first we need to make a few changes in the *config.json *file.
{
  "twitter_name": "@botHandle",
  "twitter_id": "@botHandle",
  "consumer_key": "API key",
  "consumer_secret": "API secret key",
  "access_key": "Access token",
  "access_secret": "Access token secret",
  "cluster_peer_addr": "cluster peer multiaddress",
  "cluster_username": "",
  "cluster_password": ""
}
You need to add your @botHandle and the credentials that we got from the twitter developer portal.
Then replace the “cluster peer multiaddress” with:
/ip4/127.0.0.1/tcp/9696/ipfs/QmcrQZ6RJdpYuGvZqD5QEHAv6qX4BrQLJLQPQUrTrzdcgm
If you look closely, you can see that this is the same multiaddress which we added above while changing the IPFS Cluster config file.
We do this to interact with the IPFS Cluster Setup that we created above.
You can leave the “cluster_username” & “cluster_password” blank.
Now, as we are done with our config.json *file, let’s start working on *main.go.
package main

import (
    "regexp"
)

// ConfigFile is the path of the default configuration file
var ConfigFile = "config.json"

// Gateway
var IPFSGateway = "https://ipfs.io"

const twittercom = "twitter.com"

type Action string

// Variables containing the different available actions
var (
    // (spaces)(action)whitespaces(arguments)
    actionRegexp = regexp.MustCompile(`^\s*([[:graph:]]+)\s+(.+)`)
    // (cid)whitespaces(name with whitespaces). [:graph:] does not
    // match line breaks or spaces.
    pinRegexp          = regexp.MustCompile(`([[:graph:]]+)\s+([[:graph:]\s]+)`)
    PinAction   Action = "!pin"
    UnpinAction Action = "!unpin"
    AddAction   Action = "!add"
    HelpAction  Action = "!help"
)

func main() {
    //Let's code ☕
}
The main.go file contains a few constants that we will be using as we move forward in the tutorial.
Let’s first add a way to read and manage the data from config.json.
// Config is the configuration format for the Twitter Pinbot
type Config struct {
    TwitterID       string `json:"twitter_id"`
    TwitterName     string `json:"twitter_name"`
    AccessKey       string `json:"access_key"`
    AccessSecret    string `json:"access_secret"`
    ConsumerKey     string `json:"consumer_key"`
    ConsumerSecret  string `json:"consumer_secret"`
    ClusterPeerAddr string `json:"cluster_peer_addr"`
    ClusterUsername string `json:"cluster_username"`
    ClusterPassword string `json:"cluster_password"`
}

// Function to read JSON config file
func readConfig(path string) *Config {
    cfg := &Config{}
    cfgFile, err := ioutil.ReadFile(path)
    if err != nil {
        log.Fatal(err)
    }
    err = json.Unmarshal(cfgFile, &cfg)
    if err != nil {
        log.Fatal(err)
    }
    return cfg
}
Here we have Config struct which manages different key-value pairs from our config.json file. Also, we have the function readConfig(path string) which takes the path of the config.json and parses the JSON from the file.
Next, we create the Bot struct, which is used to manage the different
functionalities of the twitter pinbot.
// Bot is a twitter bot which reads a user's timeline
// and performs actions on IPFS Cluster if the tweets
// match, i.e. a tweet with: "@botHandle !pin <cid> <name>"
// will pin something. The users with pin permissions are
// those who follow the bot. Retweets by users who follow
// the bot should also work. The bot will answer
// the tweet with a result.
type Bot struct {
    ctx    context.Context
    cancel context.CancelFunc

    name          string
    id            string
    twClient      *twitter.Client
    clusterClient client.Client

    followedBy sync.Map

    die chan struct{}
}
You will also have to import these 2 modules:
import (
    "github.com/dghubble/go-twitter/twitter"
    "github.com/ipfs/ipfs-cluster/api/rest/client"
)
Now, let’s add the function to create a Bot.
import (
    "github.com/multiformats/go-multiaddr"
    "github.com/dghubble/oauth1"
)

// New creates a new Bot with the Config.
func New(cfg *Config) (*Bot, error) {
    ctx, cancel := context.WithCancel(context.Background())

    // Creating Twitter client
    ocfg := oauth1.NewConfig(cfg.ConsumerKey, cfg.ConsumerSecret)
    token := oauth1.NewToken(cfg.AccessKey, cfg.AccessSecret)
    httpClient := ocfg.Client(ctx, token)
    twClient := twitter.NewClient(httpClient)

    // Creating IPFS Cluster client
    peerAddr, err := multiaddr.NewMultiaddr(cfg.ClusterPeerAddr)
    if err != nil {
        cancel()
        return nil, err
    }
    clusterClient, err := client.NewDefaultClient(&client.Config{
        APIAddr:  peerAddr,
        Username: cfg.ClusterUsername,
        Password: cfg.ClusterPassword,
        LogLevel: "info",
    })

    if err != nil {
        cancel()
        return nil, err
    }

    //Creating Bot Object
    bot := &Bot{
        ctx:           ctx,
        cancel:        cancel,
        twClient:      twClient,
        clusterClient: clusterClient,
        name:          cfg.TwitterName,
        id:            cfg.TwitterID,
        die:           make(chan struct{}, 1),
    }

    bot.fetchFollowers()
    go bot.watchFollowers()
    go bot.watchTweets()
    return bot, nil
}
Here we first create twClient which interacts with the twitter APIs. Also, we create clusterClient which interacts with our IPFS Cluster Setup. Then, using these 2, we create our Bot object.
At last, we have 3 methods:
-
fetchFollowers(): This method is used to fetch the list of bot followers, so that we can track their tweets, and respond accordingly. -
watchFollowers(): Thisgoroutineis used to watch the list of bot followers every 60 seconds. In case, somebody follows the bot, the list will be updated within 60 minutes, after which we will start filtering the tweets of the recent follower. -
watchTweets(): Thisgoroutineis used to watch & filter the tweets who mention our @botHandle.
We will implement these 3 methods in a while.
Next, we have a few small utility functions.
// Kill destroys this bot.
func (b *Bot) Kill() {
    b.cancel()
}

// Name returns the twitter handle used by the bot
func (b *Bot) Name() string {
    return b.name
}

// ID returns the twitter user ID used by the bot
func (b *Bot) ID() string {
    return b.id
}
As explained in the comments:
-
Kill(): destroys the bot. -
Name(): returns the twitter handle used by the bot. -
ID(): returns the twitter user ID used by the bot.
Now, let’s implement the above 3 methods.
//Fetching the bot Followers
func (b *Bot) fetchFollowers() {
    var nextCursor int64 = -1
    includeEntities := false
    for nextCursor != 0 {
        //Getting the List of bot followers
        followers, _, err := b.twClient.Followers.List(
            &twitter.FollowerListParams{
                Count:               200, //Number of bot followers we want in our list
                IncludeUserEntities: &includeEntities,
            })

        if err != nil {
            log.Println(err)
        }

        //Parsing and Storing the ID(s) of the bot followers
        for _, u := range followers.Users {
            _, old := b.followedBy.LoadOrStore(u.ID, struct{}{})
            if !old {
                //Printing the bot followers ScreenName
                log.Println("Friend: ", u.ScreenName)
            }
        }
        nextCursor = followers.NextCursor
        time.Sleep(2 * time.Second)
    }
}
The fetchFollowers() method fetches the list of bot followers using twClient. You can specify a maximum cap(Count) on how many latest followers will be allowed to interact with the bot. We will set this to 200. You can change this as per your wish.
We also parse through the followers list to get the ID of our bot followers, and print out their screen-names.
Next, let’s implement the watchFollowers() method.
//Watching bot followers every 60 secs.
//This checks the accounts following
//the bot in every 60 seconds, so that
//any new follower can be added to the
//followers list.
func (b *Bot) watchFollowers() {
    for {
        time.Sleep(60 * time.Second)
        select {
        case <-b.ctx.Done():
        default:
            b.fetchFollowers()
        }
    }
}
As the comments suggest, we call the fetchFollowers() method every 60 seconds to check for new bot followers and update our followers list.
Now, let’s implement the watchTweets() method.
//Function to watch tweets that mentions the bot
func (b *Bot) watchTweets() {
    log.Println("watching tweets")

    /*
        Filter Streams return Tweets that match one
        or more filtering predicates such as Track,
        Follow, and Locations.

        Here we are filtering our tweets with
        "!pin", "!unpin", "!add", "!help" or "<bot-name>" strings
        in tweet body.
    */
    params := &twitter.StreamFilterParams{
        Track: []string{
            PinAction.String(),
            UnpinAction.String(),
            HelpAction.String(),
            AddAction.String(),
            b.Name(),
        },
        StallWarnings: twitter.Bool(true),
    }

    stream, err := b.twClient.Streams.Filter(params)
    if err != nil {
        log.Println(err)
    }

    /*
        Receiving messages of type interface{} isn't very nice,
        it means you'll have to type switch and probably filter
        out message types you don't care about.

        For this,we use Demux, which receives messages and type
        switches them to call functions with typed messages.

        For example, say we're only interested in Tweets.
    */

    demux := twitter.NewSwitchDemux()
    demux.Tweet = func(t *twitter.Tweet) {
        //Processing the tweets
        b.processTweet(t, t)
    }

    //Constantly watching for new filtered tweets
    for {
        select {
        case <-b.ctx.Done():
            return
        case msg := <-stream.Messages:
            //"Handle(msg)" determines the type of a message
            //and calls the corresponding receiver
            //function with the typed message.
            go demux.Handle(msg)
        }
    }
}

func (a Action) String() string {
    return string(a)
}
The watchTweets() method continuously watches for different tweets, by adding a filter on the tweets. We filter for specific strings occurrence in the tweets, so that we don't reply to the every tweet by who mentions the @botHandle.
After filtering the tweets, we process the tweets using processTweet(t, t).
import (
    "github.com/ipfs/go-cid"
    "github.com/ipfs/ipfs-cluster/api"
)

//Process the filetered tweets and handle the tweets according to the
//desired action.
func (b *Bot) processTweet(tweet *twitter.Tweet, srcTweet *twitter.Tweet) {
    if tweet == nil {
        return
    }

    if srcTweet == nil {
        srcTweet = tweet
    }

    // Skip processing our own tweets (written by us)
    // and quotes or retweets we've made (origUser is us)
    // (avoid potential loops)
    if tweet.User.IDStr == b.ID() || srcTweet.User.IDStr == b.ID() {
        return
    }

    action, arguments, urls, err := b.parseTweet(tweet)
    if err != nil {
        b.tweet(err.Error(), tweet, srcTweet, false)
        return
    }

    log.Printf("Parsed: %s, %s, %s\n", action, arguments, urls)

    _, ok := b.followedBy.Load(srcTweet.User.ID)
    if !ok && action.Valid() {
        log.Println("Error: NoFollow")
        b.tweet("Follow me, and try again.", tweet, srcTweet, false)
        return
    }
    if !ok {
        return
    }

    // Process actions
    switch action {
    case PinAction:
        //Pin the Tweet to the IPFS Cluster network
        b.pin(arguments, tweet, srcTweet)
    case UnpinAction:
        //UnPin the Tweet to the IPFS Cluster network
        b.unpin(arguments, tweet, srcTweet)
    case AddAction:
        ////Add the Tweet to the IPFS Cluster network
        b.add(arguments, tweet, srcTweet)
    case HelpAction:
        //Tweet a "help tweet" that demostrates how to use the bot
        b.tweetHelp(tweet, srcTweet)
    default:
        //Need to handle default tweets by adding the assets
        log.Println("no handled action for this tweet")
    }

    // Add any media urls
    if len(urls) > 0 {
        log.Println("adding media: ", urls)
        out := make(chan *api.AddedOutput, 1)
        go func() {
            cids := []cid.Cid{}
            for added := range out {
                log.Printf("added %s\n", added.Cid)
                cids = append(cids, added.Cid)
            }
            if len(cids) > 0 {
                b.tweetAdded(cids, tweet, srcTweet)
            }
        }()
        params := api.DefaultAddParams()
        params.Wrap = true
        params.Name = "Tweet-" + tweet.IDStr
        err := b.clusterClient.Add(context.Background(), urls, params, out)
        if err != nil {
            log.Println(err)
        }
    }

    // If the tweet has retweets, process them as if they were
    // from this user.
    retweets := []*twitter.Tweet{tweet.QuotedStatus, tweet.RetweetedStatus}
    for _, rt := range retweets {
        b.processTweet(rt, srcTweet)
    }
}
The processTweet(tweet, tweet) method processes the filtered tweets and handles the tweets according to the desired action.
First, we check if the tweet is originated from the bot’s account or not. If the tweet originated from the bot’s account then we return, otherwise we will end up in an infinite loop, tweeting our own tweet.
Then we parse the tweets using parseTweet(tweet) to get the action, arguments & urls from the tweet. We will implement the parseTweet(tweet) in a while.
After that we check 2 things. First, we check that the tweets must originate from accounts that follow the bot. Second, we check if the action is a valid action or not.
We can check the validity of the parsed action using the following function.
func (a Action) Valid() bool {
    switch a {
    case PinAction, UnpinAction, AddAction, HelpAction:
        return true
    }
    return false
}
If the tweet is not from someone who follows the bot, then we return.
Then, in the switch statement, we check for action type and perform different actions accordingly. We will implement these different methods(pin, unpin, etc.) in a while.
After that we check for any urls, and use clusterClient to Add the urls to the IPFS Cluster setup, and return the content identifiers (CIDs).
And finally, we handle an edge case in which if the tweet has retweets, then we process them as if they were from the bot follower, and thus calling the processTweet(rt, srcTweet).
Now, let’s implement the parseTweet(tweet) method.
// parseTweet returns Action, arguments, media urls, and error
func (b *Bot) parseTweet(tweet *twitter.Tweet) (Action, string, []string, error) {
    // Extended tweet? let's use the entities from the extended tweet then.
    if tweet.ExtendedTweet != nil {
        tweet.Entities = tweet.ExtendedTweet.Entities
        tweet.ExtendedEntities = tweet.ExtendedTweet.ExtendedEntities
        tweet.FullText = tweet.ExtendedTweet.FullText

    }
    text := tweet.FullText
    if text == "" {
        text = tweet.Text
    }

    log.Println("Parsing:", text)

    // remote our username if they started with it
    text = strings.TrimPrefix(text, b.name)
    var action Action
    var arguments string

    if text == " "+string(HelpAction) {
        return HelpAction, "", []string{}, nil
    }

    // match to see if any action
    matches := actionRegexp.FindAllStringSubmatch(text, -1)
    if len(matches) > 0 {
        firstMatch := matches[0]
        action = Action(firstMatch[1]) // first group match
        arguments = firstMatch[2]      // second group match
    }

    urls := extractMediaURLs(tweet)
    return action, arguments, urls, nil
}
Here, we first handle the ExtendedTweettype, which is a enterprise feature of Twitter, in which you can can have tweets with no word limit.
Then we apply regular expression to our tweets to check for action & arguments. For extracting the urls we use
extractMediaURLs(tweet).
//Extracting MediaURLs from tweets
func extractMediaURLs(tweet *twitter.Tweet) []string {
    var urls []string

    // Grab any media entities from the tweet
    for _, m := range media(tweet.ExtendedEntities) {
        urls = append(urls, extractMediaURL(&m))
    }

    if len(urls) == 0 {
        // If no extended entitites, try with traditional.
        for _, m := range media(tweet.Entities) {
            urls = append(urls, extractMediaURL(&m))
        }
    }
    return urls
}

// takes *Entities or *MediaEntities
func media(ent interface{}) []twitter.MediaEntity {
    if ent == nil {
        return nil
    }

    switch ent.(type) {
    case *twitter.Entities:
        e := ent.(*twitter.Entities)
        if e != nil {
            return e.Media
        }
    case *twitter.ExtendedEntity:
        e := ent.(*twitter.ExtendedEntity)
        if e != nil {
            return e.Media
        }
    }
    return nil
}
Here we loop through the ExtendedEntities and Entities to grab the media entities. Now, we extract the actual MediaURL using the extractMediaURL(MediaEntity) function.
type byBitrate []twitter.VideoVariant

func (vv byBitrate) Len() int           { return len(vv) }
func (vv byBitrate) Swap(i, j int)      { vv[i], vv[j] = vv[j], vv[i] }
func (vv byBitrate) Less(i, j int) bool { return vv[i].Bitrate < vv[j].Bitrate }

//Extracting the highest bitrate MediaURL from MediaEntity
func extractMediaURL(me *twitter.MediaEntity) string {
    switch me.Type {
    case "video", "animated_gif":
        variants := me.VideoInfo.Variants
        sort.Sort(byBitrate(variants))
        // pick video with highest bitrate
        last := variants[len(variants)-1]
        return last.URL
    default:
        return me.MediaURL
    }
}
extractMediaURL(MediaEntity) extracts the MediaURL with the highest bitrate from the available variants of the video or animated_gif URLs.
Now, as we have parsed all the necessary information from the filtered tweets, we can proceed to implement pin, unpin,and add methods.
//Function to pin a CID to IPFS Cluster
func (b *Bot) pin(args string, tweet, srcTweet *twitter.Tweet) {
    log.Println("pin with ", args)
    pinUsage := fmt.Sprintf("Usage: '%s <cid> <name>'", PinAction)

    matches := pinRegexp.FindAllStringSubmatch(args, -1)
    if len(matches) == 0 {
        b.tweet(pinUsage, srcTweet, nil, false)
        return
    }

    firstMatch := matches[0]
    cidStr := firstMatch[1]
    name := firstMatch[2]
    c, err := cid.Decode(cidStr)
    if err != nil {
        b.tweet(pinUsage+". Make sure your CID is valid.", tweet, srcTweet, false)
        return
    }

    _, err = b.clusterClient.Pin(context.Background(), c, api.PinOptions{Name: name})
    if err != nil {
        log.Println(err)
        b.tweet("An error happened pinning. I will re-start myself. Please retry in a bit.", srcTweet, nil, false)
        b.die <- struct{}{}
        return
    }
    waitParams := client.StatusFilterParams{
        Cid:       c,
        Local:     false,
        Target:    api.TrackerStatusPinned,
        CheckFreq: 10 * time.Second,
    }
    ctx, cancel := context.WithTimeout(b.ctx, 10*time.Minute)
    defer cancel()
    _, err = client.WaitFor(ctx, b.clusterClient, waitParams)
    if err != nil {
        log.Println(err)
        b.tweet("IPFS Cluster has been pinning this for 10 mins. This is normal for big files. Otherwise, make sure there are providers for it. Don't worry, Cluster will keep at it for a week before giving up.", srcTweet, nil, false)
        return
    }

    b.tweet(fmt.Sprintf("Pinned! Check it out at %s/ipfs/%s", IPFSGateway, cidStr), tweet, srcTweet, true)
}
Here we again apply regular expression on args to validate the tweet text and content identifier(cidStr) and name(name) for the pin to be added to IPFS Cluster setup.
We have added a number of error checks for:
- Checking of the CID(
cidStr) is valid. - Checking if some unexpected error happened while pinning the CID to IPFS Cluster setup using
clusterClient.Pin. - Checking if the pinning process takes more that 10 seconds(timeout), which is sufficient for big files.
In case, everything is fine, the bot tweets the IPFSGateway link for the added pin using the tweet method. We will implement the tweet method in a while.
Now, let’s see the unpin method.
// Function to unpin a CID from IPFS Cluster network
func (b *Bot) unpin(args string, tweet, srcTweet *twitter.Tweet) {
    log.Println("unpin with ", args)
    unpinUsage := fmt.Sprintf("Usage: '%s <cid>'", UnpinAction)

    c, err := cid.Decode(args)
    if err != nil {
        b.tweet(unpinUsage+". Make sure your CID is valid.", tweet, srcTweet, false)
        return
    }

    _, err = b.clusterClient.Unpin(context.Background(), c)
    if err != nil && !strings.Contains(err.Error(), "uncommited to state") {
        log.Println(err)
        b.tweet("An error happened unpinning. I will re-start myself. Please retry in a bit.", srcTweet, nil, false)
        b.die <- struct{}{}
        return
    }
    waitParams := client.StatusFilterParams{
        Cid:       c,
        Local:     false,
        Target:    api.TrackerStatusUnpinned,
        CheckFreq: 10 * time.Second,
    }
    ctx, cancel := context.WithTimeout(b.ctx, time.Minute)
    defer cancel()
    _, err = client.WaitFor(ctx, b.clusterClient, waitParams)
    if err != nil {
        log.Println(err)
        b.tweet("IPFS Cluster did not manage to unpin the item, but it's trying...", srcTweet, nil, false)
        return
    }

    b.tweet(fmt.Sprintf("Unpinned %s! :'(", args), tweet, srcTweet, false)
}
In the unpin method we use cid.Decode to get the CID(c) from the args.
Similar to pin, here also we have a few checks in place to handle errors.
- Making sure that the CID(
c) is valid. - Checking if some unexpected error happened while unpinning the CID from IPFS Cluster setup using
clusterClient.Unpin. - Checking if the unpinning process takes more that 10 seconds(timeout).
In case, everything is fine, the bot tweets the acknowledging that the CID has been unpinned.
Now, let’s see the add method.
//Function to add URL to IPFS Cluster network
func (b *Bot) add(arg string, tweet, srcTweet *twitter.Tweet) {
    log.Println("add with ", arg)
    addUsage := fmt.Sprintf("Usage: '%s <http-or-https-url>'")
    url, err := url.Parse(arg)
    if err != nil {
        b.tweet(addUsage+". Make sure you gave a valid url!", srcTweet, nil, false)
        return
    }
    if url.Scheme != "http" && url.Scheme != "https" {
        b.tweet(addUsage+". Not an HTTP(s) url!", srcTweet, nil, false)
        return
    }

    if url.Host == "localhost" || url.Host == "127.0.0.1" || url.Host == "::1" {
        b.tweet("ehem ehem...", srcTweet, nil, false)
        return
    }

    out := make(chan *api.AddedOutput, 1)
    go func() {
        cids := []cid.Cid{}
        for added := range out {
            cids = append(cids, added.Cid)
        }
        if len(cids) > 0 {
            b.tweetAdded(cids, tweet, srcTweet)
        }
    }()

    params := api.DefaultAddParams()
    params.Wrap = true
    params.Name = "Tweet-" + tweet.IDStr
    log.Println([]string{arg})
    err = b.clusterClient.Add(context.Background(), []string{arg}, params, out)
    if err != nil {
        log.Println(err)
        b.tweet("An error happened adding. I will re-start myself. Please retry in a bit.", srcTweet, nil, false)
        b.die <- struct{}{}
        return
    }
}
The add method is used to add data via URLs in the tweet to the IPFS Cluster setup. We parse the url using url.Pars(arg). As the above 2 methods, add also has checks to counter catch the errors.
- Making sure that the URL(
c) is valid. - Checking if the
url.Schemeandurl.Hostare valid. - Checking if there is an unexpected error while adding files to the IPFS Cluster setup.
In case, everything is fine, the bot tweets CID(s) of the file(via the URL) and the folder-wrap(file wrapped in a folder) using tweetAdded.
//Function for Tweeting for the Add Action
func (b *Bot) tweetAdded(cids []cid.Cid, tweet, srcTweet *twitter.Tweet) {
    msg := "Just added this to #IPFS Cluster!\n\n"
    for i, c := range cids {
        if i != len(cids)-1 {
            msg += fmt.Sprintf("• File: %s/ipfs/%s\n", IPFSGateway, c)
        } else { // last
            msg += fmt.Sprintf("• Folder-wrap: %s/ipfs/%s\n", IPFSGateway, c)
        }
    }
    b.tweet(msg, tweet, srcTweet, true)
}
Here is the implementation of the tweetHelp method which tweets how to use the bot.
//Function for Tweeting for the Help Action
func (b *Bot) tweetHelp(tweet, srcTweet *twitter.Tweet) {
    help := fmt.Sprintf(`Hi! Here's what I can do:

!pin <cid> <name>
!unpin <cid>
!add <url-to-single-file>
!help

You can always prepend these commands mentioning me (%s).

Happy pinning!
`, b.name)
    b.tweet(help, srcTweet, nil, false)
}
Now, let’s implement the tweet method which sends tweets quoting or replying to the filtered tweets.
// tweets sends a tweet quoting or replying to the given tweets.
// srcTweet might be nil.
// Otherwise it just posts the message.
func (b *Bot) tweet(msg string, inReplyTo, srcTweet *twitter.Tweet, quote bool) {
    tweetMsg := ""
    params := &twitter.StatusUpdateParams{}
    sameTweets := false

    if inReplyTo == nil {
        tweetMsg = msg
        goto TWEET
    }

    sameTweets = srcTweet == nil || inReplyTo.ID == srcTweet.ID
    params.InReplyToStatusID = inReplyTo.ID

    switch {
    case sameTweets && !quote:
        // @user msg (reply thread)
        tweetMsg = fmt.Sprintf("@%s %s", inReplyTo.User.ScreenName, msg)
    case sameTweets && quote:
        // @user msg <permalink> (quote RT)
        tweetMsg = fmt.Sprintf(".@%s %s %s",
            inReplyTo.User.ScreenName,
            msg,
            permaLink(inReplyTo),
        )
    case !sameTweets && !quote:
        // @user @srcUser msg (reply thread)
        tweetMsg = fmt.Sprintf("@%s @%s %s",
            inReplyTo.User.ScreenName,
            srcTweet.User.ScreenName,
            msg,
        )
    case !sameTweets && quote:
        // @srcuser <replyPermalink> (quote RT mentioning src user)
        tweetMsg = fmt.Sprintf(".@%s %s %s",
            srcTweet.User.ScreenName,
            msg,
            permaLink(inReplyTo),
        )

    }

TWEET:
    log.Println("tweeting:", tweetMsg)
    newTweet, _, err := b.twClient.Statuses.Update(tweetMsg, params)
    if err != nil {
        log.Println(err)
        return
    }
    _ = newTweet
    // if quote { // then retweet my tweet after a minute
    //  go func() {
    //      time.Sleep(time.Minute)
    //      _, _, err := b.twClient.Statuses.Retweet(newTweet.ID, nil)
    //      log.Println("retweeted: ", tweetMsg)
    //      if err != nil {
    //          log.Println(err)
    //          return
    //      }
    //  }()
    // }
    return
}

func permaLink(tweet *twitter.Tweet) string {
    return fmt.Sprintf("https://%s/%s/status/%s", twittercom, tweet.User.ScreenName, tweet.IDStr)
}
Now, finally, let’s implement the main function of our pinbot, which will complete our pinbot code.
func main() {
    //Fetching the optional path from command line
    path := flag.String("config", ConfigFile, "path to config file")
    flag.Parse()

    //Reading the config file
    cfg := readConfig(*path)

    //Creating a new bot
    bot, err := New(cfg)
    if err != nil {
        log.Fatal(err)
    }
    log.Println("Bot created:", bot.Name(), bot.ID())

    // Wait for SIGINT and SIGTERM (HIT CTRL-C)
    ch := make(chan os.Signal)
    signal.Notify(ch, syscall.SIGINT, syscall.SIGTERM)
    select {
    case sig := <-ch:
        log.Println(sig)
    case <-bot.die:
    }

    bot.Kill()
}
In the main function, we read the config file from the path using the readConfig function. Then using the config file key-values(cfg) we create our bot using the New(cfg) function.
Also, we wait for SIGINT and SIGTERM so that hitting CTRL-C kills out bot.
Final Showdown
Now, it’s time to test our code.
First build the code by executing go build in the directory/folder(twitter-pinbot) where you have saved your main.go file.
This will download all the modules that we have imported. After this is done, you will see an executable file named twitter-pinbot.
Before starting, make sure that both, IPFS dameon and IPFS Cluster daemon are running, that we started above.
Now, you can run the executable file by executing ./twitter-pinbot.
If everything works fine, then you would see a list of your bot followers like this:

Now, we are waiting for your tweets…

If you get stuck in any part or have any queries/doubts, then feel free to
reach us out on our **discord channel.**

Top comments (0)