
Table of Content
- Introduction
- Getting Setup
- App Overview
- Making Navigation Screen
- State management {useState}
- Making App Screen(Simple Color Generating function)
- Ready to Roll 🥳
Introduction
Expo is a framework for React-Applications. Developer can easily built both Ios and Android platform mobile application. we can easily develop, build , deploy the app quickly. And the best part about react-native is that it gives a Native look to our Mobile / Web Application from the same JavaScript and TypeScript codebase.
Getting Setup
I am thinking that you have NODE.JS already been installed in your Machine.
Install from here if Not! 👉 Node
setting-up Expo :
npm install -g expo-cli

expo init Random-color-generator
App Overview
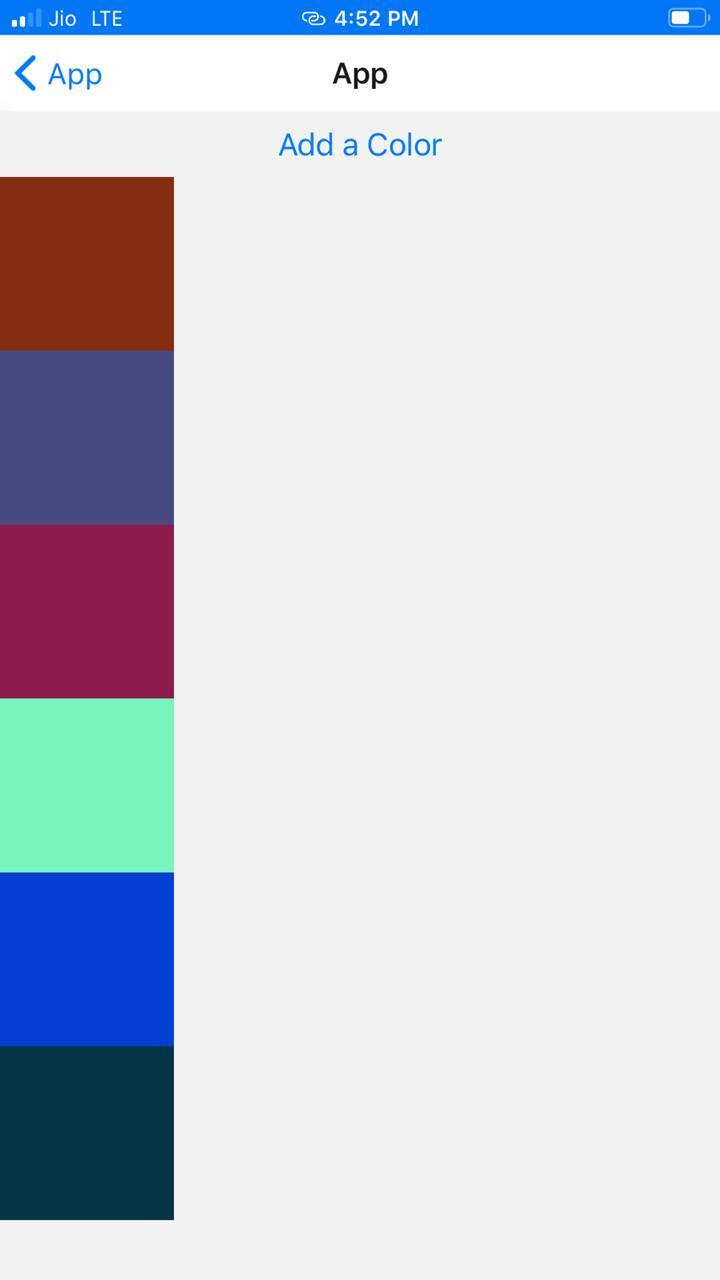
- By Clicking on the
Add Colorbutton. we should be able to learn create Block of different colors.. 🌈
Making Navigation Screen
Make Sure that you have following dependencies installed.
- react-navigation
- react-navigation-stack
npm i react-navigation react-navigation-stack
For navigation Screen Copy the following code and paste inside your
App.jsFile.
import { createAppContainer } from 'react-navigation';    // calling createAppContainer from react-navigation
import { createStackNavigator } from 'react-navigation-stack';
import HomeScreen from "./src/screens/HomeScreen";     //importing both screens to the main--> APP.js
import ColorScreen from './src/screens/ColorScreen';

const navigator = createStackNavigator(
  {
    Home: HomeScreen,                        //Stacking HomeScreen
    randC: ColorScreen                      //Stacking ColorScreen i.e our main Application
  },
  {
    initialRouteName: "Home",              //The Priority Route to be displayed first
    defaultNavigationOptions: {
      title: "App"                         //Title of the header is APP
    }
  }
);

export default createAppContainer(navigator);   //exporting default navigator
Now you have made the App.js. Now we need to make the screen between which me are navigating.
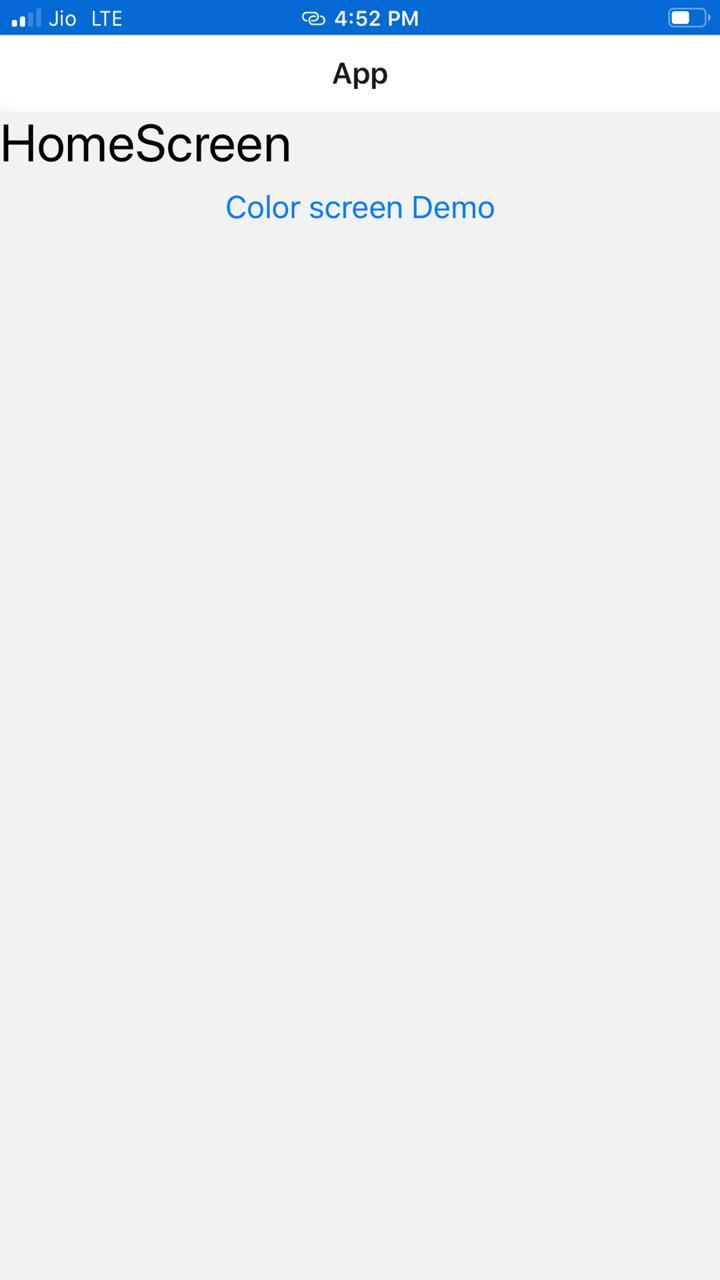
-
HomeScreen (
FileName: HomeScreen.js) -
ColorScreen (
FileName: ColorScreen.js)
Disclaimer : Remember that the File Structure will go like this...
|---src
     |---screen
            |---HomeScreen.js
            |---ColorScreen.js
HomeScreen.js
import React from "react";
import { Text, StyleSheet, View, Button } from "react-native";

const HomeScreen = ({navigation}) => {
  return (
    <View>
    <Text style={styles.text}>HomeScreen</Text>
    <Button
     onPress={() => navigation.navigate('randC')}
     title="Color screen Demo" />
    </View>

);};

const styles = StyleSheet.create({
  text: {
    fontSize: 30,
    alignItems: 'center',
    justifyContent: 'center'
  }
});

export default HomeScreen;
State management {useState}
let's understand it via example.
const [count,setCount] = useState(0);
This means that the initial value of the setCount is 0.
Hooks are functions that let you “hook into” React state and lifecycle features from function components. React uses an observable object as the state that observes what changes are made to the state and helps the component behave accordingly.
Making App Screen(Color Generating function implemented)
import React, { useState } from "react";
import { View,Text,StyleSheet,Button,FlatList } from "react-native";


const ColorScreen = (props) => {

    const [color, setColor] = useState([]);          //UseState Hook

return (
    <View>
        <Button title="Add a Color" onPress={()=> {
            setColor([...color,randomRGB()])         //Change Of state
        }} />

        <FlatList                                  //Making FlatList
          keyExtractor={(item)=>item}
          data={color}
          renderItem={({item}) =>{
              return  <View style={{ height:100, width:100, backgroundColor: item }} />
          }}

       />

    </View>
    )}

    const randomRGB = () => {              //Color Generation Function
        const red = Math.floor(Math.random()*256);
        const green = Math.floor(Math.random()*256);
        const blue = Math.floor(Math.random()*256);

        return `rgb(${red}, ${green}, ${blue})`;
    }

export default ColorScreen;           //Exporting the Screen for App.js file

const styles = StyleSheet.create({            //Defining StyleSheet
    container: {
        flex: 1,
        alignItems: 'center',
        justifyContent: 'center'
    }
});
Ready to Roll 🎉
Now We are Done with our Application. Now time to see the Application rolling.
expo start //This will start expo tunnel
- Scan the QR code and play application on Real device..
ScreenShots
- The ScreenShot shown are from my
Iphone. - You can also use
AndroidApp No worries.. React-Native is there for You.
Disclaimer : Kindly install Expo-client Application on your devices.
- Please Star it That will Make Me happy. ⭐===😍
- Fork Repository : HERE 👇
 Uyadav207
/
Expo-React-Native
Uyadav207
/
Expo-React-Native
An Expo-Beginners Models | Navigation | simple Apps | Getting Started with Expo 📱
Thanks for Reading!
Happy Coding !
![[deleted user] image](https://res.cloudinary.com/practicaldev/image/fetch/s--xtH13c6f--/c_limit%2Cf_auto%2Cfl_progressive%2Cq_auto%2Cw_800/https://res.cloudinary.com/practicaldev/image/fetch/s--diPD5F8K--/c_fill%2Cf_auto%2Cfl_progressive%2Ch_150%2Cq_auto%2Cw_150/https://thepracticaldev.s3.amazonaws.com/i/99mvlsfu5tfj9m7ku25d.png)


Top comments (0)