
Today I’ll teach you to send a SMS message from a Gatsby website using Twilio Serverless Functions and React. But first, what is Gatsby and why should you care?
Gatsby 101
If you spend time in JavaScript land, you might have heard of the JAMstack -- JavaScript, APIs, and Markup.
Traditional web apps dynamically generate HTML from templates when the server receives a request. JAMstack websites use static site generators to turn templates into HTML when the site is deployed, instead of when a request comes in.
Since plain ol’ HTML can be much faster to serve, JAMstack can give you a huge performance boost. Especially if you’re using a content delivery network. Although, there are limits to the amount of UI complexity static sites can support.
Gatsby bridges the gap between JAMstack static sites and traditional web apps. You write React components that compile to HTML plus a little bit of JavaScript to support user interactivity. Gatsby is essentially a hybrid where you have the best of both worlds.
For more detail, check out this thorough blog post about how Gatsby and other React apps differ.
Gatsby is also fully open source and run by a foundation. And it’s got a whole ecosystem with plugins, themes, and starters that empower you to build on the work of others.
Your first Gatsby site
Before you do anything else you’ll need to set up your Gatsby development environment.
A starter is an example of an entire Gatsby site you can clone and build on top of. From the terminal, run the following command to create a new project using the default starter:
gatsby new my-default-starter https://github.com/gatsbyjs/gatsby-starter-default
Open the my-default-starter folder in your favorite editor. Run the following command to get started developing:
  cd my-default-starter
  gatsby develop
Amongst the output you should see something like:
You can now view gatsby-starter-default in the browser.

  http://localhost:8000/
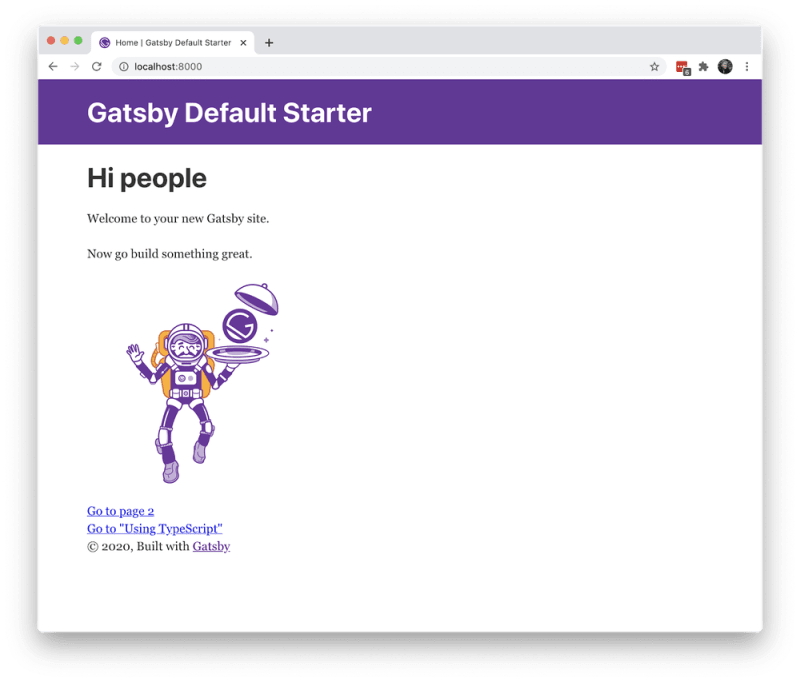
Go to that URL in a browser and see the Gatsby default starter running on your local host. 🎉
Add an SMS form to Gatsby
Now we’re going to modify the default starter by adding a form. Gatsby project structure isn’t too important for our purposes today, but if you want to learn more check out the Gatsby docs.
In the src/components folder, create a new file called SMSForm.js. Add the following code to it:
import React from "react"

class SMSForm extends React.Component {
 constructor(props) {
   super(props)
   this.state = {
     buttonDisabled: true,
     message: { to: "", body: "" },
     submitting: false,
     error: null,
   }
 }

 onChange = event => {
   const name = event.target.getAttribute("name")
   this.setState({
     message: { ...this.state.message, [name]: event.target.value },
   })
 }
 render() {
   return (
     <>
       <div>{this.state.error}</div>
       <form
         style={{
           display: `flex`,
           flexDirection: `column`,
           maxWidth: `500px`,
         }}
         method="post"
       >
         <label htmlFor="to">To:</label>
         <input
           type="tel"
           name="to"
           id="to"
           value={this.state.message.to}
           onChange={this.onChange}
         ></input>
         <label htmlFor="body">Body:</label>
         <textarea
           name="body"
           id="body"
           value={this.state.message.body}
           onChange={this.onChange}
           maxLength="160"
         />
         <button
           style={{
             marginTop: `7px`,
           }}
           type="submit"
           disabled={this.state.submitting}
         >
           Send message
         </button>
       </form>
     </>
   )
 }
}

export default SMSForm
The form asks for the recipient’s phone number, as well as the text you want to send them. The SMSForm component manages this data as React state so that it’s easy to submit and clear the data. It also has some state to disable the button when the form is being submitted, and show error text if any exists.
If you want more detailed step-by-step instructions on building out a SMS form in React, check out this blog post.
Before we can see our work, we’ll need to add SMSForm into our component tree. Open up pages/index.js and replace it with the following:
import React from "react"
import { Link } from "gatsby"

import Layout from "../components/layout"
import Image from "../components/image"
import SEO from "../components/seo"
import SMSForm from "../components/SMSForm"

const IndexPage = () => (
 <Layout>
   <SEO title="Home" />
   <h1>Hi people</h1>
   <p>Welcome to your new Gatsby site.</p>
   <p>Now go build something great.</p>
   <SMSForm></SMSForm>
   <div style={{ maxWidth: `300px`, marginBottom: `1.45rem` }}>
     <Image />
   </div>
   <Link to="/page-2/">Go to page 2</Link> <br />
   <Link to="/using-typescript/">Go to "Using TypeScript"</Link>
 </Layout>
)

export default IndexPage
Save index.js in your editor. As soon as you do so, the browser reloads automatically and our form shows up. Neat!

Add a serverless function
Our form doesn’t do anything yet, so let’s fix that. To integrate Twilio into the site, we’ll need some sort of back end. Storing Twilio credentials on the front end is a “DON’T” as that exposes them to potential attackers. Lucky for us, the "A" in JAMstack stands for APIs which includes serverless functions. We don’t need to spin up an entire server just to send a message.
If you don’t have a Twilio account now’s the time to sign up for one. After you’ve done that buy and configure a Twilio phone number with SMS capabilities.
Go to the Twilio Functions dashboard. Make sure the checkbox for enabling your ACCOUNT_SID and AUTH_TOKEN environment variables is checked. Click the “+” button to create a new function from a blank template. Your function will need a name and a path. Let’s go with “Send SMS” and “send-sms” respectively.
Uncheck the box that says “Check for valid Twilio signature” since we’ll be making a request from a non-Twilio domain. Copy the following code into the function body. Replace the from value with your Twilio number:
exports.handler = async function (context, event, callback) {
 const client = context.getTwilioClient()
 const response = new Twilio.Response()
 response.setHeaders({
   "Access-Control-Allow-Origin": "http://localhost:8000",
   "Content-Type": "application/json",
 })

 try {
   await client.messages.create({
     to: event.to,
     from: "", // replace this with your Twilio number in e.164 format
     body: event.body,
   })
   response.setBody({})
   response.setStatusCode(200)
 } catch (error) {
   response.setBody({ error })
   response.setStatusCode(500)
 }

 callback(null, response)
}
At a high level this code is passing along the message body and the recipient number along to our Twilio client which then creates the message. Since we are making a request from localhost to a different domain, we need to set CORS headers in our function response or the request will fail. The Twilio response object gives us granular control over headers and status codes. Using a response object also enables us to pass any errors through to the client so that the user knows what’s going on when things fail.
If you were going to deploy your Gatsby site to staging or production, you’d need to refactor this code a little. A CORS header can only contain one domain. You’d need some server-side logic to dynamically construct the header based on the list of domains you want to allow.
Hit the “Save” button so that your function deploys itself. Copy the path of your function because we’ll need it in a second.
Going back to your editor, let’s modify the SMSForm to actually make a request to the serverless function. Copy the following code into SMSForm.js and replace the functionURL with your own.
import React from "react"

const functionURL = "" // replace with your function URL

class SMSForm extends React.Component {
 constructor(props) {
   super(props)
   this.state = {
     buttonDisabled: true,
     message: { to: "", body: "" },
     submitting: false,
     error: null,
   }
 }

 onClick = async event => {
   event.preventDefault()
   this.setState({ submitting: true })
   const { to, body } = this.state.message
   const response = await fetch(functionURL, {
     method: "post",
     headers: {
       "Content-type": "application/x-www-form-urlencoded; charset=UTF-8",
     },
     body: new URLSearchParams({ to, body }).toString(),
   })
   if (response.status === 200) {
     this.setState({
       error: null,
       submitting: false,
       message: {
         to: "",
         body: "",
       },
     })
   } else {
     const json = await response.json()
     this.setState({
       error: json.error,
       submitting: false,
     })
   }
 }

 onChange = event => {
   const name = event.target.getAttribute("name")
   this.setState({
     message: { ...this.state.message, [name]: event.target.value },
   })
 }
 render() {
   return (
     <>
       <div>{this.state.error}</div>
       <form
         style={{
           display: `flex`,
           flexDirection: `column`,
           maxWidth: `500px`,
         }}
         method="post"
         action={functionURL}
       >
         <label htmlFor="to">To:</label>
         <input
           type="tel"
           name="to"
           id="to"
           value={this.state.message.to}
           onChange={this.onChange}
         ></input>
         <label htmlFor="body">Body:</label>
         <textarea
           name="body"
           id="body"
           value={this.state.message.body}
           onChange={this.onChange}
           maxLength="160"
         />
         <button
           style={{
             marginTop: `7px`,
           }}
           type="submit"
           disabled={this.state.submitting}
           onClick={this.onClick}
         >
           Send message
         </button>
       </form>
     </>
   )
 }
}

export default SMSForm
We added a click handler function to handle the form submission. Our click handler makes a fetch request to the serverless function. If all is well we reset the form state to blank and the message is sent. If there’s an error, we pop that into the component’s state so we can show the user what went wrong.
Try the form out. Send yourself any message you’d like, but might I suggest “high five”? You’ve earned it.
Conclusion: How to send a SMS from Gatsby
Today you’ve learned a little about Gatsby and how it fits into the JAMStack world, as well as how to integrate Gatsby and Twilio with serverless functions. But there’s always more to learn. Gatsby has fantastic documentation, so if you want to dive in deeper I’d encourage you to start there.
If you have built something cool with Gatsby, I’d love to hear about it. Let me know on Twitter or in the comments below.


Top comments (0)