This step-by-step tutorial will go over how to build such a Slackbot with Twilio Autopilot.

Setup
Before you get started, you'll need a Twilio account to make a Twilio Autopilot bot. Once you have that, first make an Autopilot Assistant.
- Go to the Autopilot Console and click "Create a new Assistant."
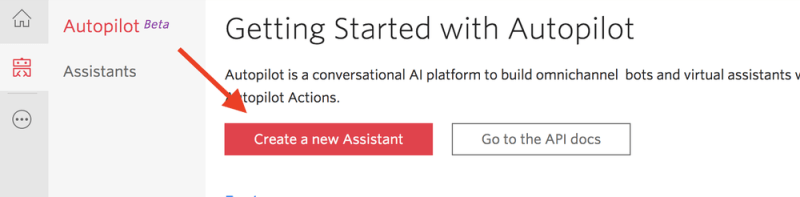
Give it a name and click "Create". In this case, I wanted to make a Slackbot to handle event sponsorships so I put "Dev-conf-bot".

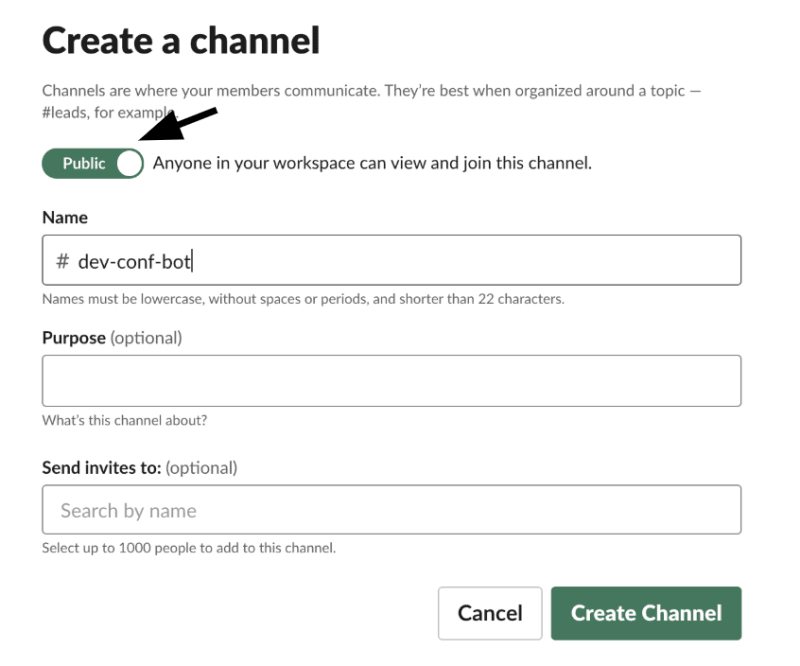
To make your Autopilot Assistant a Slackbot, you must do three things.Make a new public Slack channel. First click the plus button next to "Channels" on the left-hand side bar of your Slack client.

Then, name the channel. Make sure it is public as shown below, and click "Create Channel".
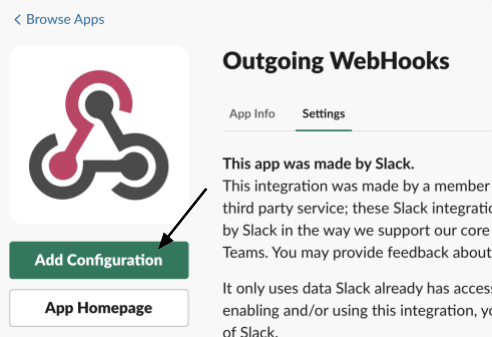
Create a new outgoing webhook integration in Slack to send a POST request containing message details to a URL of your choosing. In this case, it is https://.slack.com/apps/manage/custom-integrations. From that Custom Integrations page, click "Outgoing Webhooks". If you don't see that as an option, search for "Outgoing Webhooks" in the search box like so:

Select it and then click the green "Add Configuration" button below it.
Then on the "Add Configuration" page, click the green "Add Outgoing WebHooks Integration" button near the bottom of the page. Scroll down to the section titled Integration Settings. Select the name of the public channel that you created for your bot.

Leave the Trigger Words field empty (you can read more about trigger words at the bottom of this page) as well as the URLs field for now--we'll get to it soon!

Give your bot a Custom Name (ie. "Devnet Conf Bot", in this case), which users will see each time the bot replies in the channel. You can also choose a custom image or Emoji for your Slackbot.
-
Add your Assistant's custom webhook to the Slack URLs field. The webhook looks like https://channels.autopilot.twilio.com/v1///slack. Replace with your Twilio Account SID found in your console here:
 Next, get your in your Autopilot Assistant list:

After replacing your personal SID's in the webhook URL: https://channels.autopilot.twilio.com/v1///slack. Then paste it in the URLs section below Trigger Words back in the Outgoing Webhooks page here:

Now go to the public channel you made and say "hi" and you should get a response saying "This is your new Task".

With your Slackbot good to go, let's now customize this Autopilot bot. You can of course edit the Hello_world task to return whatever text you wish!

Build the Slackbot
Go to your Autopilot console, click the Assistant you just made above, and then click "Tasks" on the left-hand panel followed by "Add a task".

Give your task a name--I titled mine "event_sponsorship". To the right of the "Train" button, click "Program". Replace that code with the following code to ask the user questions, and collect their input. Using Autopilot's built-in Field Types, this Slackbot will expect certain types of responses from the user. Then it will ask them to try again if they send an answer that is not a first name, number, city, etc., depending on what is expected of the answer they are on.
{
    "actions": [
                {
                        "collect": {
                                "name": "event_sponsorship",
                                "questions": [
                                        {
                                                "question": {
                                                        "say": "What is the event name?"
                                                },
                                                "name": "event_name"
                                        },
                                        {
                                                "question": {
                                                        "say": "What evangelist would you like there?"
                                                },
                                                "name": "devangel_name",
                                                "type": "Twilio.FIRST_NAME"
                                        },
                                        {
                                                "question": {
                                                        "say": "What's your email?"
                                                },
                                                "name": "user_email",
                                                "type": "Twilio.EMAIL"
                                        },
                                        {
                                                "question": {
                                                        "say": "What is the event start date?"
                                                },
                                                "name": "event_start_date",
                                                "type": "Twilio.DATE"
                                        },
                                        {
                                                "question": {
                                                        "say": "What city is the event located?"
                                                },
                                                "name": "event_location",
                                                "type": "Twilio.CITY"
                                        },
                                        {
                                                "question": {
                                                        "say": "What is the anticipated number of developers?"
                                                },
                                                "name": "anticipated_developers_num",
                                                "type": "Twilio.NUMBER"
                                        },
                                        {
                                                "question": {
                                                        "say": "Will there be alcohol at the event?"
                                                },
                                                "name": "alcohol",
                                                "type": "Twilio.YES_NO"
                                        }
                                ],
                                "on_complete": {
                                        "redirect": "task://hello_world"
                                }
                        }
                }
        ]
}
Click "Save". In part two of this blog series, the Slackbot will respond differently after saving the input to a MongoDB database. For now, the Slackbot will redirect to the Hello_world task, starting over. You can customize the text in that task to relate to your Slackbot.
Now you can add multiple training samples at once to trigger the "event_sponsorship" task. Back on the Task List, click the "Train" button near the right and then the "Expand" button below to let you paste multiple lines at once.

For this tutorial, you can use the samples below or some of your own! Capitalization should not matter here.
help
support this event
i want to sponsor an event
i have an event i want sponsored
let's sponsor this event
could we sponsor this conference
sponsor this meetup
sponsor a hackathon
how can we support this event
i'd like to support this event
You should have at least ten samples for each task so your Assistant has enough data to properly map user input to the task. Now click the red plus button on the right.
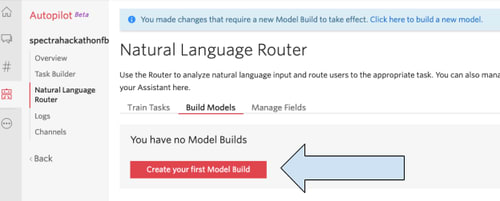
After making all these changes to the Autopilot Assistant we need to create a new model. Go to the Build Models tab under the Natural Language Router and create a new Model Build with a name like "v0.1".
Now test the bot and see that it will ask you to send in the correct input if it expects, say, a number or a date or a "yes/no" answer.
What's Next
Yes, it really is that easy to build a Slackbot with Twilio Autopilot. Stay tuned for the next blog post on collecting form responses via Slackbot with Twilio Autopilot, Functions, and MongoDB. Let me know what kind of Slackbot you want to build in the comments or online!

- Email: lsiegle@twilio.com
- Twitter: @lizziepika
- GitHub: elizabethsiegle

Top comments (0)