Using Scalable Vector Graphics (SVG's) when building your web apps has some major benefits when compared to other graphic types!
Incredibly responsive:
If you've ever spent time battling with making a pretty little graphic look perfect on all screen sizes, I feel you. SVGs are incredibly responsive because they are resolution-independent, meaning, unlike other file types (JPG, PNG, etc), SVG's can scale to any dimension without losing quality. Browsers just recalculate the math behind the image so that it won't get blurry.
Raster images, on the other hand, can get blurry when we make them bigger because their small pixels are forced to stretch beyond their original size.
Super performant:
When we use PNGs and JPGs, we're usually dealing with some really hefty file sizes. SVG's, on the other hand, are just code, so if optimized properly, they can have very small file sizes making your web app lightning fast!
You can even take that speed a step further by swapping out your graphic for an inline SVG, reducing the number of HTTP requests being made.
Beautifully animated:
Because SVG's can move smoothly and freely, all while maintaining their perfect quality, we're able to make them dance around the page in ways that can help really tell a story and engage our users like never before!
Over the next 9 weeks, my pals and I are diving into learning more about SVG animation, but let's start with the basics of how to even create an SVG!
Creating an SVG
If you're going to build a really complex SVG, it's a good idea to use a drawing app that will allow you to export the SVG. But, really, it's all just code, so let's take a look at a really basic example!
1) Start with your root SVG element:
<svg></svg>
2) Then we need to give the SVG viewport it's height and width
<svg width="450px" height="100px">
</svg>
At this point, the SVG's canvas dimensions are the exact same as the viewport dimensions we defined.
3) Once we've got our SVG viewport created, we can start making it look pretty. Let's add a shape!
There are a number of predefined shape elements, but let's just test out a rectangle for now.
- Start by using the
rect(rectangle) element. - Then we need to tell it where on the SVG canvas it should start so we give it
xandycoordinates. - Give it some shape by defining the
widthandheight. - And finally add some style!
<svg width="450px" height="100px" viewBox="0 0 450 100">
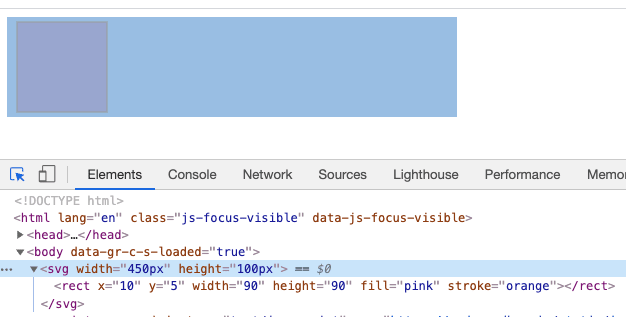
  <rect x="10" y="5" width="90" height="90" fill="pink" stroke="orange" />
</svg>
At this point, you should have an SVG canvas (450px x 100px) with a square inside it (90 x 90) like this:
Excellent! We've got a nice little square, but there is so much more we can do here.
Up next we will take a look at how to scale SVG's with the viewBox attribute. Stay tuned!


Top comments (3)
Thanks
This is great Stacie.
I always love using SVG icons.
Thanks for sharing 🌟💯
🎉🎉🎉 I love this Stacie! Thank you for sharing! 🎉🎉🎉