Abstract
By the end of this tutorial, you will be able to use Tencent Cloud IM TUIKit to integrate the Chat module to Flutter APP. Tencent Cloud IM Chat is more capable than this, check more information here!
What is Tencent Cloud IM In-App Chat for Flutter?
Tencent Cloud IM provides Chat API for apps on Flutter. It integrates diverse chat capabilities such as one-to-one chat, group chat, chat room, and system notification into its SDKs.
Moreover, its TUIkit library contains complex UI components and relative business logic, helps you integrate In-App chat to your Flutter App easily and quickly.
Choosing Tencent Cloud IM can bring you and your customers closer together.
The Solutions of Integrating Tencent Cloud IM Chat for Flutter
There are three solutions to integrate Tencent Cloud IM Chat to your Flutter apps, including modifying the DEMO, using TUIKit, and invoke the SDK API directly.
Solution & Scenario
Chat DEMO: IM DEMO is a complete chat app. The code isopen source. If you need to implement a similar scene, you can do secondary development based on it. Here is the DEMO.
TUIKit library with UI components and business logic: TUIKit library provides universal UI components, such as conversation list, chat , and contact list, etc. You can quickly build the In-App chat module with your actual business needs based on it. It is recommended to use as priority.
Invoke SDK API and self-implementing UI: If the UI of TUIKit cannot meet your business needs, or you need more customization, this solution could be your option.
This tutorial will introduce how to implement the In-App Chat module with the second solution, TUIKit.
Environment Requirements
Platform & Version
Flutter: Flutter 2.8.1 or later.
Android: Android Studio 3.5 or later; API 21 (Android 5.0) or late for apps.
iOS: Xcode 11.0 or later. Ensure that your project has a valid developer signature.
Prerequisites
You have signed up for a Tencent Cloud account and completed identity verification.
Created a Chat application, and get the
SDKAppID. Ref: Creating and Upgrading an Application | Tencent Cloud
Start Integration
Step 1: Create two accounts for testing
Log in to the IM console.
Select Auxiliary Tools > UserSig Generation and Verification on the left sidebar. Generate two pairs of "UserID" and the corresponding "UserSig", and copy the "key" information.
Tips: You may create "user1" and "user2" here.

Step 2: Load TUIKit library for Flutter
It's unnecessary to install the IM SDK manually, as TUIKit also convers it.
Please execute this command in Terminal on your Flutter project.
flutter pub add tim_ui_kit
Step 3: Initialize and log in
Initialize
Initialize the TUIKit after you app starts.
Get the instance of TUIKit first by "TIMUIKitCore.getInstance()", followed by initializing it, "init()", with your "sdkAppID".
/// main.dart
import 'package:tim_ui_kit/tim_ui_kit.dart';
final CoreServicesImpl _coreInstance = TIMUIKitCore.getInstance();
@override
void initState() {
_coreInstance.init(
sdkAppID: 0, // Replace 0 with the SDKAppID of your IM application
loglevel: LogLevelEnum.V2TIM_LOG_DEBUG,
listener: V2TimSDKListener());
super.initState();
}
}
Log in testing account
Now, you can log in one of the testing accounts, generated on Step 1, to start the IM module.
Log in by "_coreInstance.login" .
import 'package:tim_ui_kit/tim_ui_kit.dart';
final CoreServicesImpl _coreInstance = TIMUIKitCore.getInstance();
_coreInstance.login(userID: userID, userSig: userSig);
Caveat: Importing UserSig to your application is ONLY for Debugging purposes and cannot be applied for the Release version. Before publishing your app, you should generate your UserSig from your server. Refers to: Generating UserSig | Tencent Cloud
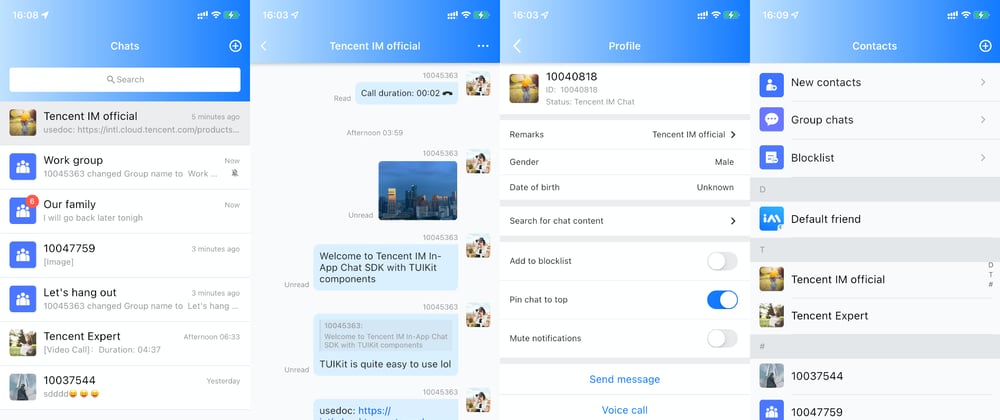
Step 4: Implementing conversation list page
You can take the conversation (channel) list page as the homepage of your Chat module, covering the conversation with all users and groups that have chat records.
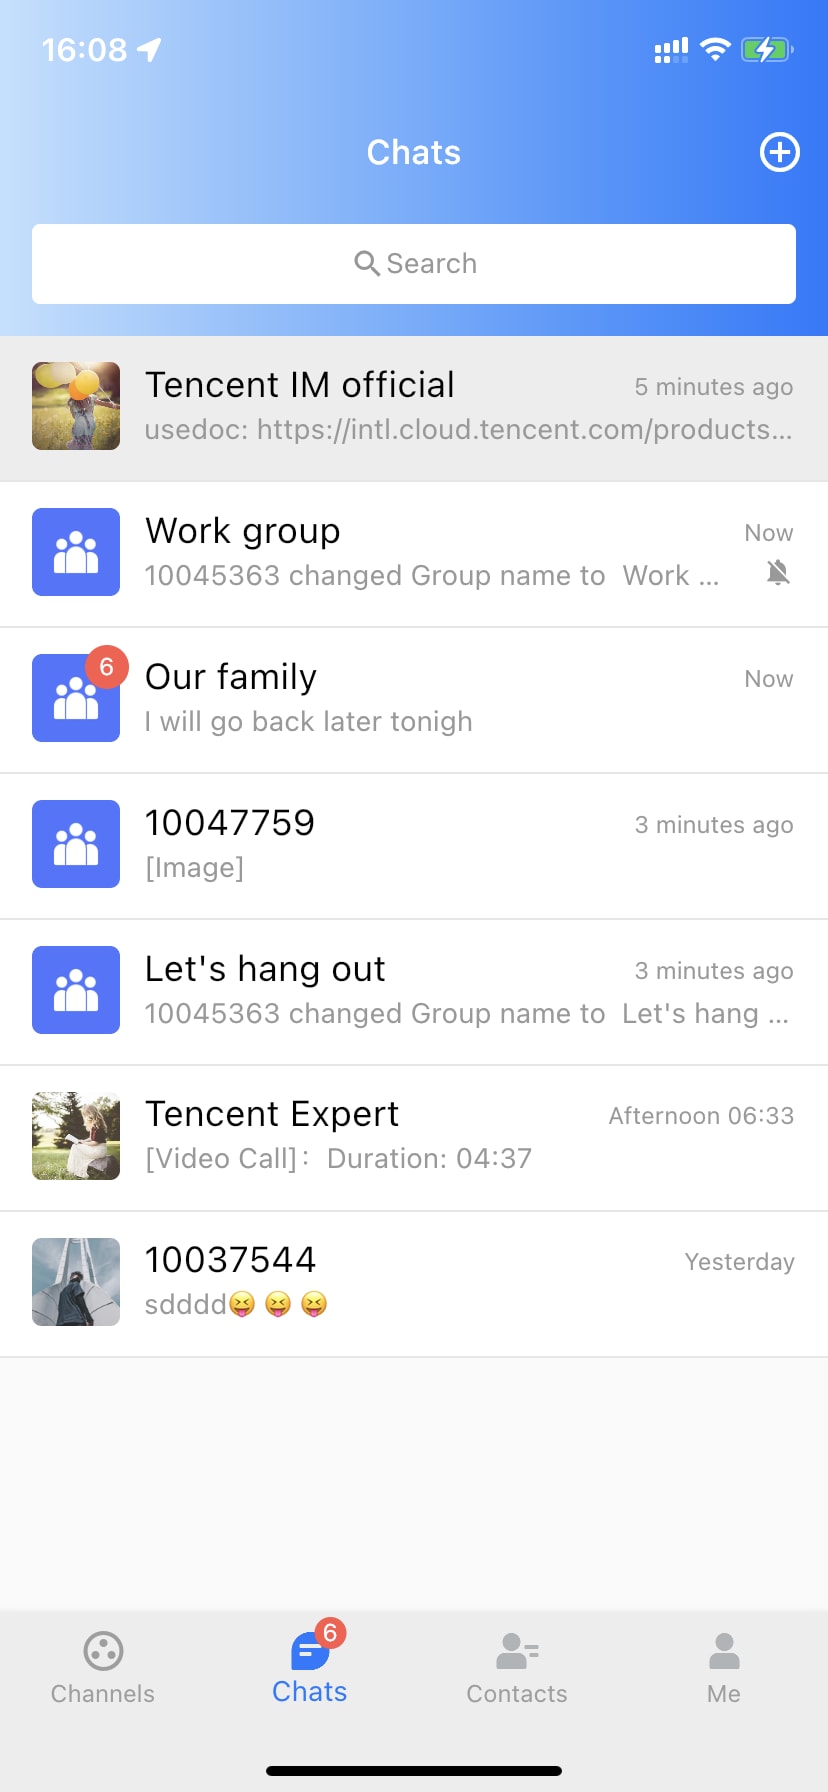
You can create a "Conversation" class, with "TIMUIKitConversation" on its "body", to render the conversation list.
The only parameter you need to provide at least is "onTapItem" callback, aimed at navigating to the Chat page for each conversation. The "Chat" class will be introduced in the next step.
import 'package:flutter/material.dart';
import 'package:tim_ui_kit/tim_ui_kit.dart';
class Conversation extends StatelessWidget {
const Conversation({Key? key}) : super(key: key);
@override
Widget build(BuildContext context) {
return Scaffold(
appBar: AppBar(
title: const Text(
"Message",
style: TextStyle(color: Colors.black),
),
),
body: TIMUIKitConversation(
onTapItem: (selectedConv) {
Navigator.push(
context,
MaterialPageRoute(
builder: (context) => Chat(
selectedConversation: selectedConv,
),
));
},
),
);
}
}
Step 5: Implementing chat page
The chat page is composed of the main historical message list and a message sending bar at the bottom.

You can create a "Chat" class, with "TIMUIKitChat" on its "body", to render the chat page.
It is recommended to provide a "onTapAvatar" callback function, for navigating to the profile page for current contact, which will be introduced in the next step.
import 'package:flutter/material.dart';
import 'package:tim_ui_kit/tim_ui_kit.dart';
class Chat extends StatelessWidget {
final V2TimConversation selectedConversation;
const Chat({Key? key, required this.selectedConversation}) : super(key: key);
String? getConvID() {
return selectedConversation.type == 1
? selectedConversation.userID
: selectedConversation.groupID;
}
@override
Widget build(BuildContext context) {
return TIMUIKitChat(
conversationID: _getConvID() ?? '', // groupID or UserID
conversationType: selectedConversation.type ?? 1, // Conversation type
conversationShowName: selectedConversation.showName ?? "", // Conversation display name
onTapAvatar: () {
Navigator.push(
context,
MaterialPageRoute(
builder: (context) => UserProfile(userID: userID),
));
}, // Callback for the clicking of the message sender profile photo. This callback can be used with TIMUIKitProfile.
);
}
Step 6: Implementing profile page
This page can show the profile of a specific user and maintain the relationship between the current login user and it.
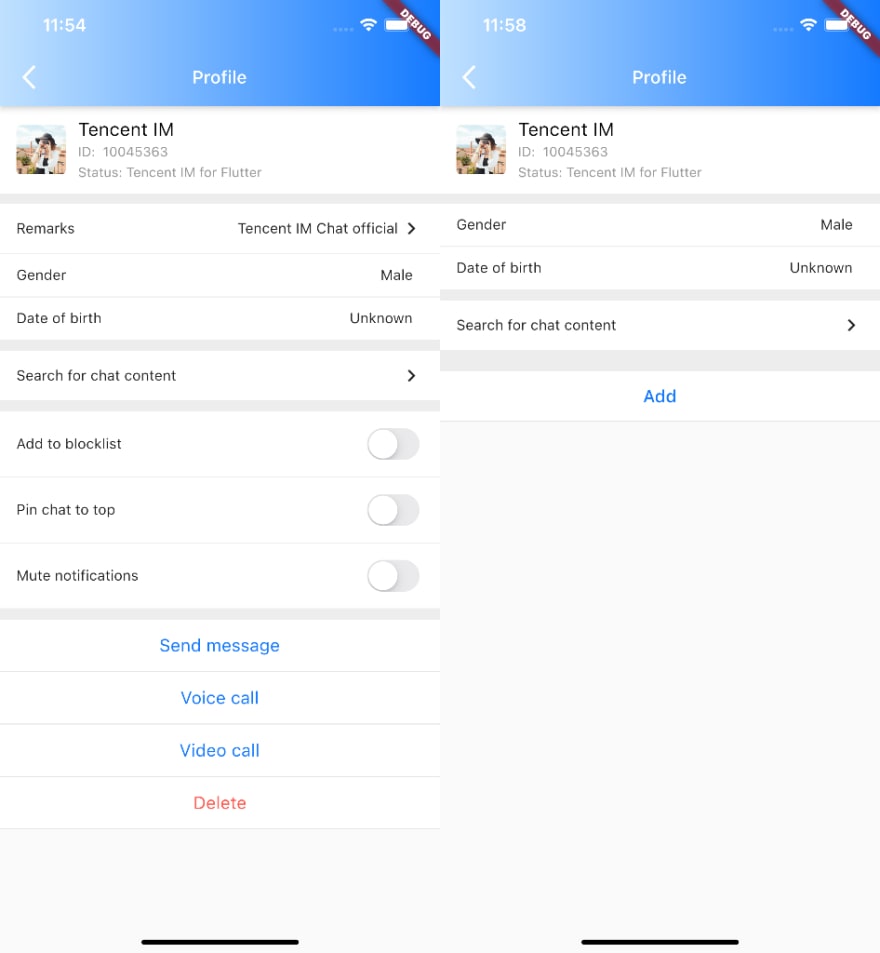
ere, you can create a "UserProfile" class, with "TIMUIKitProfile" on its "body", to render the profile page.
The only parameter you have to provide at least is "userID", while this component can generate the profile and relationship maintenance page based on the existence of friendship automatically.
TIPS: Please give priority to use "profileWidgetBuilder", to customize some profile widgets, with "profileWidgetsOrder", determine the vertical sequence, if you tend to customize this page. If this method could not meet your business needs, you may consider using "builder" instead.
iimport 'package:flutter/material.dart';
import 'package:tim_ui_kit/tim_ui_kit.dart';
class UserProfile extends StatelessWidget {
final String userID;
const UserProfile({required this.userID, Key? key}) : super(key: key);
@override
Widget build(BuildContext context) {
return Scaffold(
appBar: AppBar(
title: const Text(
"Message",
style: TextStyle(color: Colors.black),
),
),
body: TIMUIKitProfile(
userID: widget.userID,
),
);
}
}
Now, your app can send/receive messages, show the conversation list, and deal with the contact friendship.
Futhermore
You can use the following components from TUIKit continually to implement the complete IM function quickly and easily.
[TIMUIKitContact]: The contact list page shows the contacts and friends list of a specific user.
[TIMUIKitGroupProfile]: The group profile page, the integrating is basically the same as "TIMUIKitProfile".
[TIMUIKitGroup]: Lists all the group of the specific user.
[TIMUIKitBlackList]: The list contains blocked users.
[TIMUIKitNewContact]: Lists the new contacts applications by other users.
[TIMUIKitSearch]: The search page supports searching contacts, groups, chat records both globally and in specific conversation.
That's all you need to do to integrate the chat module to your Flutter apps.
Hopefully the In-App chat module can help bring you and your customers closer together.
Find out more at: https://www.tencentcloud.com/dynamic/blogs/sample-article/100304


Top comments (0)