products versions - {webMethods Integration 10.15 and above}
Introduction
We are pleased to announce that we have a new delivery channel for our software, to make it easier for both developers and operations to install and update features into their integration servers.
wpm is a new command line interface tool (CLI) that allows both developers and operations to download and install webMethods packages into either an Integration Server or Microservices runtime. It will allow you to better leverage our base images via our container registry and customise them to include both Software AG modules such as the JDBC adapter, but also to deploy your own custom packages. The only requirement is that you adopt GitHub repositories to version control your packages.

You will no longer need Installer or Update Manager and instead use a simple Dockerfile to build your custom container containing all of the packages and configuration required to implement your service(s) or API. An update to the base image to include a new feature or fix becomes available ? Simply rebuild via your Dockerfile. Want to deploy a new version of your API or service ? Just re-run the Dockerfile again.
wpm is baked into our 11.0 image and can easily be added to our older images. It it is an integral part of our new unified platform and deployment model, see What is Develop Anywhere, Deploy Anywhere?.
wpm also allows developers to collaborate and share packages more easily via a central package registry, either Software AG’s official registry at https://packages.softwareag.com or your own private registry.
In this article we will explain how to use wpm standalone to update your local development environment and also the steps to create a custom image from our base image to include your required packages.
Packages are fundamental to webMethods integration and represent the principal deployment method for both customer code and Software AG licensed modules. You can find out more about packages from this tech article that I wrote in the past “A word about packages”
Pre-requisites
- wpm.zip cli tools to allow you generate the required Dockerfiles(s).
- GitHub account to allow you to pull packages without rate limiting.
- Empower account that allows you to download Software AG licensed packages.
- Service Designer so that you can develop your own packages.
- git - Git client of your choice installed locally on your computer.
Steps to follow
The following section will step through the actions to get you up and running with wpm to bundle both Software AG packages and your own into an Integration Server running locally and also how to create a static image for container deployment. However, it doesn’t replace our documentation, nor will it detail all of the available functionality. Please refer to our documentation centre for more detailed information.
Download Service Designer & wpm.
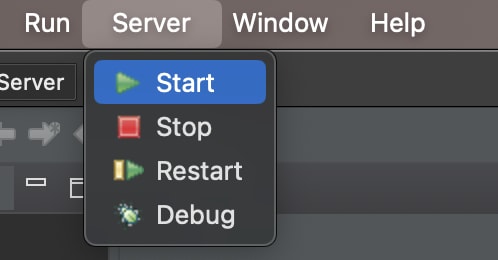
First download Service Designer locally and unzip it, run the setup script and launch it. From the Server menu click on “Run” to startup your local design time server.
It should only take about a 12 seconds to start, refer to the console to check if it has started correctly

You can now connect your Designer to the server via the package navigator and start building packages.
Download wpm.zip (13.4 MB) and unzip somewhere on your machine. I would recommend that you unzip it into you Service Designer folder. To configure it open the setenv.sh or setenv.bat file in your text editor of choice.

Check that the JRE_HOME is not commented out and that it points to a valid jvm directory. You can use the JRE bundled with your Service Designer if using 10.11 or above (In which case replace the ‘opt/softwareag’ with the path to your wMServiceDesigner folder). If using an older version then you will have to install your own JRE as the webMethods version will be too old to be compatible with wpm.
Refer to the page Guide to Download and Install webMethods Service Designer in our tech community for more help about using this tool.
Get to know wpm.
After configuring your environment check that the wpm cli tool works by typing wpm without any arguments on the command line;
$ wpm
(wpm) code: 3 severity: INFO, message: wpm requires at least 1 argument.
Welcome to wpm - the webMethods Package Manager!

A list of commands:

install - download specified packages into the target installation
remove - remove specified packages from the target installation
update - update specified packages to the latest version
clean - clean up specified repositories or all the repositories in the working dir

A list of arguments:

-d - path to the target IS installation - required for install and update commands if it is not defined in the wpm.yml and not the same installation path as where wpm is installed
-u - username for repo connection - required for install and update commands that require authenticated access with basic authentication if the repo and the repo username are not defined in the wpm.yml
-p - password or passphrase for repo connection - required for install and update commands that require authenticated access with basic or private key authentication if the repo and the repo password or passphrase are not defined in the wpm.yml
-k - private key file path - required for install and update commands that require authenticated access with private key authentication if the repo and its private key are not defined in the wpm.yml
-r - Repo URL - required for install and update commands
-j - jwt token - optional, only required for install and update commands with token based authorization
-sb - scan branches - optional, by default is true
-kr - keep the local repository - optional, by default is false
-ws - location of the package registry server, like https://packages.softwareag.com
-wr - name of the registry on the package registry server, e.g. softwareag
The command you will most often use is install, which will allow you to pull a package from a git repository and move it into the package directory of your local Integration Server, which would normally require that you specify a range of switches when entering the command to let wpm know where your target server is located etc.
To simplify this, let’s introduce you to the wpm.yml file in the root folder of wpm. This file allows you to preconfigure the tool to avoid overloading the command every time you type it in. For instance we can use this file to specify where your local IS/MSR resides, rather than using the -d switch every time you enter the command.

Edit the reference to target_installation to point to the directory containing your packages directory, in the case of an Microservices Runtime (MSR) that will be the IntegrationServer folder. If configuring wpm to work with Integration Server reference the correct instance, normally default.
Installing an official Software AG package
First let’s look at how we can install an official Software AG package from the Software AG registry at https://packages.softwareag.com.
Go to the above site and login using your empower credentials. Once logged in you will see a list of the official packages that we have made available and for which you are licensed.
Click on your profile icon in the top right hand corner and click on settings. From here you can generate a token that you can use with the wpm command to download licensed packages. The label will allow you to reference the token if you want to revoke it later or understand the impact when it expires.
You can now use this token with wpm to update the JDBC Adapter in your service Designer to the latest version including all the latest fixes e.g.
$ wpm update -ws https://packages.softwareag.com -wr softwareag -j <PASTE_TOKEN_HERE> WmJDBCAdapter
(wpm) code: 7 severity: INFO, message: wpm update starting
(wpm) code: 9 severity: INFO, message: Update result: Time spent cloning repository wpm-ssh from git@github.com:wm-packages: 5567
(wpm) code: 9 severity: INFO, message: Update result: Time spent determining version to pull (result - 10.3.0.20): 25
(wpm) code: 9 severity: INFO, message: Update result: Time spent checking out version v10.3.0.20: 800
(wpm) code: 9 severity: INFO, message: Update result: Package does not indicate a minimum required runtime version. Proceeding with the operation.
(wpm) code: 9 severity: INFO, message: Update result: Time spent copying repo to /Applications/SoftwareAG/11.0/IntegrationServer/packages/WmJDBCAdapter: 2819
(wpm) code: 9 severity: INFO, message: Update result: Package WmJDBCAdapter successfully updated (version v10.3.0.20).
(wpm) code: 32 severity: INFO, message: cleaning result: Removed working dir of repository wpm successfully.
You will then need to restart your Integration Server in order for the new package to appear.
Version control with wpm
You can specify what version of a package that you want to download via the wpm command, by default it will always try to download the latest available version. Official Software AG packages are versioned according to released features and fixes.

If you need to install or update to a specified version, simply append to the end of the package name separated by a colon ‘:’ e.g.
$ wpm update -ws https://packages.softwareag.com -wr softwareag -j <PASTE_TOKEN_HERE> WmJDBCAdapter:v10.3.0.20
Create a new package and get it into GitHub
Importantly you can use wpm to install or update your own packages, the first step is to get your package into a GitHub repository so that wpm can reference it. To do rthis you will need access to the packages folder of your local development environment and a GitHub account.
First, in GitHub create a new git repository and name it the same as your package and do not initialize it with a README as the repository will need to be empty. After creation, you should see something like the following

You can follow the instructions other than the “add” command, but first make sure that you are at the root level of your package, before running the commands
$ cd <SAG_HOME>/IntegrationServer/packages/MyGreatPackage
$ git init
$ git add .
$ git commit -S -m "Moving my package to a git repo for the first time!"
$ git branch -M main
$ git remote add origin https://github.com/............
$ git push -u origin main
The -S option on the commit command ensures that the update is cryptographically signed, but will require that you have shared a GPG key/pair with your git account (Github docs on signing commits). You can remove it if you haven’t done this, but I would recommend configuring it especially if you want to share the package with the outside world as it will allow you to verify the version and reassure the developers who want to use your package.
Once done reload the web page and you will see that the commands have been replaced with your package contents.

You will notice that in the above screenshot, the package is documented thanks to the included README.md file. As of webMethods 10.15 a README.md file is created automatically when creating a new package and we would recommend that you regularly update this file to help other developers better use your package. For packages created with older versions of webMethods just create the file manually beforehand.
Pull your own custom package directly via git information
Now that you have your package in a git repo you can also install it into another environment via wpm and you do not need to register it with a package registry, as wpm can reference your git details directly e.g.
$ wpm install -u johnpcarter -p <DEVELOPER_ACCESS_TOKEN> -r https://github.com/<GIT_ID> MyGreatPackage
The user and password are your git id and a developer access token that you have generated. The URL should only include the namespace up to your user id or organisation. The package name is still specified as a separate input and will be appended to the URL to locate the correct git repository.
As before if you want to download a specific version then you should either create a new branch or create a tagged release. In either case you can specify the branch or tag by appending it to the package name as before e.g.
$ wpm install -u johnpcarter -p <DEVELOPER_ACCESS_TOKEN> -r https://github.com/<GIT_ID> MyGreatPackage:main
In a future article I will discuss how you can set up your own private package registry to avoid having to reference git specific details to your install you packages.
Using wpm to build an image
One of the main drivers to introduce wpm is to ensure that you can easily leverage our pre-built images that you can find at https://containers.softwareag.com
Our Microservices Runtime container is stripped back to be the bare-bones of our integration runtime. You will need to add both the optional features provided by us as well as your own packages.
Bake wpm into the microservices runtime image
Let’s first add wpm to the base image so that we can then use it from within a Dockerfile to add packages. Copy the following text into a file named Dockerfile.
FROM sagcr.azurecr.io/webmethods-microservicesruntime:10.15

ADD --chown=sagadmin:sagadmin wpm /opt/softwareag/wpm
ENV PATH=/opt/softwareag/wpm/bin:$PATH
Then build your derived image e.g.
$ docker build -t webmethods-microservicesruntime-wpm:10.15 .
Bake your packages in via wpm
Now you can create a Dockerfile that references the above image and use wpm to install packages e.g.
FROM sagcr.azurecr.io/webmethods-microservicesruntime-wpm:10.15

WORKDIR /opt/softwareag/wpm

RUN wpm install -ws https://packages.softwareag.com -wr softwareag -j <WPM_ACCESS_TOKEN> WmJDBCAdapter
RUN wpm install -u johndoe -p <GIT_TOKEN> -r https://github.com/johndoe MyGreatPackage

WORKDIR /
Here we see an example to add both the Software AG database adapter and a custom package to the base image.
Next steps
- Setup your own private package registry to make developer collaboration easier.
- Start reusing your packages in webMethods.io Integration with Develop anywhere, Deploy anywhere
- learn how to use git.
Useful links | Relevant resources
Guidelines for developing packages - webMethods packages from a developers perspective
Download the latest version of Service Designer - here
Check out our available packages - Software AG package registry
Learn more about version control with git - Git tutorial


Top comments (0)