
What is this article all about 🔎
Writing games is both a uniquely challenging and rewarding endeavour, a great way to improve you're analytical skills, and the fruits of a well written game are well..

This article is part of a series in which I'd like to showcase steps to create a browser based online mulitplayer game using free and opensource api's. I'll assume that the reader is somewhat familiar with Typescript and Babylonjs the realtime 3d game engine. But I will try to explain what the code does as necessary. Also, all of the code will be available in Stackblitz where you can follow along or just run the code without the need to install any tools.
Ok, enough jibber jabber. We're here to make games. 👊 Today we'll work on a remake of the well known game of chess. We'll make it multiplayer such that anyone with a link can join, and we'll spice things up by making it into a 2 - 4 player game, we'll also get rid of the turn based system because, why not?

For those who need to see the game in action first, I don't blame you, you can see the live version of the final game here:
![]()
1. Getting started 🚀
In order to follow along the only thing you'll need is a web browser. We'll be doing using stackblitz, an incredible browser based IDE based on VS Code, that will allow us to write, compile and debug our game, and I'll also provide links to key steps as we progress.
Navigate to stackblitz and start a New Project based on the Blank Nodejs template.
Once the template load, open up the Terminal Window, and execute the following commands:
npm i @frakas/cli
npx frakas init
npx frakas serve
These should take a moment to run, and once complete you should see the following:

Stackblitz
2. Add game resources 🪨🪵🪓
For the chess board, we'll use some royalty free images courtesy of pexels


Next we'll need some 3d chess pieces. This royalty free collection from Turbosquid looks great:
https://www.turbosquid.com/3d-models/chess-pieces-3d-model-1502330.

The file format of this file is .fbx, in order to make this play nicely with Babylonjs we'll need to convert the format to .glb. This can be done using Blender. However since blender is out of scope for this tutorial, you can obtain a copy of this resource from my github repo here:
https://raw.githubusercontent.com/teamhitori/chess-royale/main/raw/chess.glb
Let's add these to our game.
Open up src/frontend.ts, delete the contents and add the following imports:
import {
  Engine,
  Scene,
  Vector3,
  HemisphericLight,
  ShadowGenerator,
  PointLight,
  MeshBuilder,
  StandardMaterial,
  ArcRotateCamera,
  Matrix,
  Color3,
  AssetContainer,
  SceneLoader,
  Texture,
  AbstractMesh,
  InstantiatedEntries,
  TransformNode,
} from 'babylonjs';
import { createFrontend, FrontendTopic } from '@frakas/api/public';
import { PlayerEvent } from './shared';
import { LogLevel } from '@frakas/api/utils/LogLevel';
import { filter, tap } from 'rxjs';
import 'babylonjs-loaders';
Next add the following variables, enums, and interfaces that will help us structure our game.
const squareSize = 1;
const gridWidth = 12;
const halfGridWidth = gridWidth / 2;

enum PlayerSide {
  top = 0,
  left = 1,
  bottom = 2,
  right = 3
}

enum PieceType {
  pawn,
  knight,
  bishop,
  tower,
  queen,
  king
}

enum AliveState {
  alive,
  dead
}

interface PlayerPiece {
  pieceName: string
  pieceType: PieceType;
  gridPosition: number,
  aliveState: AliveState,
  isFirstMove: boolean
}

interface Player {
  aliveState: AliveState,
  playerSide: PlayerSide,
  playerName: string,
  pieces: { [name: string]: PlayerPiece },
}
First we're defining some constants to do with the chess grid, each block will be unit 1 size, and the grid will have a width of 12 units. We the define some useful enumerations for the player side, type of chess piece and whether the piece is alive or dead.
We then define the properties of a Player piece which are hopefully self explanatory. We then define the properties of a player who basically has a side, a name, a collection of chess pieces, and is either alive or dead. Next lets add the Babylonjs game engine code.
// HTML Canvas used by Babylonjs to project game scene
var canvas = document.getElementById('renderCanvas') as HTMLCanvasElement;

// Load the 3D engine
var engine = new Engine(canvas, true, {
  preserveDrawingBuffer: true,
  stencil: true,
});

// This creates a basic Babylon Scene object (non-mesh)
var scene = new Scene(engine);

// This creates an arcRotate camera
var camera = new ArcRotateCamera(
  'camera',
  BABYLON.Tools.ToRadians(0),
  BABYLON.Tools.ToRadians(10),
  16,
  new Vector3(halfGridWidth, 0, halfGridWidth - 0.5),
  scene
);
camera.minZ = 0.1;
camera.wheelPrecision = 80;
camera.pinchPrecision = 30;
camera.angularSensibilityX = 6000;
camera.angularSensibilityY = 6000;
camera.upperBetaLimit = BABYLON.Tools.ToRadians(80);
camera.lowerRadiusLimit = 5;
camera.upperRadiusLimit = 30;

// This attaches the camera to the canvas
camera.attachControl(canvas, true);

// This attaches the camera to the canvas
camera.attachControl(canvas, true);

// This creates a light, aiming 0,1,0 - to the sky (non-mesh)
var lightH = new HemisphericLight('light1', new Vector3(0, 1, 0), scene);

// Default intensity is 1. Let's dim the light a small amount
lightH.intensity = 0.7;

var light = new PointLight('point-light', new Vector3(3, 3, -3), scene);
light.position = new Vector3(3, 10, 3);
light.intensity = 0.5;

// Babylonjs render loop
engine.runRenderLoop(() => {
  scene?.render();
});
Here we've added some boilerplate babylonjs setup along with useful variables for our game. We've added the Babylon Engine, Scene, a Camera a Hemispheric Light and a Point Light. Finally we've called the engine render loop and added a call to scene?.render();
Refresh the preview screen at this stage and our code should compile, but we will be presented with a dark scene as we have not added any physical objects yet. Lets do that now.
// Babylonjs built-in 'ground' shape. Params: name, options, scene
var ground = MeshBuilder.CreateBox('table', {
  width: gridWidth + 1,
  depth: gridWidth + 1,
  height: 1,
}); //MeshBuilder.CreateGround("ground", { width: gridWidth, height: gridWidth }, scene);
var groundMaterial = new StandardMaterial('groundMaterial', scene);
groundMaterial.diffuseTexture = new Texture(
  `https://images.pexels.com/photos/172276/pexels-photo-172276.jpeg?auto=compress&cs=tinysrgb&w=1260&h=750&dpr=1`
);
ground.material = groundMaterial;
ground.receiveShadows = true;
ground.position = new Vector3(
  halfGridWidth - squareSize / 2,
  0,
  halfGridWidth - squareSize / 2
);

var shadowGenerator = new ShadowGenerator(1024, light);
shadowGenerator.useExponentialShadowMap = true;
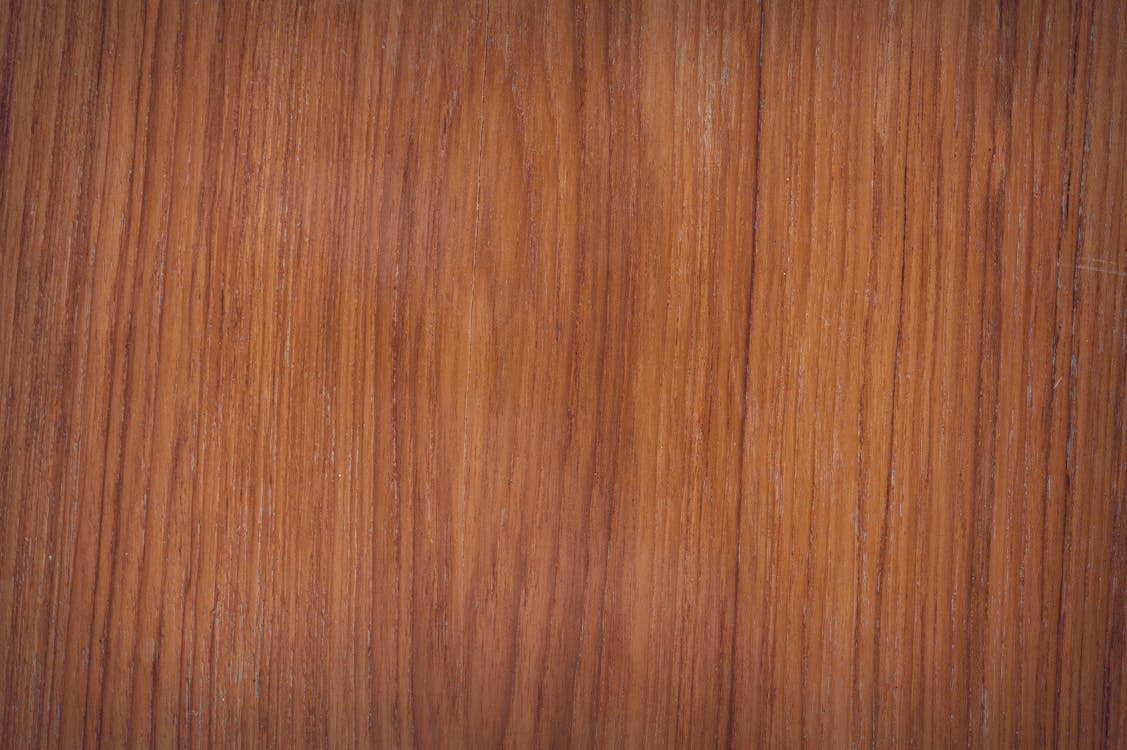
You should now see the following wooden table top rendered, and you should be able to rotate and zoom the camera using your mouse or touch screen.

Next we'll add our chess grid. Since this is an upto 4 player game, we'll need a grid bigger than 8x8, lets go for 12x12.
for (let index = 0; index < gridWidth * gridWidth; index++) {
  var block = MeshBuilder.CreateBox(`block`, {
    width: 0.85,
    height: 0.1,
    depth: 0.85,
  });
  block.id = `${index}`;

  var blockMaterial = new StandardMaterial('groundMaterial', scene);
  var blockTexture = new Texture(
    `https://images.pexels.com/photos/2824173/pexels-photo-2824173.jpeg?auto=compress&cs=tinysrgb&w=1260&h=750&dpr=1`
  );
  blockTexture.vScale = 1 / 10;
  blockTexture.uScale = 1 / 10;
  blockTexture.uOffset = Math.random();
  blockTexture.vOffset = Math.random();
  var defaultPosition = new Vector3(
    Math.floor(index / gridWidth),
    0.55,
    index % gridWidth
  );
  blockMaterial.diffuseTexture = blockTexture;
  block.material = blockMaterial;
  block.receiveShadows = true;
  block.position = defaultPosition;
}
Here we're looping through the 12x12 grid and creating blocks using a random part of our stone texture. We should now see the following:
 => {
SceneLoader.LoadAssetContainer(
'https://chess-royale.frakas.net/assets/',
'chess.glb',
scene,
(container) => {
container.addAllToScene();
for (const g of container.geometries) {
g.meshes[0].isVisible = false;
}
resolve(container);
}
);
});
var chessPieces = assetContainer.instantiateModelsToScene(
(name) => `chess-pieces`,
true,
{ doNotInstantiate: true }
);
We create a babylon asset container to manage loading the chess.glb files, note that these file are being pulled from https://chess-royale.frakas.net. I've made this resource available here as github does not allow CORS for *.glb files, and you will see an error when trying to run from Stackblitz. Alternatively if you're working in VSCode, you can reference the files directly. Next add the following functions:
function roatate(
  gridPosition: number,
  count: number,
  isClockwise: boolean
): number {
  var gridSize = gridWidth * gridWidth;

  for (let index = 0; index < count; index++) {
    var y = Math.floor(gridPosition / gridWidth);
    var x = gridPosition % gridWidth;

    if (isClockwise) {
      gridPosition = x * gridWidth + (gridWidth - 1 - y);
    } else {
      gridPosition = (gridWidth - 1 - x) * gridWidth + y;
    }
  }

  return ((gridPosition % gridSize) + gridSize) % gridSize;
}

function getStartPosition(side: PlayerSide): Player {
  var pieces: { [piece: string]: { type: PieceType; pos: number } } = {
    pawn1: { type: PieceType.pawn, pos: 29 },
    pawn2: { type: PieceType.pawn, pos: 15 },
    pawn3: { type: PieceType.pawn, pos: 16 },
    pawn4: { type: PieceType.pawn, pos: 2 },
    pawn5: { type: PieceType.pawn, pos: 9 },
    pawn6: { type: PieceType.pawn, pos: 19 },
    pawn7: { type: PieceType.pawn, pos: 20 },
    pawn8: { type: PieceType.pawn, pos: 30 },
    tower1: { type: PieceType.tower, pos: 3 },
    tower2: { type: PieceType.tower, pos: 8 },
    knight1: { type: PieceType.knight, pos: 17 },
    knight2: { type: PieceType.knight, pos: 18 },
    bishop1: { type: PieceType.bishop, pos: 4 },
    bishop2: { type: PieceType.bishop, pos: 7 },
    queen: { type: PieceType.queen, pos: 5 },
    king: { type: PieceType.king, pos: 6 },
  };

  var player = <Player>{
    pieces: {},
    playerSide: side,
  };

  for (const pieceName in pieces) {
    var config = pieces[pieceName];

    switch (side) {
      case PlayerSide.top:
        break;
      case PlayerSide.left:
        config.pos = roatate(pieces[pieceName].pos, 1, true);
        break;
      case PlayerSide.bottom:
        config.pos = roatate(pieces[pieceName].pos, 2, true);
        break;
      case PlayerSide.right:
        config.pos = roatate(pieces[pieceName].pos, 3, true);
        break;
    }

    var playerPiece = <PlayerPiece>{
      aliveState: AliveState.alive,
      pieceType: config.type,
      gridPosition: config.pos,
      pieceName: pieceName,
      isFirstMove: true,
    };

    player.pieces[pieceName] = playerPiece;
  }

  return player;
}

function gridToWorld(gridPosition: number): Vector3 {
  return new Vector3(
    -Math.floor(gridPosition / gridWidth),
    0.6,
    gridPosition % gridWidth
  );
}
The first function roatate rotates a grid coordinate vector by 90 degrees, it contains algorithmic logic that I wont devlve too deeply into here other than to point to this stackoverflow on 2d Vector Rotations. We then define a function getStartPosition that based on a playerside enume as input will rotate pieces to find correct start location. We then add a helper function gridToWorld that will map grid positions back to the game world vector location. Next we add 2 more game constants:
const colorMapping: { [playerSide in PlayerSide]: string } = {
  0: '#590696',
  1: '#FBCB0A',
  2: '#37E2D5',
  3: '#C70A80',
};

const pieceTypeMapping: { [piece: string]: PieceType } = {
  pawn1: PieceType.pawn,
  pawn2: PieceType.pawn,
  pawn3: PieceType.pawn,
  pawn4: PieceType.pawn,
  pawn5: PieceType.pawn,
  pawn6: PieceType.pawn,
  pawn7: PieceType.pawn,
  pawn8: PieceType.pawn,
  tower1: PieceType.tower,
  tower2: PieceType.tower,
  knight1: PieceType.knight,
  knight2: PieceType.knight,
  bishop1: PieceType.bishop,
  bishop2: PieceType.bishop,
  queen: PieceType.queen,
  king: PieceType.king,
};
These 2 constants allow us to map a player side to a color, and an player piece to the PieceType as each player will start the game with a fixed set of pieces. Lets get everything on screen finally.
for (var playerSide = 0; playerSide < 4; playerSide++) {
  var player = getStartPosition(+playerSide);
  createNewPlayerMesh(player, chessPieces);
}

function createNewPlayerMesh (player: Player, assets: InstantiatedEntries) {
  var meshes: { [name: string]: TransformNode } = {};
  for (const pieceName in player.pieces) {
    var piece = player.pieces[pieceName];
    const worldPosition = gridToWorld(piece.gridPosition);
    meshes[pieceName] = configureMesh(
      assets.rootNodes[0]
        .getChildMeshes()
        [pieceTypeMapping[pieceName]].clone('', null, false)!!,
      Color3.FromHexString(colorMapping[player.playerSide]),
      worldPosition
    );
  }
};

function configureMesh(mesh: AbstractMesh, color: Color3, position: Vector3){
  var meshMaterial = new StandardMaterial('groundMaterial', scene);
  meshMaterial.diffuseTexture = new Texture(
    `https://images.pexels.com/photos/172276/pexels-photo-172276.jpeg?auto=compress&cs=tinysrgb&w=1260&h=750&dpr=1`
  );
  meshMaterial.diffuseColor = color;
  mesh.material = meshMaterial;
  mesh.position = position;
  mesh.isVisible = true;
  mesh.isPickable = false;
  shadowGenerator.addShadowCaster(mesh);
  return mesh;
};
For each player side we'll call createNewPlayerMesh passing in player configuration. the function calculates the game world location for each player piece and call the function configureMesh which is responsible for adding the mesh to the Bablylonjs Scene so that it is visible to us.
You should now see something similar to the following;

Stackblitz
This completes the initial game setup, and everything I wanted to get to in this tutorial. I really hope you enjoyed, and thank for reading to the end 👏 Please stay tunes for the next article where I will run through adding movement and setting up the backend so that multiple players can complete. Any feedback, would be great to hear from you in the comments!
Have a nice day 🌞

Top comments (0)