
Welcome to the first post in a new series I'm calling Beginner's Guide to Unity.
I created this series for anyone who is interested in learning game development in Unity but isn't sure where to start.
In this article, we will go over the basics of setting up a 2D project and learn about key components of the Unity interface.
Learning Outcomes:
By the end of this article, you will be able to:
- Download and install Unity.
- Create a new 2D project via the Unity Hub.
- Identify the six main components of the Unity interface and explain their purpose.

Downloading Unity
Click the following link to open up the Unity Download webpage in your browser: https://unity3d.com/get-unity/download.
Select Choose your Unity + download.
-
Scroll down until you find the grey box with the heading Unity Personal. Click Get started.

-
Under First-time users , click Start here.

Follow the on-screen instructions to download and install the Unity Editor and Unity Hub (you will need both for this tutorial).
Creating a new project
-
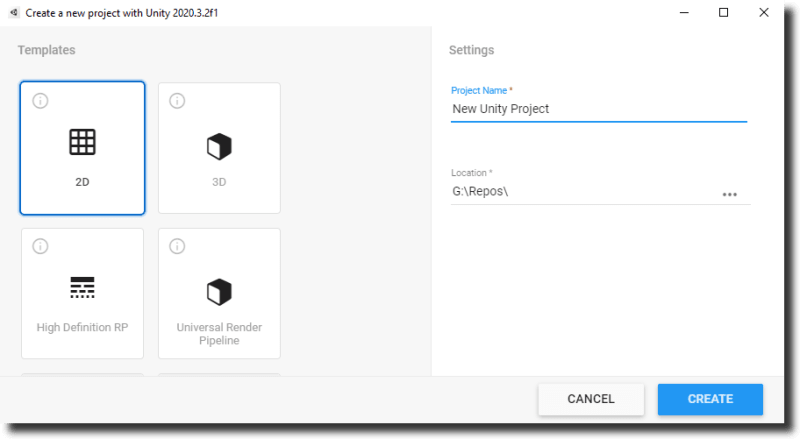
Open up the Unity hub. In the top-right corner, click New to launch the New Project Window. Select 2D under Templates and enter a Project Name and Location. Then click Create.
Wait for Unity to load. This may take a few minutes. Once this process is done, you should see your blank project open in the Unity editor.
Identifying key parts of the UI
There are six main UI components in Unity: the Hierarchy , Project Assets folder, Scene View , Game View , Inspector , and Console. With your blank project open, let's take a few minutes to look at each one of them.
Hierarchy
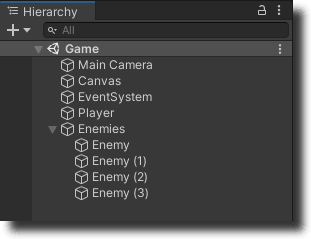
The Hierarchy is located on the left side of the Unity editor. It displays all of the Game Objects which are currently contained within your scene. You can create a new element in the Hierarchy by right-clicking and selecting your desired option. Objects which are deleted from the Hierarchy will no longer be included in your scene.
Project Assets
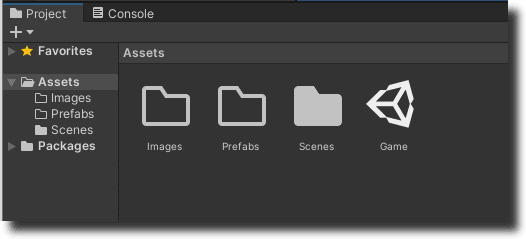
The Project Assets folder is located at the bottom of the Unity editor. Within this folder, you can see all of the assets which are included in your project. These can be assets that you have created, such as images or prefabs, as well as packages that you have downloaded from the Unity Asset Store. Assets which are in this folder are not automatically in your scene and must be added manually.
Scene View

Scene View is where you will do all of your edits. You can move the Scene View window by dragging it and docking it to a different location. You can also toggle between 2D and 3D view at the top of the Scene window.
Game View

Game View displays the game as it currently appears to the player. You cannot make edits in the Game window. Like with Scene View, you can drag the Game View window and dock it to a different location. Changing the camera position in Scene View will change the output in Game View.
Inspector

The Inspector displays characteristics of the currently-selected element either in your Hierarchy or Project Assets folder. This is where you can add components, such as C# scripts, to your Game Objects. You can lock the Inspector on a particular element by clicking the lock icon at the top-right of the Inspector panel.
Console
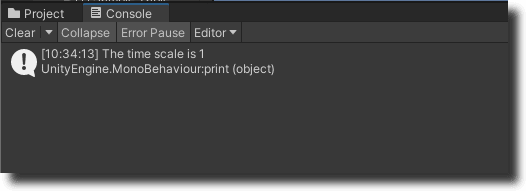
The Console is where debugging occurs in Unity. You can print logs to the Console in your C# scripts using print() or Debug.Log(). The Console displays warnings and errors in your project. You can double-click on them to see where these problems exist in your scripts.
Test Your Knowledge
Let's test your understanding of the material in this article with a few quiz questions.
For each question, answer either True or False.
You cannot make edits to your game in Game View.
The Inspector is where you can view debug messages such as Debug.Log().
To create a new 2D project in Unity, you need a Project Name and Location.
The Hierarchy contains all of your game assets, including those not currently in your scene.
Scene View is where you can toggle between 2D and 3D view.
Answers: T; F; T; F; T;

Top comments (0)