So you followed the "Getting started with Boomi and Solace" tutorial or played with the "Solace PubSub+ Connector" in your Boomi account.
Everything is great - you can connect, produce and consume events using the PubSub+ cloud service.
(Note - for the rest of this article we assume you have a Connection to Solace defined in your Boomi workspace, e.g. because you followed the tutorial above)
But hang on - in the tutorial you used a plain TCP socket to connect to PubSub+. Wouldn't it be better to use TLS encryption?
That's when you look at your PubSub+ Service in Solace Cloud and discover there's a TLS encrypted endpoint - labelled "Secured SMF Host". This should be easy - just use the secure endpoint and you're done? Right?

Well it isn't otherwise I wouldn't have written this post.
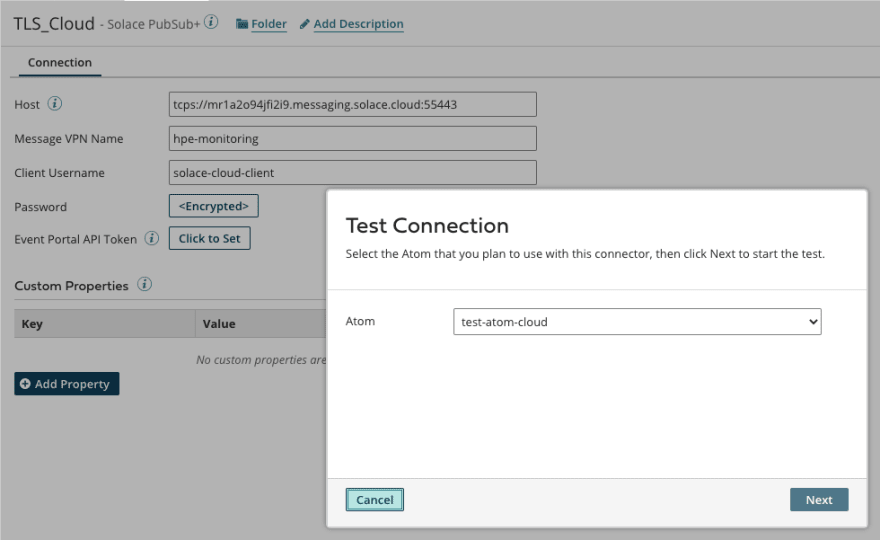
Next you replaced the plain TCP connection URL with the secured URL (as I did in the screenshot below). Then you tested the connection again using the handy "Test Connection" button in the Boomi Connection Setup dialog.
Looks good, right?
Oh no, not if you are using a cloud hosted Atom!
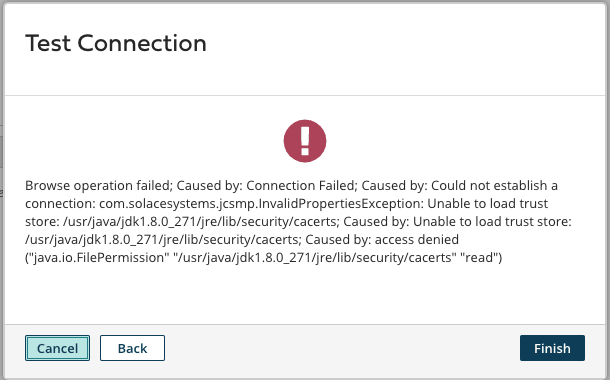
As you can see the Connector tries to use the default Java trust store so it can verify the certificate presented by the PubSub+ service. And for good reason this access isn't allowed in the cloud.
How do we fix this?
- we will need to obtain or create a suitable trust store
- we will need to make the trust store available on the Atom
- then tell the connector to use it.
Luckily we can do this. Let's look at these steps.
Obtain a suitable Trust Store
PubSub+ Cloud services use a certificate signed by Digicert. The standard Java trust store includes the Root CA certificate.
You have two options here:
- the easy way
- the hard way
Let's do easy first - as you can see the Connector attempts to use cacerts. This is included in all Java installations - chances are high you have a few copies on your hard disk already. So just do a search and grab one of these. You can also obtain a copy from the OpenJDK repository - e.g. here.
If you wanted to make the effort to create a trust store with only the Root CA required by the Connector to connect to Solace Cloud there's always the hard way.
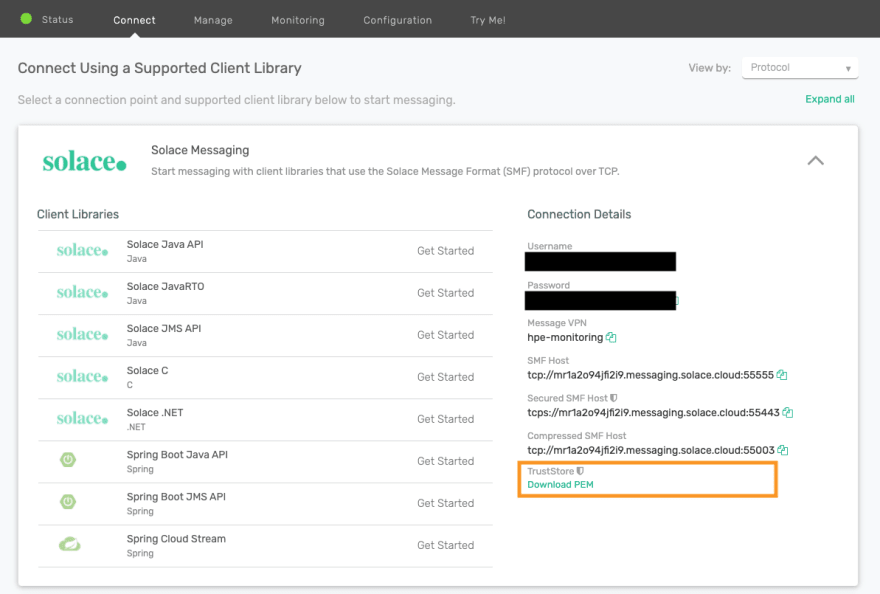
First you need to download the root certificate from the Solace Cloud console in PEM format:
Java requires the trust store in a Java Keystore format. To create the trust store in the required format you can follow steps 1 to 6 in Converting PEM-format keys to JKS format.
In the following screenshots I used the easy way, just replace cacerts where ever you see it with the name of your trust store if you did it the hard way.
Uploading the Trust Store to Boomi Atom(s)
Now you have a trust store, how do you deploy it to your Boomi environment?
There are multiple folders that a Boomi process has access to.
From that list the work and the userlib location stood out to me. Any process can write into the work directory so that may be an option, but although it is marked as "Permanent" storage it reads like it's intended for temporary storage. The other folder - userlib - is used to store "Custom Libraries". These are a way to add additional Java libraries to a Boomi environment. It goes through the same packaging, versioning and deployment cycle as Boomi processes themselves.
Sounds like a good way to manage the rollout of our trust store.
The steps to do this are:
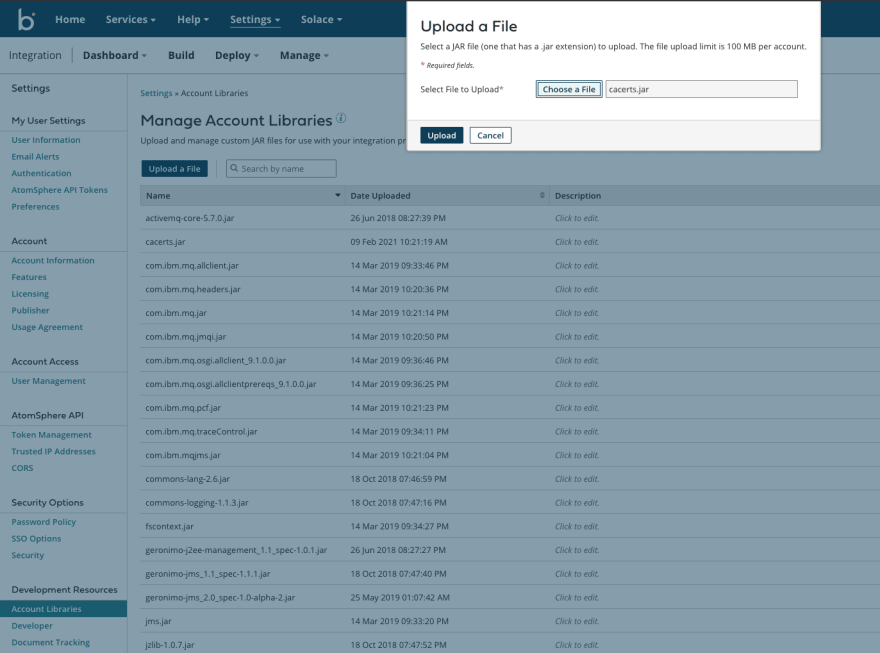
- Upload the trust store to the Account Library in your Boomi account
- Create and deploy a Custom Library -Verify the trust store was uploaded to your Atom(s)
I'll add some key screen shots below, detailed instructions can be found in the links.
Here's how you add the "Account Library". Note that you are only allowed to upload JAR files - you need to add the .jar extension to your trust store's file name. I have renamed mine to cacerts.jar
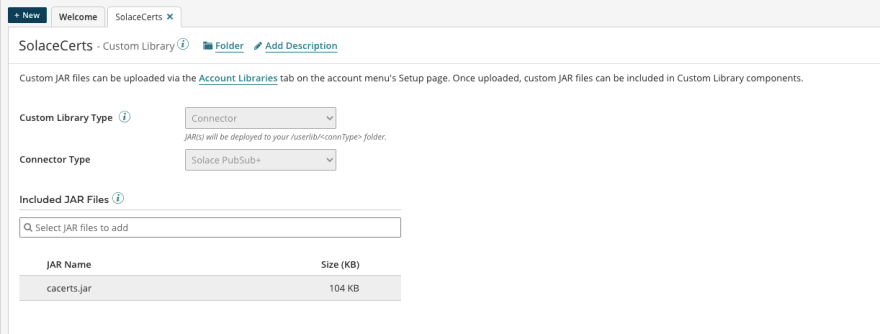
Then create the "Custom Library", here's a screen shot how you do that. Also the library I have created is in the background, note how I added the cacerts.jar in there:

If you prefer - when creating the custom library you can choose to associate it with the Connector by setting the library type to "Connector" and connector type to "PubSub+ Connector". This will put the trust store in a dedicated sub-directory of userlib
You then create a "Packaged Component" and deploy it to your environment, I'll skip this here and fast forward to the result, the library was applied to the Atom:
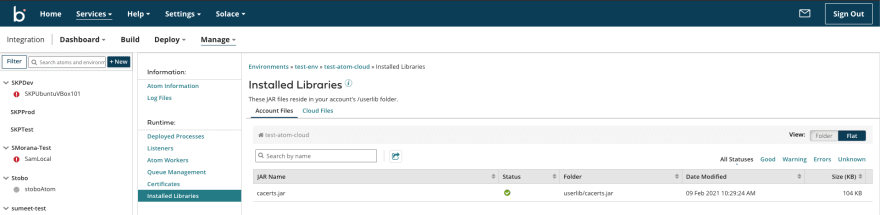
And here is what it looks like if you set the Custom Library type to "Connector", note the sub directory that was created in userlib.

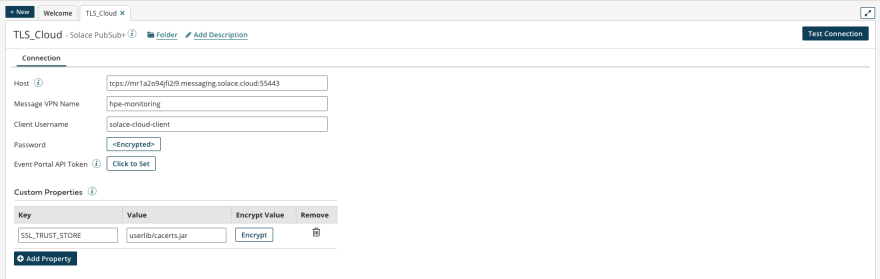
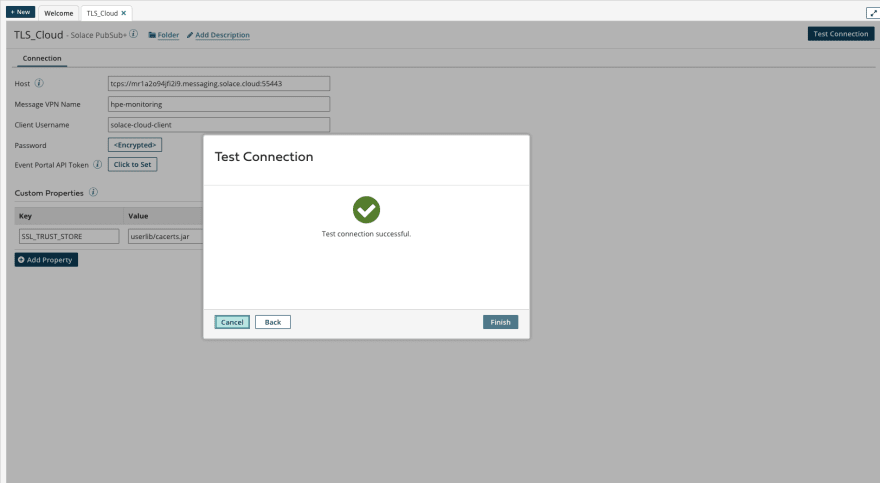
Set Trust Store used by the Connector
The last step is to let the Connector know to use our trust store.
This is where the "Custom Properties" come into play. There is a property SSL_TRUST_STORE we can set and we point that to the file that was uploaded - remember it's in the userlib directory
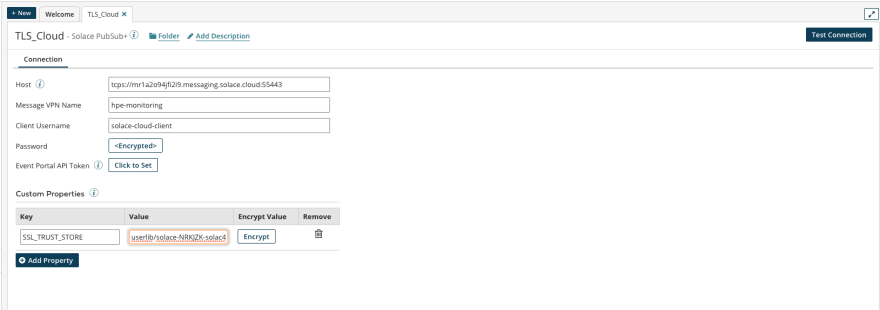
If you selected "Connector" as Custom Library Type the trust store will be located in a sub directory of userlib - you can look up the location in the Atom Management - see the screen shot in the preceding section.
There's some information on these "Custom Properties" in the Connector's documentation and a guide on the properties you can use in the Solace API documentation.
Now try "Test Connection" again, select an Atom in the Environment that you applied the "Custom Library" to and ...

Top comments (0)