
Overview
One of the best things about this project is its simplicity. There are many overwhelmed applications/websites on the internet which are very hard to comprehend because the data is all over the places. As a developer, I always try to sort and simplify the main objective of the project into smaller bits and pieces. Then I start with coding the core objective of those pieces. Once it is layout properly on the page then I think of different ways to maximize its value to the audience.
The COVID-19 Tracker's home page follows the same approach. It is easy to understand the layout for the home page because it only contains the information that user needs to know when they land to the face of this application which is 'what's happening around the globe?'

Let's break this page into smaller pieces.
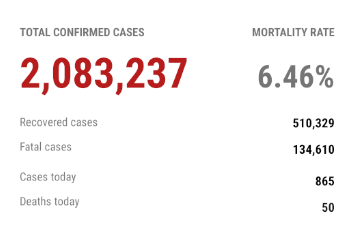
The first component of this page is a stats area. This area contains Total Confirmed Cases for the globe in bold and large text to emphasize the importance of this number follows by Recovered Cases, Fatal Cases, Cases Today, Deaths Today, and Mortality Rate. Each piece of information is valuable to a concerned audience and it is easy to understand.
The second main component of this page is a bar chart. This chart compares the top 5 countries with the most confirmed cases against each other in terms of confirmed, active, and fatal cases. The chart as well is easy to understand.

Some other components put a lot of value on the page. The refresh button is an essential ingredient because the user needs to have the ability to view updated records. Then there is a bar navigation view in the bottom which allows you to navigate throughout the page.
Now let's code each of the components! :)
Code
Before jumping into the coding make sure you have a basic android project setup ready to go. You should also have an emulator set up to test your application.
Side note: Break up pieces of functionality into their classes and encapsulate all the logic so that you can focus on small pieces of code. This way code is more maintainable, reusable, manageable and testable.
DataService.java
We need to create a service that provides us data for information like a list of country names, confirmed cases, recovered cases, etc. This service needs to call a REST API and return specific data in a simple ArrayList format so that we can use that list however we want in the form of visuals and front-end.
We will be calling this REST API: https://coronavirus-monitor.p.rapidapi.com/coronavirus/cases_by_country.php
We will call this API using an HTTP client. Luckily we have an amazing open-source project which allows us to create an HTTP request. Okhttpclient performs best when you create a single OkHttpClient instance and reuse it for all of your HTTP calls.
First, add this implementation inside build.gradle file under dependencies section:
implementation 'com.squareup.okhttp3:okhttp:3.5.0'
Let's create a DataService.java class inside our project folder.
Add these imports to your class:
import org.json.JSONArray;
import org.json.JSONException;
import org.json.JSONObject;

import java.io.IOException;
import java.util.ArrayList;
import java.util.List;

import okhttp3.Call;
import okhttp3.Callback;
import okhttp3.OkHttpClient;
import okhttp3.Request;
import okhttp3.Response;
Now, let's build our HTTP request.
First, instantiate our OkHttpClient inside the class.
OkHttpClient client = new OkHttpClient();
For the request we need two things: URL and headers. For this API these are the two headers we need to add in order to access the JSON data:
| KEY | VALUE |
|---|---|
| x-rapidapi-host | coronavirus-monitor.p.rapidapi.com |
| x-rapidapi-key | 12a8dba6admshd5f767ad7c36e5bp17cb05jsn3c9cee783e36 |
This is how our request will look like after adding headers:
Request request = new Request.Builder()
            .url("https://coronavirus-monitor.p.rapidapi.com/coronavirus/cases_by_country.php")
            .get()
            .addHeader("x-rapidapi-host", "coronavirus-monitor.p.rapidapi.com")
            .addHeader("x-rapidapi-key", "12a8dba6admshd5f767ad7c36e5bp17cb05jsn3c9cee783e36")
            .build();
We have the most important part of this service is setup. We can now write our methods based on this request.
We need to create a method that returns ArrayList of all the country names in string format. A JSON for the whole dataset looks like this:
{
    "countries_stat": [
        {
            "country_name": "China",
            "cases": "81,054",
            "deaths": "3,261",
            "region": "",
            "total_recovered": "72,440",
            "new_deaths": "6",
            "new_cases": "46",
            "serious_critical": "1,845",
            "active_cases": "5,353",
            "total_cases_per_1m_population": "56"
        },
        {
            "country_name": "Italy",
            "cases": "53,578",
            "deaths": "4,825",
            "region": "",
            "total_recovered": "6,072",
            "new_deaths": "793",
            "new_cases": "6,557",
            "serious_critical": "2,857",
            "active_cases": "42,681",
            "total_cases_per_1m_population": "886"
        },
This is what code for our first method (getCountryNames0 to extract 'country_name' from all the 200+ JSON objects looks like:
public ArrayList<String> getCountryName() throws IOException, JSONException
    {
        final ArrayList<String> countries = new ArrayList<>();

        client.newCall(request).enqueue(new Callback()
        {
            @Override
            public void onFailure(Call call, IOException e) {
            }

            @Override
            public void onResponse(Call call, final Response response) {

                try {
                    String casesByCountry = response.body().string();

                    JSONObject Jobject = new JSONObject(casesByCountry);
                    JSONArray Jarray = Jobject.getJSONArray("countries_stat");

                    for (int i = 0; i < Jarray.length(); i++) {
                        String object = Jarray.getJSONObject(i).getString("country_name");
                        countries.add(object);
                    }
                } catch (Exception e) {
                    e.printStackTrace();
                }
            }
        });

        return countries;
    }
There are two important parts of this method: call the API using OkHttpClient through the request we created and the logic of extracting country_name.
client.newCall(request).enqueue(new Callback()
        {
            @Override
            public void onFailure(Call call, IOException e) {
            }

            @Override
            public void onResponse(Call call, final Response response) {
        }
OkHttpClient's newCall() method allows us to create a callback function which is very crucial for our application thread concerns. The purpose of the callback function is to inform a class Sync/Async if some work in another class is done.
 String casesByCountry = response.body().string();

                    JSONObject Jobject = new JSONObject(casesByCountry);
                    JSONArray Jarray = Jobject.getJSONArray("countries_stat");

                    for (int i = 0; i < Jarray.length(); i++) {
                        String object = Jarray.getJSONObject(i).getString("country_name");
                        countries.add(object);
                    }
Once we get response from our called function, we then store our dataset into string variable. Then we create a JSON object for our dataset so that we can later create a JSON array object for all the 'country_stat' object in our JSON object. For loop would go through array and store value of 'country_name' into ArrayList which we return back in our method. That's how I created a simple but yet thorough method.
Now we can create similar methods to retrieve other information like the number of cases, deaths, recovered, new deaths, new cases, serious critical, active, cases per one million population from the JSON.
Here is one more example of another method that retrieves the total number of cases for all the countries.
public List<String> getNumberOfCases() throws IOException, JSONException
    {
        final List<String> cases = new ArrayList<>();

        client.newCall(request).enqueue(new Callback()
        {
            @Override
            public void onFailure(Call call, IOException e) {
            }

            @Override
            public void onResponse(Call call, final Response response) {

                try {
                    String casesByCountry = response.body().string();

                    JSONObject Jobject = new JSONObject(casesByCountry);
                    JSONArray Jarray = Jobject.getJSONArray("countries_stat");

                    for (int i = 0; i < Jarray.length(); i++) {
                        String object = Jarray.getJSONObject(i).getString("cases");
                        cases.add(object);
                    }
                } catch (Exception e) {
                    e.printStackTrace();
                }
            }
        });

        return cases;
    }
Looks similar? Except for the name of JSON Object (cases) and variable names, the structure of a method is similar.
You can create the rest of the methods similarly. Here is the name of methods and JSON objects.
| METHOD NAME | JSON OBJECT NAME |
|---|---|
| getNumberOfDeaths() | "deaths" |
| getTotalRecovered() | "total_recovered" |
| getNewDeaths() | "new_deaths" |
| getSeriousCritical() | "serious_critical" |
| getNewCases() | "new_cases" |
| getActiveCases() | "active_cases" |
| getTotalCasesPerMillionPopulation() | "total_cases_per_1m_population" |
Once you have all the methods, move on to the next step.
activity_home.xml
Now that we have a service that provides data, we can work on setting up a front-end for the home page. I usually like to set up back-end first and then move to front-end, but since it is a small page and back-end requires unique IDs of labels and buttons, therefore, it is safe to set up front-end first.
Create an empty activity inside res/layout folder and give it a name activity_home.xml.
You can create your layout in any way you want but before you add an XML code, you need to add some imports to the Gradle file and declare this activity inside the AndroidManifest file. Here is how you do it.
Add this implementation inside build.gradle file under dependencies section:
implementation 'com.github.PhilJay:MPAndroidChart:v2.2.4'
This implementation will allow us to create fancy charts.
Now add this snippet of code inside the Android Manifest file to declare Home page as a main and launcher page of the application.
<activity android:name="[projectName].[package].[module].Home">
            <intent-filter>
                <action android:name="android.intent.action.MAIN" />

                <category android:name="android.intent.category.LAUNCHER" />
            </intent-filter>
</activity>
Replace [projectName], [package], and [module] with appropriate data.
Now you are ready to create front-end for the homepage. Let's start by defining a layout that we want to use. There are tons of layouts available so if you need more information about layout then click here.
For the sake of this tutorial, let's create a constraint layout like this.
<androidx.constraintlayout.widget.ConstraintLayout xmlns:android="http://schemas.android.com/apk/res/android"
    xmlns:app="http://schemas.android.com/apk/res-auto"
    xmlns:tools="http://schemas.android.com/tools"
    android:layout_width="match_parent"
    android:layout_height="match_parent"
    android:background="#FFFFFF"
    tools:context="[projectName].[package].[module].Home">

</androidx.constraintlayout.widget.ConstraintLayout>
Inside the Constraint Layout, we need to add all the labels that we will later populate them with real data by calling the DataService class.
Here is the link to all textView and charts with unique IDs and constraints that will work on any size of the mobile screen:
Please go ahead and create one more activity inside res/layout folder and name it bottom_navigationn.xml
Add the code from file below:
Now we are ready to move on to the back-end of the home page which is the main meat. 🎊🎉
Home.java
First thing first, let's quickly set up variables for TextViews, ImageButtons, progressBar, and ArrayList/List for data.
public class Home extends AppCompatActivity
{
   TextView txtConfirmedCases, txtRecoveredCases, txtDeathCases,
   txtGlobalNewCases, txtGlobalNewDeaths, txtMortality;
   ImageButton btnRefresh;
   private ProgressBar progressBar;

   ArrayList<String> globalCases = new ArrayList<>();
   ArrayList<String> globalRecovered = new ArrayList<>();
   ArrayList<String> globalFatal = new ArrayList<>();
   ArrayList<String> globalNewCases = new ArrayList<>();
   ArrayList<String> globalNewDeaths = new ArrayList<>();
   List<String> confirmedCases = new ArrayList<>();
   ArrayList<String> countryNames = new ArrayList<>();
   List<String> activeCases = new ArrayList<>();
   List<String> fatal = new ArrayList<>();
Let's code each of the components separately.
'Statistics area': contains global data
Initialize all the text views under onCreate() method that goes inside the statistics area.
txtConfirmedCases = findViewById(R.id.txtConfirmedCases);
txtRecoveredCases = findViewById(R.id.txtRecoveredCases);
txtDeathCases = findViewById(R.id.txtDeathCases);
txtGlobalNewCases = findViewById(R.id.txtNewCases);
txtGlobalNewDeaths = findViewById(R.id.txtNewDeaths);
txtMortality = findViewById(R.id.txtMortality);
Before proceeding with code that will call DataService class under insert data inside these text views, I want to walk you through an important concept of multi-threading. Multi-threading is the ability of a central processing unit (CPU) (or a single core in a multi-core processor) to provide multiple threads of execution concurrently, supported by the operating system. The Home.java class would run on the main thread that will execute all the events inside the class from top to bottom. But the DataService class has methods that use callBack methods to create new events.
If call DataService methods from Home class, the main thread would not wait for it to retrieve data out of those methods because calling a REST API and retrieving data back takes milliseconds amount of time and sometimes even some seconds. The main thread would not wait for our methods to retrieve data and we will get null values. So we need to create a background job that will call DataService methods and wait for the data to store inside ArrayList variables and then we can use those variables to populate our TextViews.
We will be using AsyncTask class to help us create background jobs.
Let's call this function inside onCreate()
new HomeAsync2().execute();
We haven't created this HomeSync2() method yet but let's do it now. Go ahead create a new class inside our main Home class which is of course outside onCreate().
class HomeAsync extends AsyncTask
    {
        @Override
        protected void onPreExecute() {
            super.onPreExecute();
        }

        @Override
        protected String doInBackground(Object[] objects)
        {

        }
        @Override
        protected void onPostExecute(Object o)
        {
        }
Little bit background about these methods: onPreExecute will execute before our background task starts, doInBackground is where we will call DataService methods, and onPostExecute will execute after the job gets done.
Inside doInBackground() call DataService Class which is calling this URL https://coronavirus-monitor.p.rapidapi.com/coronavirus/worldstat.php and retrieving global stat.
GlobalDataService gs = new GlobalDataService();
            try
            {
                globalCases = gs.getGlobalCases();
                globalRecovered = gs.getGlobalRecovered();
                globalFatal = gs.getGlobalFatal();
                globalNewCases = gs.getGlobalNewCases();
                globalNewDeaths = gs.getGlobalNewDeaths();
            } catch (IOException e) {
                e.printStackTrace();
            } catch (JSONException e) {
                e.printStackTrace();
            }
It will take time for ArrayList variable to get populated because there is about 400ms delay in calling REST API. So we have to wait for at least 1-2 seconds before populating our textViews. So let's add wait() function.
int i =0;
synchronized (this)
{
while (i<10)
{
try {
wait(150);
i++;
}catch (InterruptedException e){
e.printStackTrace();
}
}
}
After waiting for 1.5 seconds, we can insert our dataService values inside our textViews.
runOnUiThread(new Runnable() {

                @Override
                public void run()
                {
                    try
                    {
                        double cases = Double.parseDouble(globalCases.get(0).replaceAll(",", ""));
                        double deaths = Double.parseDouble(globalFatal.get(0).replaceAll(",", ""));
                        double mortality = (deaths / cases) * 100;
                        double mm = Math.round(mortality * 100.0) / 100.0;
                        String m = String.valueOf(mm);
                        txtMortality.setText(m + "%");
                        txtConfirmedCases.setText(globalCases.get(0));
                        txtRecoveredCases.setText(globalRecovered.get(0));
                        txtDeathCases.setText((globalFatal.get(0)));
                        txtGlobalNewCases.setText((globalNewCases.get(0)));
                        txtGlobalNewDeaths.setText((globalNewDeaths.get(0)));
                    } catch (IndexOutOfBoundsException e)
                    {
                        e.printStackTrace();
                    }

                }
            });

            return null;
        }
A good developer knows she/he needs to off load-heavy tasks to a worker Thread to avoid clogging the Main Thread and allow a smoother user experience and avoid ANR. Therefore, I am populating values using UI thread.
Now if you run your app, you should see values inside the statistics area. Let's move on to our next component!
Bar chart
Let's create a try-catch block and put all the code that I am about to show you inside of it.
For bar chart, we need values so let's call DataService methods to retrieve data.
DataService ds = new DataService();
            try {
                confirmedCases = ds.getNumberOfCases();
                countryNames = ds.getCountryName();
                activeCases = ds.getActiveCases();
                fatal = ds.getNumberOfDeaths();
            } catch (IOException e) {
                e.printStackTrace();
            } catch (JSONException e) {
                e.printStackTrace();
            }
As I explained earlier, it will take some seconds to retrieve data from the API. So go ahead and add our wait() function after it.
int i =0;
            synchronized (this)
            {
                while (i<10)
                {
                    try {
                        wait(150);
                        i++;
                    }catch (InterruptedException e){
                        e.printStackTrace();
                    }
                }
            }
I would highly recommend looking through our charts library to understand the mechanics behind it.
Let's start by initializing entries (vertical bars) and barChart.
ArrayList<BarEntry> entries = new ArrayList<>();
ArrayList<BarEntry> entries2 = new ArrayList<>();
ArrayList<BarEntry> entries3 = new ArrayList<>();
BarChart barChart = (BarChart) findViewById(R.id.bargraph);
Now we need to add data in these entries. Three entries represent vertical bars for confirmed, fatal, and active cases. We will limit the amount of data we supply to 5 records which the data for top 5 countries. To accomplish it we will need to create three for loop to populate entries.
confirmedCases entry:
for(int j = 0; j < 5; j++)
            {
                try
                {
                    int c = Integer.parseInt(confirmedCases.get(j).replaceAll(",", ""));
                    entries.add(new BarEntry(c, j));
                }
                catch (Exception e)
                {
                    e.printStackTrace();
                }
            }
activeCases entry:
for(int j = 0; j < 5; j++)
            {
                try
                {
                    int c = Integer.parseInt(activeCases.get(j).replaceAll(",", ""));
                    entries2.add(new BarEntry(c, j));
                }
                catch (Exception e)
                {
                    e.printStackTrace();
                }
            }
fatal entry:
for(int j = 0; j < 5; j++)
            {
                try
                {
                    int c = Integer.parseInt(fatal.get(j).replaceAll(",", ""));
                    entries3.add(new BarEntry(c, j));
                }
                catch (Exception e)
                {
                    e.printStackTrace();
                }
            }
We can give these entries a label and put it inside a bar data set. We will use this data set to create a the whole Bar Data later.
BarDataSet bardataset = new BarDataSet(entries, "Confirmed cases ");
BarDataSet bardataset2 = new BarDataSet(entries2, "Active cases ");
BarDataSet bardataset3 = new BarDataSet(entries3, "Fatal cases ");
Store these dataSets inside a list:
List<IBarDataSet> set = new ArrayList<>();
set.add(bardataset);
set.add(bardataset2);
set.add(bardataset3);
So we have data for our 5 groups of vertical bars (the group of confirmed, fatal, active cases vertical bar). Let's create labels to display country names on the x-axis.
ArrayList<String> labels = new ArrayList<String>();
for(int k = 0; k < 5; k++)
{
   try
   {
       labels.add(countryNames.get(k));
   }
   catch (Exception e)
   {
       e.printStackTrace();
    }
}
We have labels and a set of the vertical bar data set. Supply both of these data to our main bar data.
BarData data = new BarData(labels, set);
Technically, you're done! But wait what about animations, grid lines, scaling, zoom functionality and all those fancy stuff? We can set properties for both X-axis and Y-axis separately. Here is how you do it.
Set X-axis properties:
XAxis xAxis = barChart.getXAxis();
xAxis.setPosition(XAxis.XAxisPosition.BOTTOM);
xAxis.setTextColor(Color.BLACK);
xAxis.setTextSize(8f);
xAxis.setDrawAxisLine(false);
xAxis.setDrawGridLines(false);
xAxis.setLabelsToSkip(0);
xAxis.setLabelRotationAngle(-45);
Set Y-axis properties:
YAxis right = barChart.getAxisRight();
right.setDrawLabels(false); // no axis labels
right.setDrawAxisLine(false); // no axis line
right.setDrawGridLines(false); // no grid lines
right.setDrawZeroLine(true);

YAxis left = barChart.getAxisLeft();
left.setDrawLabels(false); // no axis labels
left.setDrawAxisLine(false); // no axis line
left.setDrawGridLines(false); // no grid lines
left.setDrawZeroLine(true);
Set overall properties:
barChart.setData(data);
barChart.setDrawGridBackground(false);
barChart.setDescription("");  // set the description
barChart.animateXY(5000,5000);
barChart.setScaleEnabled(true);
barChart.setDrawValueAboveBar(true);
barChart.setDrawGridBackground(false);
barChart.setDoubleTapToZoomEnabled(true);
barChart.setPinchZoom(true);

bardataset.setColor(Color.parseColor("#B71C1C"));
bardataset2.setColor(Color.parseColor("#000000"));
bardataset3.setColor(Color.parseColor("#717171"));
There you have your second main component working! Great job!
You made it this far! We are so close to finish the home page. Just few more basic components.
Bottom Navigation Bar
This is a navigation component that will allow the user to navigate different pages of our app. The user will click one of the icon and navListener would respond by displaying the selected page.
Let's initialize our bottomNavigationBar and set a listener to it.
BottomNavigationView bottomNav = findViewById(R.id.bottom_navigation);
bottomNav.setOnNavigationItemSelectedListener(navListener);
Don't worry we haven't created navListener yet. We need to create global private variable for navListener outside our onCreate() method.
private BottomNavigationView.OnNavigationItemSelectedListener navListener = new BottomNavigationView.OnNavigationItemSelectedListener() {
        @Override
        public boolean onNavigationItemSelected(@NonNull MenuItem menuItem) {
            switch (menuItem.getItemId()) {
                case R.id.nav_home:
                    break;
                case R.id.nav_cases:
                    Intent a = new Intent(Home.this, CasesByCountry.class);
                    startActivity(a);
                    break;
                case R.id.nav_news:
                    Intent c = new Intent(Home.this, News.class);
                    startActivity(c);
                    break;
                case R.id.nav_help:
                    Intent d = new Intent(Home.this, Help.class);
                    startActivity(d);
                    break;
            }
            return false;
        }
    };
In the above code snippet, we are attaching a 'navListener' to our Bottom Navigation View variable. The switch-break statements are working like if-else statements.
At this point, you would need to create some blank java classes for our future pages. Create these empty java classes: CasesByCountry.java, News.java, Help.java.
That's it for this component.
Refresh Button
The main purpose of this refresh button to call the REST API again and populate all the values again. We are not updating the data. The people who are actually updating the data set are the people who are maintaining the API.
Programatically, we just need to call our Async() class inside the refresh button onClickListener() and that's about it.
btnRefresh = findViewById(R.id.btnRefresh);

btnRefresh.setOnClickListener(new View.OnClickListener() {
            @Override
            public void onClick(View v) {
                progressBar.setVisibility(View.VISIBLE);
                new HomeAsync2().execute();
            }
        });
Progress Bar
We need to let the user know that we are calling the API and it is taking time to retrieve the updated data. Imagine clicking the button and not seeing anything on the page, how frustrating it could be.
We need to add a progress bar at two places: 1. Before calling HomeAync2() class inside onCreate() method 2. in onpostExecute() method of asyncTask class
onCreate():
progressBar = findViewById(R.id.progressBar);

progressBar.setVisibility(View.VISIBLE);
new HomeAsync2().execute();
onPostExecute():
@Override
protected void onPostExecute(Object o)
{
   progressBar.setVisibility(View.GONE);
}
You made it! 🎊
Conclusion
As you might realize that there is a lot of work on this page. However, this is the easiest page of my application. I tried to break down code and explained it as much as I could. There weren't a lot of new concepts on this page to know since we are only trying to implement a basic page. The sole purpose of this page is to give insightful global information to the user. Users should take one quick glance and know what is going around the world.
In the upcoming tutorial, I will be going through the next exciting page which is a 'Stats' page. This page is more challenging than the home page because there is more coding involved in the back-end. 'Stats' page requires an adapter and data provider class. You will also be creating a recycler view which is one of the most exciting components of the page. I will take you through a process of implementing search functionality which will allow the user to search for specific countries along with their unique data which is really cool.
Stay tuned because much more exciting content is coming up! 🔔
Thanks for reading the blog and spending time working through the page. Please let me know if your questions/feedback/suggestions in the comment box. I would love to hear what do you think. 😃

Top comments (0)