
Every day more and more people are transiting to Web3. The demand for developers is increasing and skills in blockchain development are among the most in-demand in the tech industry.
The greatest approach to improving your Web3 skills is to use them to create projects. In this article, you are going to build a full-stack YouTube clone on top of the Polygon blockchain using the below tech stack.
- Frontend framework: Next.js
- Smart contracts: Solidity
- Ethereum web client library: Ethers.js
- File storage: IPFS
- Querying data: The Graph
- CSS Framework: TailwindCSS
- Ethereum development environment: Hardhat
- Layer 2 blockchain: Polygon
Prerequisites
Before you start with the tutorial make sure you have Node.js v14 or greater, and the Metamask browser extension installed on your machine.
Setting up Next.js App
The first step is to set up a next.js app and install the required dependencies. In order to do that, you would need to run the below command in your terminal.
mkdir web3-youtube && cd web3-youtube && npx create-next-app .
The following command creates a new directory named web3-youtube, then navigates to that directory and creates a next.js app.
Once the project is created successfully, run the following command to install a few other dependencies.
npm install react-icons plyr-react moment ipfs-http-client ethers @apollo/client graphql dotenv
-
react-iconsis an icon library that we will be using in the app. -
plyr-reactis a video player component with rich plugins and functionalities. -
momentis a JavaScript date library for parsing, validating, manipulating, and formatting dates. -
ipfs-http-clientis used to upload videos and thumbnails to IPFS. -
ethersis an Ethereum client literary that will be used to interact with the smart contracts
You can also run the below command to install Hardhat as a dev dependency in your project.
npm install --dev hardhat @nomicfoundation/hardhat-toolbox
Initialize local Ethereum environment
Next, it is time to initialize a local smart contract development using Hardhat. To do that, simply run the below command in your terminal.
npx hardhat
The above command will scaffold the basic Solidity development environment. You should see below the new files/folders generated in your project directory.
test: This folder contains a test script written in Chai and it is used to test the smart contract.
hardhat.config.js: This file contains the configuration for Hardhat.
scripts: This folder contains a sample script to show to deploy a smart contract.
contracts: This is the folder that includes the files in which we write our smart contract code.
Adding TailwindCSS
Tailwind CSS is a utility-first CSS framework for building user interfaces rapidly. We will be using it for styling our applications. Run the below command to install tailwindcss and its dependencies.
npm install --dev tailwindcss postcss autoprefixer
Once the dependencies are installed, we need to initiate the Tailwind CSS. To do that, run the below code in your terminal.
npx tailwind init -p
The above command will generate two files named tailwind.config.js and postcss.config.js. Next, open the project in any code editor and replace the code inside tailwind.config.js with the below code.
module.exports = {
  content: [
    "./pages/**/*.{js,ts,jsx,tsx}",
    "./components/**/*.{js,ts,jsx,tsx}",
  ],
  theme: {
    extend: {},
  },
  plugins: [],
}
At last, add the tailwind directives for each of Tailwind’s layers to the ./styles/globals.css file.
@tailwind base;
@tailwind components;
@tailwind utilities;
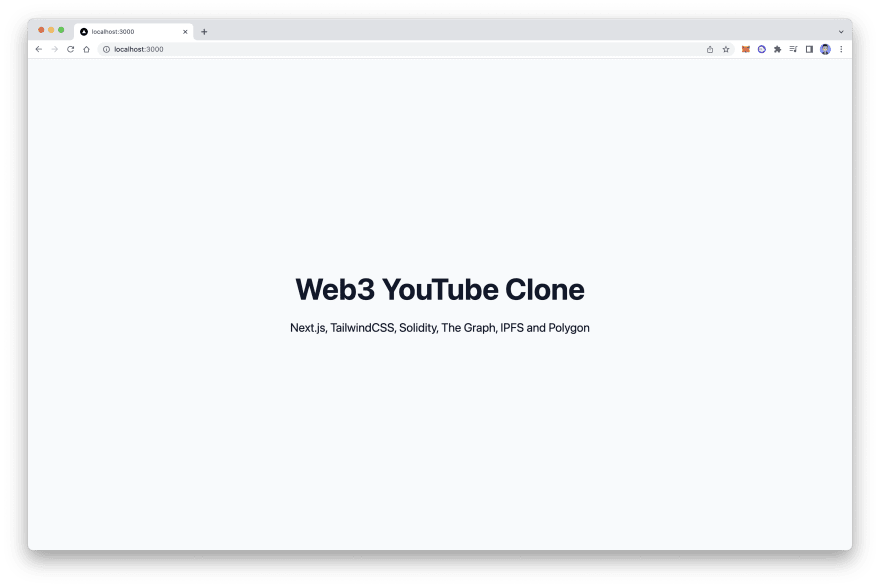
You can also check if Tailwind CSS is integrated successfully by updating the code inside of the pages/index.js file.
import React from "react";

export default function index() {
  return (
    <div className="flex flex-col justify-center items-center h-screen">
      <h1 className="text-6xl font-bold text-slate-900">Web3 YouTube Clone</h1>
      <h3 className="text-2xl mt-8 text-slate-900">
        Next.js, TailwindCSS, Solidity, IPFS, The Graph and Polygon
      </h3>
    </div>
  );
}
Save the file and run npm run dev to start the next.js app and you should see a similar page.
The smart contract
Now that the project setup is completed, we can start writing smart contracts for our application. In this article, I will be using Solidity.
A smart contract is a decentralized program that responds to events by executing business logic.
In the contracts folder, create a new file named Youtube.sol and add the following code to it.
//SPDX-License-Identifier: Unlicense
pragma solidity ^0.8.0;

contract YouTube {
    // Declaring the videoCount 0 by default
    uint256 public videoCount = 0;
    // Name of your contract
    string public name = "YouTube";
    // Creating a mapping of videoCount to Video
    mapping(uint256 => Video) public videos;

    //  Create a struct called 'Video' with the following properties:
    struct Video {
        uint256 id;
        string hash;
        string title;
        string description;
        string location;
        string category;
        string thumbnailHash;
        string date;
        address author;
    }

    // Create a 'VideoUploaded' event that emits the properties of the video
    event VideoUploaded(
        uint256 id,
        string hash,
        string title,
        string description,
        string location,
        string category,
        string thumbnailHash,
        string date,
        address author
    );

    constructor() {}

    // Function to upload a video
    function uploadVideo(
        string memory _videoHash,
        string memory _title,
        string memory _description,
        string memory _location,
        string memory _category,
        string memory _thumbnailHash,
        string memory _date
    ) public {
        // Validating the video hash, title and author's address
        require(bytes(_videoHash).length > 0);
        require(bytes(_title).length > 0);
        require(msg.sender != address(0));

        // Incrementing the video count
        videoCount++;
        // Adding the video to the contract
        videos[videoCount] = Video(
            videoCount,
            _videoHash,
            _title,
            _description,
            _location,
            _category,
            _thumbnailHash,
            _date,
            msg.sender
        );
        // Triggering the event
        emit VideoUploaded(
            videoCount,
            _videoHash,
            _title,
            _description,
            _location,
            _category,
            _thumbnailHash,
            _date,
            msg.sender
        );
    }
}
Modifying the Hardhat configurations
Now, we need to do some modifications to the Hardhat configuration file in order to deploy our smart contract. Open hardhat.config.js in your code editor and update the module.exports object to the below code.
require("@nomicfoundation/hardhat-toolbox");
require("dotenv").config();

module.exports = {
  solidity: "0.8.9",
  networks: {
    mumbai: {
      url: "https://rpc-mumbai.maticvigil.com",
      accounts: process.env.PRIVATE_KEY,
    },
  },
  paths: {
    artifacts: "./artifacts",
  },
};
To deploy our contract, we need a private key. Open Metamask in your browser and click on three top right and choose account details.

Then, click on "Export Private Key". You will be prompted to enter your Metamask password. Enter your password and click on Confirm.

You should see your private key inside a box in red color.

Create a .env file in the projects root directory and add your private key.
PRIVATE_KEY="YOUR_METAMASK_PRIVATE_KEY"
Never ever share your private key. Anyone with your private keys can steal any assets held in your account.
Compiling smart contracts with Hardhat
Now that our smart contract is completed, let's go ahead and compile them. You can compile it using the command below.
npx hardhat compile
if you have encountered Error HH801: Plugin @nomicfoundation/hardhat-toolbox requires the following dependencies to be installed. Run the below command to install hardhat dependencies
npm install --save-dev "@nomicfoundation/hardhat-network-helpers@^1.0.0" "@nomicfoundation/hardhat-chai-matchers@^1.0.0" "@nomiclabs/hardhat-ethers@^2.0.0" "@nomiclabs/hardhat-etherscan@^3.0.0" "@types/chai@^4.2.0" "@types/mocha@^9.1.0" "@typechain/ethers-v5@^10.1.0" "@typechain/hardhat@^6.1.2" "chai@^4.2.0" "hardhat-gas-reporter@^1.0.8" "solidity-coverage@^0.7.21" "ts-node@>=8.0.0" "typechain@^8.1.0" "typescript@>=4.5.0"
Once the package is installed, re-run the above compile command.
After the compile successfully completes, you should see a new directory named artifacts created in your projects directory.
Artifacts contain the compiled version of our smart contract in JSON format. This JSON file contains an array called ABI. ABI or Application Binary Interface is what we need to connect our client (Next app) with our compiled smart contract.
Deploying smart contract on Polygon
Now, we can deploy our smart contract on a Polygon Mumbai. We have already added RPC and Metamask private keys, so we don't need to do it again. However, you need some $MATIC in order to deploy a smart contract.
Navigate to https://faucet.polygon.technology/ and paste your wallet address. Click on confirm and you should receive 0.2 MATIC in your wallet.

By default, Metamask doesn't have Polygon blockchain in the list of networks, so we need to add it manually. Go to Metamask settings and choose to Add a network manually. Use the below information to add Polygon Mumbai to the Metamask.
Network Name: Mumbai Testnet
New RPC URL: <https://rpc-mumbai.maticvigil.com/>
Chain ID: 80001
Currency Symbol: MATIC
Block Explorer URL: <https://polygonscan.com/>
Save it and you should see 0.2 MATIC on your Metamask wallet.

Next, replace the code inside scripts/deploy.js with the below code.
// We require the Hardhat Runtime Environment explicitly here. This is optional
// but useful for running the script in a standalone fashion through `node <script>`.
//
// When running the script with `npx hardhat run <script>` you'll find the Hardhat
// Runtime Environment's members available in the global scope.
const hre = require("hardhat");

async function main() {
  // Hardhat always runs the compile task when running scripts with its command
  // line interface.
  //
  // If this script is run directly using `node` you may want to call compile
  // manually to make sure everything is compiled
  // await hre.run('compile');

  // We get the contract to deploy
  const YouTube = await hre.ethers.getContractFactory("YouTube");
  const youtube = await YouTube.deploy();

  await youtube.deployed();

  console.log("YouTube deployed to:", youtube.address);
}

// We recommend this pattern to be able to use async/await everywhere
// and properly handle errors.
main()
  .then(() => process.exit(0))
  .catch((error) => {
    console.error(error);
    process.exit(1);
  });
At last, run the below command to deploy your smart contract.
npx hardhat run scripts/deploy.js --network mumbai
This command will take some time, but once it is completed, you should see a message similar to this:
YouTube deployed to: 0x0AE42f411420b2710474e5e4f2F551b36350F9D1
And that means our contract was successfully deployed 🎉
Setting up The Graph
You can either use smart contract events with help of packages like ethers.js or you can use The Graph to query data from Blockchain. The Graph is an off-chain indexing solution that can help you query data in a much easier way.
In this tutorial, we will be using The Graph to query the videos from the blockchain, because it makes it so easy and it uses GraphQL query language.
Creating a Subgraph
A subgraph extracts data from a blockchain, processing it and storing it so that it can be easily queried via GraphQL.
To create a subgraph, you first need to install The Graph CLI. The Graph CLI is written in JavaScript, and you will need to install either yarn or npm to use it. You can run the below command to install it.
npm install -g @graphprotocol/graph-cli
Once installed, run graph init in order to initialize the subgraph in the project. You will be prompted with some questions. You can follow the below code for the answers:
✔ Protocol · ethereum
✔ Product for which to initialize · hosted-service
✔ Subgraph name · suhailkakar/blog-yt-clone
✔ Directory to create the subgraph in · indexer
✔ Contract address · 0x0AE42f411420b2710474e5e4f2F551b36350F9D1
✖ Failed to fetch ABI from Etherscan: ABI not found, try loading it from a local file
✔ ABI file (path) · /Users/suhail/Desktop/web3-youtube/frontend/artifacts/contracts/Youtube.sol/YouTube.json
✔ Contract Name · YouTube
✔ Add another contract? (y/N) · false
Make sure to update the contract address, name, and ABI.
Next, let’s declare the schema for our application. Replace the code inside of schema.graphql inside of the indexer directory with the below code.
type Video @entity {
  id: ID!
  hash: String! # string
  title: String! # string
  description: String # string
  location: String # string
  category: String # string
  thumbnailHash: String! # string
  date: String # string
  author: Bytes! # address
  createdAt: BigInt! # timestamp
}
Now, replace the code inside of you-tube.ts with the below code.
import { VideoUploaded as VideoUploadedEvent } from "../generated/YouTube/YouTube";
import { Video } from "../generated/schema";

export function handleVideoUploaded(event: VideoUploadedEvent): void {
  let video = new Video(event.params.id.toString());
  video.hash = event.params.hash;
  video.title = event.params.title;
  video.description = event.params.description;
  video.location = event.params.location;
  video.category = event.params.category;
  video.thumbnailHash = event.params.thumbnailHash;
  video.date = event.params.date;
  video.author = event.params.author;
  video.createdAt = event.block.timestamp;
  video.save();
}
Navigate to the indexer directory and run yarn codegen to generate code from your GraphQL operations and schema.
Building Subgraph
Before we deploy the subgraph, we need to build it. To do that simply run the below command in your terminal.
yarn build
Next, in order to deploy our subgraph, we need to create an account on The Graph.
Deploying Subgraph
Go ahead and create an account and then navigate to https://thegraph.com/hosted-service/dashboard. Click on Add Subgraph button.

On the next, screen fill in information related to your subgraph and create Subgraph Button at the bottom of the screen

Once the subgraph is created, copy its access token as we would need it later. In your terminal run graph auth and choose hosted service. In the deploy key, paste the key that you copied earlier.
At last, run the below command to deploy your subgraph.
yarn deploy
If everything goes fine, you should see your subgraph link similar to the below output. 🎉
Build completed: QmV19RJaCXCcKKBe3BTyrL8cGqKNaEo9kpwxMTgrPnDKYA

Deployed to https://thegraph.com/explorer/subgraph/suhailkakar/test-blog-yt

Queries (HTTP):     https://api.thegraph.com/subgraphs/name/suhailkakar/test-blog-yt
The Frontend
Now that we have completed smart contracts, it is time to work on the front end of the application. Let’s start with the Authentication of the app.
Authentication
The first step is to set up authentication in our app that allows users to connect their wallets. Create a new folder named landing inside of the pages folder and create a new file inside of it named index.js. This file will have the code for the landing page in our application, which will also allow users to connect their wallets.
Erase everything inside of index.js in the page directory and inside import the Landing file to the file. Here is what your index.js file should look like.
import React from "react";
import Landing from "./landing";

export default function index() {
  return (
   <Landing />
  );
}
Now, on the landing page, we will create a simple hero component with connect wallet button that will allow users to connect their wallets and access our application.
Add the below code to the landing page. I have already added comments so you can understand them properly.
import React, { useState } from "react";

function Landing() {
  // Creating a function to connect user's wallet
  const connectWallet = async () => {
    try {
      const { ethereum } = window;

      // Checking if user have Metamask installed
      if (!ethereum) {
        // If user doesn't have Metamask installed, throw an error
        alert("Please install MetaMask");
        return;
      }

      // If user has Metamask installed, connect to the user's wallet
      const accounts = await ethereum.request({
        method: "eth_requestAccounts",
      });

      // At last save the user's wallet address in browser's local storage
      localStorage.setItem("walletAddress", accounts[0]);
    } catch (error) {
      console.log(error);
    }
  };

  return (
    <>
      {/* Creating a hero component with black background and centering everything in the screen */}
      <section className="relative bg-black flex flex-col h-screen justify-center items-center">
        <div className="max-w-7xl mx-auto px-4 sm:px-6">
          <div className="pt-32 pb-12 md:pt-40 md:pb-20">
            <div className="text-center pb-12 md:pb-16">
              <h1
                className="text-5xl text-white md:text-6xl font-extrabold leading-tighter tracking-tighter mb-4"
                data-aos="zoom-y-out"
              >
                It is YouTube, but{" "}
                <span className="bg-clip-text text-transparent bg-gradient-to-r from-blue-500 to-teal-400">
                  Decentralized
                </span>
              </h1>
              <div className="max-w-3xl mx-auto">
                <p
                  className="text-xl text-gray-400 mb-8"
                  data-aos="zoom-y-out"
                  data-aos-delay="150"
                >
                  A YouTube Clone built on top of Polygon network, allow users
                  to create, share and watch videos, without worrying about
                  their privacy.
                </p>
                <button
                  className="items-center  bg-white rounded-full font-medium  p-4 shadow-lg"
                  onClick={() => {
                    // Calling the connectWallet function when user clicks on the button
                    connectWallet();
                  }}
                >
                  <span>Connect wallet</span>
                </button>
              </div>
            </div>
          </div>
        </div>
      </section>
    </>
  );
}

export default Landing;
If everything goes fine you should see a similar screen. You should also be able to connect your MetaMask wallet.

Uploading videos
Now that users are able to connect their wallets, it is time to add upload video functionality to our app.
Create a new folder in the pages directory named upload and add a file named index.js. Inside of the file adds the below code. Again I have already added the comments on the code, so I hope that helps you to understand it.
import React, { useState, useRef } from "react";
import { BiCloud, BiMusic, BiPlus } from "react-icons/bi";
import { create } from "ipfs-http-client";

export default function Upload() {
  // Creating state for the input field
  const [title, setTitle] = useState("");
  const [description, setDescription] = useState("");
  const [category, setCategory] = useState("");
  const [location, setLocation] = useState("");
  const [thumbnail, setThumbnail] = useState("");
  const [video, setVideo] = useState("");

  //  Creating a ref for thumbnail and video
  const thumbnailRef = useRef();
  const videoRef = useRef();

  return (
    <div className="w-full h-screen bg-[#1a1c1f] flex flex-row">
      <div className="flex-1 flex flex-col">
        <div className="mt-5 mr-10 flex  justify-end">
          <div className="flex items-center">
            <button className="bg-transparent  text-[#9CA3AF] py-2 px-6 border rounded-lg  border-gray-600  mr-6">
              Discard
            </button>
            <button
              onClick={() => {
                handleSubmit();
              }}
              className="bg-blue-500 hover:bg-blue-700 text-white  py-2  rounded-lg flex px-4 justify-between flex-row items-center"
            >
              <BiCloud />
              <p className="ml-2">Upload</p>
            </button>
          </div>
        </div>
        <div className="flex flex-col m-10  mt-5  lg:flex-row">
          <div className="flex lg:w-3/4 flex-col ">
            <label className="text-[#9CA3AF]  text-sm">Title</label>
            <input
              value={title}
              onChange={(e) => setTitle(e.target.value)}
              placeholder="Rick Astley - Never Gonna Give You Up (Official Music Video)"
              className="w-[90%] text-white placeholder:text-gray-600  rounded-md mt-2 h-12 p-2 border  bg-[#1a1c1f] border-[#444752] focus:outline-none"
            />
            <label className="text-[#9CA3AF] mt-10">Description</label>
            <textarea
              value={description}
              onChange={(e) => setDescription(e.target.value)}
              placeholder="Never Gonna Give You Up was a global smash on its release in July 1987, topping the charts in 25 countries including Rick’s native UK and the US Billboard Hot 100.  It also won the Brit Award for Best single in 1988. Stock Aitken and Waterman wrote and produced the track which was the lead-off single and lead track from Rick’s debut LP “Whenever You Need Somebody."
              className="w-[90%] text-white h-32 placeholder:text-gray-600  rounded-md mt-2 p-2 border  bg-[#1a1c1f] border-[#444752] focus:outline-none"
            />

            <div className="flex flex-row mt-10 w-[90%]  justify-between">
              <div className="flex flex-col w-2/5   ">
                <label className="text-[#9CA3AF]  text-sm">Location</label>
                <input
                  value={location}
                  onChange={(e) => setLocation(e.target.value)}
                  type="text"
                  placeholder="Bali - Indonesia"
                  className="w-[90%] text-white placeholder:text-gray-600  rounded-md mt-2 h-12 p-2 border  bg-[#1a1c1f] border-[#444752] focus:outline-none"
                />
              </div>
              <div className="flex flex-col w-2/5   ">
                <label className="text-[#9CA3AF]  text-sm">Category</label>
                <select
                  value={category}
                  onChange={(e) => setCategory(e.target.value)}
                  className="w-[90%] text-white placeholder:text-gray-600  rounded-md mt-2 h-12 p-2 border  bg-[#1a1c1f] border-[#444752] focus:outline-none"
                >
                  <option>Music</option>
                  <option>Sports</option>
                  <option>Gaming</option>
                  <option>News</option>
                  <option>Entertainment</option>
                  <option>Education</option>
                  <option>Science & Technology</option>
                  <option>Travel</option>
                  <option>Other</option>
                </select>
              </div>
            </div>
            <label className="text-[#9CA3AF]  mt-10 text-sm">Thumbnail</label>

            <div
              onClick={() => {
                thumbnailRef.current.click();
              }}
              className="border-2 w-64 border-gray-600  border-dashed rounded-md mt-2 p-2  h-36 items-center justify-center flex"
            >
              {thumbnail ? (
                <img
                  onClick={() => {
                    thumbnailRef.current.click();
                  }}
                  src={URL.createObjectURL(thumbnail)}
                  alt="thumbnail"
                  className="h-full rounded-md"
                />
              ) : (
                <BiPlus size={40} color="gray" />
              )}
            </div>

            <input
              type="file"
              className="hidden"
              ref={thumbnailRef}
              onChange={(e) => {
                setThumbnail(e.target.files[0]);
              }}
            />
          </div>

          <div
            onClick={() => {
              videoRef.current.click();
            }}
            className={
              video
                ? " w-96   rounded-md  h-64 items-center justify-center flex"
                : "border-2 border-gray-600  w-96 border-dashed rounded-md mt-8   h-64 items-center justify-center flex"
            }
          >
            {video ? (
              <video
                controls
                src={URL.createObjectURL(video)}
                className="h-full rounded-md"
              />
            ) : (
              <p className="text-[#9CA3AF]">Upload Video</p>
            )}
          </div>
        </div>
        <input
          type="file"
          className="hidden"
          ref={videoRef}
          accept={"video/*"}
          onChange={(e) => {
            setVideo(e.target.files[0]);
            console.log(e.target.files[0]);
          }}
        />
      </div>
    </div>
  );
}
And you should see a similar screen if you navigate to http://localhost:3000/upload.

This is a basic upload page, for now, we just have the inputs and save their value of them in the state.
Before working on the handle submit function, create a new folder named utils and inside of it create a file named getContract. This file will be used to interact with your contract on the upload page. Add the below code to it and make sure to replace the contract address with your contract address.
import ContractAbi from "../artifacts/contracts/YouTube.sol/YouTube.json";
import { ethers } from "ethers";

export default function getContract() {
  // Creating a new provider
  const provider = new ethers.providers.Web3Provider(window.ethereum);
  // Getting the signer
  const signer = provider.getSigner();
  // Creating a new contract factory with the signer, address and ABI
  let contract = new ethers.Contract(
    "0xf6F03b0837569eec33e0Af7f3F43B362916e5de1",
    ContractAbi.abi,
    signer
  );
  // Returning the contract
  return contract;
}
Now we need an IPFS client to upload videos and thumbnails. There are many services that offer IPFS service, you can signup and paste your IPFS URL below code.
Back to the upload page (pages/upload/index.js), let's first create an IPFS client to upload videos and thumbnails.
const client = create("YOU_IPFS_CLIENT_LINK_HERE");
Now let's declare 4 functions in the upload page.
  // When user clicks on the upload button
  const handleSubmit = async () => {
    // Checking if user has filled all the fields
    if (
      title === "" ||
      description === "" ||
      category === "" ||
      location === "" ||
      thumbnail === "" ||
      video === ""
    ) {
      // If user has not filled all the fields, throw an error
      alert("Please fill all the fields");
      return;
    }
    // If user has filled all the fields, upload the thumbnail to IPFS
    uploadThumbnail(thumbnail);
  };

  const uploadThumbnail = async (thumbnail) => {
    try {
      // Uploading the thumbnail to IPFS
      const added = await client.add(thumbnail);
      // Getting the hash of the uploaded thumbnail and passing it to the uploadVideo function
      uploadVideo(added.path);
    } catch (error) {
      console.log("Error uploading file: ", error);
    }
  };

  const uploadVideo = async (thumbnail) => {
    try {
      // Uploading the video to IPFS
      const added = await client.add(video);
      // Getting the hash of the uploaded video and passing both video and thumbnail to the saveVideo function
      await saveVideo(added.path, thumbnail);
    } catch (error) {
      console.log("Error uploading file: ", error);
    }
  };

  const saveVideo = async (video, thumbnail) => {
    // Get the contract from the getContract function
    let contract = await getContract();
    // Get todays date
    let UploadedDate = String(new Date());
    // Upload the video to the contract
    await contract.uploadVideo(
      video,
      title,
      description,
      location,
      category,
      thumbnail,
      UploadedDate
    );
  };
I have already commented on each line of the code so you can understand what is going on.
Save the file and BOOM!!
We are done with the upload functionality. You should now be able to upload videos to the contract.

Connecting with The Graph
In order to fetch videos from The Graph, we need to set up a graphQL client. Create a new file named client.js in the root directory and add the following code inside of it.
import { ApolloClient, InMemoryCache } from "@apollo/client";

const client = new ApolloClient({
uri: "YOUR_GRAPHQL_URL_HERE",
cache: new InMemoryCache(),
});

export default client;
Make sure to replace the URI with your graph URL. And also replace the code inside of _app.js in the page directory with the below code.
import { ApolloProvider } from "@apollo/client";
import client from "../client";
import "../styles/globals.css";

function MyApp({ Component, pageProps }) {
  return (
    <ApolloProvider client={client}>
      <Component {...pageProps} />
    </ApolloProvider>
  );
}

export default MyApp;
In the above code, we have wrapped our code with ApolloProvider and provided the client which we created earlier as a prop.
Fetching videos from Blockchain
Create a new file named index.js inside of a new folder named home. And for now you can add the below code to the file.
import React, { useEffect, useState } from "react";
import { useApolloClient, gql } from "@apollo/client";

export default function Main() {
  // Creating a state to store the uploaded video
  const [videos, setVideos] = useState([]);

  // Get the client from the useApolloClient hook
  const client = useApolloClient();

  // Query the videos from the the graph
  const GET_VIDEOS = gql`
    query videos(
      $first: Int
      $skip: Int
      $orderBy: Video_orderBy
      $orderDirection: OrderDirection
      $where: Video_filter
    ) {
      videos(
        first: $first
        skip: $skip
        orderBy: $orderBy
        orderDirection: $orderDirection
        where: $where
      ) {
        id
        hash
        title
        description
        location
        category
        thumbnailHash
        isAudio
        date
        author
        createdAt
      }
    }
  `;

  // Function to get the videos from the graph
  const getVideos = async () => {
    // Query the videos from the graph
    client
      .query({
        query: GET_VIDEOS,
        variables: {
          first: 200,
          skip: 0,
          orderBy: "createdAt",
          orderDirection: "desc",
        },
        fetchPolicy: "network-only",
      })
      .then(({ data }) => {
        // Set the videos to the state
        setVideos(data.videos);
      })
      .catch((err) => {
        alert("Something went wrong. please try again.!", err.message);
      });
  };

  useEffect(() => {
    // Runs the function getVideos when the component is mounted
    getVideos();
  }, []);
  return (
    <div className="w-full bg-[#1a1c1f] flex flex-row">
      <div className="flex-1 h-screen flex flex-col">
        <div className="flex flex-row flex-wrap">
          {videos.map((video) => (
            <div className="w-80">
              <p>{video.title}</p>
            </div>
          ))}
        </div>
      </div>
    </div>
  );
}
Save the file and you should see a similar output.

As you can see for now we are just fetching the video title. So let's create a reusable component to display the videos nicely.
Make sure to upload a few videos so you can see the above output
Create a folder named components, and then create a new file named Video.js inside of it. Add the below code the file. It is a very basic video component.
import React from "react";
import { BiCheck } from "react-icons/bi";
import moment from "moment";

export default function Video({ horizontal, video }) {
  return (
    <div
      className={`${
        horizontal
          ? "flex flex-row mx-5 mb-5  item-center justify-center"
          : "flex flex-col m-5"
      } `}
    >
      <img
        className={
          horizontal
            ? "object-cover rounded-lg w-60  "
            : "object-cover rounded-lg w-full h-40"
        }
        src={`https://ipfs.io/ipfs/${video.thumbnailHash}`}
        alt=""
      />
      <div className={horizontal && "ml-3  w-80"}>
        <h4 className="text-md font-bold dark:text-white mt-3">
          {video.title}
        </h4>
        <p className="text-sm flex items-center text-[#878787] mt-1">
          {video.category + " • " + moment(video.createdAt * 1000).fromNow()}
        </p>
        <p className="text-sm flex items-center text-[#878787] mt-1">
          {video?.author?.slice(0, 9)}...{" "}
          <BiCheck size="20px" color="green" className="ml-1" />
        </p>
      </div>
    </div>
  );
}
Import the Video component to the home file and replace the map function with the below code.
{videos.map((video) => (
        <div
            className="w-80"
            onClick={() => {
                // Navigation to the video screen (which we will create later)
                window.location.href = `/video?id=${video.id}`;
       }}
            >
                <Video video={video} />
        </div>
))}
Save the file and now you should see a nice-looking homepage, similar to below image.

Video page
Now that we are able to fetch the videos in the home screen. Let's work on the video page where the user will be redirected if they click on any video component.
Create a new file in the components folder named Player and add the below code to it.
We are using react plyr to create a video player component.
import Plyr from "plyr-react";
import "plyr-react/plyr.css";

export default function Player({ hash }) {
  let url = `https://ipfs.io/ipfs/${hash}`;
  return (
    <Plyr
      source={{
        type: "video",
        title: "Example title",
        sources: [
          {
            src: url,
            type: "video/mp4",
          },
        ],
      }}
      options={{
        autoplay: true,
      }}
      autoPlay={true}
    />
  );
}
Create another file in the same directory named VideoContainer . Imagine this component as the left side of the youtube video page, which contains a player, video title, upload date, and description. Add the below code to the file.
import React from "react";
import Player from "./Player";

export default function VideoComponent({ video }) {
  return (
    <div>
      <Player hash={video.hash} />
      <div className="flex justify-between flex-row py-4">
        <div>
          <h3 className="text-2xl dark:text-white">{video.title}</h3>
          <p className="text-gray-500 mt-1">
            {video.category} •{" "}
            {new Date(video.createdAt * 1000).toLocaleString("en-IN")}
          </p>
        </div>
      </div>
    </div>
  );
}
At last create a new folder named video inside of pages folder and create a new file index.js of it.
For now you can add the following code to the file.
import React, { useEffect, useState } from "react";
import { useApolloClient, gql } from "@apollo/client";
import Video from "../../components/Video";
import VideoComponent from "../../components/VideoContainer";

export default function VideoPage() {
  const [video, setVideo] = useState(null);
  const [relatedVideos, setRelatedVideos] = useState([]);

  const client = useApolloClient();
  const getUrlVars = () => {
    var vars = {};
    var parts = window.location.href.replace(
      /[?&]+([^=&]+)=([^&]*)/gi,
      function (m, key, value) {
        vars[key] = value;
      }
    );
    return vars;
  };

  const GET_VIDEOS = gql`
    query videos(
      $first: Int
      $skip: Int
      $orderBy: Video_orderBy
      $orderDirection: OrderDirection
      $where: Video_filter
    ) {
      videos(
        first: $first
        skip: $skip
        orderBy: $orderBy
        orderDirection: $orderDirection
        where: $where
      ) {
        id
        hash
        title
        description
        location
        category
        thumbnailHash
        isAudio
        date
        author
        createdAt
      }
    }
  `;

  const getRelatedVideos = () => {
    client
      .query({
        query: GET_VIDEOS,
        variables: {
          first: 20,
          skip: 0,
          orderBy: "createdAt",
          orderDirection: "desc",
          where: {},
        },
        fetchPolicy: "network-only",
      })
      .then(({ data }) => {
        setRelatedVideos(data.videos);
        const video = data?.videos?.find(
          (video) => video.id === getUrlVars().id
        );
        setVideo(video);
      })
      .catch((err) => {
        alert("Something went wrong. please try again.!", err.message);
      });
  };

  useEffect(() => {
    getRelatedVideos();
  }, []);

  return (
    <div className="w-full   bg-[#1a1c1f]  flex flex-row">
      <div className="flex-1 flex flex-col">
        {video && (
          <div className="flex flex-col m-10 justify-between      lg:flex-row">
            <div className="lg:w-4/6 w-6/6">
              <VideoComponent video={video} />
            </div>
            <div className="w-2/6">
              <h4 className="text-md font-bold text-white ml-5 mb-3">
                Related Videos
              </h4>
              {relatedVideos.map((video) => (
                <div
                  onClick={() => {
                    setVideo(video);
                  }}
                  key={video.id}
                >
                  <Video video={video} horizontal={true} />
                </div>
              ))}
            </div>
          </div>
        )}
      </div>
    </div>
  );
}
Save the file and click on any videos on the home screen. You should be redirected to the video screen similar to the below page.

Search Functionality
Now that we are almost completed with app’s functionality. Let’s also add a search functionality.
In the components folder, create a new file named Header.js. For now, you can add the below code.
import React from "react";
import { AiOutlinePlusCircle } from "react-icons/ai";

export const Header = ({ search }) => {
  return (
    <header className="w-full flex justify-between h-20 items-center border-b p-4 border-[#202229]">
      <div className=" w-1/3    ">
        <img
          width={80}
          src={"https://i.ibb.co/JHn1pjz/logo.png"}
          alt="YouTube Logo"
        />
      </div>
      <div className=" w-1/3 flex justify-center items-center">
        {search ? (
          <input
            type="text"
            onChange={(e) => search(e.target.value)}
            placeholder="Type to search"
            className=" border-0 bg-transparent focus:outline-none text-white"
          />
        ) : null}
      </div>
      <div className=" w-1/3 flex justify-end">
        <AiOutlinePlusCircle
          onClick={() => {
            window.location.href = "/upload";
          }}
          size="30px"
          className="mr-8 fill-whiteIcons dark:fill-white cursor-pointer"
        />
      </div>
    </header>
  );
};
This is a very simple component that is divided into 3 parts. On the left we have a logo of the application, on the middle we have declared a input that users can type to search and at the last we have a icon that navigates users to the upload screen.
Back to the home page (pages/home/index.js) import the Header component and add if after line number 73
// <div className="flex-1 h-screen flex flex-col">
        <Header
          search={(e) => {
            console.log(e);
          }}
        />
// <div className="flex flex-row flex-wrap">
Now you should see a header component in the home page.

Declare a new state on the home page after line 8 to capture the value in the search screen.
const [search, setSearch] = useState("");
You can also update the Header component to set the value of the input in the above useState.
<Header
    search={(e) => {
        setSearch(e);
    }}
 />
Let’s also update the getVideos function to search videos in case there is some value in the state.
const getVideos = async () => {
    // Query the videos from the graph
    client
      .query({
        query: GET_VIDEOS,
        variables: {
          first: 200,
          skip: 0,
          orderBy: "createdAt",
          orderDirection: "desc",
                    // NEW: Added where in order to search for videos
          where: {
            ...(search && {
              title_contains_nocase: search,
            }),
          },
        },
        fetchPolicy: "network-only",
      })
      .then(({ data }) => {
        // Set the videos to the state
        setVideos(data.videos);
      })
      .catch((err) => {
        alert("Something went wrong. please try again.!", err.message);
      });
  };
In the above function, we just added a where object to search for videos in case there is a value in the state.
Finally, update the useEffect function to also run the function if there is a change in the search state.
useEffect(() => {
    // Runs the function getVideos when the component is mounted and also if there is a change in the search stae
        getVideos();
  }, [search]);
And now if you search anything, you should see the videos automatically filters. Yayy 🎉

What’s Next?
If you have come this far, it means that you have very passionate about building Web3 applications. here are a few other functionalities/improvements which you can add to the application if you are interested.
- Allowing users to search for videos based on video category. (Check this repo, if you need a reference)
- Trying to use Arweave instead of IFPS and see how it works.
- Trying adding light mode to the application and allow users to toggle
- You can also make the application responsive
Conclusion
That is it for this article. I hope you found this article useful, if you need any help please let me know in the comment section or DM me on Twitter.
Let's connect on Twitter and LinkedIn.
👋 Thanks for reading, See you next time

Top comments (3)
thx for your post. It's great practice for learners.
I have some issues while training your project.
When deploying smart contract, there is an error like below:
ProviderError: the method has been deprecated: eth_accounts
at HttpProvider.request (D:\Work\practice\hardhat_dev\node_modules\hardhat\src\internal\core\providers\http.ts:96:21)
at processTicksAndRejections (node:internal/process/task_queues:95:5)
at Proxy.deploy (D:\Work\practice\hardhat_dev\node_modules\@nomicfoundation\hardhat-ignition-ethers\src\ethers-ignition-helper.ts:102:23)
thanks sir for this awesome tutorial
Thanks so much boss i will surely connect with you for more training