In Azure, A virtual machine scale set allows to deploy and manage a set of auto-scaling virtual machines. We can scale the number of VMs in the scale set manually, or define rules to auto-scale based on resource usage like CPU, memory demand, or network traffic. An Azure load balancer then distributes traffic to the VM instances in the scale set.
Let’s create VM Scale set as below.
Step 1: Create VM Scale Set
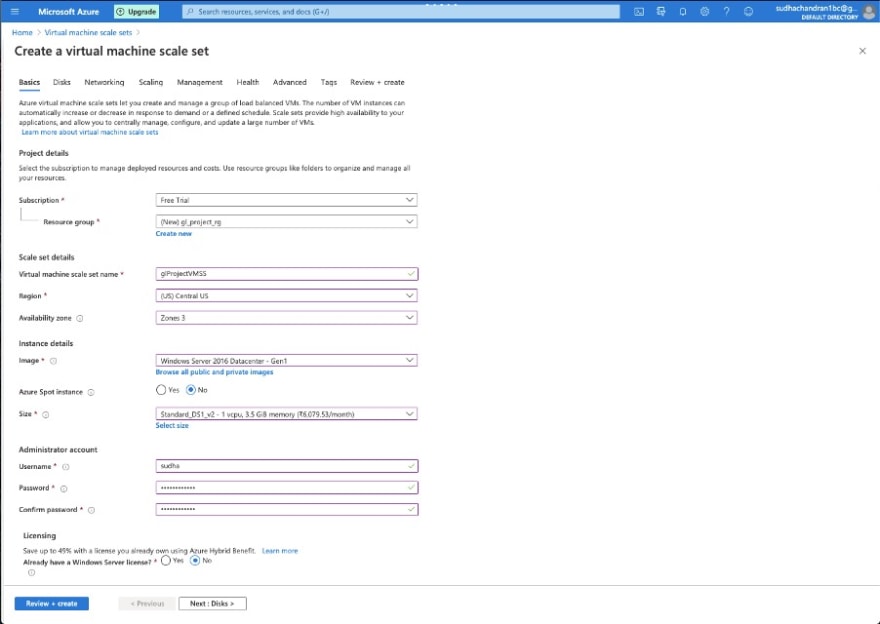
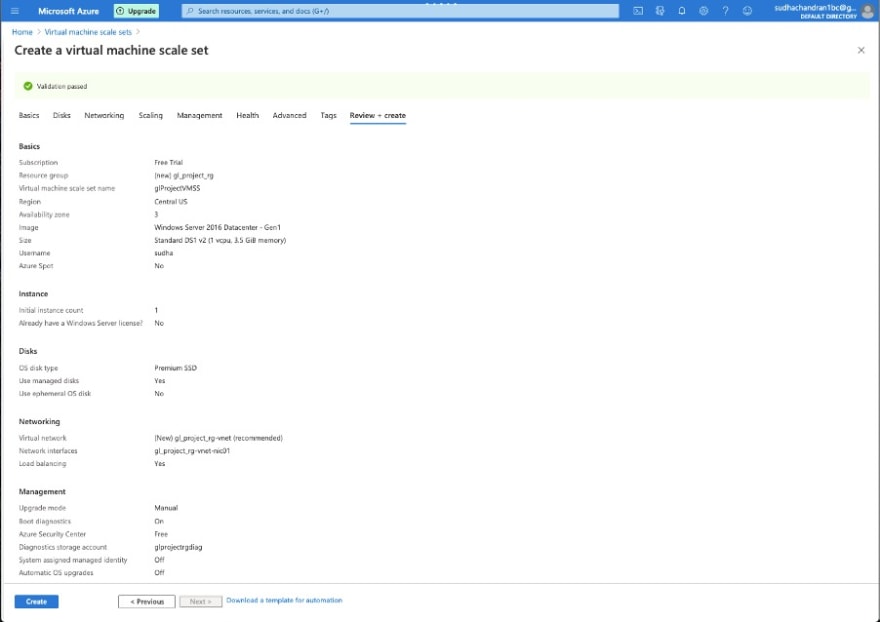
1.Let’s add basic information like
- Resource group “gl_project_rg”
- VMSS name “glProjectVMSS”
- Region “Central US”
- Availability Zone “Zone 3”
- Image “Windows Server 2016-Datacenter – Gen 1”
- Size “Standard_DS1_V2 – 1 vcpu, 3.5 GiB memory”
- Credentials
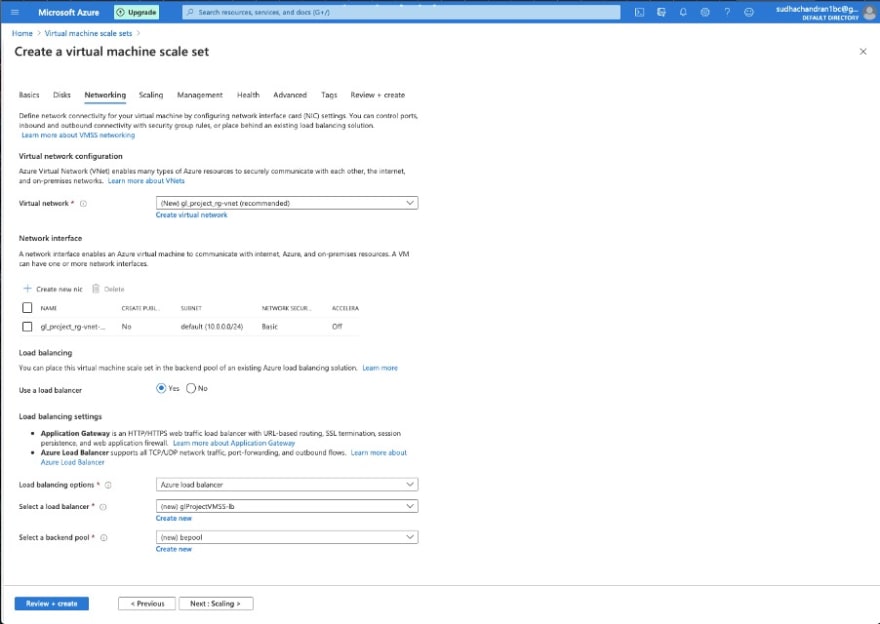
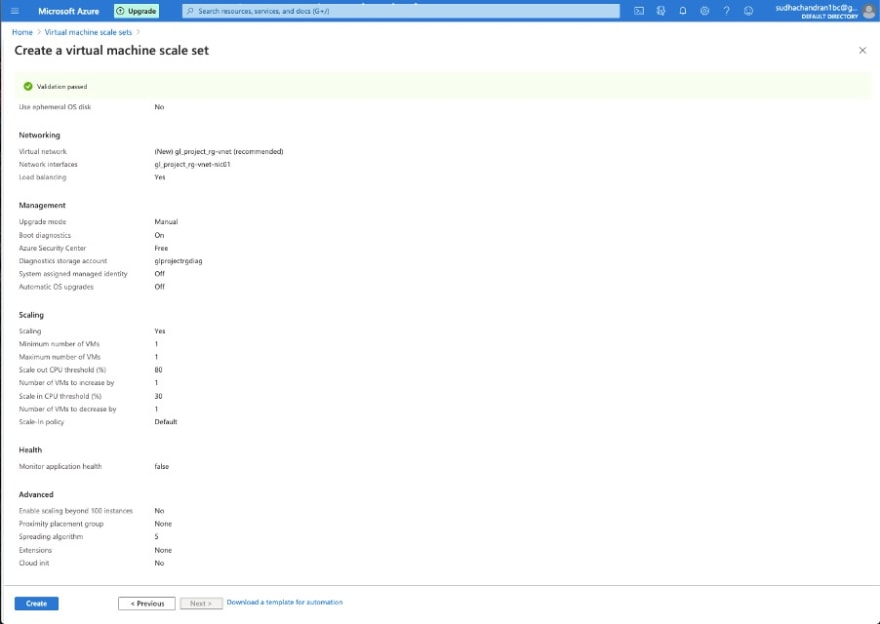
Create Load Balancers with backend pool.
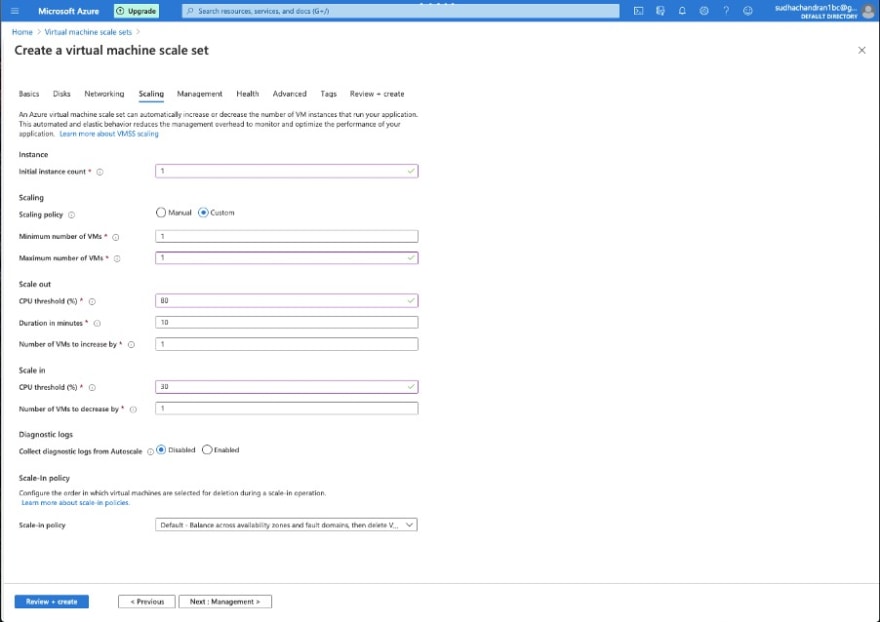
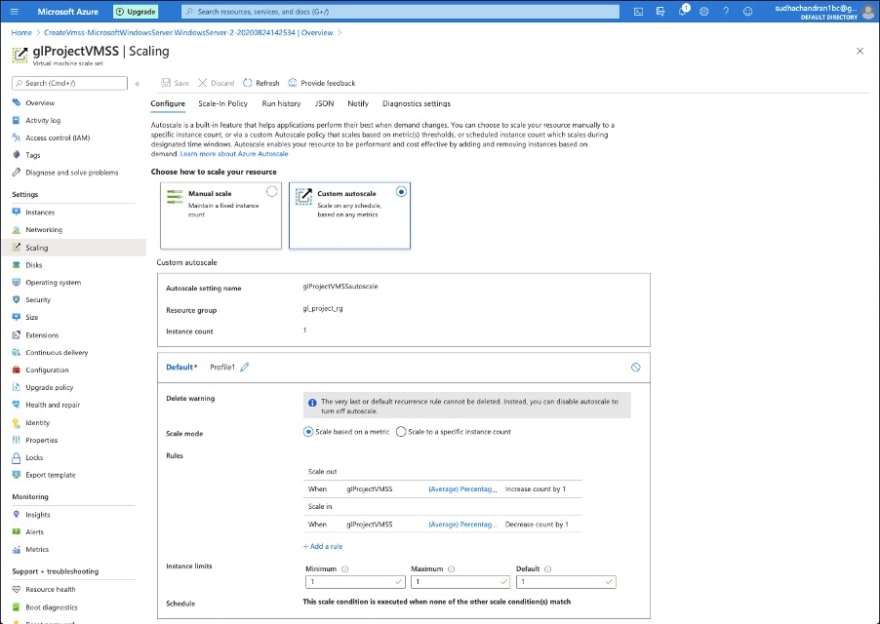
Auto Scale setup to have one instance max and min. And Scale out rule to increase instance count by 1 when CPU threshold is greater than 80%. And Scale in to decrease instance count by 1 when CPU threshold is less than 30%.
Final Review page.
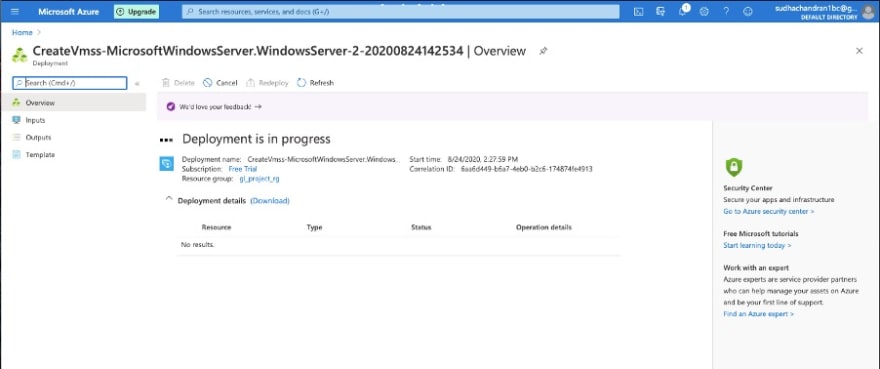
After clicking on Create, deployment will start.
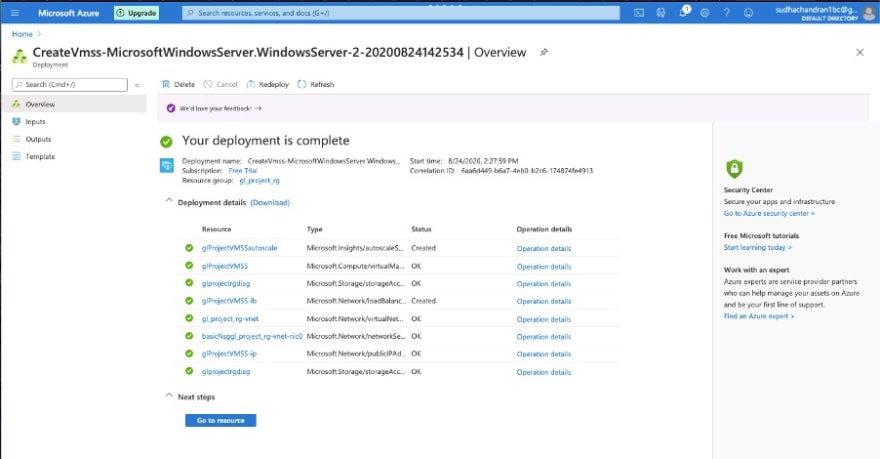
Deployment complete:
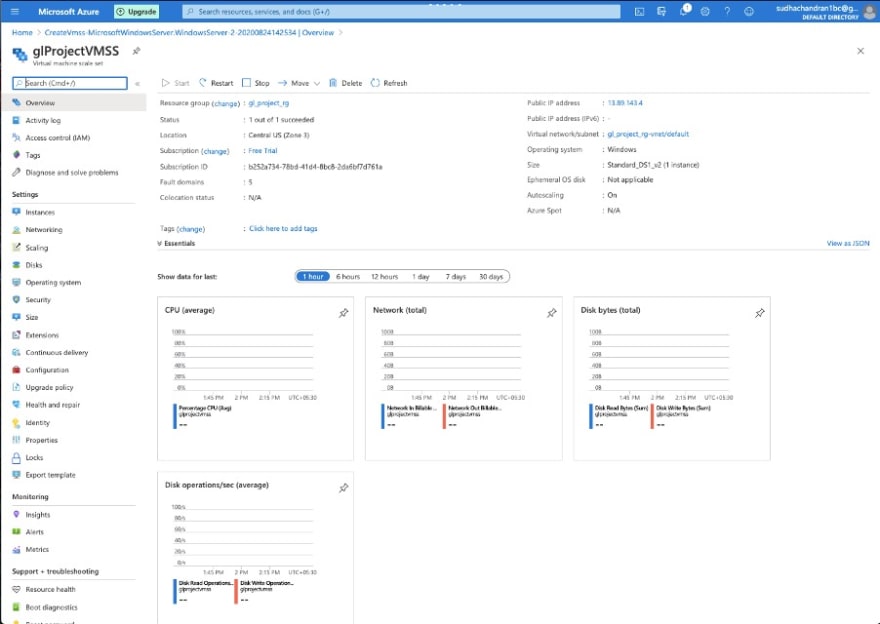
VMSS will have one instance created: “glProjectVMSS_1”
Scaling rules created as below:
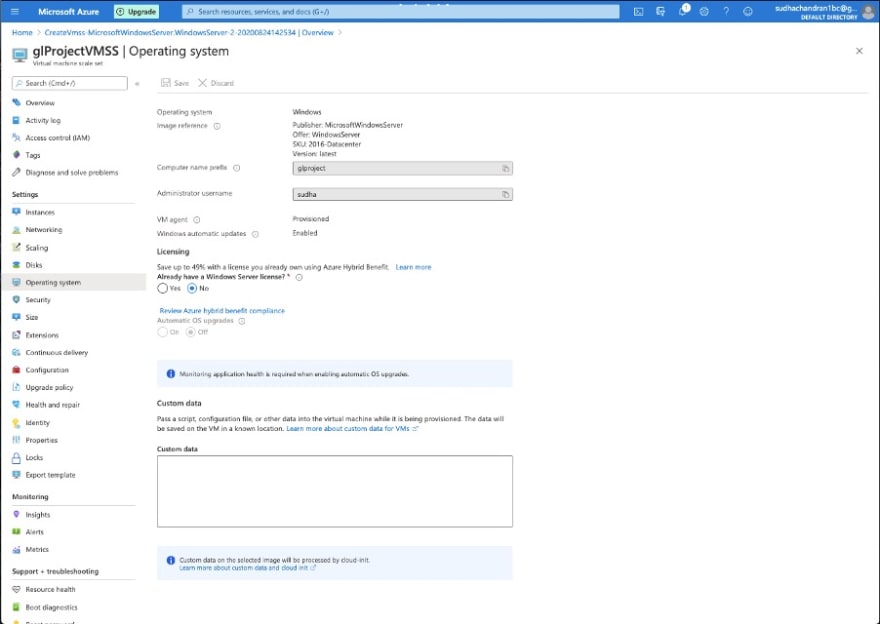
Operating System information.
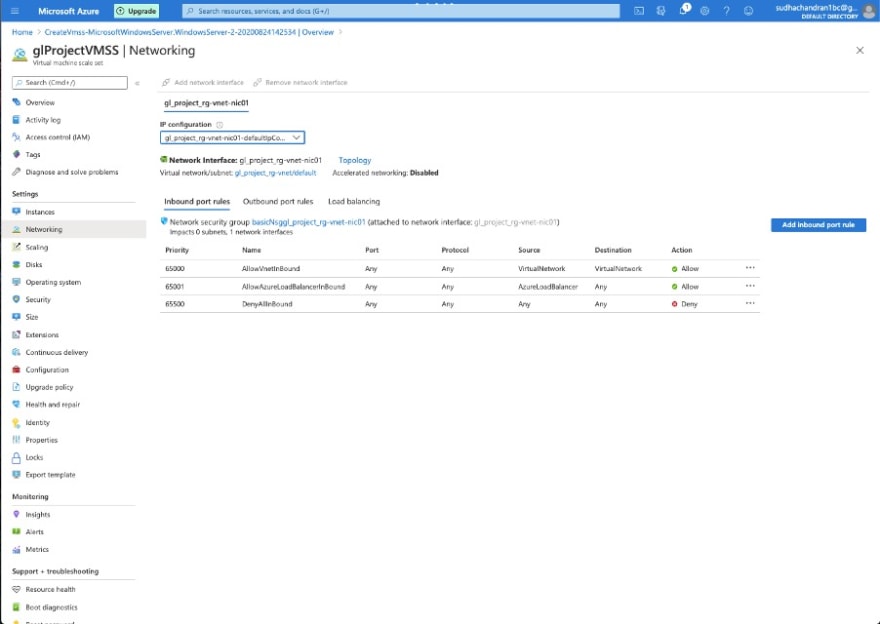
Following inbound rules created by default.
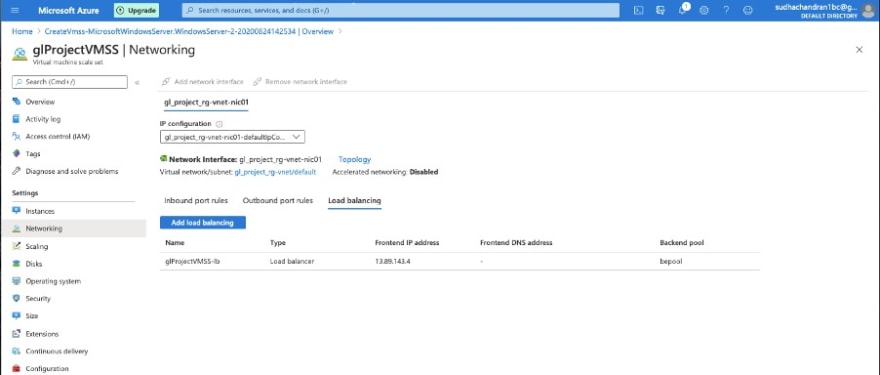
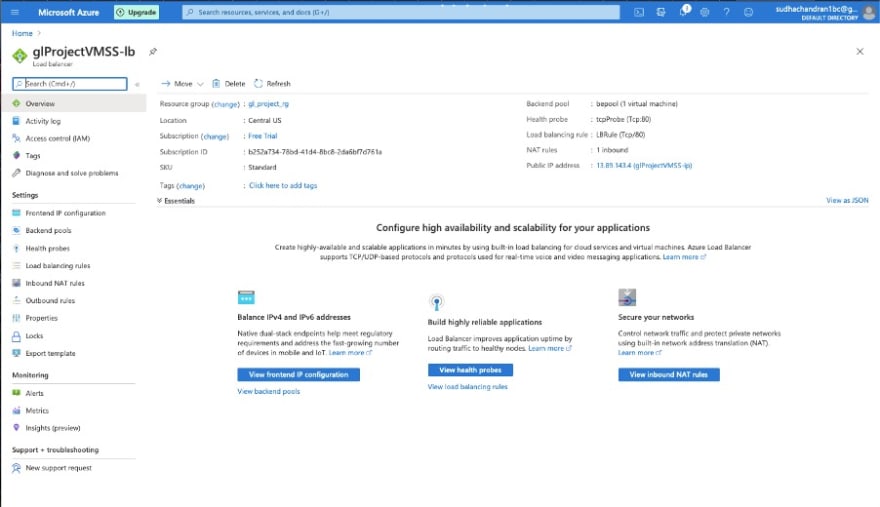
Load Balancer created.
Step 2: Modify Network configuration.
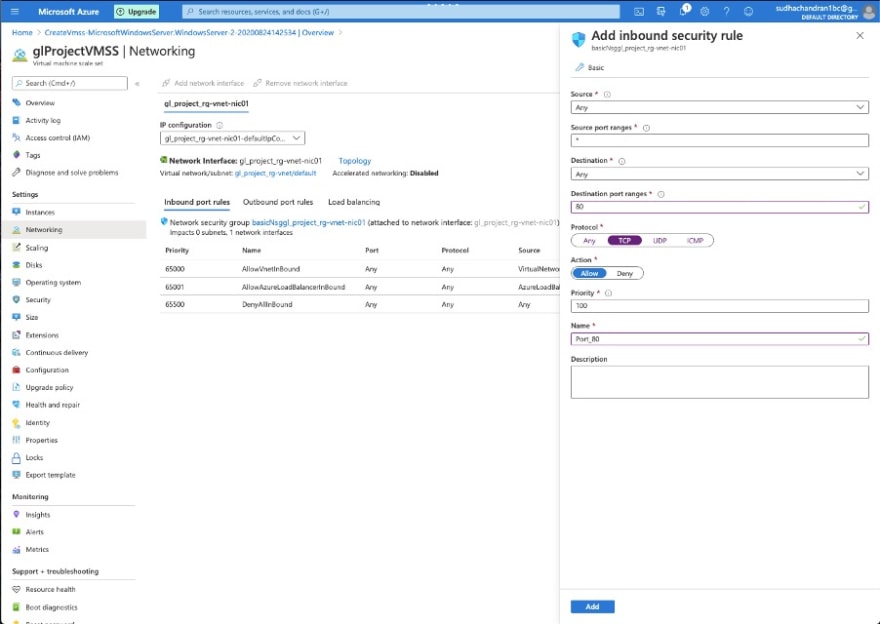
We need to allow incoming traffic through port 80. So will create a new inbound rule “port_80”
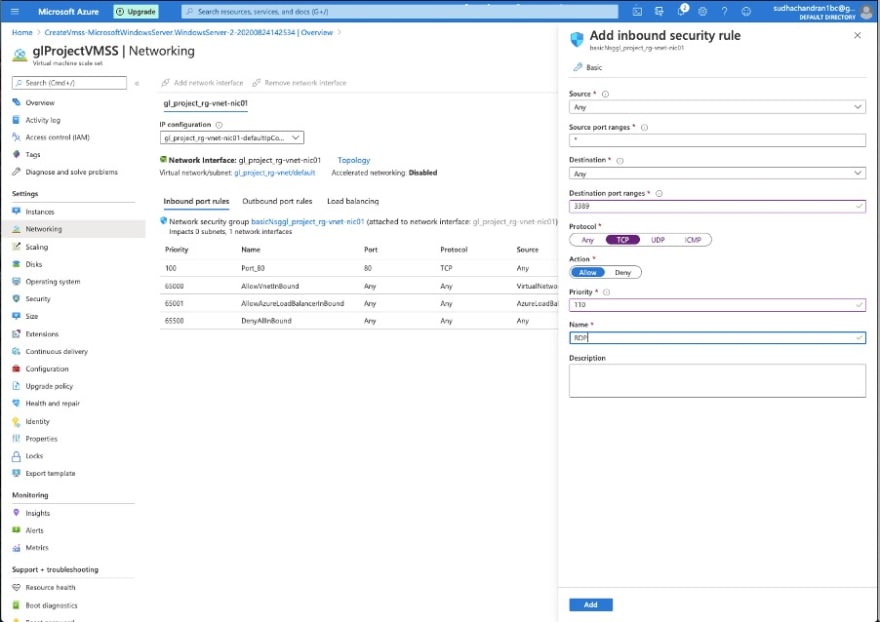
Also we need to allow port 3389 to connect to virtual machine through RDP.
Step 3: Setup IIS and run default website.
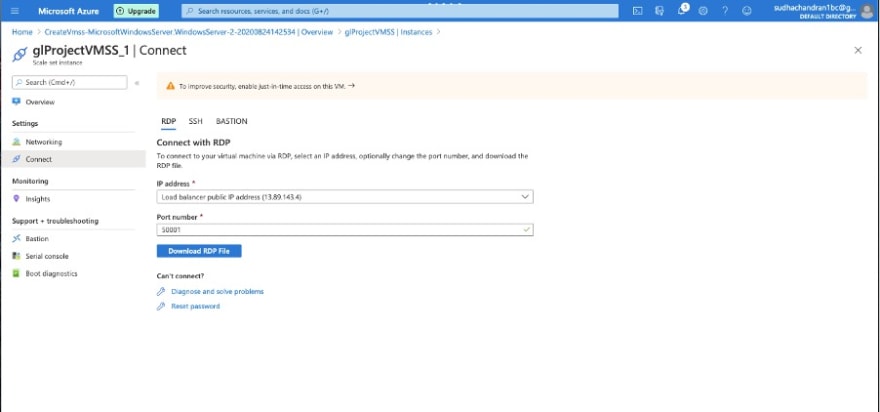
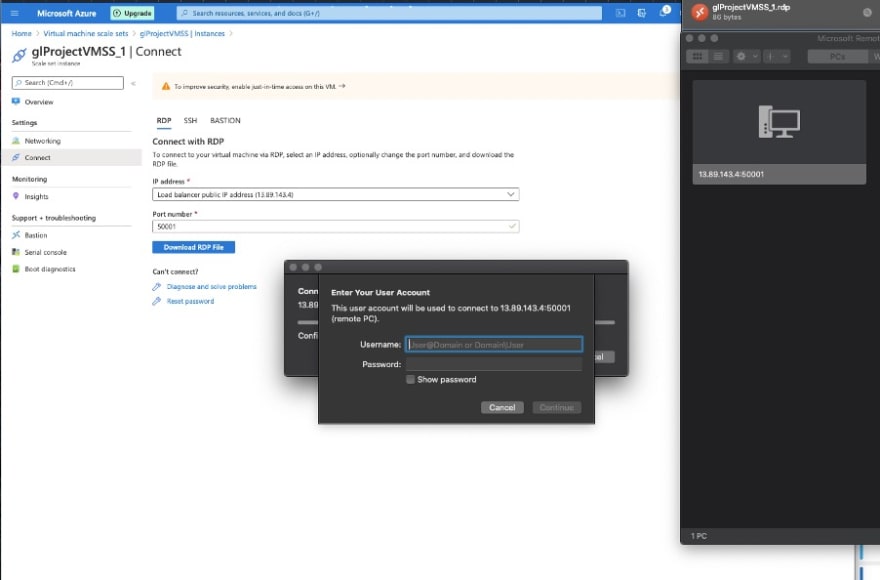
Let’s connect to our VM through RDP through load balancers public ip address.
Go to instance glProjectVMSS_2 and click on connect through RDP. Download RDP file.
The RDP file downloaded asks for username and password.
Asks for certificate validation. Click on continue.
On connecting successfully, it will open Windows Server app automatically.

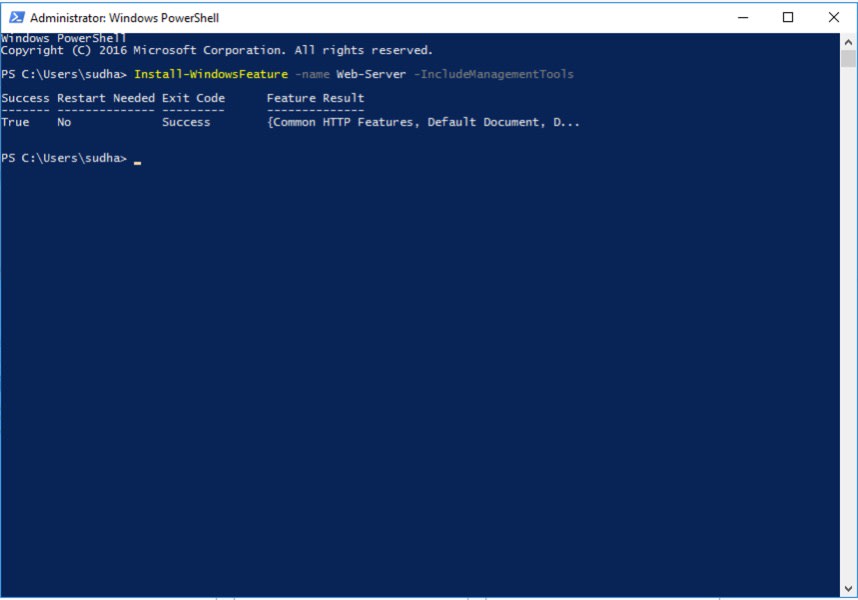
Next, Open the PowerShell app in the remote VM and add the following command to install IIS.
Install-WindowsFeature -name Web-Server -IncludeManagementTools
Installed successfully.
Next try to access Load balancers public IP address.
Now we are able to access IIS home page successfully through Load Balancer’s IP.
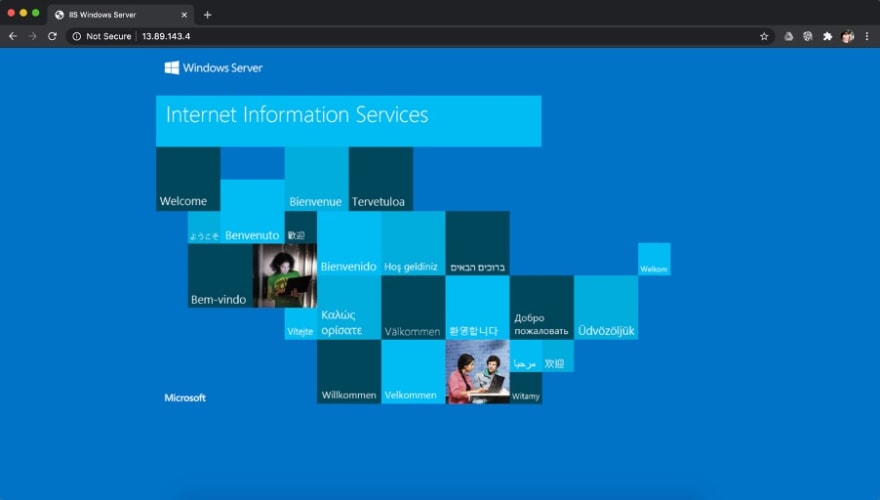
Finally we have created Virtual Machine Scale Set, Load Balancers, Scale rules.
Then we connected to Instance with RDP using Load Balancer's IP address.
Lastly we installed IIS and setup a default web server and accessed it from Load Balancer's IP address.
Thank you for Reading! 😊





Top comments (0)