Introduction
From the official GraphQL documentation, GraphQL is a query language for APIs and a runtime for fulfilling those queries with your existing data. GraphQL provides a complete and understandable description of the data in your API, gives clients the power to ask for exactly what they need, and nothing more, makes it easier to evolve APIs over time, and enables powerful developer tools.
I will be demonstrating with a simple application of how you start using GraphQL with Golang using the awesome gqlgen package
There are other packages used in Golang for GraphQL implementations, but these are the few reasons we use gqlgen:
- gqlgen is based on a Schema first approach — You get to Define your API using the GraphQL Schema Definition Language.
- gqlgen prioritizes Type safety — You should never see map[string]interface{} here.
- gqlgen enables Codegen — We generate the boring bits, so you can focus on building your app quickly. You can get a complete read here
The purpose of this article is to give you a hands-on introduction to using Graphql in Golang. As such, we won't focus on definitions of terms in great detail.
We will be building a multi-choice question and answer application.
Basic Setup
You can get the complete code for this article here
Create a folder of the project at any location on your computer(preferably where you have your Go projects), initialize go mod, then install the package gqlgen package.
mkdir multi-choice
cd multi-choice
go mod init multi-choice
go get github.com/99designs/gqlgen
Then create a Makefile to house all the commands that will be used.
touch Makefile
Content:
init:
    go run github.com/99designs/gqlgen init
Initialize using:
make init
After running the above command, the project structure will look like this(from the documentation):
The end product of the application we will be building has this structure:
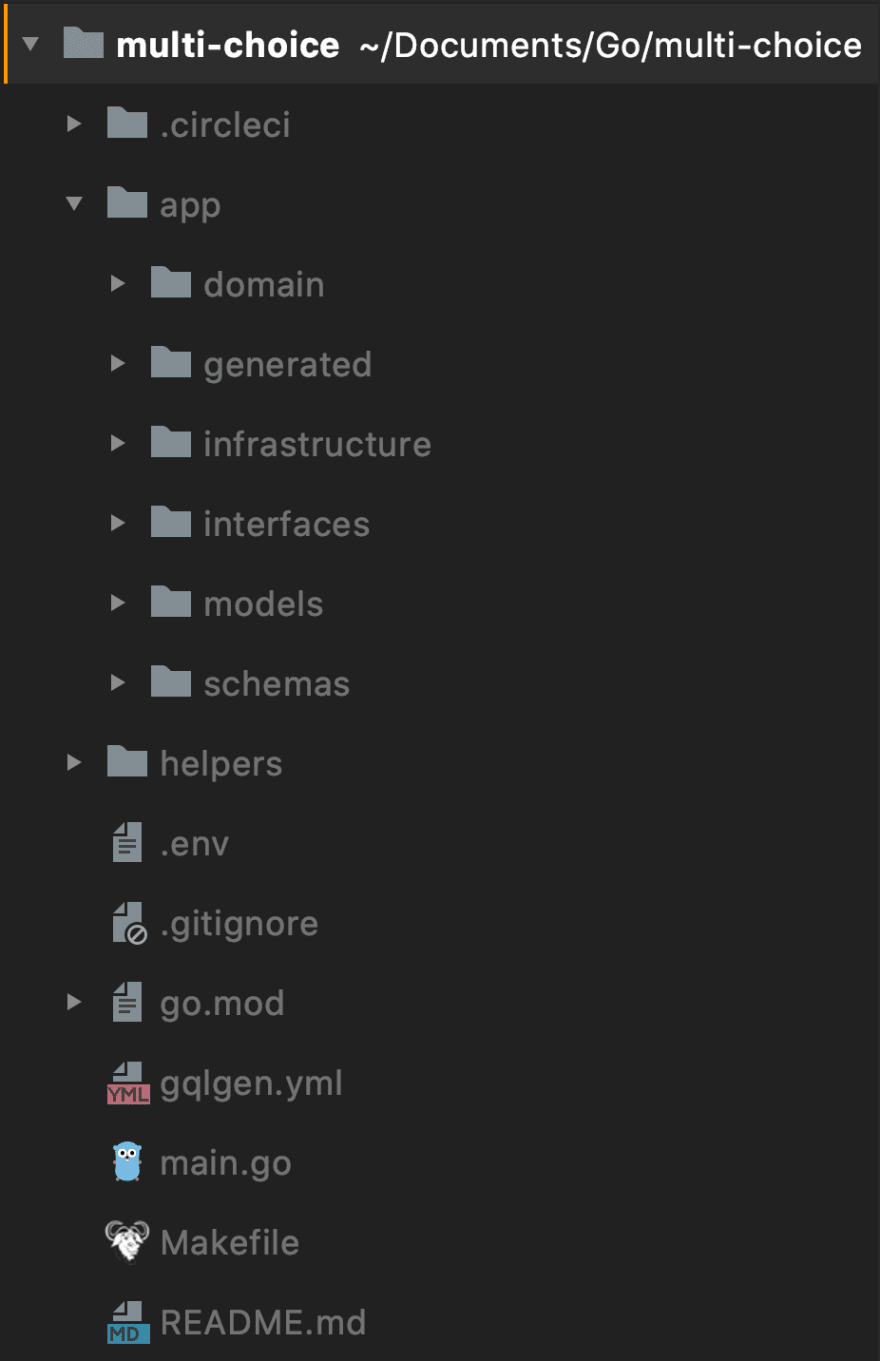
We will now customize to fit our use case.
The gqlgen.yml is modified to be:
Schemas
A GraphQL schema is at the core of any GraphQL server implementation. It describes the functionality available to the client applications that connect to it. - Tutorialspoint
gqlgen ships with a default schema.graphql. We can create more schemas based on project requirements.
The look of the schemas directory:
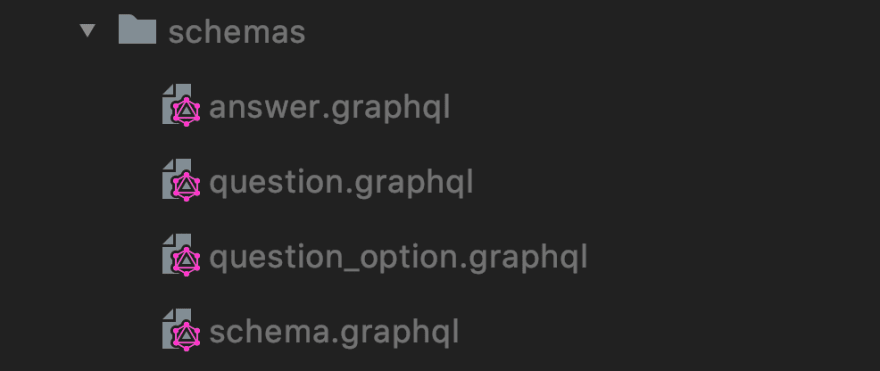
I thought it neat to have the schema for a particular functionality to be in just one file(including the mutation and the query).
Rather than have a huge mutation/query that houses all mutation/query descriptions, we will have several, based on the number of concerns/features we are to implement.
In a nutshell:
- Base:
type Mutation {
    #schema here
}

type Query {
    #schema here
}
- Extended:
extend type Mutation {
    #schema here
}

extend type Query {
    #schema here
}
The Question Schema:
The Question Option Schema:
Observe there is no mutation/query. Well, question options are created only when questions are created, so they are not created independently.
The QuestionOptionInput was used as an argument in the Question schema defined above.
The Answer Schema:
Note:
Graphql does not permit more one definition of mutation/query. So we had to use the extend keyword when defining other mutation/query for other functionalities.
I don't consider it neat to have all mutation/query in one file as I have often seen from projects.
Custom Types
We can always add custom types outside the built-in types(ID, String, Boolean, Float, Int) to do so, we use the scalar keyword.
A good example is Time(created_at, updated_at, etc)
That can be defined in the schema.graphql file:
We don't need to bother adding the marshaling behavior to Go types; gqlgen has taken care of that. This also applies to other custom scalar types such as Any, Upload, and Map. Read more here. To add your own custom type, you will need to wire up the marshaling behavior to Go types.
Models
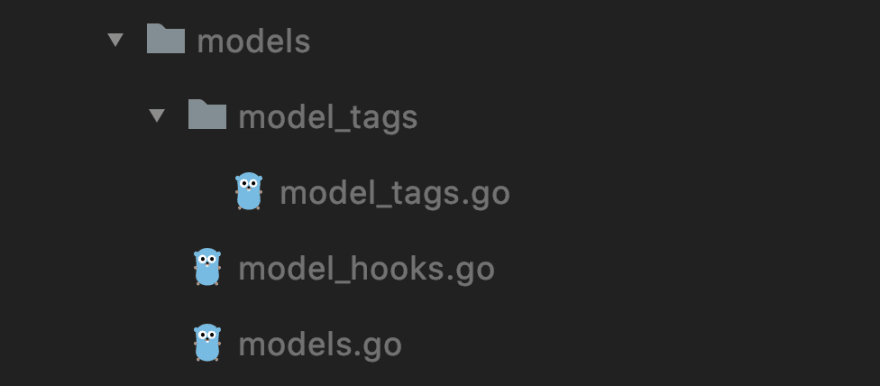
Models' directory structure:
The graphql schema defined in the schemas directory is translated into Go code and saved in the models.go file.
For example,
type Question {
    id: ID!
    title: String!
    questionOption: [QuestionOption]
    createdAt: Time!
    updatedAt: Time!
}
Is translated to:
type Question struct {
    ID             string            `json:"id"`
    Title          string            `json:"title"`
    QuestionOption []*QuestionOption `json:"questionOption"`
    CreatedAt      time.Time         `json:"createdAt"`
    UpdatedAt      time.Time         `json:"updatedAt"`
}
Where QuestionOption is a type just like Question
For us to translate schema to an actual Go code, we need to run a generate command.
Update the Makefile:
init:
    go run github.com/99designs/gqlgen init

generate:
    go run github.com/99designs/gqlgen
Then run the generate command:
make generate
This will generate the following in the models.go file
Observe that the mutation and query translations are not here. That will be in the resolvers as we will see later.
To have a different model for each schema, you can inform the gqlgen.yml about them. Read more here I think is neat to have the models inside the models.go file for now.
Custom hooks
You can define hooks to alter your model's behavior. In my case, I want the id to be a randomly generated string(UUID). So, to do that, I have to use gorm's BeforeCreate hook:
Custom tags
We might need to add extra tags to our model structs. For instance, we might add a "db" tag, a "gorm" tag, a "bson" tag(when using MongoDB).
This is defined in the path: models/model_tags
We can update the generate command in the Makefile so that we always add the model tags each time we run the generate command.
generate:
    go run github.com/99designs/gqlgen && go run ./app/models/model_tags/model_tags.go
Running the generate command:
make generate
We will now have the models.go updated as:
Resolvers
A resolver acts as a GraphQL query handler
Mutations and Queries are translated into Go code and placed in the resolvers when the generate command is run:
make generate
So, for a mutation like this:
type Mutation {
    CreateQuestion(question: QuestionInput!): QuestionResponse
}
The corresponding translation is:
func (r *mutationResolver) CreateQuestion(ctx context.Context, question models.QuestionInput) (*models.QuestionResponse, error) {
   panic(fmt.Errorf("not implemented"))
}
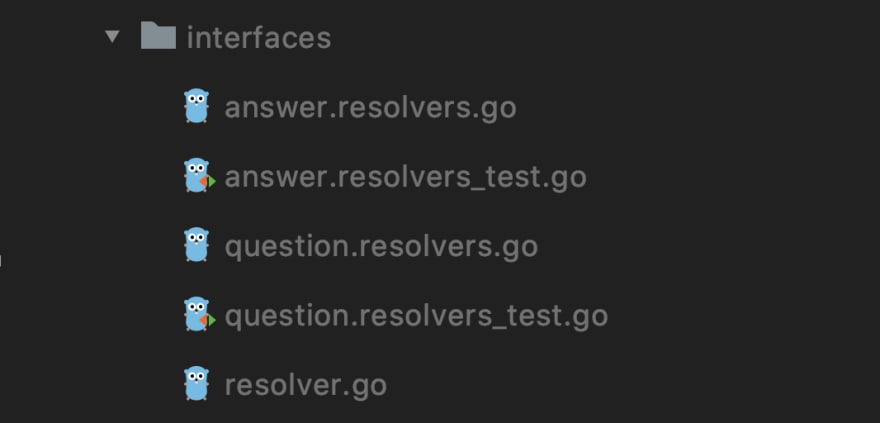
- The article slightly adheres to DDD(Domain Driven Design) principles. So I thought it cool to have the resolver.go and all resolver related files to be placed in the interfaces directory.
The Question Resolver:
The Answer Resolver:
The above are simple crud operations. We use dependency injection to require external functionalities. The dependencies used are:
- QuestionService
- QuestionOptionService
- AnsService
which are defined in the base resolver file:
This makes our resolver methods to be easily testable. We can easily replace those dependencies with fake ones, so we can achieve unit testing. Kindly check the test files.
Domain
We injected some dependencies into our resolver above. Let's define those. This will be done in the domain:

The Question Repository:
The Question Option Repository:
The Answer Repository:
Infrastructure
We will now implement the interfaces defined above in the infrastructure layer:
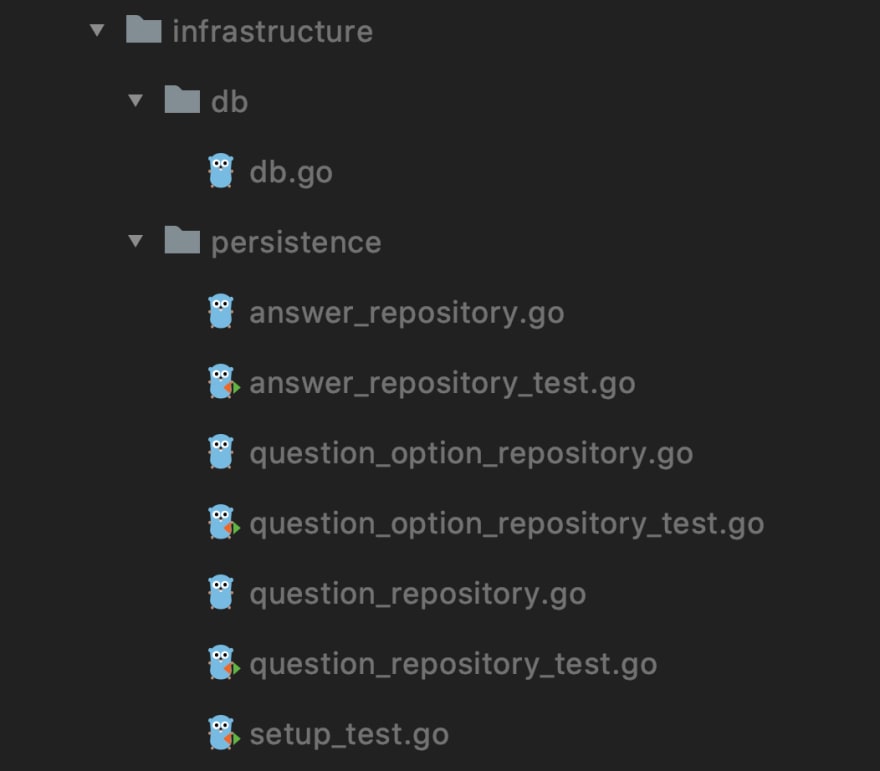
Implementing Question Methods:
Implementing Question Option Methods:
Implementing Answer Methods:
From the above implementations, gorm is used as the ORM to interacting with the PostgreSQL database.
Next, let's look at db.go file, which has functions that open the db and run migration.
Running the Application
We have pretty much everything wired.
Let's now connect to the database, pass down the db instance.
All environmental variables are stored in a .env file at the root directory:
In the root directory, create the main.go file. The content of the server.go that graphql initial setup ships with are added to the main.go file, and the file is deleted.
We can update the Makefile that have the run and the test commands:
Run the application:
make run
Trying Some Endpoints
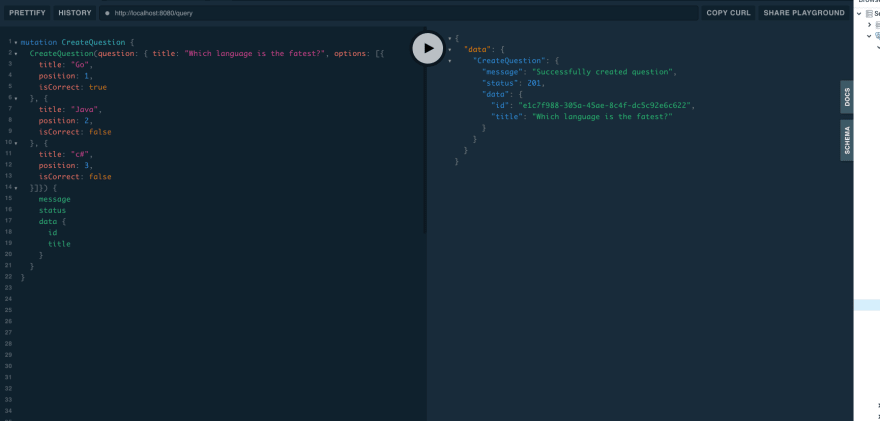
- Create a Question with multi-choice
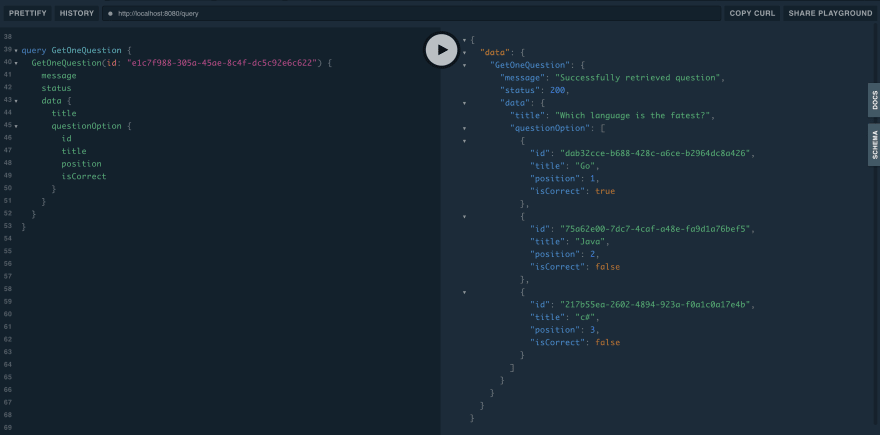
- Get one question with multi-choice
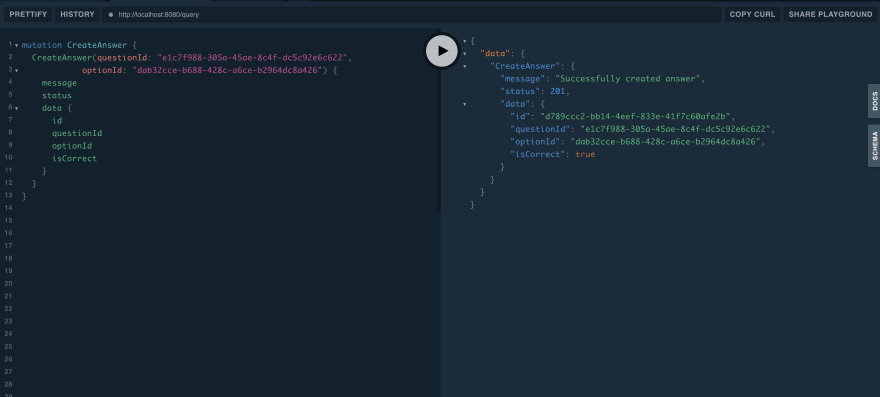
- Answer the question:
Running the tests
Integration Tests
You will need to create a test database and update the .env file with the credentials to run the integration tests in the infrastructure layer.Unit Tests
The dependencies from the infrastructure layer are swapped with fake implementation. This allowed us to unit test the resolvers in the interfaces layer.
Having updated the .env, run all test cases from the root directory:
make test
Conclusion
You have seen how simple it can be to start using graphql in golang. I hope you enjoyed the article.
Get the complete code for this article here
I will be expanding on the current idea in future articles to add:
- File upload
- Authentication
Stay tuned!
You can follow me on twitter for any future announcement.
Thank you.




Top comments (0)