Technical stuff shouldn't surface in your app, but it can be useful at times: let's see how we can enable a "Diagnostic Mode" or a "Developer" menu in your app using Settings.bundle.

Fight your inner geek
Before diving into the instructions, here are some personal insights explaining why I needed this.

I get it, you love tweaking everything, and your app should let users gut it open and dissect everything.
But for the average user, anything technical can create confusion and complexity. Our job as software developers is to solve problems, not create new ones. And by offering too many options, you're creating a burden for your users: they have to understand what these options are for, figure out if/when they need them and learn how to use them.
Even as a tech-savvy user, I don't want to be bothered with too many options inside the app itself if it's not part of the experience.
My personal rule is that any menu item that users are unlikely to need shouldn't appear in the in-app Settings.
For instance, my app has a hidden "iCloud Sync" menu option in its Settings to help identify potential iCloud sync issues.

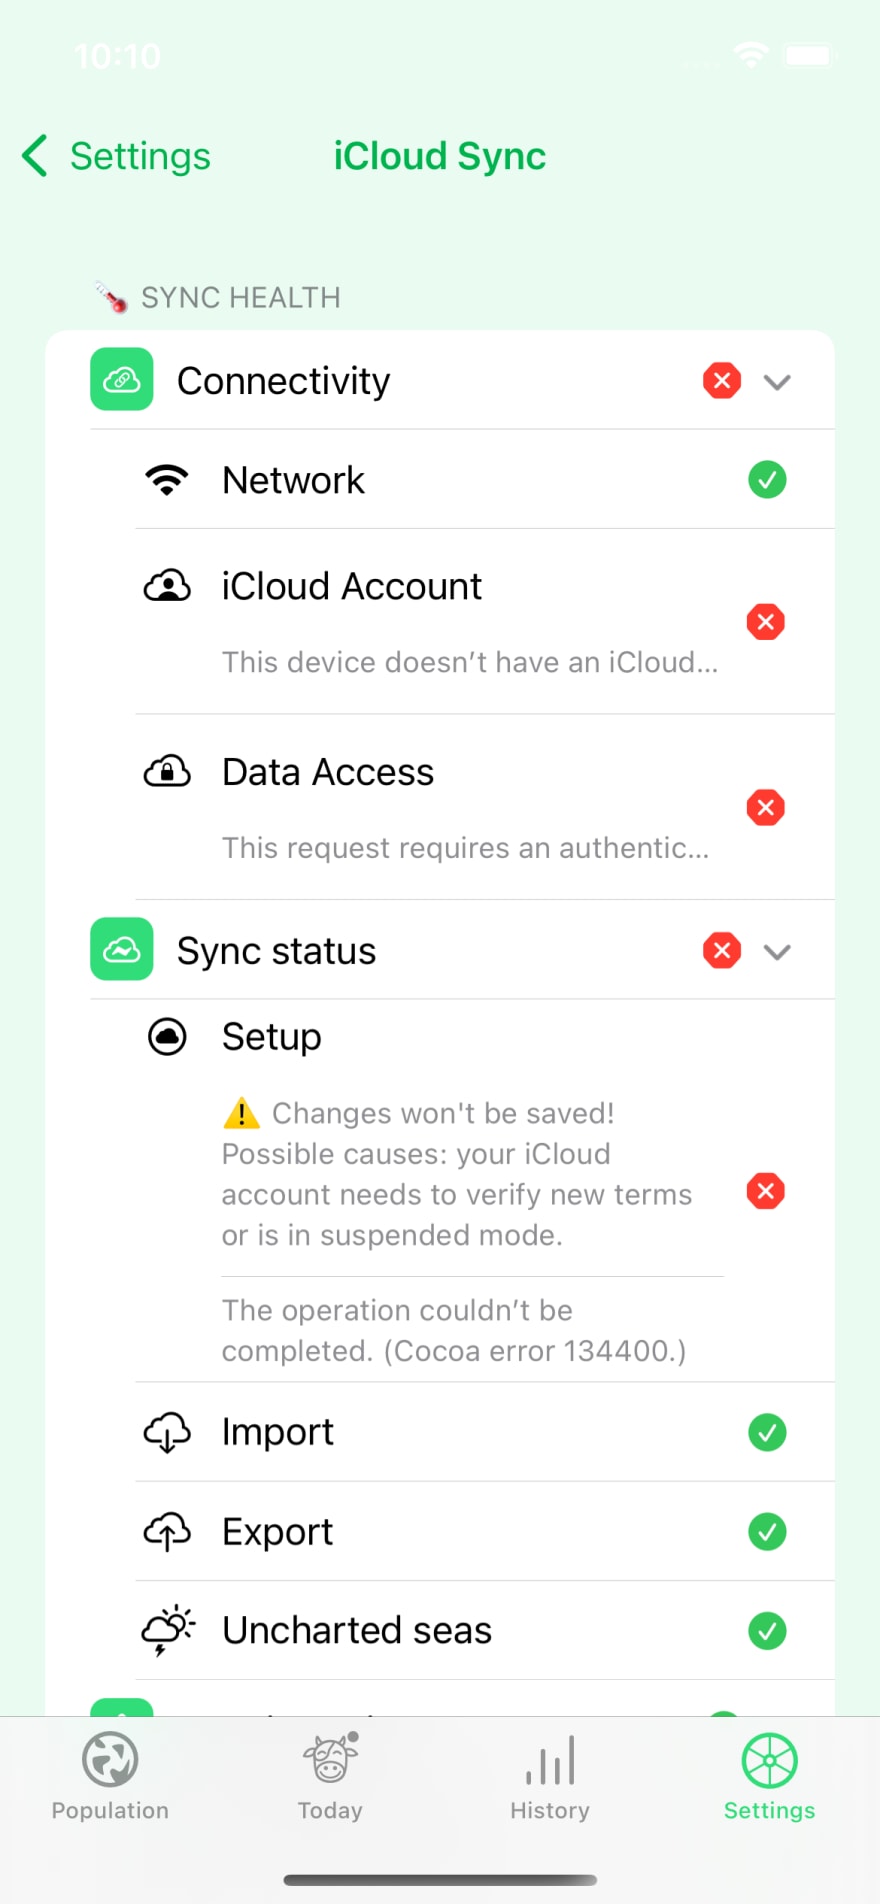

Until now, this menu appeared automatically based on the connectivity status (which I get from CloudKitSyncMonitor).
But there are 2 drawbacks:
- it can be disturbing or anxiety-inducing : sometimes the menu will appear for a split second during the course of a normal event, and if you don't know what this is about it can be troubling
- you can't access it willingly : I added a "Data integrity" section that is not directly related to CloudKit's connectivity status and I want to be able to access it
So I wanted to have a way to reveal this menu manually, and this is where Settings.bundle comes in.
This means I will also be able to add other menu options that could help me collect data, like the entire SQLite store if need be.
By adding a toggle in the app Settings (the ones inside the device Settings, not the in-app Settings), where (almost) no one ever goes looking.
Adding Settings.bundle
I'm only going to cover adding a "Diagnostic Mode" toggle, I'm sure you can figure out the rest from there.
First, add a new file (⌘N) and look for "Settings Bundle"

Snapshot of template picker
This will add the Settings.bundle which includes a default Root.plist file and a localization file.
In the "Preference Items":
- keep only the "Toggle Switch"
- change the
Titleto "Diagnostic Mode" - change the
Identifierto "diagnostic_mode_enabled" - set the
Default Valueto NO so that it'sfalseby default
It should look like this:

Target Root.plist
Let's see if this value is available to us:
- add a breakpoint somewhere in your app
- run it (⌘R)
- get into the console
- Enter
po UserDefaults.standard.bool(forKey: "diagnostic_mode_enabled")
false, it works 🥳
WRONG.
Go back and now enterpo UserDefaults.standard.dictionaryRepresentation().keys.sorted()
The diagnostic_mode_enabled key is missing 😒.
You only got false because bool(forKey:) returns false if the key doesn't exist, and not because Default Value is "NO".
Here's the catch: that key won't be available until the user changes the setting.
So you'd better be careful about the default values you use there. In our case, since we want false by default (including if the user didn't touch the settings), NO is perfect.
Showing the button in your SwiftUI view
The only thing you have to do is to listen to the UserDefaults.didChangeNotification and toggle a @State variable to show or hide your Button or NavigationLink.
It should look something like this:
struct SettingsSection: View {
    @State var isShowingCloudLink = false

    var body: some View {
        Section {
            if isShowingCloudLink {
                NavigationLink(destination: CloudSettingsView()) {
                    Label(…)
                }
            }
        }
        .onReceive(
            NotificationCenter.default
                .publisher(for: UserDefaults.didChangeNotification)
                .receive(on: RunLoop.main)
        ) { _ in
            isShowingCloudLink = UserDefaults.standard.bool(forKey: "diagnostic_mode_enabled")
        }
    }
}
Code Sample of the SeriousSection in my Settings
Don't forget to receive on RunLoop.main or you will get a notification from Xcode warning that you are "Publishing changes from background threads".
🍒 As suggested by @alpennec, it's a good idea to wrap the isShowingCloudLink = UserDefaults.standard.bool(forKey: "diagnostic_mode_enabled") in a `withAnimation {}.
Localizing the Settings
If your app is available in multiple languages, you'll probably want to localize the settings.
Unfortunately, this has to be done manually (instead of the usual box-checking from the File Inspector)
- Right-click on "en.lproj" and select "Show in Finder"
- Duplicate and rename "en.lproj" for each language you support
Since the Settings.bundle is added as a reference, you don't have to drag them into Xcode, they will appear automatically.
If you're using Localazy like me, here's what the config for your localazy.json could look like (more about this here)
`
{
"upload": {
    "files": [
        {
            "type": "ios-strings",
            "pattern": "YourApp/Settings.bundle/en.lproj/Root.strings",
            "path": "YourApp/Settings.bundle"
        }
    ]
},

"download": {
    "files": [
        {
          "conditions": [["!startsWith: fastlane, ${path}"]],
          "output": "${path}/${iosLprojFolder}/${file}"
        }
    ]
}
}
`
🫵 Enjoyed this article?
If you liked this article or want to talk, please like/RT/comment this tweet:
 How to add a "Diagnostic Mode" in your #SwiftUI app?
My "iCloud Sync" menu appears automatically if there's an issue but I wanted something that could be triggered manually and wrote a blog about it.
Here are the highlights, a catch, and a link to the article at the end 👇11:13 AM - 27 Apr 2022


Top comments (0)