
This article was originally published on my personal blog
If you haven't read parts 1 and 2, I suggest you do to understand part 3 a little better.
In the first two parts of this tutorial, we went over how to create a Twitter bot that sends out tweets from the Today in History API and then created scheduled tasks that make sure these tweets are tweeted automatically at certain times of the day. We are using twitter-api-client to easily connect to the Twitter API. You can see the bot for this tutorial in live action on @HistoryBot7.
In this part of the tutorial, we'll go over searching tweets based on specific queries and retweeting them. You've probably seen a lot of bots do this. You tweet something with a hashtag or certain keywords, and a bot retweets it right away. This is what we will do. We will search for tweets that have the hashtag "#HistoryBot" every minute and retweet them.
You can follow up with the code for this tutorial on the GitHub Repository.
Searching Tweets
The first step is to search through the latest tweets that have the hashtag "#HistoryBot" so that we can later on retweet them.
We will create a new file at the root of the project called search.js. The reason we are doing it in a separate file is that we will later need to run a scheduled command on this file independently.
The file should start by initializing the TwitterClient as such:
//search.js
require('dotenv').config()
const {TwitterClient} = require('twitter-api-client')

const twitterClient = new TwitterClient({
    apiKey: process.env.TWITTER_API_KEY,
    apiSecret: process.env.TWITTER_API_SECRET,
    accessToken: process.env.TWITTER_ACCESS_TOKEN,
    accessTokenSecret: process.env.TWITTER_ACCESS_TOKEN_SECRET
})
If you've been following up with the tutorials, you'll notice that this is exactly the same in index.js. So, instead of repeating the code. We will move this code into another file called init.js, export twitterClient in it, and then require it in our index.js files and search.js files. (If you are just following the tutorial for your own project, you don't need to do this step.)
So, now we will have init.js with the following content:
//init.js
require('dotenv').config()
const {TwitterClient} = require('twitter-api-client')

const twitterClient = new TwitterClient({
    apiKey: process.env.TWITTER_API_KEY,
    apiSecret: process.env.TWITTER_API_SECRET,
    accessToken: process.env.TWITTER_ACCESS_TOKEN,
    accessTokenSecret: process.env.TWITTER_ACCESS_TOKEN_SECRET
})

module.exports = twitterClient
Then, we will require twitterClient in index.js and remove the previous code initializing the Twitter Client:
//index.js
const twitterClient = require('./init')
const axios = require('axios')

axios.get... //rest of the code from before
And change search.js as such:
//search.js
const twitterClient = require('./init')
This way, we are avoiding repeating the same code in different files.
Now back to our search script. After initializing the Twitter Client, we need to search tweets that have in them "#HistoryBot". To do so, we will use the method tweets.search on twitterClient. This method takes a variable number of parameters, for example, since_id helps you get tweets after a specific tweet. This can help you optimize the search you are doing and the tweets you are retreiving. You can find a list of all their parameters here.
For the basic usage of our example, we will pass it two parameters: q which is the search query we are performing, which in the case of our tutorial is "#HistoryBot" but you can place any kind of keywords or hashtags in it that you want to find in a tweet. The second parameter is result_type and the value will be recent. This is to ensure that we are getting the most recent results, as the default value for this parameter is mixed which retrieves a mix of recent tweets as well as popular tweets. We need to use recent as our goal is to retweet tweets as they are tweeted.
By default, the endpoint this method calls retrieves a maximum of 15 tweets. You can change that if you want by passing the count parameter, which can be 100 at most.
So, our code in search.js will be as such:
const twitterClient = require('./init')

twitterClient.tweets.search({
    q: '#HistoryBot',
    result_type: 'recent', //get latest tweets with this hashtag
}).then ((response) => {
    console.log(response)
}).catch ((err) => console.error(err))
This will retrieve the last 15 tweets that have the "#HistoryBot" in them, then will just print them to the console.
To test this, run the following command in your terminal:
node search.js
If everything is done correctly, you will see an object containing status attribute which has an array of statuses. Each status has attributes like id, id_str, text, and many others as well. Keep in mind that there aren't many tweets with this hashtag (probably none), as I am using this hashtag to make sure the tutorial doesn't retweet anything random. So, you can replace the hashtag with anything else to see it in effect.
Retweeting Tweets
After searching tweets based on our query, we will want to retweet them into our bot. To do so, we will use the method tweets.statusesRetweetById on twitterClient. This method takes the parameter id, which will be id_str from the status object we received before.
It should be noted that if a tweet has been already tweeted, Twitter will ignore it. If you've hit a limit for retweeting, you'll receive an error with status code 403. You can read more about this endpoint here.
So, we will change our code in search.js as such:
//...
twitterClient.tweets.search({
    q: '#HistoryBot',
    result_type: 'recent', //get latest tweets with this hashtag
}).then ((response) => {
    if (response.statuses) {
        response.statuses.forEach((status) => {
            twitterClient.tweets.statusesRetweetById({
                id: status.id_str
            })
            .then ((resp) => console.log(`Retweeted tweet #${status.id}`))
            .catch ((err) => console.error(err))
        })
    }
}).catch ((err) => console.error(err))
Instead of printing the response from tweets.search into our console, we are iterating over the statuses array received in the response and retweeting each tweet using tweets.statusesRetweetById, passing it id_str of each of the statuses. If it's successful, it will print to the console Retweeted tweet #${status.id} where status.id is the id of the status. If it fails, it will print to the console the error received.
Now, let's test this again by running the same command:
node search.js
And you will see that it will retweet tweets with this hashtag.

Note: I've tweeted this tweet on @HistoryBot7 so you can test it out as well if there aren't any tweets with the hashtag!
Deploying To Server
If you've followed up with part 2 of our tutorials, you've seen that we deployed the bot on alwaysdata. We will now update the server with our updated code, so that we can after schedule a task to run every minute and execute search.js.
First, update your GitHub repository that you are using on the server with the most recent changes:
git add .
git commit -m "added retweet functionality"
git push origin master
Then, connect to your server with SSH like we did in part 2 using your credentials.
Once connected, navigate to the directory that has the bot's code and pull from the GitHub repository:
cd history-bot
git pull origin master
This will update the code on our server with the latest changes.
Now, let's create the scheduled task on our alwaysdata server. If you are using a different server, this is just an easy way to create a cron job.
In your alwaysdata admin dashboard, go to Scheduled tasks under Advanced in the sidebar. Then click "Add a scheduled task"
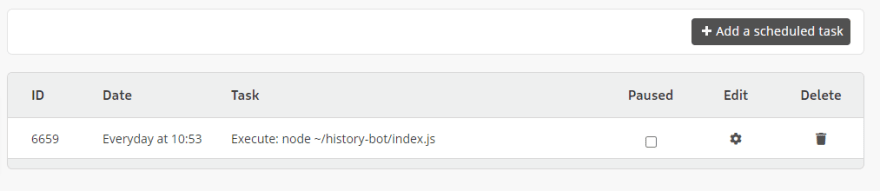
In the form on the next page, choose "Execute the command" for "Type of task", then for "Value" type the command "node ~/history-bot/search.js". Make sure to replace the command based on your own server path and files.

In the Environment section, choose your SSH user from the dropdown and enter in the Working Directory field /home/history-bot/history-bot, where the first history-bot is the name of the app you've created on alwaysdata for the bot, and the second one is the directory we have history bot in. You can also choose to omit this, as our command already specifies the full path of search.js
In the Frequency section, choose "Every" and type 1 in the field to execute the command every minute. You can change that of course to whatever fits your use case.

Once you're done click Submit. Then, go to Sites under Web in the sidebar and restart your app. Now, the script will execute every minute!

To test the history bot for this tutorial, just tweet something with #HistoryBot and it will retweet you!
Note that if your bot already retweeted some tweets throughout the tutorial, you will need to unretweet them to see it in effect now.
If the bot is not working properly, you can check out the logs on your server for more info. If you are using alwaysdata, you can find the logs under ~/admin/logs/job/2021.
Conclusion
Following these 3 tutorials, you should be able to create a bot that tweets periodically and search through Twitter based on a specific keyword or hashtag and retweet tweets, then deploy the bot. Hope you create something great with it!

Top comments (0)