Hi there, you're probably searching for a simple and cost-effective way to deploy your Rails app, especially now that Heroku no longer offers its free plan. Well, look no further. Dokku is an open-source Heroku alternative that simplifies deploying and managing our apps on a server. Combine that with DigitalOcean's affordable Droplets, and you've got an attractive solution.
For reference, you can deploy and run about three simple apps on one $6 droplet, but that's only about half the cost of hosting one app on Heroku with a database and caching. Moreover, unlike a Droplet, the Heroku server will sleep when it's not been accessed for a while. This is not to say that Heroku is overpriced. They do a lot of the work for you and charge more for the convenience.
Alright, before we proceed, what are "Droplets"? They are DigitalOcean's Linux-based virtual machines. When you create one, it becomes a server for your app(s).
Creating the Droplet
First, you need to sign up on DigitalOcean.
- Next, head to the Dokku Droplet page and click the "Create Dokku Droplet" button to create a droplet with Dokku preinstalled. Note that if you create a regular droplet, you'll have to install Dokku manually, and more configuration will be required.
- Select a region closest to you or your userbase on the create page for best performance. Select the "Basic" option and choose the $6/month plan under the "Regular" CPU option.
- For authentication, choose SSH and click the button to add a "New SSH Key." You should see a pop-up like this
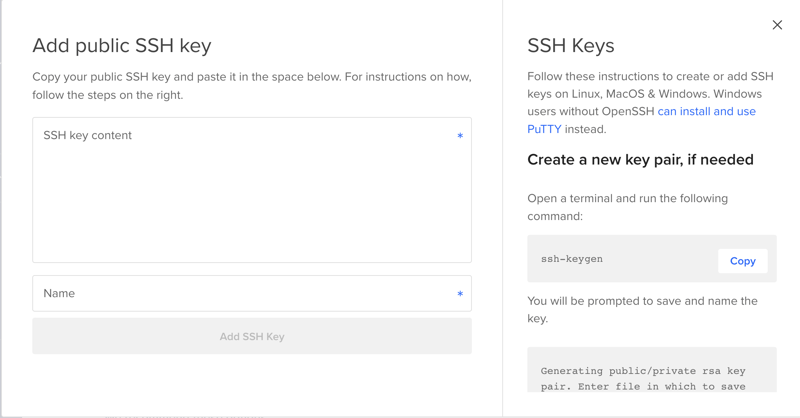
with instructions on how to get your SSH key from your device. Give your key a descriptive name. I like to use the name of my device (e.g., "M1 MacBook Air")
- Scroll to the bottom and replace your droplet's hostname. A shorter name is ideal. You can use a name like "bootcamp-projects" or the app's name if the droplet is used exclusively for a single app. Create the droplet, which should take you to the project page, where you'll see your droplet with a loading progress bar. This indicates that your Droplet is being initialized. Once it's ready, you should see more details like this:
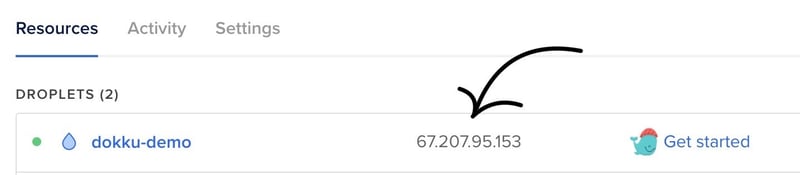
The series of numbers the arrow points to is your droplet's IP address. Please take note of the IP address, as you'll be using it later.
-
Next, enter the IP address in your browser's address bar (preferably in a different tab), and you'll see a setup page.
On the setup page, you'll see three fields:- Public Key: By default, this field will contain the SSH key you supplied earlier, so you don't need to do anything. However, if you didn't already upload a key, you can do so here.
- Hostname: If you want to use a domain name, enter it here. Otherwise, enter your Droplet IP address.
- Use virtual host naming for your apps: Only tick this if you're using a domain name since the option isn't available for IP address hostnames.
Click 'Finish Setup' to complete the setup. If successful, it may redirect you to an error page but don't mind it.
Note: You should complete this setup immediately because anybody that visits that IP address before you can insert their pubic key and complete the setup, granting them access to your server as thedokkuuser.
Once you complete the setup, though, nobody can access the page again.
Prepare for Deployment
The rest of this guide assumes that you're comfortable running commands in the terminal, but here are some things to note if you aren't.
When you see a command with angle brackets like so:
# enter your app directory
cd <your app directory>
Replace the content of the brackets (including the brackets) with the appropriate information. So, in this case, assuming the directory is my-shiny-new-app, the command you type into your terminal window will be:
cd my-shiny-new-app
The line that starts with a # will be omitted because it's a comment. Comments are only there to describe the code or command.
So, with that out of the way, let's proceed.
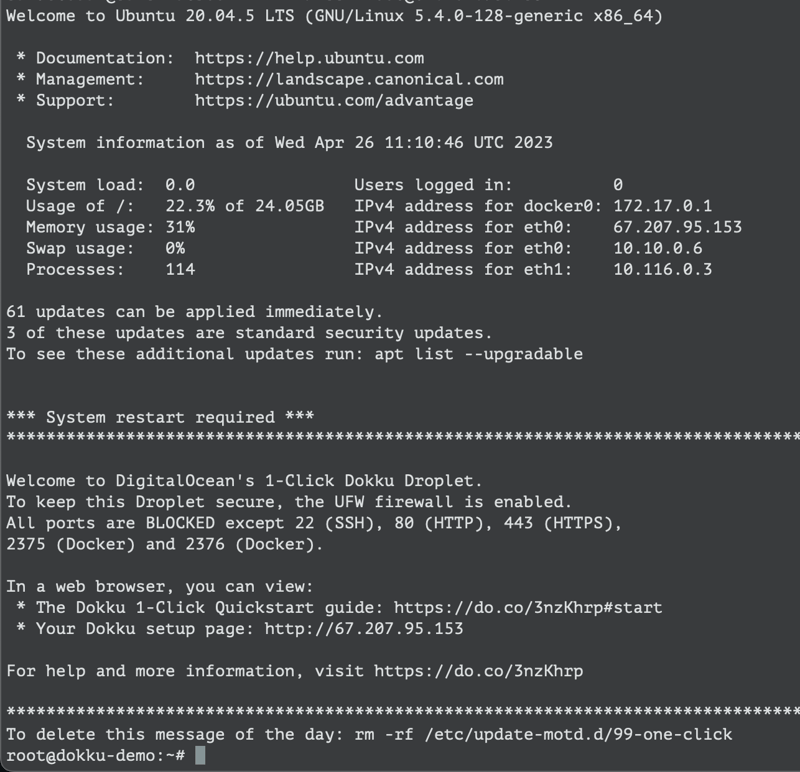
SSH into your droplet using ssh root@<your droplet IP or domain name> . Replace the <> with your IP like so, ssh root@127.0.0.1
If you get a message in the terminal saying "the authenticity of host <your IP> can't be established," proceed to connect by entering yes.
You should see Warning: Permanently added '<your IP>' (ED25519) to the list of known hosts. and that's fine. If the connection is closed afterwards, rerun the ssh command, and you should now see an output like this:
You'll be deploying a sample Rails app provided by Heroku.
Clone the app on your local machine.
# from the root folder or a folder containing your other repos
git clone git@github.com:heroku/ruby-getting-started.git
# enter into the directory of the sample app
cd ruby-getting-started
In another terminal window, connect to your dokku host (SSH into it like before) and create the app there:
# on your dokku host
dokku apps:create ruby-getting-started
"ruby-getting-started" is the app name I chose because it matches the repo, but you can give it any name you want.
Create The Database Service
This app uses PostgreSQL, so you'll need to install the progress plugin for Dokku:
# on your dokku host
# we're using sudo because the install requires root
sudo dokku plugin:install https://github.com/dokku/dokku-postgres.git
Next, create the database service and link it to your app:
# on your dokku host
dokku postgres:create rails-sample-database

dokku postgres:link rails-sample-database ruby-getting-started
Again, I'm using the name "rails-sample-database," but you can name it something else.
The link method is used like so:
dokku postgres:link <service> <app> [--link-flags]
# service   service to run the command against
# app       app to run the command against
You can learn more about it by running the command below:
dokku postgres:help link
or
# for a list of all the available commands
dokku postgres
Deploy The App
You first need to add a git remote to your app's repo on your local machine (not on the Dokku host)
# on your local machine
# remote name must be dokku for it to work
git remote add dokku dokku@<our-Dokku-IP>:ruby-getting-started
and push:
git push dokku main:master
That's it! You've successfully deployed your app.
You'll find the URL to your app in the output of the push like so;
=====> Application deployed:
       http://67.207.95.153:20104
This link will only work after manually updating the Droplet firewall to allow your app's port. You'll do so with the command below:
# the port in the URL above is 20104, so insert your app's port
sudo ufw allow <port>/tcp comment 'ruby-getting-started app'
Your app should load up just fine now. Congrats!
If you forget the port for any particular app, you can always check it by running:
# it'll be under 'host port'
dokku proxy:ports <app-name>
Like Heroku, you don't need to configure buildpacks. If you checked the deployment output, you may have noticed that the buildpack identified your application as a Ruby app. This is because the root directory of your app contains both the Gemfile and Gemfile.lock files.
Handling Database Migrations
Instead of remembering to run migrations after every deployment, you can use a Procfile. We didn't create one earlier, and that was fine because Dokku creates a default Procfile for the app if none is found. But we will create one now to add the db:migrate command under the release process type. Here's how:
- Enter the root directory of your app in your local machine and create a file named
Procfile. Don't add an extension. - Next, paste this into the file:
rake: bundle exec rake
console: bin/rails console
web: bin/rails server -p ${PORT:-5000} -e $RAILS_ENV
release: bin/rails db:migrate
That's it. Now, every time you push to your dokku repo, the release command will run, and the database migration files will run automatically. Click here if you want a general understanding of what a Procfile is.
Some concluding remarks:
- Because you only have 1GB of RAM, learn how to create Swap memory using this link.
I recommend 4GBs of SWAP. So, change the value of
count=1000to4000. - Check out the official Dokku docs to learn about all the other things you can do in Dokku.
Note: This article has been updated to make the part about running db migrations into its own section. This change was done to provide a more efficient way of handling the task. I'll continue to make small changes as I learn new stuff.
Thank you for taking the time to read this. If you have any questions or if you found this helpful, please feel free to leave a comment below.

Top comments (0)