
What is Azure Command Line Interface?
Azure Command-Line Interface (Azure CLI) is a set of commands used to manage and interact with resources in Microsoft Azure. It provides a command-line interface to manage various Azure services, including Virtual Machines, Storage, Networking, and more. The Azure CLI allows you to automate tasks, create and manage resources, deploy applications, and perform various administrative operations within your Azure environment, all through the command line.
In Microsoft Azure, this CLI tool enables users to interact with their Azure account via a CLI interface, this tool is called the Azure CLI. For Azure-specific syntax, you need to install the Azure CLI and log into your Azure account via the Azure CLI.
STEP 1: Installing the Azure CLI
Go to (https://learn.microsoft.com/en-us/cli/azure/install-azure-cli.) Select your operating system accordingly and follow the steps, click on Install and update then select the link that match your system windows Bit 32/64.

Kindly note that installation is only required once. If you already have it installed, you can skip this process and continue to Step 2
Step 2: Log into your Azure account via the CLI
Open any CLI application of your choice. I am using a Windows system, and I will make use of the traditional CMD windows that came with Windows. On your Windows search bar type CDM.

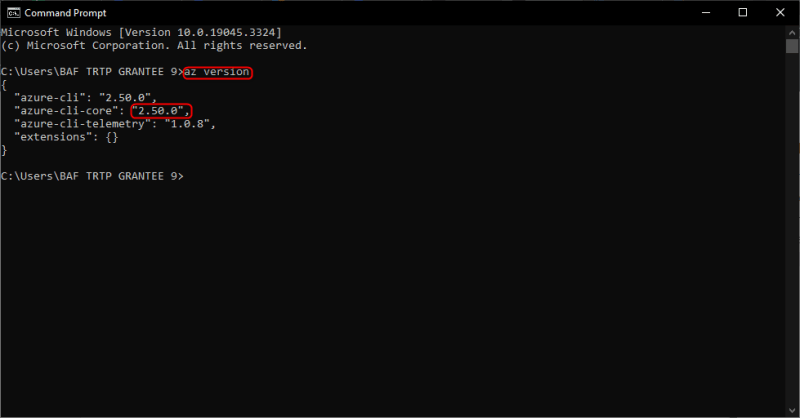
To confirm if Azure CLI is installed. Type az version on your CMD here our Az version is "2.50.0",
Log in to your Azure account by typing az login
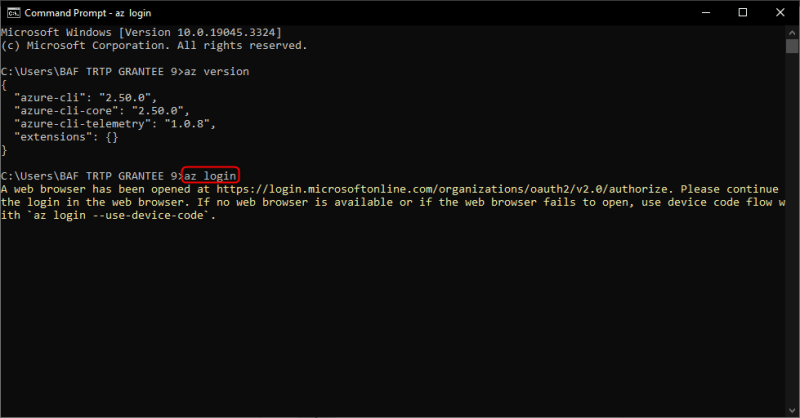
Your default web browser will open requesting you to select Azure account to log into. Select account with an active subscription.

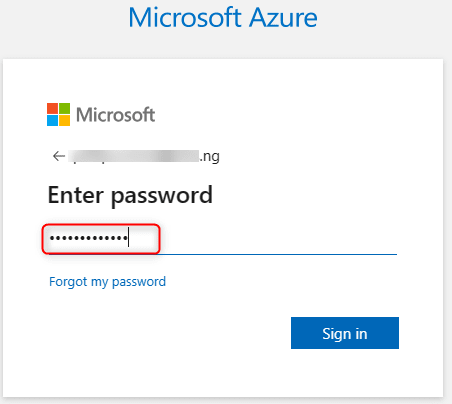
Once you click, you will receive a prompt to enter password, please do.
You will receive the confirmation below.

At this stage return to your CMD and tap enter

Step 3: Create your resource group.
Create a new resource group where your VM will be deployed with the following command.
az group create --name -- location and press enter.
For this example, we will have our ResourceGroup name - demoRG and Location - UKSouth

Resource group has been successfully created.

Step 4: Create a Linux VM in the demoRG resource group.
To create the VM via the CLI use the syntax-
az vm create --resource-group MyResourceGroup --name MyVM --image UbuntuLTS --admin-username azureuser --admin-password MyPassword123 --size Standard_DS2_v2
Note
-- resource-group: Here we add the Resource group we created earlier on {demoRG}
-- name: Provide a name for your VM. I will call mine demolinux1
-- image: Choose the operating system you want to use I will be using the UbuntuLTS.
--admin-username: This is the admin username for the VM- I will call mine azureuser
--admin-password: Set the password for the VM, you have to remember this to be able to log into the VM. Remember your password must meet the requirements for VM password as stipulated by Azure.
--size Standard_DS2_v2

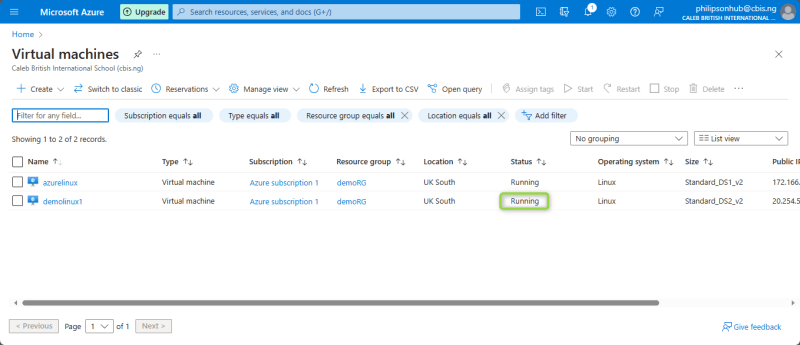
demolinux1 successfully created. Verify on your Azure portal. virtual machine has been successfully created, please check your Azure portal to confirm this.

We need to log into the machine.
Please note that our VM username is azureuser and password, we can use the command: ssh username@ipaddress
Run the command
ssh azureuser@20.254.51.82
Login successful

demolinux1 successfully created. Verify on your Azure portal.
INSTALL AZURE CLI ON AZURE LINUX VIRTUAL MACHINE [newly deployed].
Once the Azure Linux Virtual Machine has been connected successfully, Then, we can now install the Azure CLI on the Linux Virtual Machine [newly deployed] for more management activities.
1). Input the command:
curl -sL https://aka.ms/installAzureCLIDeb | sudo bash
A. Run the Azure CLI command to install.
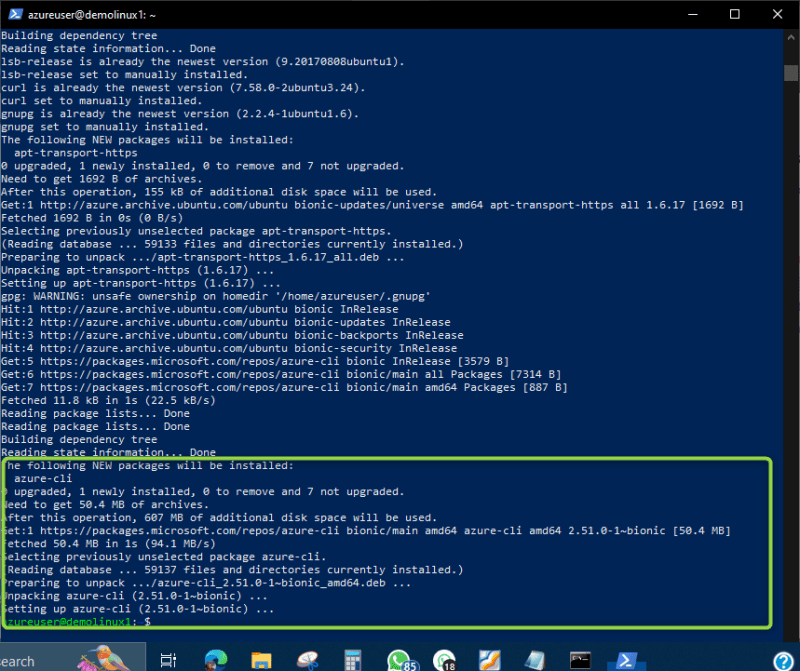
Azure CLI successfully installed.
MANAGE AZURE LINUX VIRTUAL MACHINE (demolinux1) USING AZURE CLI.
Azure CLI has been installed successfully on the Azure Linux Virtual Machine, Then, we can now manage the VM via running certain Key commands on the VM.
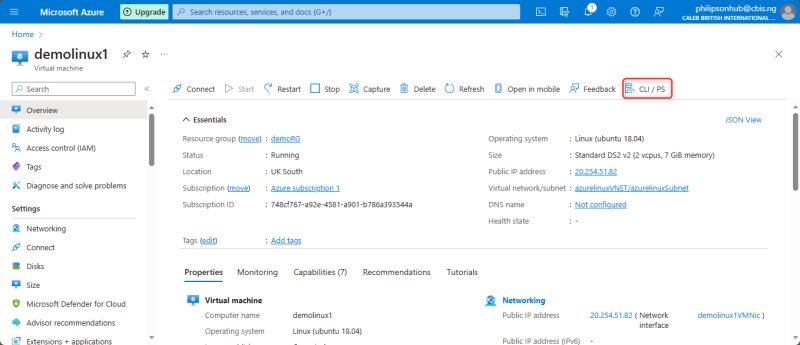
To get list of usable commands, double click on you Virtual Machine from Azure portal, then at the top right conner click CLI/PS to pick list of commands should in case you are new to this environment.

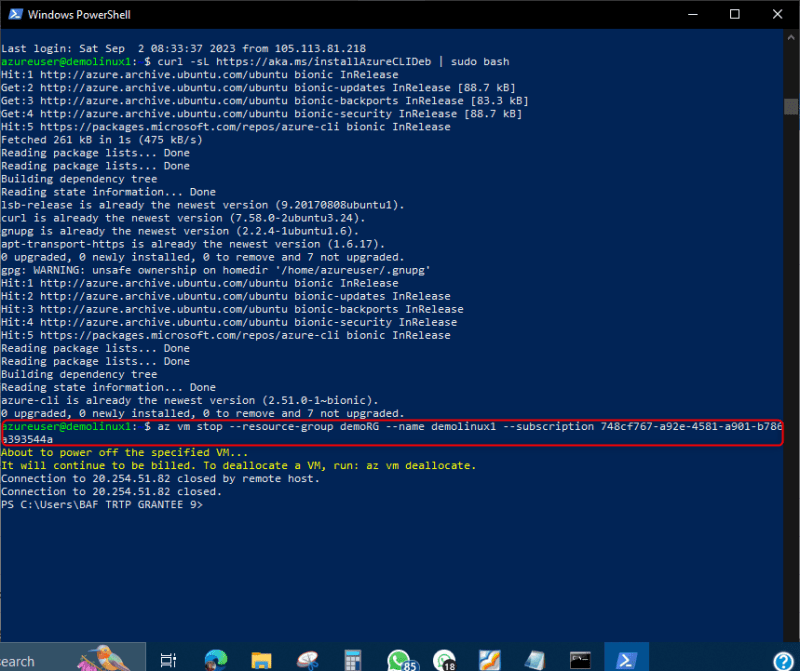
1). STOP VM
Input the command: az vm stop --resource-group demoRG --name demolinux1 --subscription 748cf767-a92e-4581-a901-b786a393544a
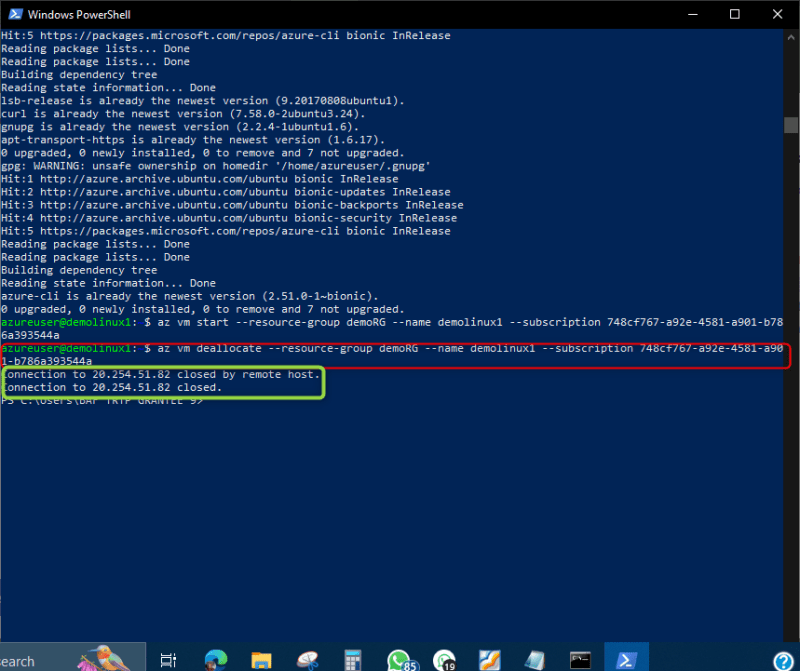
2). START VM
Input the command:az vm start --resource-group demoRG --name demolinux1 --subscription 748cf767-a92e-4581-a901-b786a393544a

3). DEALLOCATE VM
Input the command: az vm deallocate --resource-group demoRG --name demolinux1 --subscription 748cf767-a92e-4581-a901-b786a393544a
Deallocated
demolinux1 Deallocation confirmation from Azure portal.

4). RESTART VM.
Input the command: az vm restart --resource-group demoRG --name demolinux1 --subscription 748cf767-a92e-4581-a901-b786a393544a
5). VM IP ADDRESS LIST
Input the command: az vm list-ip-addresses [--ids] [--name] [--resource-group] [--subscription]
Thank you for reading my article till the end. I hope you learned something special today. If you enjoyed this article, then please share to your friends and if you have suggestions or thoughts to share with me then please write in the comment box.

Top comments (0)