
When I first got my Raspberry PI 4 (RPI for the rest of the article), I was so excited to get started. However, there was one problem. How do I get started? To make matters worse it only had 2 micro-HDMI ports and I couldn’t connect it to a monitor. After a while I found myself wading through link after link.
I am going to show you what worked best for me and a recipe you can also use to get started with your RPI 4 quickly - without an external monitor 🙂
Specs

Source: https://www.raspberrypi.org/products/raspberry-pi-4-model-b/
Step 1 - Installing an OS
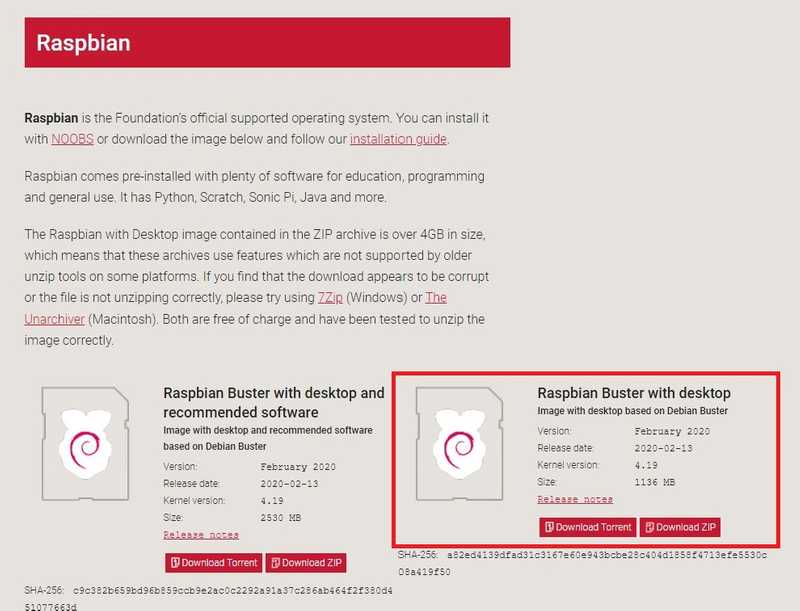
My choice of OS for the RPI is Raspbian since it’s easy to get started with and comes with a lot of tools out of the box. I would recommend selecting “with Desktop” option if you are planning to use it with a window manager.
Once you have got the ISO downloaded we need to flash it to a microSD card. I used balenaEtcher since it was pretty straight forward to use.

If you are using Windows, it will ask you to format the drive when opened with Windows Explorer. Don’t do that 😀 Otherwise, you will find yourself doing this step over and over again.
Now, open the microSD drive in your Windows Explorer or Finder. For us to be able to connect via ssh later, we need to create an empty file called ssh at the root of the drive (without any extension).

Safely eject, unplug the microSD card and chuck the microSD card in to the RPI’s slot.
Step 2 - Connecting the RPI to LAN
This is going to be a one-off step. We need to connect the RPI to the router with an ethernet cable (RJ45) and boot it up. Give it a minute to settle down.
After that, we need to find the local IP of our RPI for us to be able to SSH into it. Normally you can head over to 192.168.1.1 or routerlogin.net if you are using a NETGEAR router.
You need to find the connected list of devices of your router. Now, copy the IP of your RPI
Step 3 - SSH in to your RPI (Headless mode)
You can wither use PuTTY if you are on windows or your terminal on a *nix system.
ssh pi@your_rpi_local_ip
In default settings, the password would be just raspberry

There’s only a single step remaining to get in to your RPI’s desktop environment.
Step 4 - Connecting to RPI with VNC
Now that you know how to ssh into the RPI, we need to use it in GUI mode. We are going to use a VNC provider for that. VNC is a graphical desktop sharing system that allows us to remotely control the desktop interface of our RPI (running VNC Server) from another computer or mobile device (running VNC Viewer).
While you are connected your RPI, let’s run the following commands in the terminal
  sudo apt update
  sudo apt install realvnc-vnc-server realvnc-vnc-viewer
You can enable VNC Server at the command line using raspi-config:
sudo raspi-config

Now, enable VNC Server by doing the following:
- Navigate to Interfacing Options.
- Scroll down and select VNC > Yes.

For our changes to take effect, let’s reboot the RPI
sudo reboot
While it’s rebooting, let’s download the RealVNC viewer,
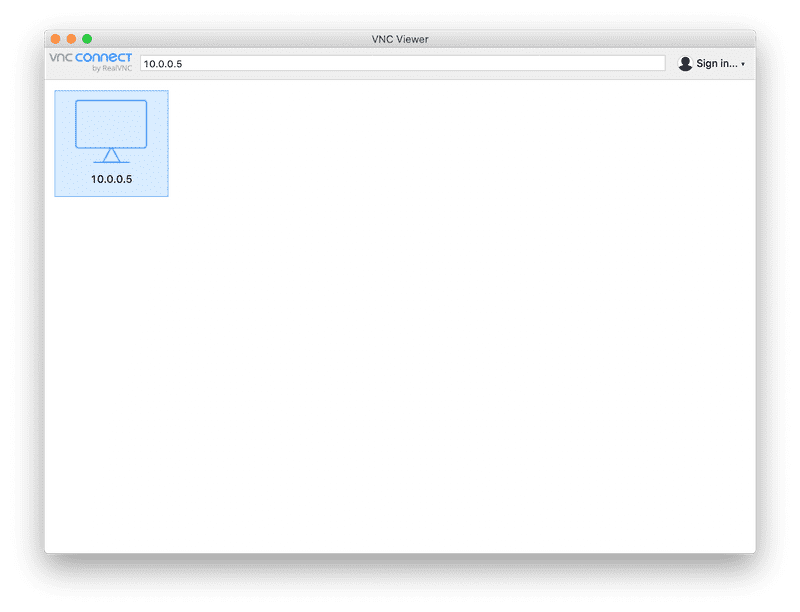
Once the viewer is installed on your local machine, let’s open it up and enter the IP address of your RPI, username & password.
Don’t forget to connect the RPI to your home’s Wifi network. Now you can unplug the RJ45 from the RPI and keep it anywhere you want.

Hope this article helped you. In my next article, we will see how you can configure your own Kubernetes cluster on your RPI!
Enjoy your new Raspberry PI 🥧

Top comments (0)
Some comments may only be visible to logged-in visitors. Sign in to view all comments.