In this post, I am discussing how we can create a simple API with Spring Boot. This post discusses about Repository, Controller/Resource and Model layer.
Let's get to it. 🚀
Prerequisite: Make sure you have Java 11 and maven installed.
Head over to start.spring.io from your favourite browser and create a starter project. Add these three dependency from the Add Dependency tab on right pane.
JPA : JAVA Persistence API. Provides lot of methods to interact with database.
H2 : In memory relational database.
Spring Web : Uses Apache Tomcat as default embedded container.
Click on Generate at the bottom to download the zipped folder. Extract it and open it in IntelliJ or any other favourite editor of your choice.
Your pom.xml with dependencies should look like below.
Just three dependencies that we added from the website. Simple and clean.
At this point we can run the service and it'll start the tomcat but it won't be very useful to us since we haven't defined any endpoints.
So let’s jump into the action and start creating classes. I'll start from bottom-up i.e. creating classes that are closer to the database and then move up to utilize those classes.
1. Model layer
The first thing I like to think about is the object that I want to store in the database. In this post I am using Video object. A video can contain a title and a description.
Let's create a class named Video.java.
Here is the quick summary of the annotations used in the class.
@id
: Annotation tells that the field is a primary key.
@GeneratedValue : JPA will take care of auto generating this value for us. We don't need to manually send it with the object.
@Entity : Represents that the POJO can be persisted in the database.
2. Repository layer
Remember JPA that we added while generating the project. It exposes many methods that can be utilized to interact with the database. Methods like save(), findAll(), delete for regular CRUD operations.
No more hassle of constructing JDBC queries.👍
@Repository : Helps Spring Boot to scan the repository layer.
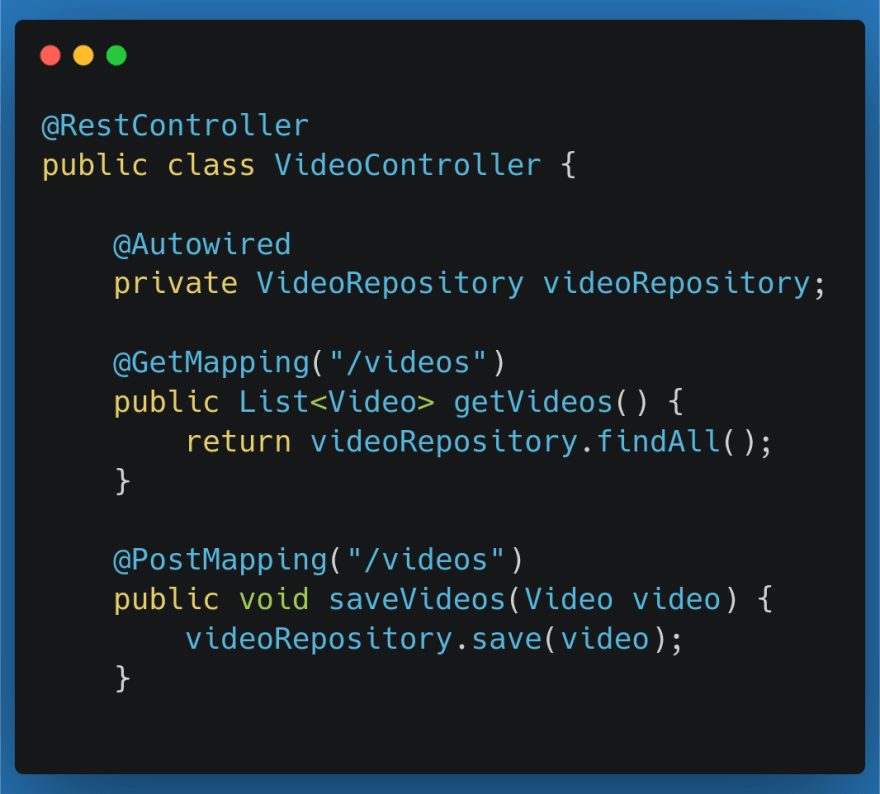
3. Controller/ Resource layer
Layer that expose object from data to the outside world and brings days from outside world.
In other words, it is where we define GET, POST and other REST mappings to create API endpoints.
@RestController : Signifies that the class is a controller class and contains REST endpoints.
That's it. 🎉🎉
Now you are ready to run the service. Look for the class ending with Application in your project. It should contain main method.
You can simply run the main method that will scan all the components based on the annotations that we have supplied and bootup the service.
If everything went well, you should be able to see tomcat running at port 8080. Fireup postman and go to http://localhost:8080 and GET, POST a Video object.
http://localhost:8080/h2-console will open the window to connect to in memory database. You don't need to change anything other than Jdbc_url which can be find from the logs inside the terminal window.
This is a very basic and simple implementation of creating an API with Spring Boot. There are many features of SB that comes out of the box which I will write about in the next few posts.
If you like to walk through video tutorial rather I have a Spring Boot playlist on YouTube 👉 Spring Boot Tutorial Series
I post daily about programming. You can find me 👇
Let’s learn together 💪💪
Happy Coding 💻


Top comments (0)