
Introdction
Docker is all the rage these days and hosting containers in production is becoming the norm. Complex application stacks have evolved beyond the t2.small instances running a LAMP stack in AWS. But what are you going to do if your successful business is built on a wonderful PHP shopping site and you are expected to learn all the ins and outs of deploying and orchestrating images on today's advanced platforms? As each day passes, more and more of our t2 instances running RHEL5 and RHEL6 are being torn down by AWS and not able to be replaced by any suitable alternatives.
This guide will help you avoid orchestration and deployment woes by hosting your production PHP application using docker build and a new easy-mode entry into Kubernetes with docker bake. The examples presented will show a modern PHP7 stack running on RHEL8 using the latest innovations available to production workloads today. You do not need to learn complex ideas about docker push, docker run, kubectl, and more. With this example you can be up and running in the modern era in as little as 30 minutes.
Starting Simple with Docker Build
docker build is a beginners' command that allows you to execute complex workflows and shell scripts inside a container without complex infrastructure or expertise. If you are new to docker build, you can find some good resources online. Basically, you would create a Dockerfile and then provide instructions on which OS to choose, which yum packages to install, copy your code into the directories, and then run your website commands from there.
This example is based on the excellent blog post by RedHat.
Save the following example in your CVS folder where your PHP code lives and name it Dockerfile.rhel8.
FROM registry.access.redhat.com/ubi8/ubi:8.1 AS runtime

ARG NGROK_TOKEN

#RUN yum --disableplugin=subscription-manager -y module enable php:7.3 \
#  && yum --disableplugin=subscription-manager -y install httpd php wget \
#  && yum --disableplugin=subscription-manager clean all
RUN yum --disableplugin=subscription-manager -y install httpd php wget \
  && yum --disableplugin=subscription-manager clean all

RUN wget --no-verbose 'https://bin.equinox.io/c/bNyj1mQVY4c/ngrok-v3-stable-linux-amd64.tgz' \
  && tar xvzf ngrok-v3-stable-linux-amd64.tgz -C /usr/local/bin \
  && rm -f ngrok-v3-stable-linux-amd64.tgz

COPY *.php /var/www/html

RUN sed -i 's/Listen 80/Listen 8080/' /etc/httpd/conf/httpd.conf \
  && sed -i 's/listen.acl_users = apache,nginx/listen.acl_users =/' /etc/php-fpm.d/www.conf \
  && mkdir /run/php-fpm \
  && chgrp -R 0 /var/log/httpd /var/run/httpd /run/php-fpm \
  && chmod -R g=u /var/log/httpd /var/run/httpd /run/php-fpm

FROM runtime

COPY *.php /var/www/html

RUN php-fpm & httpd -D FOREGROUND & NGROK_TOKEN=$NGROK_TOKEN ngrok http 8080 --log=stdout
This file will create a docker container and run all of the setup commands you need to install the full LAMP stack you are used to without any infrastructure or devops help. In each step, we execute setup commands and download yum packages to add software to your running container.
You will notice that although docker build is very powerful and can run any command you tell it to, it will not allow you to connect to any network resources for safety and security. That is, normally, you could just run nginx and then visit http://localhost:8080 to visit your website. The nginx command is running on localhost but you will not be able to access it. It is a different localhost inside the container. You could call it remotehost in this scenario.
All of these networking details are securely hidden by the safety precautions of docker build. You will use these safety features when you get to deploy to production because the networking features are not available with the docker build commands. So we use ngrok to go around these details.
The ngrok tunnel command can be customised to use a custom domain on the endpoint you select and where you issue the correct ngrok token. To run your website locally, simply type this on your laptop (this is not production yet, so you can use an auto-generated hostname at this point):
read -p "Input token? " NGROK_TOKEN
export NGROK_TOKEN
docker build -f Dockerfile.rhel8 -t mywebsiteapp:1 --build-arg NGROK_TOKEN=$NGROK_TOKEN .
This will ask for your production ngrok token for hosting and then your website will be available:
Input token? *********
#1 [internal] load .dockerignore
#1 transferring context: 2B done
#1 DONE 0.0s
#2 [internal] load build definition from Dockerfile.rhel8
#2 transferring dockerfile: 940B done
#2 DONE 0.0s
#3 [internal] load metadata for registry.access.redhat.com/ubi8/ubi:8.1
#3 DONE 0.5s
#4 [1/6] FROM registry.access.redhat.com/ubi8/ubi:8.1@sha256:1f0e6e1f451ff020b3b44c1c4c34d85db5ffa0fc1bb0490d6a32957a7a06b67f
#4 DONE 0.0s
#5 [2/6] RUN yum --disableplugin=subscription-manager -y module enable php:7.3 && yum --disableplugin=subscription-manager -y install httpd php wget && yum --disableplugin=subscription-manager clean all
#5 CACHED
#6 [internal] load build context
#6 transferring context: 30B done
#6 DONE 0.0s
#7 [3/6] RUN wget --no-verbose 'https://bin.equinox.io/c/bNyj1mQVY4c/ngrok-v3-stable-linux-amd64.tgz' && tar xvzf ngrok-v3-stable-linux-amd64.tgz -C /usr/local/bin && rm -f ngrok-v3-stable-linux-amd64.tgz
#7 3.511 2023-08-04 21:41:43 URL:https://bin.equinox.io/c/bNyj1mQVY4c/ngrok-v3-stable-linux-amd64.tgz [8826207/8826207] -> "ngrok-v3-stable-linux-amd64.tgz" [1]
#7 3.519 ngrok
#7 DONE 3.8s
#8 [4/6] ADD index.php /var/www/html
#8 DONE 0.1s
#9 [5/6] RUN sed -i 's/Listen 80/Listen 8080/' /etc/httpd/conf/httpd.conf && sed -i 's/listen.acl_users = apache,nginx/listen.acl_users =/' /etc/php-fpm.d/www.conf && mkdir /run/php-fpm && chgrp -R 0 /var/log/httpd /var/run/httpd /run/php-fpm && chmod -R g=u /var/log/httpd /var/run/httpd /run/php-fpm
#9 DONE 0.5s
#10 [6/6] RUN php-fpm & httpd -D FOREGROUND & NGROK_TOKEN=xyzzy ngrok http 8080 --log=stdout
#10 0.586 t=2023-08-04T21:41:44+0000 lvl=info msg="no configuration paths supplied"
#10 0.586 t=2023-08-04T21:41:44+0000 lvl=info msg="ignoring default config path, could not stat it" path=/root/.config/ngrok/ngrok.yml
#10 0.587 t=2023-08-04T21:41:44+0000 lvl=info msg="starting web service" obj=web addr=127.0.0.1:4040 allow_hosts=[]
#10 0.601 AH00558: httpd: Could not reliably determine the server's fully qualified domain name, using 127.0.0.1. Set the 'ServerName' directive globally to suppress this message
#10 0.941 t=2023-08-04T21:41:44+0000 lvl=info msg="client session established" obj=tunnels.session obj=csess id=c8fe54e8acb1
#10 0.941 t=2023-08-04T21:41:44+0000 lvl=info msg="tunnel session started" obj=tunnels.session
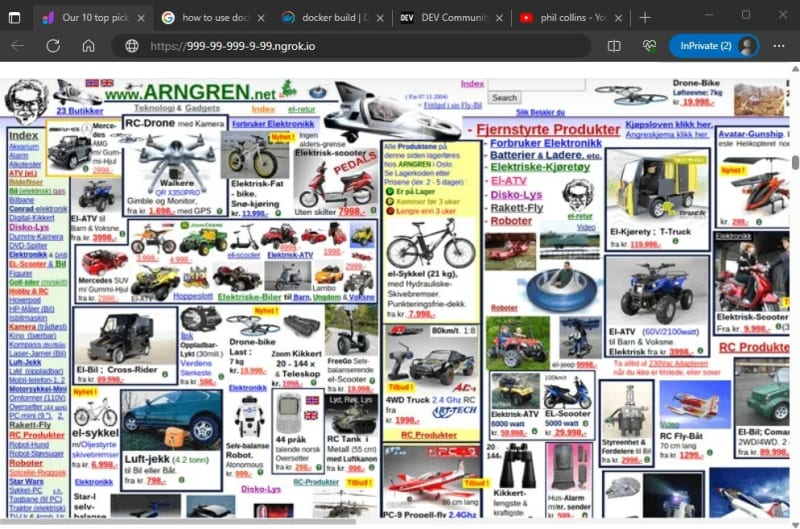
#10 1.050 t=2023-08-04T21:41:44+0000 lvl=info msg="started tunnel" obj=tunnels name=command_line addr=http://localhost:8080 url=https://999-99-999-9-99.ngrok.io
At this point your website is running and you will be able to get your browser to load your new website in your browser:
Notice that you do not need to use any complicated push, pull, or run commands. The container simply runs and waits for you to test your code.
I Feel the Ache, the Cache for Speed
You may notice that Docker will not cache the final results for your build because it does not complete a full layer. This is by design so that your code is secured and not stored anywhere that is unsafe. However, by utilising the multi-stage dockerfile available to the most elite Docker users, you can see that subsequent builds will be very fast, slowing down only to copy your code base after it is updated or when you restart the development environment.
$ docker build -f Dockerfile.rhel -t rhel8:4 . --build-arg NGROK_TOKEN=$NGROK_TOKEN --progress plain
#1 [internal] load build definition from Dockerfile.rhel
#1 transferring dockerfile: 966B done
#1 DONE 0.0s

#2 [internal] load .dockerignore
#2 transferring context: 2B done
#2 DONE 0.0s

#3 [internal] load metadata for registry.access.redhat.com/ubi8/ubi:8.1
#3 DONE 0.3s

#4 [runtime 1/4] FROM registry.access.redhat.com/ubi8/ubi:8.1@sha256:1f0e6e1f451ff020b3b44c1c4c34d85db5ffa0fc1bb0490d6a32957a7a06b67f
#4 DONE 0.0s

#5 [runtime 2/4] RUN yum --disableplugin=subscription-manager -y module enable php:7.3   && yum --disableplugin=subscription-manager -y install httpd php wget   && yum --disableplugin=subscription-manager clean all
#5 CACHED

#6 [runtime 3/4] RUN wget --no-verbose 'https://bin.equinox.io/c/bNyj1mQVY4c/ngrok-v3-stable-linux-amd64.tgz'   && tar xvzf ngrok-v3-stable-linux-amd64.tgz -C /usr/local/bin && rm -f ngrok-v3-stable-linux-amd64.tgz
#6 CACHED

#7 [internal] load build context
#7 transferring context: 30B done
#7 DONE 0.0s

#8 [runtime 4/4] RUN sed -i 's/Listen 80/Listen 8080/' /etc/httpd/conf/httpd.conf   && sed -i 's/listen.acl_users = apache,nginx/listen.acl_users =/' /etc/php-fpm.d/www.conf   && mkdir /run/php-fpm   && chgrp -R 0 /var/log/httpd /var/run/httpd /run/php-fpm   && chmod -R g=u /var/log/httpd /var/run/httpd /run/php-fpm
#8 DONE 0.4s

#9 [stage-1 1/2] COPY index.php /var/www/html
#9 DONE 0.1s

#10 [stage-1 2/2] RUN php-fpm & httpd -D FOREGROUND & NGROK_TOKEN= ngrok http 8080 --log=stdout
#10 0.477 t=2023-08-05T22:33:54+0000 lvl=info msg="no configuration paths supplied"
#10 0.477 t=2023-08-05T22:33:54+0000 lvl=info msg="ignoring default config path, could not stat it" path=/root/.config/ngrok/ngrok.yml
#10 0.478 t=2023-08-05T22:33:54+0000 lvl=info msg="starting web service" obj=web addr=127.0.0.1:4040 allow_hosts=[]
#10 0.487 AH00558: httpd: Could not reliably determine the server's fully qualified domain name, using 127.0.0.1. Set the 'ServerName' directive globally to suppress this message
#10 0.816 t=2023-08-05T22:33:54+0000 lvl=info msg="client session established" obj=tunnels.session obj=csess id=88117dc8c891
#10 0.816 t=2023-08-05T22:33:54+0000 lvl=info msg="tunnel session started" obj=tunnels.session
#10 0.906 t=2023-08-05T22:33:54+0000 lvl=info msg="started tunnel" obj=tunnels name=command_line addr=http://localhost:8080 url=https://abcde-99-999-9-99.ngrok.io
You can see how blazingly fast the steps are now that the previous layers have been cached and your code is safe and secure in memory. The previous build took over 6 seconds to complete, while the cached version took less than 0.7 seconds, a savings of just under 90%!!
Updating your code locally before running in production
Obviously you will want to make some code changes and adjust and test your site before you are ready to publish to production. No problem, use the following example on in another terminal in your laptop:
cd production-web-site
cvs update
pico sales.php
<make your changes and save>
cvs add sales.php
cvs commit -m "Add thinner border and show postal code" .
Switch back to your original docker build command terminal and hit APPLE-CMD-C to terminate the original site. Then run version two of your site again:
read -p "Input token? " NGROK_TOKEN
export NGROK_TOKEN
docker build -f Dockerfile.rhel8 -t mywebsiteapp:2 .
Running in Kubernetes
Everyone wants to deploy to Kubernetes, but it is difficult, if not impossible. However, it is relatively simple to add a buildx builder to your cluster to deploy production-level quality for your containers. Again, no push and pull and run complexities are required.
This new feature of docker build that we rely on is the ability to deploy running containers to Kubernetes, using the docker build bake commands. The bake commands are an extension of build, much like you would build an oven and then bake a cake. It is the same with the code.
To be able to run your production website on Kubernetes with bake you will first create the buildx instance pod that will run your production website:
$ docker buildx create mywebsite --driver kubernetes --driver-opt nodeselector=kubernetes.io/arch=amd64
watoosi-canal
You can list your builders with the following command
docker buildx ls
NAME/NODE       DRIVER/ENDPOINT             STATUS  BUILDKIT PLATFORMS
watoosie-canal* kubernetes
  watoosie-canal0 ......... running v0.19.4  linux/amd64
Next, you will need to create a bake file which is very similar to a recipe for your code to go into the Kubernetes oven.
A quick note on the ngrok configuration: you can supply your credentials to the ngrok.yaml configuration file with hostnames and so forth. This is the recommended way to set the custom domain name, web and security settings, and so forth. You can visit the ngrok documentation for more details.
Simply create a file like this called docker-bake.prod.hcl with the following contents:
target "webapp-release" {
  dockerfile = "Dockerfile.rhel8"
  tags = ["mywebsiteapp"]
  platforms = ["linux/amd64"]
  args = {
    NGROK_TUNNEL = "<insert credentials here>"
  }
}
Then run the following command to connect to Kubernetes, deploy the build container and run your website!
docker buildx bake -f docker-bake.prod.hcl webapp-release
(if your website crashes or you want to restart it, you might need to find the build instance and use it as follows:)
$ docker buildx ls
....
$ docker buildx use <name of instance>
Visit your production website in the browser and you will see something like this:

Conclusion
If you use docker build in production, I'd like to hear about it! We can share the best practices and write more blog posts to share knowledge.
Photo by Josue Isai Ramos Figueroa on Unsplash

Top comments (0)