This is a follow up on this post.
Intro
In the first part we saw how we can extend the CRT to include additional fields in the extension properties, and how to surface that in your own 'Dynamics 365 Commerce - Ecom' custom module.
In this section I'm going to add that field to the 'Add to cart' process.
If you recall, we added an 'Is Warranty' flag to the product table, and we want to produce a message to the end user when they add this item to their cart. It will inform them that the item does not have warranty, and asks them to confirm that they want to buy it.
Setup
Since we are going to add logic to the cart (buybox), we need to be able to mimic adding items to the cart. However, that is not easy when you don't have a full blown Ecom site linked to your dev box.
I think technically it should be possible by setting up a page mock, but I could not get this to work.
However, you can actually use your Test environment's Ecom site for this.
By configuring your .env file to use your Test environment's Ecom site and server, you can use all the site's functionality and data setup while running your Ecom mods locally.
To do this, point all the variables in your .env file to the test environment.
Then when you access https://:4000 it will render test site and all its data, but loads the code locally.
We'll see further below that we use a custom theme to extend the functionality, and by specifying the theme in our url (with a parameter) we can run the custom code.
Implementation
Since I want to add a dialog/message box to the 'add to cart' process, I initially thought I had to change the buybox module.
However Sam Jarawan from Micsrosoft pointed to an easier solution:

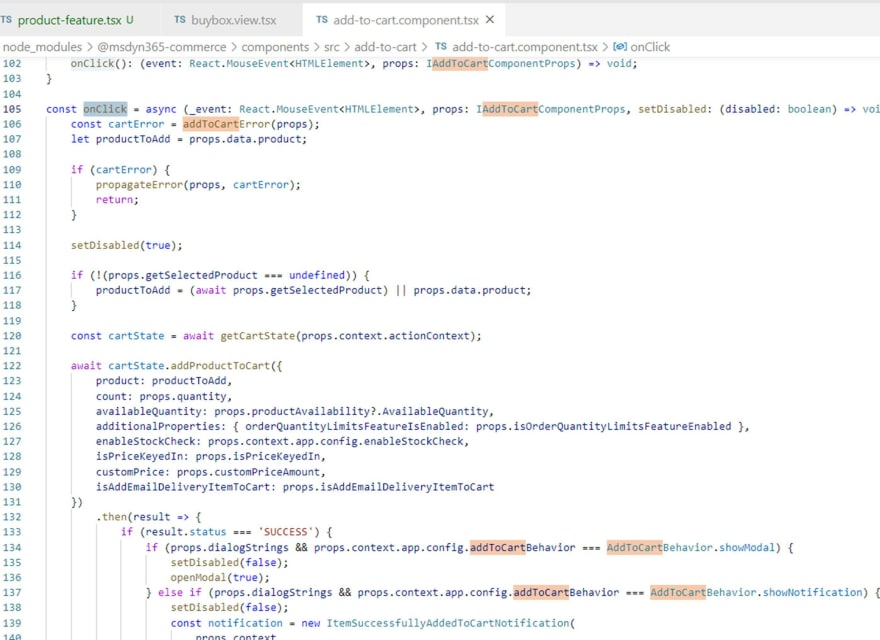
This poses the question; how do we override this?
If you must change any logic in a component, you can use the command-line interface (CLI) add-component-override command to override the component for a selected theme.
See here
First we need to either create or extend a theme.
Create a new theme using the CLI. (You do this in your Visual Code terminal window):
yarn mdsyn365 add-theme itk
Then modify the theme definition so it extends the standard Fabrikam theme:

Make sure to include the styles per here.
Now that we have a theme, we can add our component override to it:
yarn msdyn365 add-component-override itk AddToCart
The command above will copy the component to our themes' "views\components" folder:

You will need to update the imports, as the default paths are no longer valid.
From:

To:

Lets make sure that our new code is executed, and that we can do something when an item is added to the cart. For testing we add a simple alert to the code:
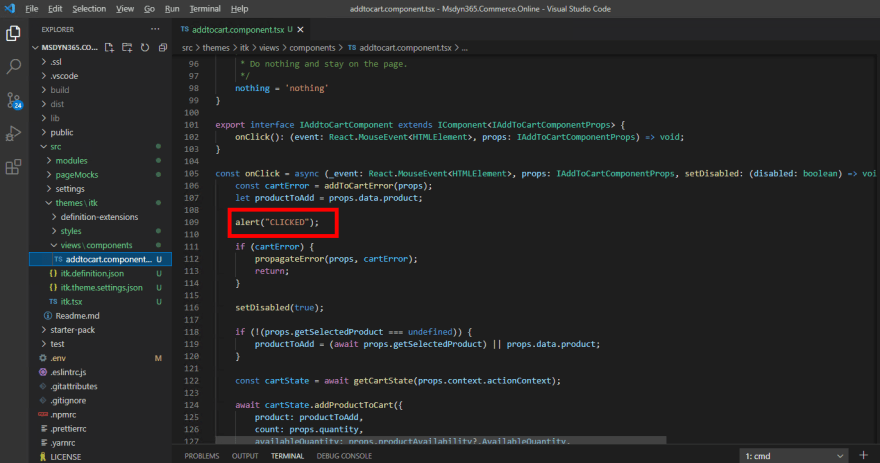
We start the local server:
yarn start
Then fire up the browser, navigate to a PDP page, make sure you select the new theme by modifying the URL, and add the item to the bag:

Beauty! It works!
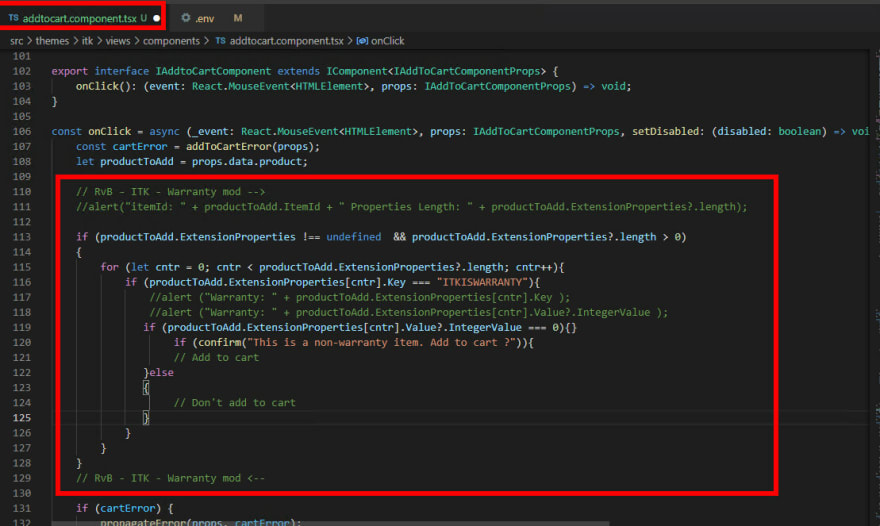
Next step: Use the new field in the alert message.
To do this, we modify the code in our component override :
If we now access the pdp page again using our theme, and add the item to the cart, we see this:
(Make sure you use an item that does NOT have the custom warranty flag set)
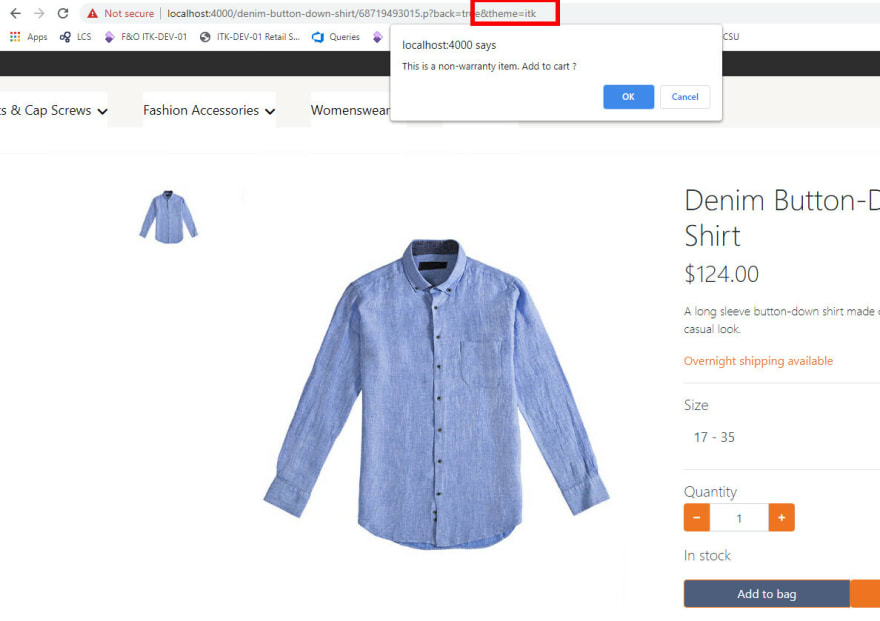
Then if we test again, but this time using an item that does have the custom warranty flag set, we do not get the message.
The code needs to be adjusted to actually add, or not add the item to the cart based on the user's response, but the example at least shows the concept.
Rob.

Top comments (6)
Hi Rob,
I tried the same thing and as your screenshot I have also two buttons (Add to bag & empty). Why is this happening? And after closing the alert message system raises error message "Unhandled Rejection (Error): [getActiveCartWithProdcuts]Unable to hydrate cart with product information". I think add to cart couldn't work properly.
Hi Erkan, I'm not sure what you mean when you say you have 2 buttons? Can you post a screenshot?
As to your error, are you modifying the cart contents at all in your code?
Hi Rob,
I attached the screenshot. In your screenshot I can also see the other button in orange color. I just override AddToCart and even though I didn't modify it I have two buttons. When I click the button with caption it adds the item into basket and after that raises error message. When I click the second button without caption system tries to login and do nothing.
dev-to-uploads.s3.amazonaws.com/up...
dev-to-uploads.s3.amazonaws.com/up...
Erkan - sorry for the delay. I finally had a chance to look into this. I had not even noticed this myself :)
I wonder if this is a bug in the Theme extension / Component extension framework. If I look at the generated page, I see that there actually are 2 buttons (see attached screenshot). However, the extended component only has one. I might post this in the Yammer group to see if I can get some insight from others and possibly Microsoft. Good find!
dev-to-uploads.s3.amazonaws.com/up...
Hey Rob, Great article!
I am trying tp put a limit on the cart itself such that users can only add 1 item.
Can you suggest the best approach to achieve this?
Thanks.
HI Muhammad, just from the top of my head, I would say, find out which action is called to add items to a cart. Then trace that to the actual CRT method that is being called.
Once you know that, you can extend that method by adding the logic to check for the number of items in the cart, and send the appropriate message back to the front end.
Hope this helps.