Introduction
You can now use Microsoft PowerApps with D365 Finance and Operations. (D365 Supply Chain Management, Finance, Commerce)
I always struggled with finding a business case for doing this. Why not just customize F&O?
But I actually came up with a scenario that I think could be useful.
Read on if you are interested.
Business Case
Sometimes you want to quickly see what items are on a sales order. You don't need all the bells and whistles, dates, categories, what have you. You just want to see what's on that order as far as items/products go.
Right now, you will need to go to the 'All Sales Orders' screen, select the order from the grid, then go to the lines, wait until all the stuff you DON'T need is loaded, and then discover you selected the wrong order, and have to start all over again.
What if I could just bring up a super simple screen that ONLY shows the item, description and qty for the order I selected?
Enter PowerApps.
This posts outlines the steps to complete the above scenario. Let's get started.
I got most of the info from the link below, and the helpful
"Finance and Operations Insider Program" Yammer community.
https://docs.microsoft.com/en-us/dynamics365/fin-ops-core/fin-ops/get-started/embed-power-apps#adding-an-embedded-canvas-app-from-power-apps-to-a-page
Creating the App
To create your App, make your way to make.powerapps.com and log in.
First we need to create a connection, select the 'Connections' node in the left pane and select 'New connection':

Select the FinOps connector and click 'Create':

Now we can create our app.
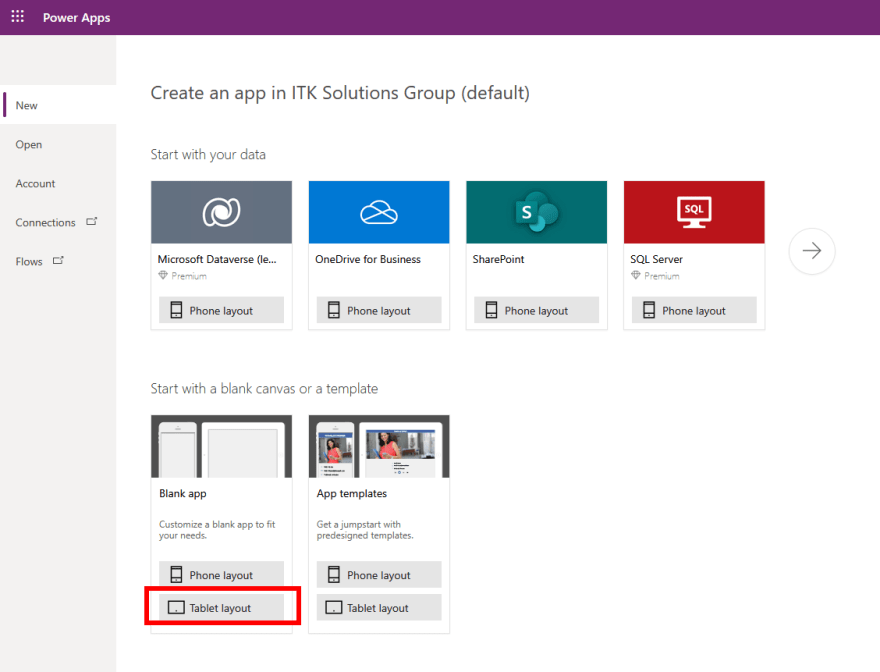
Click on 'Apps' in the left pane and create a canvas app:

You can either start with a 'Table' (Entity) and have a base layout generated based on the data (you do this by clicking on the right arrow) - or start with a blank app.
Since we're building a super simple app, I'm starting with a blank app:
First we add our data source. Click on the 'Data' icon on the left, then "Add Data". Drop down the 'Connectors' section and select the F&O connection you just created:
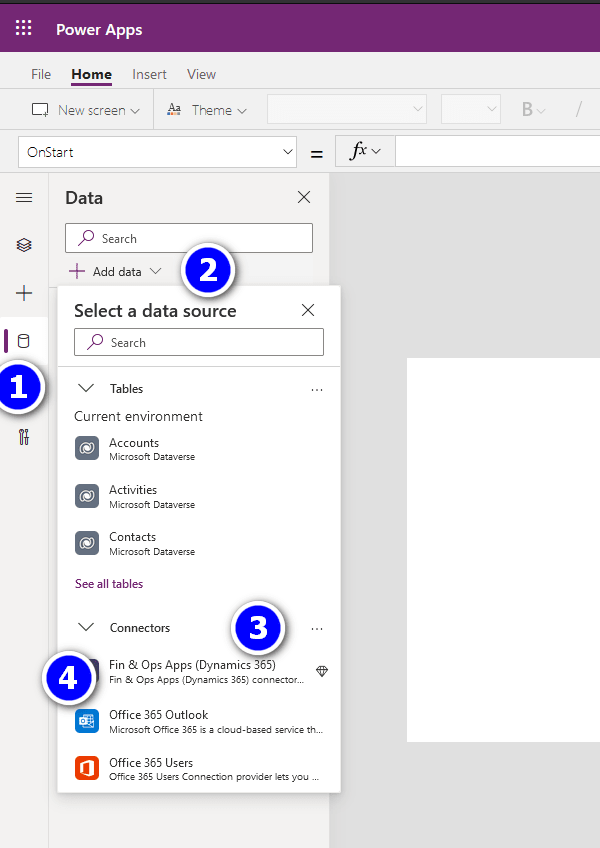
This will list the available F&O instances in the 'Choose a dataset' window that comes up. Select the one you want to connect to, and then select the table (= F&O Data Entity - ) you want to connect to.
In this example we want to see sales order lines, so we're picking the 'CDSSalesOrderLinesV2' table, and click 'Connect':

Provide an app Name, hit 'CTRL-S' to save, hit the 'back' arrow once saved, and close the Data pane.

Now let's add some data to our form.
Select the 'Insert' tab and click 'Data table', then select the data source you just added:

As you add this, the app will actually load the data, so be patient.
It shows a set of default fields on the grid with their data.
We will change these fields so the grid has the ones we need.
Bring up the tree view by first clicking on the hamburger menu, and then the 'Tree view' node.
You can close the hamburger menu now if you want more space, the tree view will remain on screen.

Expand the 'DataTable' node, and delete the fields you don't want (I'm only leaving the sales order number column at this point)

To add the fields you want, select the 'DataTable' in the tree view, then select 'Edit fields' on the properties pane on the right:

In the pane that comes up you can select the fields you need. For now, add the product name and number, and the quantity:


Now we have our very basic app.
Filtering the rows
As it sits now, the app now shows ALL sales Order lines.
When we call the app from F&O, we only want to show the lines for the selected order.
We need to implement some logic that filters the rows.
This section has info on that:
https://docs.microsoft.com/en-us/dynamics365/fin-ops-core/fin-ops/get-started/embed-power-apps#building-a-canvas-app-that-uses-data-that-is-sent-from-finance-and-operations-apps
When we add the app to F&O, we can specify which field is going to be passed to the app when the app is started from F&O.
The framework will put this value in a parameter called 'EntityId'.
Parameter 'cmp' is passed with the Legal Entity value.
When the app starts we want to use that parameter, and put it in a variable so we can filter the records using that variable.
For our scenario, that will be the sales order number.
First step for this is to put the parameter in a variable.
Sample code for that is in the article linked above, so let's implement this (with a small change).
In the tree view, select the 'App' node.
Make sure that the 'OnStart' event is selected in the top left.
Expand the formula section so we have more room to put the code.
Then enter the code snippet below. Note that variable names are case sensitive.
If(!IsBlank(Param("EntityId")), Set(FinOpsInput, Param("EntityId")), Set(FinOpsInput, "EMPTY"));
If(!IsBlank(Param("cmp")), Set(FinOpsInput, Param("cmp")), Set(FinOpsLegalEntity, ""));
Notify("EntityId parameter: " & FinOpsInput);

TIP: For testing/debugging it is useful to provide some output when the app is called. That's why we are putting the 'Notify' command in the code, so we can verify that the proper value is passed from F&O.
The next step is to actually filter the content in the view, using the new 'EntityId' variable.
Click on the DataTable in the tree view, and enter the code below in the formula window:
Filter(CDSSalesOrderLinesV2,'Sales order (SalesOrderNumber)' = FinOpsInput)

You have probably noticed that annoying red 'X' shown in the table view. I think this is due to the naming of the sales order field on the entity. It makes the code generate an incorrect field name.
To further investigate and fix, click on the down-arrow next to the error, and select 'Get help for this error':

It tells us that it does not like the Sales Order field in the grid:

Click in the 'Text' field and delete everything so only 'ThisItem' is left.
Then enter a period, and the field list will pop up.
If you scroll down, then you'll find that the field name is NOT just 'Sales Order', but actually
'Sales order (SalesOrderNumber)'

Just select that one and the error will go away.
That should be it for our app. Hit CTRL-S to save it again.
In order to use the app in F&O, we first need to publish it.
Easy enough, just click 'File' in the top left, and hit the big 'Publish' button.
We will need the App's ID in order to add it to F&O.
Close the App Editor tab to get back to the main PowerApps site.
Select your new app from the list, and then click 'Details':
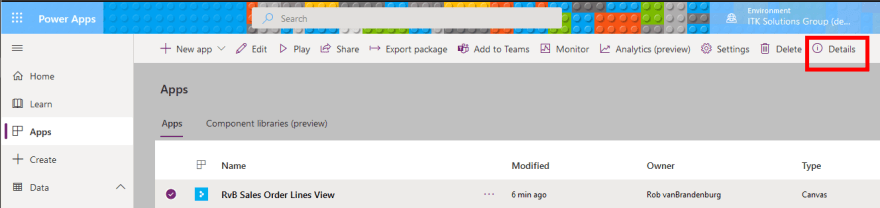
Copy the App ID from the details page, we'll need that in the next step:

Add the App to F&O
Now let's add the app to F&O.
As outlined at the top we want to be able to call this from the 'All Sales Orders' screen, so let's open that up, and click on the "PowerApps" button, then 'Add an app':

In the window that pops up, enter a name for the app, your AppID that you copied above, and select the sales order number as the key to be passed to the App:

Click 'insert' and hit F5 to reload the page.
When the page reloads you should now see your app under the 'PowerApps' button in F&O:

To test it, first select a sales order from the grid, then click the PowerApps button and select your app.
If everything went well, it should show the sales ID in the notification and the sales lines in the grid:

Tips
Couple tips:
- If you are making changes to the app, make sure to publish the app before testing.
- Sometimes it is hard to know if the updated app is executed or not. I usually change something simple, like the text in a header to make sure that the latest version is executed.
- If you want to remove the app from F&O, or edit the F&O settings, right-click on the PowerApps button and select 'Personalize: PowerApps'.
This will bring up a screen where you can edit or delete (remove) the app:

There is also a way to embed a PowerApp into the F&O UI directly via F&O development. See part 2 for details on that.
Hope this was useful.
Rob

Top comments (2)
Hi,
I just followed your blog and did exactly same but when I select a Sale Order from Dynamics fins and Ops and then click on the embedded application.
its not getting the Sale Order Number in the parameter and its just getting USRT.
what should I do Help?
@devastat3r Same here. Were you able to figure out the solution for it? Please let me know. I have been doing this for days. I am new to PowerApps. Just getting EntityID as USXX. The data table says "There is no data to show".