Building Conway's Game of Life with Kaboom.js
Conway's Game of Life was invented back in 1970 by John Conway. He called it a Zero-Player Game, as it was played by the computer. We could call it a sim game as well, as we create the initial state of the game, and then let it evolve according to pre-defined rules.
The Game of Life is played on a grid of cells. Each cell has a state of being either alive or dead. A set of rules is applied on each generation to determine the next state of the cells. These rules are:
- If a cell is alive and has less than two live neighbors, it dies.
- If a cell is alive and has more than three live neighbors, it dies.
- If a cell is alive and has two or three live neighbors, it lives on to the next generation.
- If a cell is dead and has exactly three live neighbors, it becomes a live cell.
John Conway spent about 18 months of his coffee breaks tweaking the rules for the game, to come up with the rule set that made the most interesting patterns and properties. He didn't build it for a computer initially. He first played it using a Go board, updating the game manually.
The interesting thing about Game of Life is that, despite its simple rules, it can create amazingly complex and interesting patterns, and even "lifeforms" and machines. It's pretty cool to set some patterns, and then watch how they evolve.
In this tutorial, we'll build the Game of Life using JavaScript and Kaboom.
Getting started on Replit
Head over to Replit and create a new repl, using "Kaboom" as the template. Name it something like "Game of life", and click "Create Repl".
After the repl has booted up, you should see a main.js file under the "Code" section. This is where we'll start coding. It already has some code in it, but we'll replace that.
Setting up Kaboom
We need to initialize Kaboom. In the "main" code file, first delete all the example code. Now we can add reference to Kaboom, and initialize it:
import kaboom from "kaboom";

// initialize context
kaboom({
  background: [0, 0, 0],
  width: 1024,
  height: 640,
  scale: 1,
  debug: true,
});
We initialize the Kaboom drawing context with a black background ([0, 0, 0]), a width of 1024 pixels, a height of 640 pixels, and a scale factor of 1. We also set debug to true, so we can access Kaboom diagnostics and info as we are developing. You can bring up the Kaboom debug info in the simulation by pressing F1.
Designing the model
Game of Life is played on a two-dimensional grid, or matrix. Each cell has a state of being either alive or dead. Let's think about how to model this in code.
Since we only need to have two states per cell, we can use a Boolean value to represent the state of these four cells:
let cell1 = false;
let cell2 = true;
let cell3 = false;
let cell4 = true;
Declaring each cell gets tedious really fast, and it's also difficult to loop through the cells when we want to update the model.
JavaScript has a concept of an array. This is a one-dimensional construct, like a list of values. We could use an array to model each row in the grid. Each element of the array would be a Boolean value, true if the cell is alive, and false if it is dead.
So, this row could be represented in a JavaScript array as:
let row1 = [false, true, true, true, false, true, false];
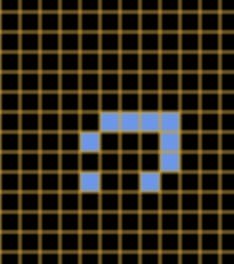
If we wanted to represent this grid:
We could create a new array for each row, like this:
let row1 = [true, true, true, false, true];
let row2 = [true, false, false, false, true];
let row3 = [false, true, false, true, false];
let row4 = [true, false, true, false, true];
This is OK, but it would be nicer to have all the rows in a single construct, so we can easily manipulate and query it.
One solution is to use the array construct again. An array doesn't just need to be a list of single values, it can also be a list of arrays. So we can make an array for the grid, and each of its elements would be the row arrays:
let grid = [
  [true, true, true, false, true],
  [true, false, false, false, true],
  [false, true, false, true, false],
  [true, false, true, false, true],
];
Now this makes it easier to query the grid and manipulate it. For example, if we wanted to find out the value of the cell at row 2, column 3, we could do this:
let value = grid[1][2];
We use [1] and [2] instead of [2] and [3] because arrays are zero-indexed. This means the first row is at index 0, and the first column is at index 0, so the first cell (1) is actually referenced as grid[0][0]
We can use the same notation when setting a cell value:
grid[1][2] = true;
Implementing the model
Now that we've figured out how to model the grid, we can implement some functions to create and manipulate the grid.
First, let's create a function to create a new grid. We'll call the grid a matrix in the code, as this is the mathematical term for it. Therefore our function is called createMatrix. It uses a global constant MATRIX_SIZE to determine the number of rows and columns of the matrix, and returns an array of arrays of the specified size, with all cells set to dead, or false. Add the code below to the main.js file:
const MATRIX_SIZE = 64;

function createMatrix() {
  const matrix = new Array(MATRIX_SIZE);

  for (var i = 0; i < matrix.length; i++) {
    matrix[i] = new Array(MATRIX_SIZE).fill(false);
  }
  return matrix;
}
Note that we use the array constructor by calling new Array(MATRIX_SIZE) to create each array. The first call to the constructor creates the "outer" array, and then we use a for loop to repeatedly create the "inner", or row, arrays. To set the value of each cell in the row, we use the fill method on the row arrays. This method takes a single value, and sets all the values in the array to that value. We set all the values to false, or dead, to start.
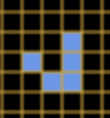
In the Game of Life rules, there are multiple references to "neighbor" cells. Neighbors are any cells that touch a particular cell. For example, for the blue cell below, all the red cells are neighbors.
In particular, the rules refer to the number of "live" neighbors a cell has. A handy function to have would be one that finds all the neighbors of a particular cell, and counts how many of them are alive.
Notice how each neighbor cell is one row or column away from the cell we are looking at. So if we create a function that looks at each cell one position away from the target cell and counts how many of those cells are alive, we can use this to find the number of neighbors a cell has.
Recall that we can reference any cell in our matrix structure using the notation matrix[row_number][column_number]. So, noting that every neighbor is one position away, we can add or subtract one from the row and column numbers to find the neighbors. A few examples:
- The immediate left neighbor would be:
matrix[row_number][column_number - 1] - The immediate right neighbor would be:
matrix[row_number][column_number + 1] - The immediate top neighbor would be:
matrix[row_number - 1][column_number] - The immediate bottom neighbor would be:
matrix[row_number + 1][column_number] - The immediate top left neighbor would be:
matrix[row_number - 1][column_number - 1]
So, if we have the target cell coordinates, x and y, we can use the following code to find the number of neighbors:
function neighbors(matrix, x, y) {
  let count = 0;
  for (var i = -1; i <= 1; i++) {
    for (var j = -1; j <= 1; j++) {
      if (i === 0 && j === 0) {
        // this is the cell itself, do nothing
        continue;
      }
      let currentX = x + i;
      let currentY = y + j;
      if (
        currentX < 0 ||
        currentX >= MATRIX_SIZE ||
        currentY < 0 ||
        currentY >= MATRIX_SIZE
      ) {
        // this is an edge cell, do nothing
        continue;
      } else if (matrix[currentX][currentY] === true) {
        // the neighbor is alive, count it
        count++;
      }
    }
  }
  return count;
}
Notice that we use for loops to sweep from -1 to 1, which represents left to right and up to down. We use a conditional to check if the current cell is the target cell. We know it's the target cell if both of the sweep values are 0. If it is the target cell, we don't count it as a neighbor. We also check if the current cell is outside the grid (<0 || >=sMATRIX_SIZE), in which case we don't count it as a neighbor. Finally, if we have a valid neighbor cell, we check if it is alive, by testing if its value is true. If it is, we increment the count of "living" neighbors.
Implementing the rules
Now that we have a representation, and a way to query the model for the number of neighbors a cell has, we can implement the rules of the Game of Life.
Recall that the rules of the game of life are:
- If a cell is alive and has less than two live neighbors, it dies.
- If a cell is alive and has more than three live neighbors, it dies.
- If a cell is alive and has two or three live neighbors, it lives on to the next generation.
- If a cell is dead and has exactly three live neighbors, it becomes a live cell.
The rules are applied across all cells in the matrix with each generation. To avoid having a partially updated matrix, with cells in the next generation that are not yet updated, we can create a new, blank matrix. Then we can iterate over each cell in the current generation's matrix, apply the rules to each cell, and set the value of the cell in the next generation's matrix according to the result of the rules.
Let's start with some pseudo-code to find the outline of this strategy:
create nextMatrix

for each row in matrix
  for each column in row
    get alive neighbors of cell at matrix[row][column]
    if cell is alive
      if cell  has less than two live neighbors
        set cell to dead in nextMatrix[row][column]
      if cell has more than three live neighbors
        set cell to dead in nextMatrix[row][column]
      if cell has two or three live neighbors
        set cell to alive in nextMatrix[row][column]
    if cell is dead
      if cell has exactly three live neighbors
        set cell to alive in nextMatrix[row][column]

return nextMatrix
Translating to JavaScript, and using our matrix functions, we will write the following function:
function nextGeneration(matrix) {
  const nextMatrix = createMatrix();

  for (var i = 0; i < matrix.length; i++) {
    for (var j = 0; j < matrix[i].length; j++) {
      const cellNeighbors = neighbors(matrix, i, j);

      if (matrix[i][j] === true) {
        if (cellNeighbors === 2 || cellNeighbors === 3) {
          nextMatrix[i][j] = true;
        } else {
          nextMatrix[i][j] = false;
        }
      }

      if (matrix[i][j] === false) {
        if (cellNeighbors === 3) {
          nextMatrix[i][j] = true;
        } else {
          nextMatrix[i][j] = false;
        }
      }
    }
  }
  return nextMatrix;
}
Updating each generation
We have a model, and we have the rules. We now need a way to regularly update the model with the rules to create one generation of the simulation after the other.
Kaboom has two key events to help us with this:
These two event handlers are called on every frame of the game. The onUpdate event is called first, and the onDraw event second. Drawing to the screen can only happen in the onDraw event handler.
This allows us to create a new generation using onUpdate, and then draw this update to the screen using onDraw.
A new frame is typically created 60 times per second, normally expressed as 60 frames per second (FPS). This means that we can create a new generation every 16.67 milliseconds (1s/60fps = 16.67 milliseconds). At times, we might want to slow this down so that we can see the patterns evolving while we watch. To control the interval between each generation, we can measure the time between updates and only create a new generation if the time between updates is greater than a preset threshold.
With Kaboom, all drawing, controls, and event handlers must be contained within a scene. We only need one scene for our game. Let's create a scene called game, containing the core onUpdate function, and some of the variables the game will need:
scene("game", () => {

  let pause = true;
  let updateInterval = 0.5;
  let generation = 0;
  let timeFromLastUpdate = 0;
  let matrix = createMatrix();

  onUpdate(() => {
    if (pause) return;
    timeFromLastUpdate += dt();
    if (timeFromLastUpdate < updateInterval) return;
    timeFromLastUpdate = 0;

    generation++;
    matrix = nextGeneration(matrix);
  });

  onDraw(()=> {
    // todo: draw the world
  });

});

go("game");
We've created a new scene called "game" here. In the code for the scene, we have a few variables which control various parameters of the simulation:
-
pause, a Boolean which indicates if the simulation should be paused, that is, not updated. -
updateInterval, the time in seconds to wait between each generation update. -
generation, a counter to track how many generations have been run. -
timeFromLastUpdate, an accumulator tracking the time in seconds since the last generation was updated. -
matrix, the model of the current generation.
Following these variables, we have a handler for the onUpdate event. Kaboom calls this handler up to 60 times per second.
First up in our handler function, we check if the game is paused. If so, we return immediately without making any changes.
Then we add the time from the last update handler call to our timeFromLastUpdate accumulator. Kaboom has a helpful function dt, which returns the time since the onUpdate method was last called. We then check this accumulated time against our set updateInterval time to see if we should update the game and create a new generation. If the accumulated time in timeFromLastUpdate is less than this updateInterval, we leave early again.
If enough time has elapsed from the last generation update and it is time to update to the next generation, we first reset the timeFromLastUpdate accumulator to 0. Then we update our generation counter, and replace the current generation matrix with next generation calculated by the nextGeneration function we created earlier.
We have put a placeholder handler for the onDraw event for now. We'll get to that in the next section.
To start the whole game off, we use the go function, which switches between scenes.
Creating the UI
We now need to create a UI to visualize and interact with the game.
Some things that would be useful are:
- Visualizing the game
- Setting or clearing a cell
- Running and pausing the game
- Setting the speed of the game
- Resetting the game
Visualization
To visualize the game, we can use some of lower level Kaboom draw functions. These allow us to draw shapes directly to the canvas. The shapes are not rich game objects like those created through Kaboom's add function, they are merely bitmaps on the drawing canvas. For this game, we don't need the advanced capabilities of Kaboom game objects, like gravity, collision detection, moving, and so on. That would just slow down our renders.
Let's start off by adding in labels for the game state, speed, and generation number. Add the following code to the game scene:
  const pauseText = add([
    text("Paused", { size: 16, font: "sink" }),
    pos(650, 40),
    origin("left"),
    layer("ui"),
  ]);

  const speedText = add([
    text("dt: 50ms", { size: 16, font: "sink" }),
    pos(650, 60),
    origin("left"),
    layer("ui"),
  ]);

  const generationText = add([
    text("Generation: 0", { size: 16, font: "sink" }),
    pos(650, 80),
    origin("left"),
    layer("ui"),
  ]);
We've added some default text in here - it will soon be updated to real values in code we will add to the onDraw handler:
onDraw(()=>{
    speedText.text = `dt: ${(updateInterval * 100).toFixed(0)}ms`;
    pauseText.text = pause ? "Paused" : "Running";
    generationText.text = `Generation: ${generation}`;

})
This update to the onDraw handler sets the text of the text labels to the variable values at that frame. Notice we use the JavaScript template literal for strings. This enables us to insert calculation and code directly into the strings using the ${} placeholder notation.
Now let's draw each of the cells in the matrix. We'll create a helper function for this. Add the following code to the game scene:
const CELL_SIZE = 10;

function drawCell(row, col) {
  drawRect({
    width: CELL_SIZE,
    height: CELL_SIZE,
    pos: vec2(row * CELL_SIZE, col * CELL_SIZE),
    color: rgb(100, 149, 237),
    fill: true,
  });
}
This function draws the cell at the given row and col of our matrix model. The function drawRect is a Kaboom function that draws a rectangle to the canvas. We use the constant CELL_SIZE to determine the width and height of each cell in pixels. The position on the canvas is set by multiplying the row and height by the cell size, using the vec2 structure. A vec2 is Kaboom's two-dimensional vector. The color is set to a classic bluish color (Google "cornflower blue"). We use the fill property to instruct Kaboom to fill the whole rectangle with the color.
We need one other helper function to draw the grid over the cells, so we can more easily see individual cells. Add the following code to the game scene:
function drawGridLines() {
  for (var i = 0; i <= MATRIX_SIZE; i++) {
    drawLine({
      p1: vec2(i * CELL_SIZE, 0),
      p2: vec2(i * CELL_SIZE, MATRIX_SIZE * CELL_SIZE),
      width: 1,
      color: rgb(218, 165, 32),
    });

    drawLine({
      p1: vec2(0, i * CELL_SIZE),
      p2: vec2(MATRIX_SIZE * CELL_SIZE, i * CELL_SIZE),
      width: 1,
      color: rgb(218, 165, 32),
    });
  }
}
This uses the Kaboom drawLine function to draw the grid lines. We set up a loop to draw MATRIX_SIZE number of lines vertically and horizontally. The first drawLine call draws the vertical lines, and the second the horizontal lines. The start and end points for each line,p1 and p2, are expressed as two-dimensional vectors, vec2. The width property sets the width of the line, and the color property sets the color of the line.
Now we can place and draw a cell on the screen. Let's go back to the onDraw handler to loop through the matrix and call out to the drawCell and drawGridLines functions. Update the onDraw handler like this:
  onDraw(() => {
    speedText.text = `dt: ${(updateInterval * 100).toFixed(0)}ms`;
    pauseText.text = pause ? "Paused" : "Running";
    generationText.text = `Generation: ${generation}`;

    // run through the matrix and draw the cells that are alive
    for (var x = 0; x < MATRIX_SIZE; x++) {
      for (var y = 0; y < MATRIX_SIZE; y++) {
        if (matrix[x][y] === true) {
          drawCell(x, y);
        }
      }
    }
    drawGridLines();
  });
Here we add looping through all rows and columns to get each cell. If the cell value is true (the cell is alive), we draw it to the canvas. Then, once we are done with the cell, we draw the grid lines to help us see each individual cell.
Setting or clearing a cell
We can draw the game, but we need some way to set the starting patterns. We can use the mouse to click on cells to set them as alive or dead. Kaboom has the function onMousePress that lets us attach a handler whenever the mouse buttons are clicked. We can also filter depending on if the left or right button is clicked. Add the following code to the game scene:
  onMousePress("left", (pos) => {
    const row = Math.floor(pos.x / CELL_SIZE);
    const col = Math.floor(pos.y / CELL_SIZE);
    if (row < 0 || col < 0 || row >= MATRIX_SIZE || col >= MATRIX_SIZE) return;
    matrix[row][col] = true;
  });

  onMousePress("right", (pos) => {
    const row = Math.floor(pos.x / CELL_SIZE);
    const col = Math.floor(pos.y / CELL_SIZE);
    if (row < 0 || col < 0 || row >= MATRIX_SIZE || col >= MATRIX_SIZE) return;
    matrix[row][col] = false;
  });
Our onMousePress function takes the mouse button to filter by as a first parameter. The second parameter is the event handler function. In the event handler, we convert the screen pos from pixels to rows and columns in our matrix by dividing the screen pixel position by the CELL_SIZE in pixels.
We do a check to make sure the row and column is not outside the bounds of the matrix, if the player clicked outside of the grid for example.
Then, for the left click handler, we update the state of the clicked cell to true, or alive. For the right click handler, we update the state of the clicked cell to false, or dead.
Great, now we can set cells!
Running and pausing the game
Now we can model the game, see it, and set states. Let's add a control to start and pause the simulation.
We can use Kaboom's onKeyPress function to attach a handler whenever a key is pressed. Add the following code to the game scene:
  onKeyPress("space", () => {
    pause = !pause;
  });
This fires whenever the spacebar is pressed. It toggles the pause variable using the Boolean NOT ! operator to the opposite of its current value. Recall the pause flag is used in the onUpdate handler we added earlier.
Setting the speed of the game
We might want to speed up or slow down the simulation. We'll use the up and down arrow keys to change the updateInterval value that is checked in the onUpdate handler to determine if it is time to create the next generation. Add the following code to the game scene:
 onKeyDown("down", () => {
    updateInterval += 0.01;
  });

  onKeyDown("up", () => {
    updateInterval -= 0.01;
    updateInterval = Math.max(0.0, updateInterval);
  });
Here we either add or subtract 0.01 seconds to the interval. Note that in the up key handler, which makes the interval between updates shorter, therefore increasing the speed of the simulation, we make sure that our interval cannot go negative. A negative time interval would make no sense, unless we accidentally invent time travel.
Resetting the game
The last control we need to add in is one to completely reset the simulation, clearing out all cells if we want to start fresh. We'll listen for the "r" key being pressed. If the "r" is pressed, we'll create a new blank matrix, and reset the generation counter. Add the following to the game scene:
  onKeyPress("r", () => {
    matrix = createMatrix();
    updateInterval = 0.5;
    generation = 0;
  });
Running the game
Now that we've finished building the game, let's give it a go!
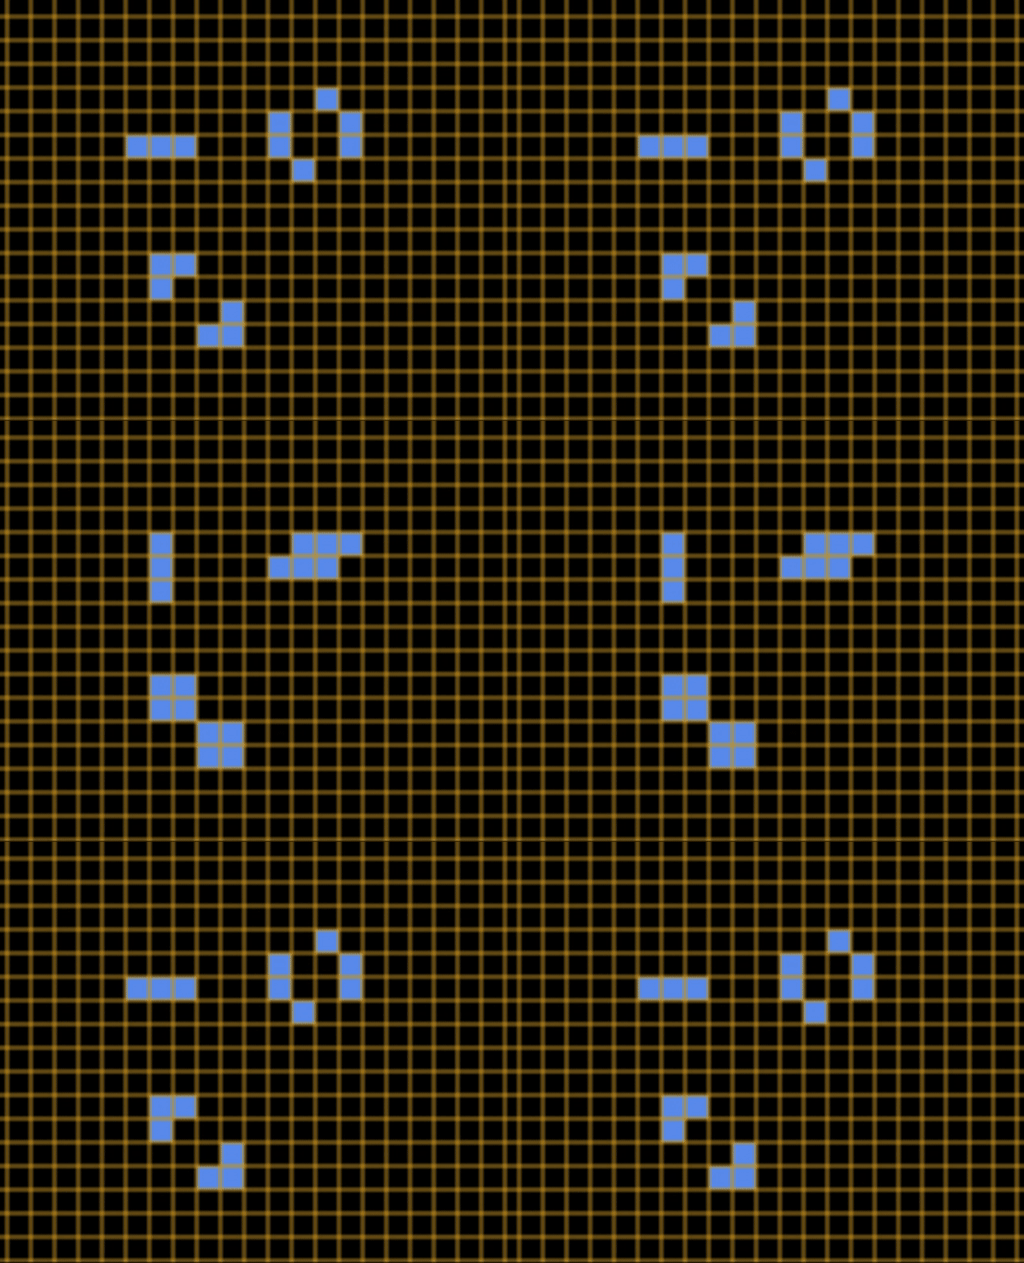
We'll start off with some basic patterns that oscillate between two or more states. Using the left mouse button, click on cells to fill them with the following starting patterns.
After you enter them, press the space bar to start the simulation. You should see something like this:
Try using the up and down arrow keys to speed up or slow down the simulation.
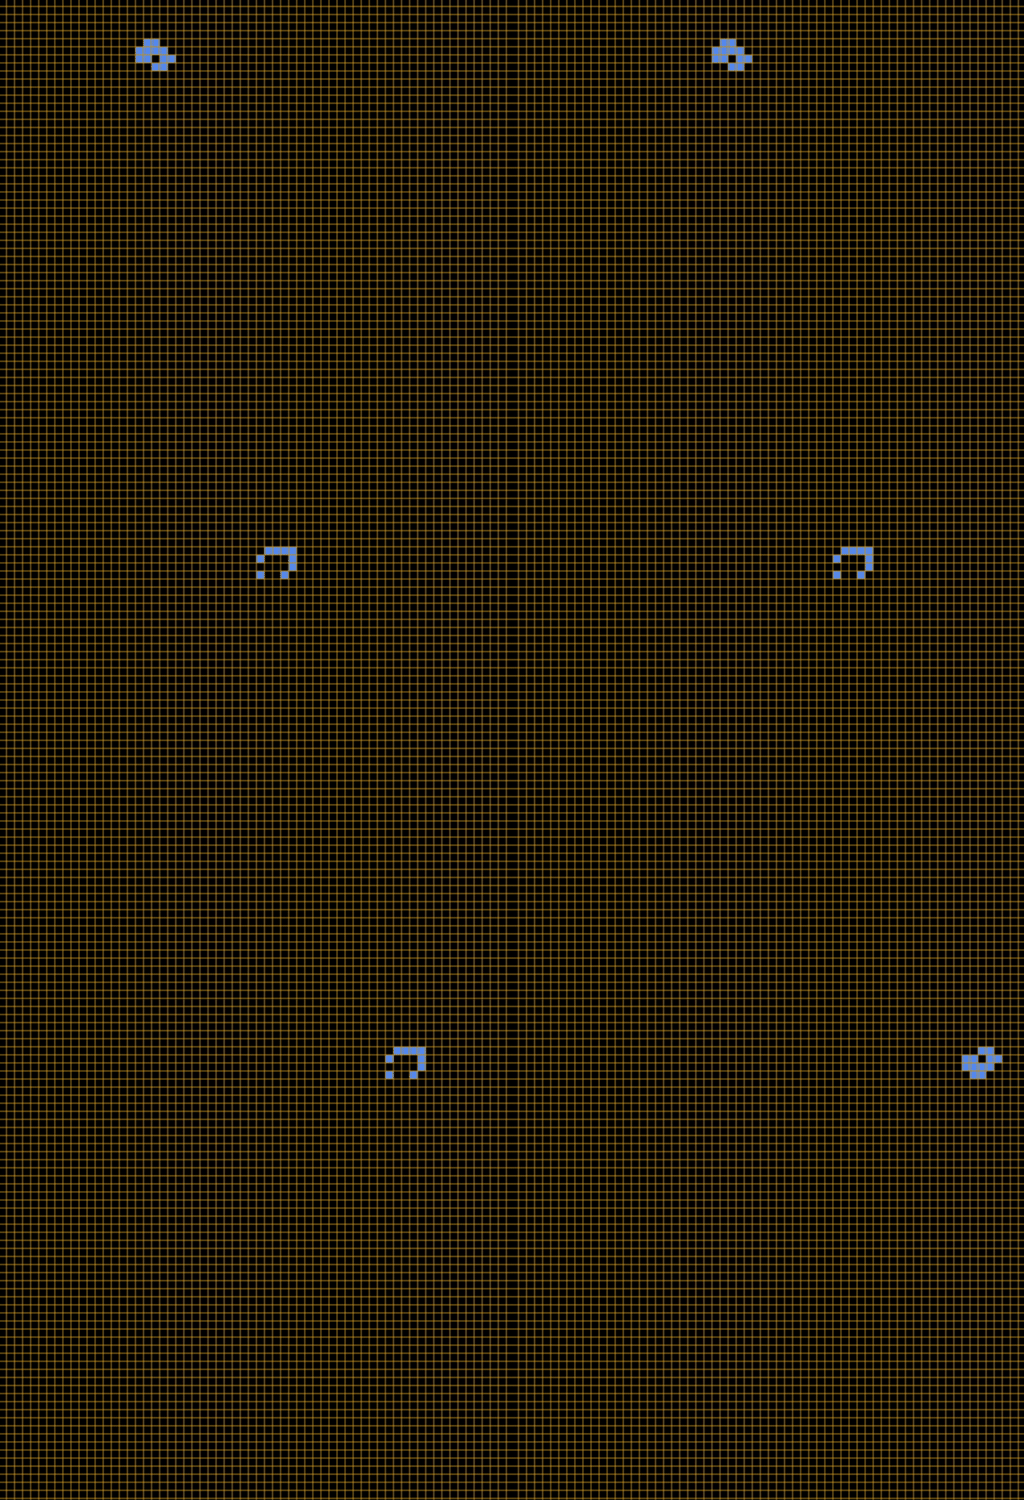
Now let's try some patterns that move and are a bit more lifelike. This one is called a glider:
Create it somewhere near the top left of your grid (you can press space to stop the previous simulation, and r to reset the game).
After entering the glider pattern, press space to start the simulation. You should see it move across the screen like this:


Top comments (0)