Feature flags are a powerful technique that allows you to toggle features on and off dynamically without redeploying your code. This can help you to deliver faster and safer web applications, as you can test new user journeys in production, perform gradual rollouts, and revert changes as required, all without triggering a redeploy.
In this tutorial, you will learn how to use custom feature flags in a Angular application that displays some magical details to the users based on their subscription (generated randomly), using Unleash. We will use the @karelics/angular-unleash-proxy-client and unleash-proxy-client packages, which provides easy integration of Unleash feature flags in an Angular application.
This article is a contribution by Rishi Raj Jain as a part of the Community Content Program. You can also suggest a topic by opening an issue, or Write for Unleash as a part of the Community Content Program.
What we’ll be using
- Angular (UI)
- Unleash (Feature Flags)
- Tailwind CSS (Styling)
What you'll need
- Docker
- Node.js 18 (make sure npm works correctly)
Setting up the project
To set up, just clone the app repo and follow this tutorial to learn everything that's in it. To fork the project, run:
git clone https://github.com/rishi-raj-jain/custom-subscription-feature-flag-angular-and-unleash
cd custom-subscription-feature-flag-angular-and-unleash
npm install
Setup Unleash
- Run the following commands in the terminal to fetch the
docker-compose.ymlfor creating an Unleash instance outside of your current project directory:
git clone git@github.com:Unleash/unleash.git
cd unleash
docker compose up -d
This will start Unleash in the background. Once Unleash is running, you can access it at http://localhost:4242.
- Now use the default credentials to log into the instance:
Username: admin
Password: unleash4all
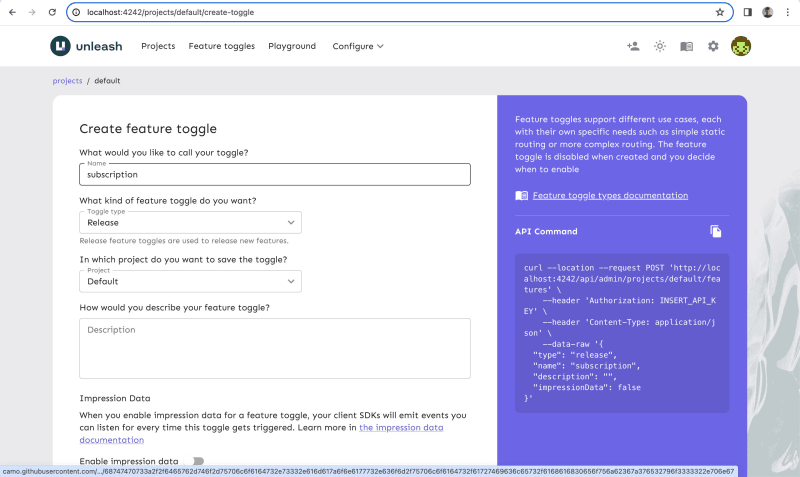
Create a New Feature Flag
Create a new feature flag in your Unleash instance named subscription:
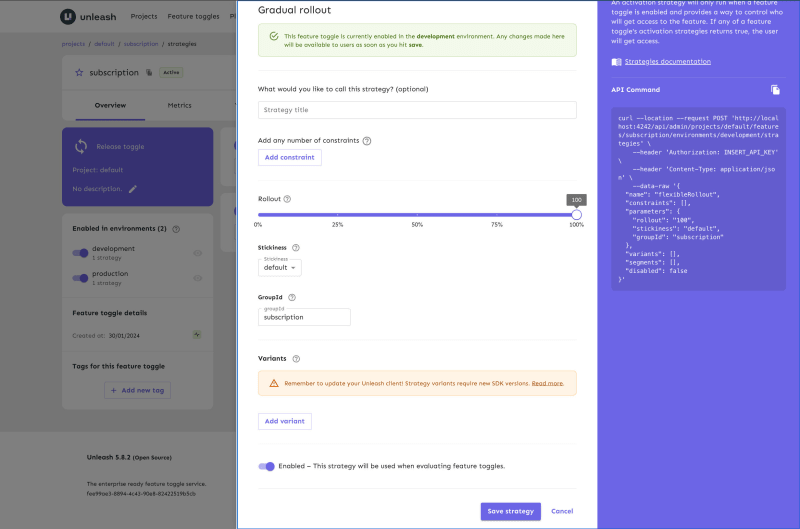
In the feature flag's dashboard, click on Add strategy in the developement environment:

Click Save to associate the pre-configured setup with the subscription feature flag.
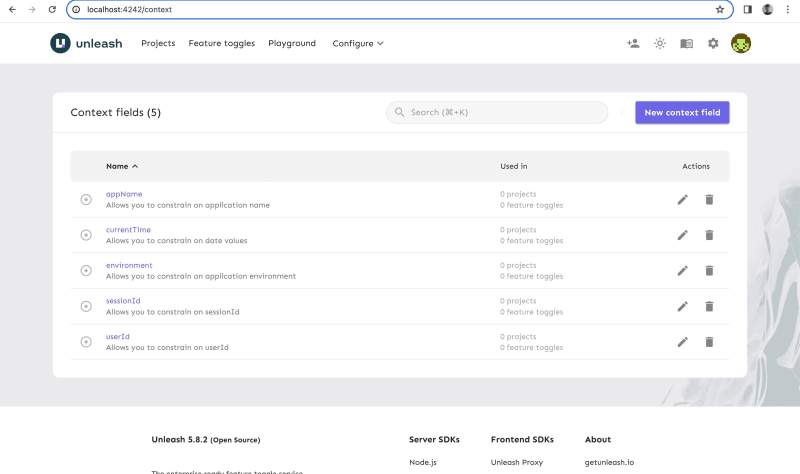
Let's move to creating a custom context field subscription, for which we'll define a set of values that'll indicate the plans that will be supported in our app.
First, click on Configure in the navigation bar, and then click on Context fields:

You would then see a screen like below. Click on New Context Field button to create a custom field:
Now, enter the details of the custom field named subscription, such as Basic and Pro in this case.

Hit create context, and then go to your feature flag in the dashboard. Update the strategy to define the constraints to enforce subscription values.
Only users with subscription plans as Pro will see this flag as enabled.

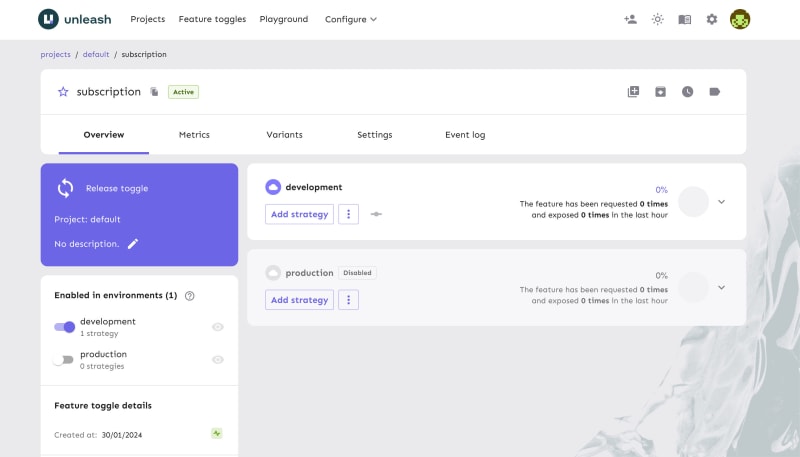
Great. Now, let's turn on the flag in the developement environment 👇🏻
Integrating Unleash in Angular
Installation
To get started with Angular and Unleash, you need to install @karelics/angular-unleash-proxy-client and unleash-proxy-client packages.
You can run the following commands in your terminal to do this:
npm install unleash-proxy-client @karelics/angular-unleash-proxy-client
Initialize Unleash SDK
To make feature flags available to our Angular application, we will use the Unleash Context Provider. This helper will initialize the Unleash Angular SDK and provide access to feature flags throughout our application. We will do this by adding it to our src/app/app.config.ts file. Notice that we're using a refreshInterval of 1 second to get instant updates.
// File: src/app/app.config.ts

import { ApplicationConfig } from '@angular/core'
import { provideRouter } from '@angular/router'
import { routes } from './app.routes'

import { provideUnleashProxy } from '@karelics/angular-unleash-proxy-client'

export const appConfig: ApplicationConfig = {
  providers: [
    provideRouter(routes),
    provideUnleashProxy({
      refreshInterval: 1,
      appName: 'customName',
      url: 'http://localhost:4242/api/frontend',
      clientKey: 'default:development.unleash-insecure-frontend-api-token',
    }),
  ],
}
Use (Unofficial) Unleash Angular SDK to fetch the feature flag value with context
Next, we will show content based on the subscription of the user if 1. the subscription feature flag is enabled, and 2. their subscription plan is allowed in the feature flag. Let's break it into steps:
1. Subscription feature flag is enabled
To check if the subscription feature flag is enabled for a user, we'll use *featureEnabled directive.
First, import the FeatureEnabledDirective in the component.ts:
// File: src/app/app.component.ts

import { Component } from '@angular/core'
import { FeatureEnabledDirective } from '@karelics/angular-unleash-proxy-client'

@Component({
  standalone: true,
  selector: 'app-root',
  templateUrl: './app.component.html',
  imports: [FeatureEnabledDirective],
})

export class AppComponent {
  title = 'custom-subscription-feature-flag-angular-and-unleash'
}
Then, update our reactive HTML:
// File: src/app/app.component.html

<div class="contents" *featureEnabled="'subscription'; else disabledTmpl">
    <div class="mt-3">
      <span class="py-2 px-4 bg-green-100 rounded">Magical Detail</span>
    </div>
</div>
<ng-template #disabledTmpl>
    <div class="mt-3">
      <span class="py-2 px-4 bg-red-100 rounded">Fallback Content</span>
    </div>
</ng-template>
Keep in mind that we've to set the subscription context with the subscription plan to evaluate whether if their plan is allowed (enabled) to show the magical details. This all done via:
2. Update subscription as context
To pass the subscription as the context while based of a random number, we'll update our Unleash Context to include the custom context value.
Here's how we'd do that:
- Update
src/app/app.component.tsto generate a random number:
// File: src/app/app.component.ts

export class AppComponent {
  title = 'custom-subscription-feature-flag-angular-and-unleash'
  randomNumber: number = 0

  constructor() {
    this.generateRandomNumber()
  }

  generateRandomNumber() {
    this.randomNumber = Math.random()
    if (this.randomNumber > 0.5) {
        // Do something
    }
  }
}
- Set the subscription plan context:
// File: src/app/app.component.ts

import { Component } from '@angular/core'
import { FeatureEnabledDirective } from '@karelics/angular-unleash-proxy-client'

+ import { UnleashService } from '@karelics/angular-unleash-proxy-client'

@Component({
  standalone: true,
  selector: 'app-root',
  templateUrl: './app.component.html',
  imports: [FeatureEnabledDirective],
})
export class AppComponent {
  title = 'custom-subscription-feature-flag-angular-and-unleash'
  randomNumber: number = 0

+  constructor(private unleashService: UnleashService) {
    this.generateRandomNumber()
  }

  generateRandomNumber() {
    this.randomNumber = Math.random()
    if (this.randomNumber > 0.5) {
+      this.unleashService.unleash.updateContext({
+        properties: {
+          subscription: 'Pro',
+        },
+      })
    }
  }
}
Awesome, now we're able to dynamically set the subscription plan user per request, and use that with Unleash to determine if the feature flag is enabled for their use case. If so, we show them the magical details (as set in our reactive HTML src/app/app.component.html), else we present with a fallback content. Here's a preview of what we've made 👇🏻

Using Unleash in Production
To setup Unleash for production, please follow the steps below:
Self-host Unleash, or run an instance on Unleash Cloud.
Get an API key from the Unleash dashboard.
Store the API key in your Environment Variables of your hosting, which secures it and makes it accessible in your code.
Unleash has a full list of feature flag best practices that can help guide you as you architect your solution.
Conclusion
Feature flags are a powerful tool for managing features in web applications. This tutorial showed us how to use feature flags with Angular and Unleash. We have seen how to create custom context field in conjuction with how to manage feature flags in the Unleash dashboard, and how to use them in our Angular code with the @karelics/angular-unleash-proxy-client and unleash-proxy-client packages.

Top comments (0)