
Hey there! In today's post we're going to build a URL Shortener API with NodeJs from zero. Wanna join us?
Notes
So you can find the final API source code in this repository and I also have the full project, frontend and backend running here. Be sure to check it out!
By the way, if you're going to follow through this tutorial and want to reproduce it on your machine (which is best), you'll need to have nodejs installed.
I also recommend you to have a REST Client like postman or insomnia to make tests on the API's routes.
Table of Contents
- Planning
- Setting up
- MVC Architecture
- Configuring package file
- Folder structure
- Server File
- Routes file
- Writing up Models
- Database Setup
- Dotenv File
- Database Connection
- Writing up Controllers
- Conclusion
Planning
Okay, we are going to build an Url Shortener API. But how do we do it?
Well, there are multiple ways we can approach this problem, but the way we are going to use it's quite simple.
- The User is going to pass a
URLthey want to shorten, the API gonna take thatURL, generate a randomaliasfor it and store them both on a database. - When the user calls the API passing that
aliasas a parameter, the API will find the matchingURLin the database and redirect the user to thatURL.
Setting up
First of all, we need to setup our environment. I'm going to create a new folder for the project, open up my terminal inside it and start a node project with:
npm init -y
With our project initiated, let's install some cool packages we're going to need.
npm install express mongoose yup dotenv nanoid cors
Oh, we're also installing nodemon as dev dependecy to make our lives easier.
npm install --save-dev nodemon
So what are we going to use all these packages for? Well, in summary:
- express: it'll provide us with the methods to handle http requests.
- mongoose: we're going to use it to make a connection with the database (yes, we're gonna have a database as well).
- dotenv: it's going to help us with handling sensitive data like tokens and database uris.
- yup: yup, we'll use it to make some cool parameters validations.
- nanoid: that's how we are going to generate the short versions of the URLs.
- cors: that's going to help us with handling Cross-Origin Resource Sharing.
MVC Architecture
For this tutorial sake, we're going to use the MVC architecture, but without the views in it. If you aren't familiar with the MVC pattern, don't worry because I'm going to give you a simple explanation of what this is. However, I do suggest you to make some outsite research to complement your knowledge and skills.
MVC Architecture Explanation
So to make it briefly, MVC stands for Model, View and Controllers. It's a design pattern that divides an application in three pieces:
- View: That's where the User Interfaces resides. So basically UIs here are called Views.
- Model: These are representations of database entities. A user, per example, can be a model in many applications.
- Controllers: They are the mediators/bridges between the Views and the Models.
When we make this separation of concerns in software development, things become way easier to maintain, understand and develop as well.
In the case of MVC, a user interacts with the User Interface, which is the View, the view then contacts the Controller that is going to call the Model. The Model then is going to pass the database data to the Controller that is going to manipulate it in order to be presentable to the user, and finally the Controller passes it to the View that is going to render all of it in the User Interface.
Folder Structure
Now that we made sure you are familiar with the concept of the MVC architecture, we can start working in our file structure so things doesn't get too messy when we really start coding stuff.
So, with the concept of Models, Views and Controllers in mind, that's how our folder structure is going to look like:
.
+-- node_modules/
+-- src/
|   +-- controllers/
|   +-- models/
|   +-- database/
+-- package.json
+-- package-lock.json
Configuring package file
In the package.json file, we're going to change the "main" field from "index.js" to "src/server.js". That's going to be our entry file.
We're also going to add a few scripts. That's how it should look like:
{
  "name": "linkshortener",
  "version": "1.0.0",
  "description": "",
  "main": "index.js",
  "scripts": {
    "start": "node src/server.js",
    "dev": "nodemon src/server.js"
  },
  "keywords": [],
  "author": "",
  "license": "ISC",
  "dependencies": {
    "cors": "^2.8.5",
    "dotenv": "^8.2.0",
    "express": "^4.17.1",
    "mongoose": "^5.9.27",
    "nanoid": "^3.1.12",
    "yup": "^0.29.3"
  },
  "devDependencies": {
    "nodemon": "^2.0.4"
  }
}
Server file

Enough of talkin', let's start to coding! Inside of src folder, make a new file named server.js. That's the entry point file and where the server is going to take place.
For now, we are going to setup the simplest HTTP server we can, so server.js is going to look like this:
const express = require('express'); //imports express module to file
const cors = require('cors');//imports cors module

const app = express();//makes a new server instance

app.use(cors());//makes server allow cross-origin
app.use(express.json());//enables server to understand json requests

app.get('/', (req, res) => { //listens to the route '/' and returns a text to it
    res.send('This is awesome!');
});

//if PORT number are defined as a environment variable, use it, if not, use 3000
const PORT = process.env.PORT || 3000;

//puts the server to listen
app.listen(PORT, () => {
    console.log(`Listening at ${PORT}`);
});
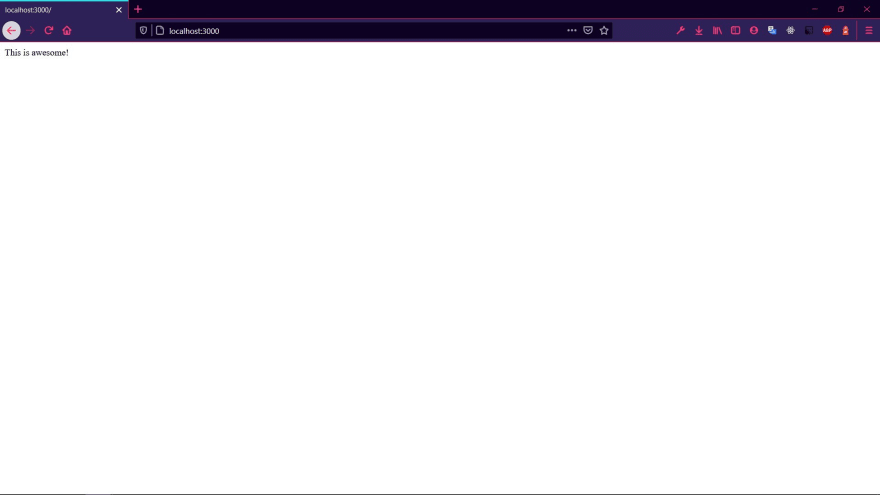
This code setups a simple server for us, so if you want to test it, you can run npm run dev on terminal and open up the browser with localhost:3000.
Routes File
Alright, now that we have a simple server running, it's time to make our routes script. That's the file where we are going to set up all the routes for our URL Shortener API.
The contents of routes.js should be something like that for now:
const router = require('express').Router();//gets express Router

//sets up routes
router.get('/', (req, res) => {
    res.send('Shortening URLs for ya');
});

router.get('/:id', (req, res) => {

});

router.post('/url', (req, res) => {

});

//exports routes
module.exports = router;
This code simply import the Router method from ExpressJS, defines a few routes and exports all of it at the end. Take note that I left two empty routes for now. We're going to need them later.
We can now update our server.js file and make it use the routes defined in this file.
So here's our updated server.js file:
const express = require('express'); //imports express module to file
const cors = require('cors');//imports cors module

const routes = require('./routes'); //imports routes file

const app = express();//makes a new server instance

app.use(cors());//makes server allow cross-origin
app.use(express.json());//enables server to understand json requests
app.use(routes);//use routes defined on routes file here

//if PORT number are defined as a environment variable, use it, if not, use 3000
const PORT = process.env.PORT || 3000;

//puts the server to listen
app.listen(PORT, () => {
    console.log(`Listening at ${PORT}`);
});
That essentially finishes server.js.
If you are asking yourself why separated the routes from the server file, that's because it makes the code easier to debug and understand. If you now look into server.js or routes.js you'll realize the code is way simpler to read. You take a look into routes.js and instantly realize that's a file that defines all API's routes. It's a lot more intuitive this way.
Writing up Models
I think it's time we start to working on our models. Like I said before, models are a representation/abstraction of a database entity.
Our app though, only needs a single entity, which also means it only needs 1 model: the ShortUrl Model.
With that said, make a new file named ShortUrl.js inside the Model folder and open it on your favorite IDE.
const mongoose = require('mongoose');

const ShortUrl = mongoose.Schema({
    alias: {
        type: String,
        unique: true,
        required: true
    },
    url: {
        type: String,
        required: true
    }
})

module.exports = mongoose.model('ShortUrl', ShortUrl);
Alright, lemme explain what's going on. The database we are going to use for this project is MongoDB, and that's why we've installed mongoose in the first place.
In order to make a model of a Database Entity, you first have to make a Schema of that entity. It's like a blueprint describing what fields and values does the entity have. That's essentially what we are doing with mongoose.Schema() method.
As I already told you, our ShortUrl entity only needs two values, the alias and the original url. The url is a String and is required but doesn't need to be unique (that would mean it cannot repeat in the database), however, alias is also a String, a required field, but has to be unique. That's why we ensured that with unique:true.
At the end of the code we are exporting the ShortUrl schema as a model.
Database Setup
We're using MongoDB for the database in this project. At this point, you have two options for dealing with it, you can either install MongoDB Community Server and work store the database locally or use a Cloud Hosted database like MongoDB Atlas (which gives you a free simple sandbox database).
After you set up the database, you are going to need the database URI string, which comes in a format similar to mongodb://<username>:<password>@host:port/<defaultdb>. That is what you are going to need to connect to the database.
If you are using a local server, the default URI string is mongodb://localhost:27017, you can pass a default database as well, for example: mongodb://localhost:27017/urlshortener.
Now if you are using a Cloud Hosted Database, look for Connection methods and they should give you the URI String.
Dotenv File
Alright, we've got the database connection URI string. But that's a sensitive data and should be plainly written on ours scripts. That would be too risky and a insecure way of handling it.
So in order to make things more secure, we are going to put that URI String inside a .env file. Then we are going to use dotenv package to import the data in .env file as environment variables.
That way, when you want to upload the project to the cloud or a github repository for example, you don't need to upload .env file as well.
Enough talking, let's make a new file named .env at the root of our project. Inside it, write:
MONGODB_URI=mongodb://localhost:27017/urlshortener
You can replace the URI string for the URI string for your database.
Database Connection
Now that we have settled up our database and got the URI String in a .env file, we are going to make a new script for handling the database connection as well.
So, make a new file named index.js inside the database folder and open it on the IDE.
const mongoose = require('mongoose');

require('dotenv').config();

const connect = async () => {
    return mongoose.connect(process.env.MONGODB_URI, {
        useNewUrlParser: true,
        useUnifiedTopology: true,
        useCreateIndex: true
    })
}

module.exports = { connect }
We are basically importing mongoose package, invoking dotenv config() method so we can import our MONGODB_URI variable defined in .env to the script, making a asynchronous function to return the database connection and exporting it.
You don't have to worry too much about the other parameter we're passing to the mongoose.connect() method because they are only necessary because of the depreciation of some mongoose inner methods.
We can now call this function inside our server.js file.
const express = require('express');
const cors = require('cors');

const routes = require('./routes');
require('./database').connect(); //connects to database

const app = express();

app.use(cors());
app.use(express.json());
app.use(routes);

const PORT = process.env.PORT || 3000;

app.listen(PORT, () => {
    console.log(`Listening at ${PORT}`);
});
Writing up Controllers
With our database settled up, we'll now code our controller. I said controller instead of controllers because we'll only need 1 of them. This Controller is going to take care of the 2 routes we care about.
So make a new file named ShortUrlController.js inside controllers folder and let's code!
const ShortUrl = require('../models/ShortUrl');

const redirect = async (req, res) => {

}

const store = async (req, res, next) => {
}

module.exports = { redirect, store }
You already know Controllers are kinda like the bridge between the Model and the View. That means ShortUrlController is going to have 2 methods for handling our 2 routes. We're calling one method redirect and the other store. We declared and exported them, but we won't code their functionalities yet.
Updating routes.js
Now let's go back to our routes.js file and pass the ShortUrlController methods as handlers for the routes.
const router = require('express').Router();

const ShortUrlController = require('./controllers/ShortUrlController');

router.get('/:id', ShortUrlController.redirect);

router.post('/url', ShortUrlController.store);

module.exports = router;
Take a look in how our code is now so much cleaner. It's easy to get to understand what those routes are for even without knowing the 'specificities' of ShortUrlController. That's the power of Concerns Separation and MVC.
We can now start working on the methods of our controller.
Store Method
We are first going to worry about our store method.
const ShortUrl = require('../models/ShortUrl');

const { nanoid } = require('nanoid');
const yup = require('yup');

const newUrlSchema = yup.object().shape({
    slug: yup.string().trim().matches(/^[\w\-]+$/i),
    url: yup.string().trim().url().required()
});

const redirect = async (req, res) => {

}

const store = async (req, res, next) => {
    let { alias, url } = req.body;
    try {
        await newUrlSchema.validate({alias, url});
        if ( !alias ) {
            alias = nanoid(5);
        } else {
            const existing = await ShortUrl.findOne({alias});
            if (existing) {
                throw new Error('Alias already in use');
            }
        }
        alias = alias.toLowerCase();
        const newShortUrl = {alias, url};
        const created = await ShortUrl.create(newShortUrl);
        res.json(created);
    } catch (error) {
        next(error);
    }
}

module.exports = { redirect, store }
Okay, we've got a lot to cover now. From the very start, we imported nanoid and yup packages.
I've told you yup is a package that allows us to easily validate objects. In our case, we're going to use it to see if the User is sending use the right parameters. If it's a valid URL and a valid Alias, for example.
That's precisely what we did with:
const newUrlSchema = yup.object().shape({
    slug: yup.string().trim().matches(/^[\w\-]+$/i),
    url: yup.string().trim().url().required()
});
In that case, newUrlSchema is the blueprint of the parameters we are expecting the user to give us.
Let's move to the store method itself.
- We received the parameters from the request.
- Validated them with our
newUrlSchema. - Verified if
aliasparameter was sent as well- If it wasn't sent, we generate a random one using
nanoid(5). - If it was sent, we verify if the alias is already in use. We made it with
ShortUrl.findOne({alias}), which uses our model to look for a matching alias in database.- If it do exists, a error will be thrown.
- if not, that Shortened Url will be stored in database with
ShortUrl.create(newShortUrl). We then returns the database data to the request as a response.
- If it wasn't sent, we generate a random one using
At this point you can actually test this route with a REST Client like Insomnia or Postman (in my case, I'm using Insomnia):
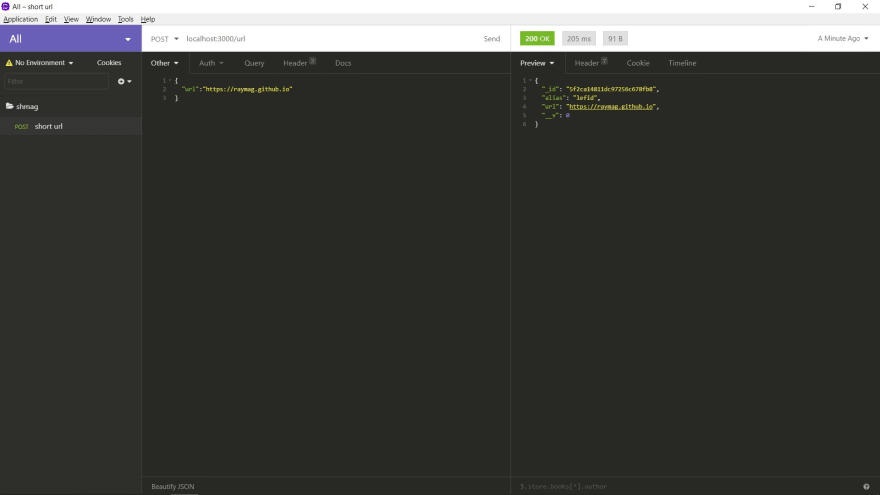
Take note I passed my website URL as a parameter and got the alias lefid in return.
Redirect method
Now let's code the redirect method, which is quite simple to be honest.
That's how redirect is gonna look like:
const redirect = async (req, res) => {
    const {id:alias} = req.params;
    try {
        const url = await ShortUrl.findOne({alias});
        if (url) {
            return res.redirect(url.url);
        } else {
            return res.status(404).send({message:'invalid url'});
        }
    } catch(error) {
        return res.status(404).send({message:'invalid url'});
    }
}
All we did was:
- Get the
aliasas a URL parameter (that means we pass it likeurlshortener.io/:alias). - Verify if that alias has a matching
urlin database.- If it do, we redirect the request to that
matching url. - if don't, we send a
404status with ainvalid urlmessage.
- If it do, we redirect the request to that
Finally you can also test this route, be it either on a Browser or inside a REST Client. In my case, I'm going to test this route with insomnia as well.

Last time, I've got the alias lefid for my website. Now when I pass that alias in a GET request, guess what? I'm actually redirected to my website. Perfectly!
Conclusion
Alright, after all these steps, we finished our URL Shortener API. You can test it now all you want and deploy it to the cloud!! Congrats!
Like I said before, you can check this API running behind a website here.
If you found any misspelled words, or other mistake I've made, contact me or leave a comment so I can fix it later.
Also, if you have any suggestion or something I should add/modify, I'd be glad to know your opinion.
Have a nice day!


Top comments (2)
Demo isnt working. getting an error link is invalid.
Forgot to mention, if you try to use an alias that is already in use you'll get the "link is invalid" error. You can try changing the alias or specifying no alias at all (the program will set one for you).