
If you've spent much time on Twitter you've likely encountered a Twitter bot or two. A bot is merely a program that automatically interacts with the Twitter API.
Twitter bots can be useful, irritating, entertaining, or just plain silly. If you've ever thought of making your own Twitter bot but didn't know where to start, you're in the right place! We're going to make a simple Twitter bot using free resources.
In part I of this tutorial, we will focus setting up the various accounts you will need and getting your first automated status update posted to Twitter.
Things you'll need
- A Twitter account
- A Glitch account
- Postman
- Some basic JavaScript knowledge
- (For part II) Some kind of content for your bot
Getting set up on Twitter
Before you can do anything else, you need a Twitter developer account. If you don't yet have one, here are the steps.
Create a new Twitter account or log into an existing one that you wish to use.
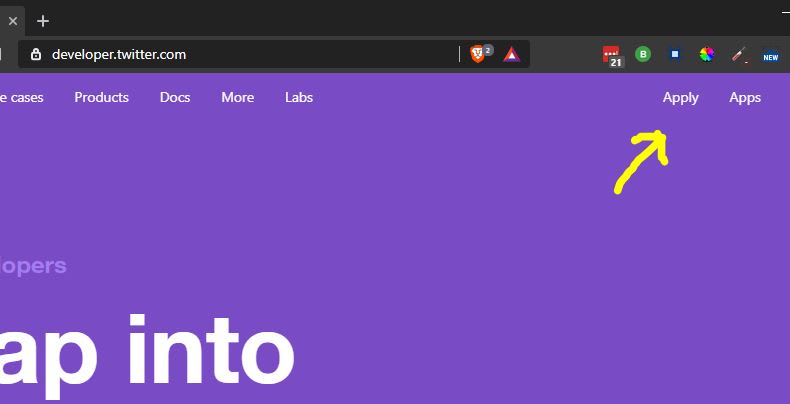
Once logged into a Twitter account, go to the Twitter Developer site at https://developer.twitter.com/
Click "Apply"
On the next page, click on "Apply for a developer account"
You'll be given a few different options. For the purposes of this tutorial, I recommend selecting "Making a bot" under "Hobbyist." Click "Next" after making your selection(s).

On the next page, verify your information is correct and fill out the required information (your country and name). Click "Next."
Next you will be asked to provide details about how you intend to use the API. Select the options you will need and answer the required questions. For this tutorial I have only selected "Yes" for the question "Will your app use Tweet, Retweet, like, follow, or Direct Message functionality?" Depending on your needs, you may select other options. Click "Next."
Verify everything is correct and click "Looks good!"
Read and agree to the developer agreement (or don't, end tutorial, have a nice day!)
NB: If you do not have a phone number connected to your Twitter account, you will need one to continue your setup at some point.
Once you have completed the developer application you will need to click a link in your email to verify your email address.
We are not done with the developer site just yet, but you will need to do some setup on Glitch (your bot host) before you can continue with the rest.
Setting up your bot host
Getting your developer application submitted and approved is just the first step. Now you need to create the app that will be connected to your bot, but in order to do that you need to have your bot's website URL. So, let's take a moment to set that up.
If you don't already have a Glitch account, go create one now and then come back here.
After you have your account, go to this template on the Glitch site.
In the top right corner, click the button that says "Remix to Edit" to create a copy on your account.

After Glitch is done creating your site, click the button in the top left that says "Show" and then "In a new window". Copy the URL from this page or keep it open while moving on to the next section.
Creating your Twitter bot's app
Okay, now that you have a URL for your bot's website, you can finish setting things up on the Twitter side.
Go back to developer.twitter.com and mouseover your name in the top right corner. Select "Apps."
On the Apps page, click "Create an app"
Fill out the information about your app, pasting your new URL in the Website URL box. For this project we do not need to use the Twitter sign in API. I recommend leaving any non-required fields blank.
Click "Create" and then "Create" again.
Awesome! Your app has been created. Now you just need to get the API keys for your app and add them to your configuration file on Glitch.
Connecting your bot to Twitter
Before you can actually interact with the Twitter API, you need to setup your Glitch environment with the API keys.
On the Twitter developer site, in your app's details page (the page you were taken to after creating the app) there is a tab at the top called "Keys and tokens," click it.

In another tab or window, open your Glitch project and click on the .env file. You should see a file opened in the right hand side that has a spot for all your API keys.
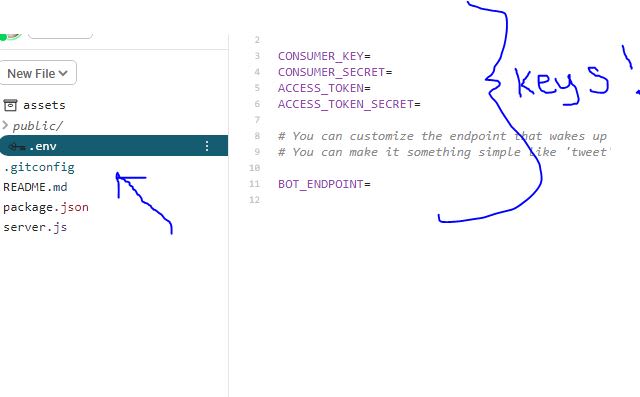
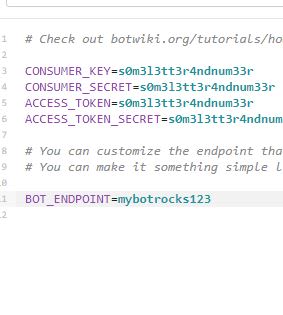
Copy and paste the keys from the Twitter developer page to the corresponding location in the .env file. You will need to click "Create" under the "Access token & access token secret" section to generate those values. You do not need to put the keys in quotes.
You will also see a spot in the .env file for
BOT_ENDPOINT. This is what you will put after the slash in your URL to trigger your bot. This will be explained in more detail later. You can put anything you want for this value.
We're almost there, I promise!
Sending your first automated Tweet
Great news, you are done with all the configuration stuff. Now you can start using your server to interact with the Twitter API. The template you used already comes with some basic stuff set up, so we will focus on that for now.
In your Glitch project, click on the "server.js" file and read through the code that is already there. You will see that it's already set up to send a simple "Hello world" post. So let's do it!
Open Postman and select the get request type. Put in your project URL plus the bot endpoint you created. (Note: You can also just put this URL into your browser's address bar, but as you build out your bot it will be easier to use Postman.)

Click "Send." If everything has been set up correctly, you should see a "Hello world" post on your bot's Twitter timeline.

Congratulations, you've just successfully sent a Tweet using the Twitter API, but it's not a bot yet. In order to be a bot it needs to be automated, so let's do that.
Making it a bot
In order to make your app a bot, the process of hitting your endpoint needs to be automated. There are several free tools you can use to accomplish this. For this tutorial, I will be using UptimeRobot.com.
UptimeRobot allows you to access a URL at a set interval that you decide. It will provide a status result in the dashboard indicating if the URL was accessible or not. This is often used to verify that a site is active, but you are going to use it to automatically trigger your bot.
Go to UptimeRobot.com and create an account (or log in if you already have an account).
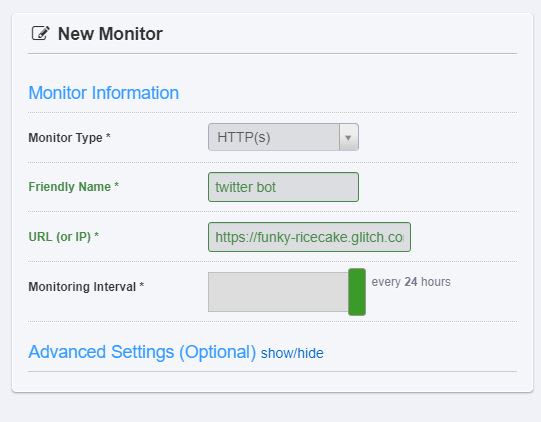
From your account dashboard, click the "Add New Monitor" button.

Select "HTTP(s)" for the monitor type
Provide a "Friendly Name," which is the name that will show on your dashboard, and your endpoint URL. Remember, the endpoint URL is your Glitch URL followed by slash and whatever you set for the BOT_ENDPOINT in your .env file (i.e. something like
https://funky-ricecake.glitch.com/MyAmazingBot456).Set an interval time. In order to comply with Glitch's terms of service, this should be an interval no less than 25 minutes. Depending on your bot, you can decide how often it should send a message. In the screenshot below, I have set the interval to once every 24 hours. This is the longest monitoring interval that UptimeRobot allows. If you want it to happen less often (i.e. once a week, once a month, etc) you may wish to find a different service.
As soon as you click "Create Monitor" UptimeRobot will send the first request to your bot and the first automated status will be posted (which, unless you've already made some changes, will still be "hello world"). If you are not ready for your bot to make a post, you can wait until you have finished setting it up to create the monitor.
That's it! At this point you should have a bot that can post a status update. Now, I'm sure that you would like your bot to do more than say "hello world" every day (or, maybe not, you do you). If so, please keep an eye out for part II of this tutorial where we will get some data from some open source APIs and use it to create slightly more interesting Twitter updates.


Top comments (7)
Maybe this tutorial will finally allow me to create unMediumify bot im dreaming about ;)
I don't know what that does, but it sounds cool.
You know how medium.com likes to track you, download 30MB of useless js in the bg, then slap you with paywall or kill your mobile experience by their app install banners?
This bot would listen for a mention
@unmediumify(similar to@unrollor whatever the threads bot is called), open the link that this mention was in response to, if it was a medium link (in any shape or form), it would create a place for the content without all this crap - ie. gist, pastebin - ideally something like "Reader mode" feature in Firefox/Safari.Ah! Yes. That makes sense. I avoid Medium these days.
Wow, its been 2 years and I still didnt do it and still am looking for it. Medium became so s***ty it doesnt even load for me nowadays. It just freezes at fold level and doesnt render anything below. Geez what a crappy website... cant understand why anyone would want to publish there their valuable content.
The glitch url (in the setting up host section) is broken..
loved your article!! Will definitely try this out.
Thanks. I fixed the url.