
This blogpost will be the starting point for a 3 part series on how to deploy a Middleman app using Webpack to GitHub Pages in simple steps.
We’ll go through:
The creation of an empty Middleman application using Webpack as an external pipeline
Dockerizing your Middleman application (plus, adding LiveReload to refresh the browser after new changes)
Finish it off by configuring deployment to GitHub Pages using GitHub Actions
You can check out the demo to see how it ends up looking on my own personal GitHub page, or you can skip this whole blogpost and head over to the repository to check out all the files and configurations.
The final result will be an empty Middleman app with an About page, it will have Webpack integrated and all relative links working properly according to Github Pages relative paths.
Also, head over to this dev.to article by Mario if you are looking to add TailwindCSS! Middleman + TailwindCSS + Webpack
Setting up the environment locally
Middleman is really simple to set up locally and it is distributed with the RubyGems package manager so you will need to install both the Ruby language and RubyGems first.
We will be working with Ruby’s 2.6.3 version, make sure to upgrade yours if necessary. You can check which Ruby version you have installed by running $ ruby -v and easily upgrade it with rvm, a Ruby version manager:
- Run
$ rvm listto list the available Ruby versions installed in your rvm - Run
$ rvm install 2.6.3to install the desired version - Run
$ rvm use 2.6.3to use a specific Ruby version
Now, lets update the Ruby Gems:
$ gem update --system
If you are already good to go, follow this get started guide to install Middleman or just try running the following command in a new terminal session:
$ sudo gem install middleman
Create a new Middleman application by running middleman’s built in command $ middleman init. You can either execute it inside your project’s folder or include the desired project name in the same command and let Middleman do everything for you:
$ middleman init your_new_project
Move inside your project’s folder to check how it all looks and let’s start a Middleman server for our first live preview:
$ cd your_new_project

$ bundle exec middleman server
Open a browser at http://localhost:4567/. You should be able to see your new Middleman app!
Stop the preview server by pressing CTRL + C in the terminal session.

Adding Webpack
We’re now ready to install and configure Webpack in the project. Start with initiating npm, and then installing Webpack:
$ npm init -y

$ npm install webpack webpack-cli --save-dev
Open the package.json file created in the repository root and edit its content to add Webpack’s scripts:
Also, we’re going to need some extra packages to handle how stylesheets are bundled. To make it easier for you, just copy and paste this entire line in your terminal to install them all at once:
$ npm install --save-dev mini-css-extract-plugin sass-loader css-loader node-sass
Don’t forget to add node_modules inside the .gitignore file so as to prevent commiting all node_modules folders and files before we configure Webpack.
Next, create a file under the project’s root directory and save it as webpack.config.js:
Go ahead and run $ npx webpack inside your terminal. You should see a new .tmp/dist folder was automatically created after bundling the assets with Webpack, and inside of it, you should end up with a style.css, a site.min.js and a style.min.js files.
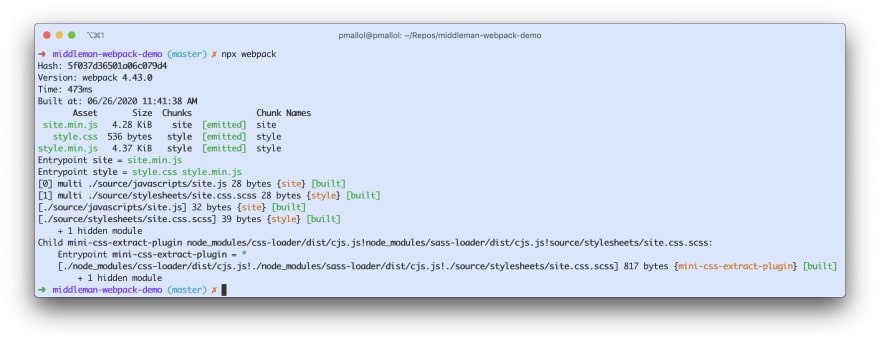
Nice!
Ok, so now that we made sure our files are being handled properly by Webpack, we need to make Middleman incorporate them when developing and building our app.
Open the config.rb file, where Middleman’s configuration lives, and add the following lines -we’re telling Middleman how to handle assets and where our new .css and .js files actually are-:
Finally, open up ./source/layouts/layout.erb, and replace the assets link helper inside the <head> tag of the application’s layout with the following two lines -asset’s file names have changed a tiny bit-:
Check everything’s working ok by starting your application again with $ bundle exec middleman.
Modify either ./source/stylesheets/site.css.scss or ./source/javascripts/site.js and open the browser at https://localhost:4567 to see the changes reflected live:
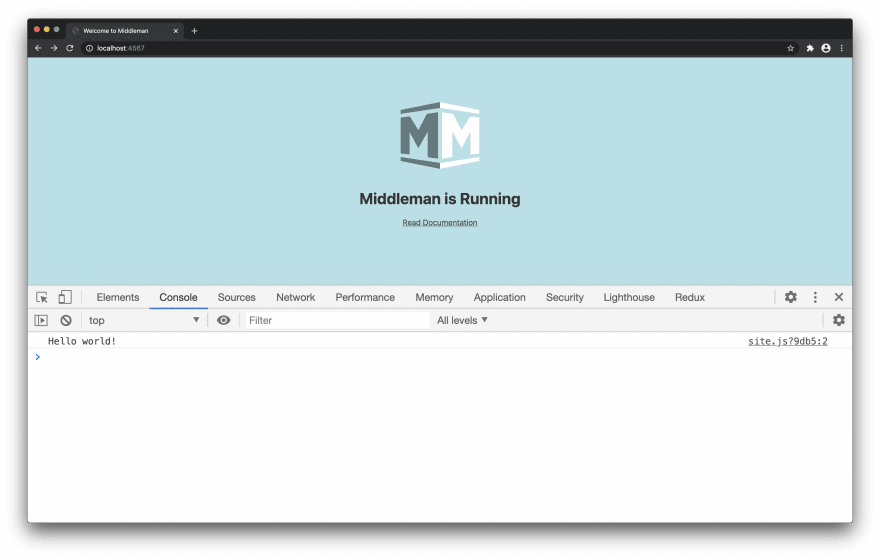
Here I’ve changed the background-color property to “powderblue” and added a console.log(“Hello World”); to the JavaScript file.
Great! You can further improve Webpack’s configuration by adding specific settings to your production environment and create a separate configuration file for both production and development.
We won’t get to cover that in this blogpost. That’s it for now on all matters regarding Webpack as an external service.
Coming next, we’re going to dockerize all of this!

Top comments (4)
Thank you! This helped me a lot!!! 💙
I had to change
-dto--devtool source-mapin line 6 in config.rb:"./node_modules/webpack/bin/webpack.js --watch -d --progress --color"Otherwise I would get this error:
Thanks for this! I'm glad it was useful :D
ThX / Gracias for sharing. Exactly what i was looking for.
Awesome! Glad I could help