
This post is part of a series. To see all published posts in the series see the tag "elm calculator book".If you wish to support my work you can purchase the book on gumroad.
This project uses Elm version 0.19
- Part 1 - Introduction
- Part 2 - Project Setup
- Part 3 - Add CSS
- Part 4 - Basic Operations
- Part 5 - Adding Decimal Support
- Part 6 - Supporting Negative Numbers
- Part 7 - Add Dirty State
- Part 8 - Support Keypad Input
- Part 9 - Combination Key Input
- Part 10 - Testing
- Part 11 - Netlify Deployment (this post)
- browse: https://gitlab.com/pianomanfrazier/elm-calculator/-/tree/master
- diff: https://gitlab.com/pianomanfrazier/elm-calculator/-/commit/e2b92f39f910329dc7b882be9ac2b82b44a09f00
Netlify makes deploying web apps super easy. You point Netlify to a git repository hosted with GitHub, GitLab, or Bitbucket and netlify will build and deploy your project. We will need to add some things to our project so that Netlify will know how to build and deploy our project.
Add deploy script
The only change we need to add to our project for Netlify is to add a build script. We will add that to the package.json. Anything added to the scripts section in a package.json can be run with npm run <script name>. So in our case we can run npm run build and npm will build our project to a dist folder.
{
"name": "elm-calculator",
...
"scripts": {
"build": "<do build stuff here>"
},
...
}
Here is what we need to do to make a build.
mkdir -p dist # make a dist folder if not already there
elm make src/Main.elm --optimize --output=dist/elm.js # make optimized build and output to dist/elm.js
cp index.html dist # copy index.html to build directory
cp style.css dist # copy style.css to build directory
And then we add it to our package.json so we can run it with npm run build.
{
"name": "elm-calculator",
...
"scripts": {
"build": "mkdir -p dist && elm make src/Main.elm --optimize --output=dist/elm.js && cp index.html dist && cp style.css dist"
},
...
}
Configure Netlify
Now we need to point Netlify to our git repository.
First you need to register for an account on Netlify. After you can log in to your netlify account you need to go to the dashboard at https//app.netlify.com.

After you click on "New site from Git" you will need to choose you git hosting service. I am hosting this project on GitLab so I will choose that one.
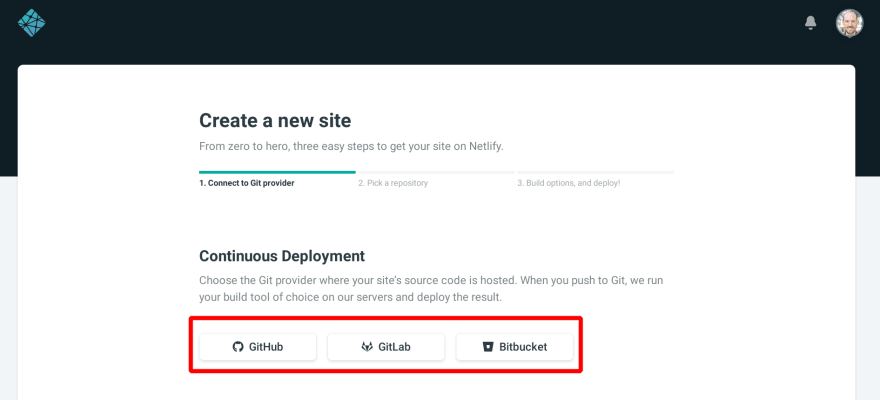
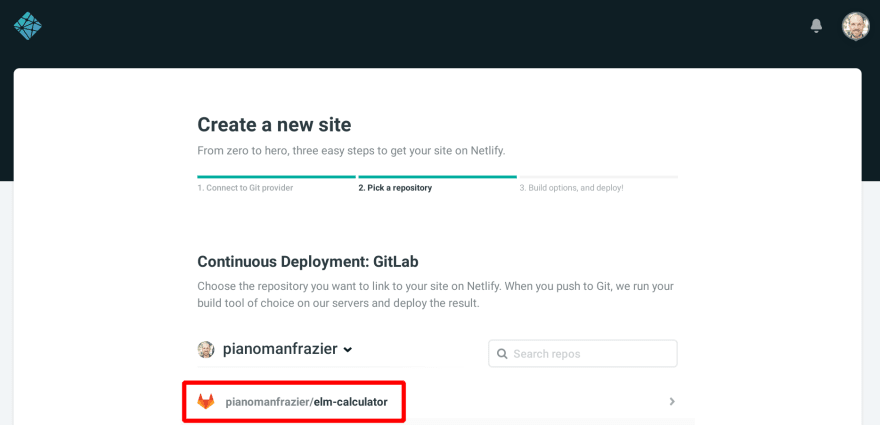
Netlify will ask you to allow permission to access you repositories on the chosen git provider. After you login and give permission you will choose a repository.
Next is the most important step. We tell Netlify what command to run to build our project and with directory to deploy from. The build command needs to be set to npm run build and the publish directory needs to be set to dist. See

Click on "deploy site". If all goes well you should see that your build is in queue waiting to be built.
When it is ready you can click on the link provided and see you app live on the internet to share with the world.
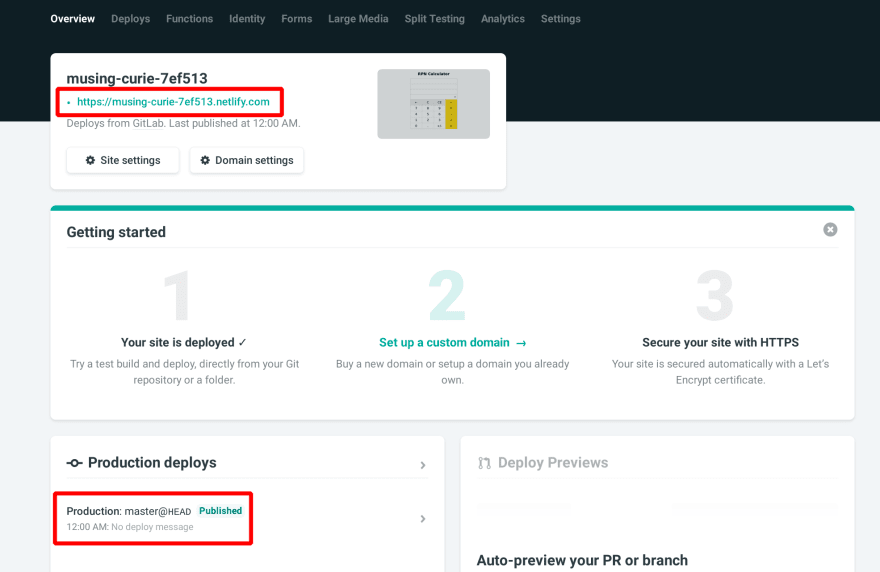
If you want a custom Netlify sub-domain name click on "Site settings". Then click on "Change site name". You can then change the name to something like "elm-calculator". Your project would then be made available at https://elm-calculator.netlify.com.

We're done
Congratulations for making it to the end of this project. I learned a lot putting this together and I hope you learned a lot as well.
Together we build an Elm application from the ground up and deployed it to netlify for all the world to see.

Top comments (0)