
This is the fourth article in the "Getting Started with Azure App Service" Series where I publish in-depth tutorial and walkthrough on using Azure App Service and best practices every week. Last week, we talked about how you can use Using Deployment Slots for your web app services.
If it's your first time here, please check out other articles in the series:
Part 1: Up and Running With Azure App Service
Part 2: Continuous Deployment for Azure App Service: GitHub and Azure Repos
Part 3: Using Deployment Slots with Azure App Service
Part 4: Setup Custom Domain for Azure App Service
Azure App Service provides you with a globally unique subdomain ending with "azurewebsites.net" which serves as a default site if you don't choose to customize it. It is likely that you don't want to continue using that domain if you are running in dev or production to test your application code.
In this article, we'll set up a custom domain for your web app and walk through what configuration you need to perform to set up your new domain for app service. Stick with me to the end and warm up your app service for some action!
Table of Content
Prerequisite
If you decide to follow along, I'd like to address some of the pre-requisites that will help you follow the steps in the article. Make sure you fulfill the requirements listed below:
- You must have an active Azure Subscription with Azure App Service resource deployed.
- You must have a custom domain purchased through a domain service provider. Use THIS URL to search available domains if you don't have one already.
Configuring Custom Domain
Adding a custom domain to Azure App Service requires you to have access to your domain provider service where you will need to update DNS records to confirm that you own the domain. You can choose to use a root domain or a subdomain to redirect to your application based on your requirement. I'll be following both approaches and showing you where you can configure your custom domain.
Choosing a Right App Service Plan
Custom Domain is supported only on Basic or higher-tier plans. F1:Free tier doesn't support the custom domain or SSL to secure your web service. If your app service plan doesn't support the custom domain, you'd get an error as shown in the image below:

Click on the highlighted text to choose the right service plan for your app service. I'll be selecting the cheapest option for demo purposes to give you a glance of what's required.
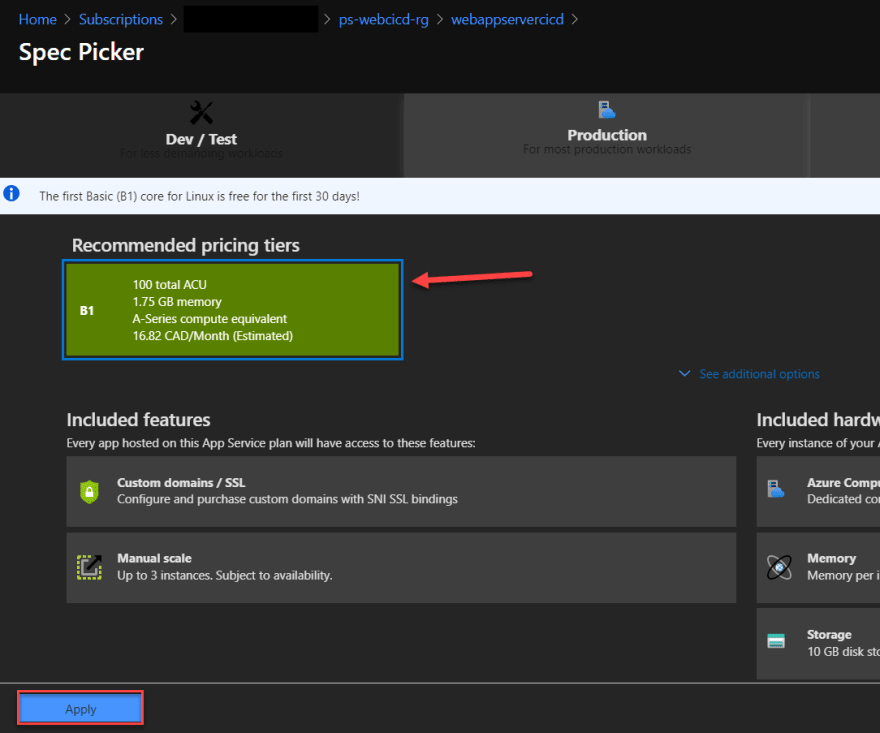
Choose any plan from the listed option as it'll show you only the supported plans that include the custom domain in its feature. Hit apply once your device the plan for your app service.
Adding Root Domain to App Service
If you wish to use your root domain for app service, follow the steps below to perform the setup.
- Navigate to Azure Portal and locate your App Service resource.
- Click on the "Custom Domains" option on the left blade and click "+ Add Custom Domain"
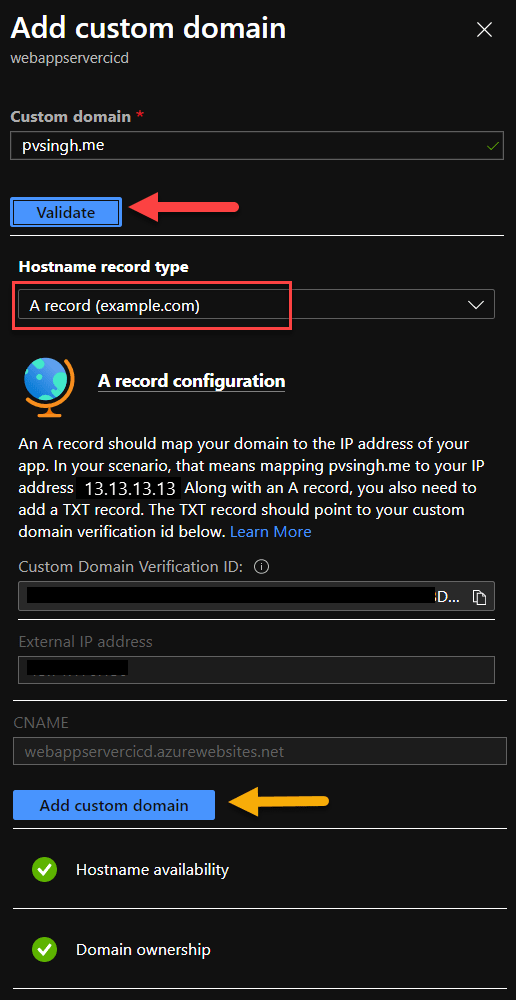
- Enter the full path of your domain. i.e. "pvsingh.me" in this case and click Validate.

- Upon clicking validate, a new window will popup with the hostname record that you need to set up in order to verify the domain ownership.
- It's worth noting that, if you choose to use your root domain, you should always configure "A Record" for your DNS.
-
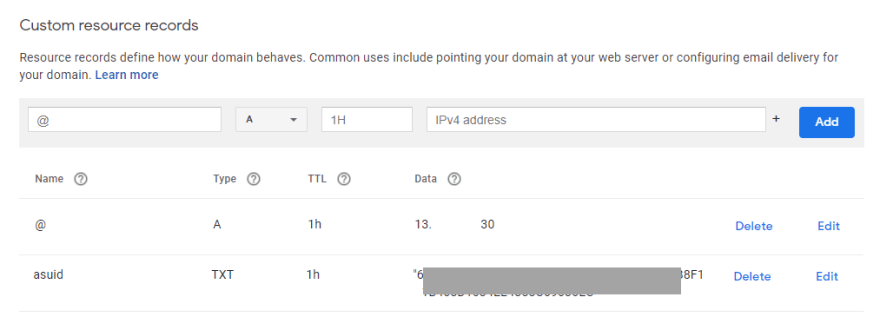
Follow the table under "Domain Ownership" and add the entries to your DNS Server on your domain provider portal.

-
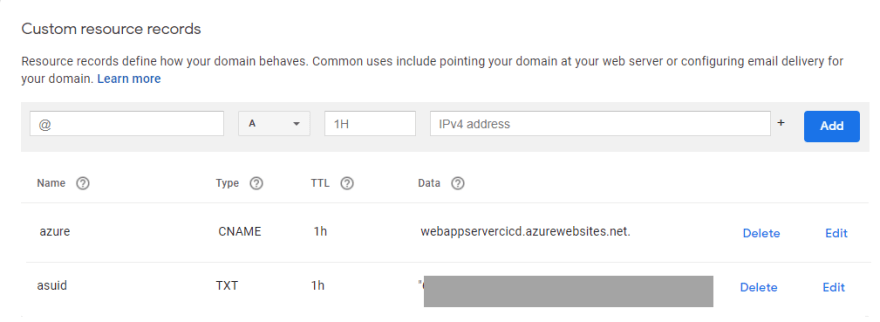
DNS Entries should look like this. (referencing google domain portal)
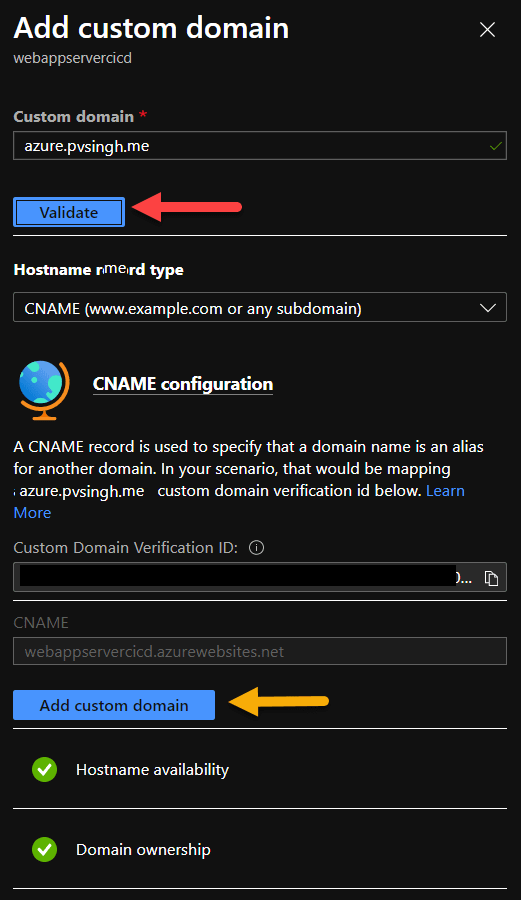
Domain entries may take some time to propagate based on your domain provider. You can check the status by clicking validate to see if the entries are synced already. Once the changes are confirmed, validation will show success, and "Add Custom Domain" will become active.
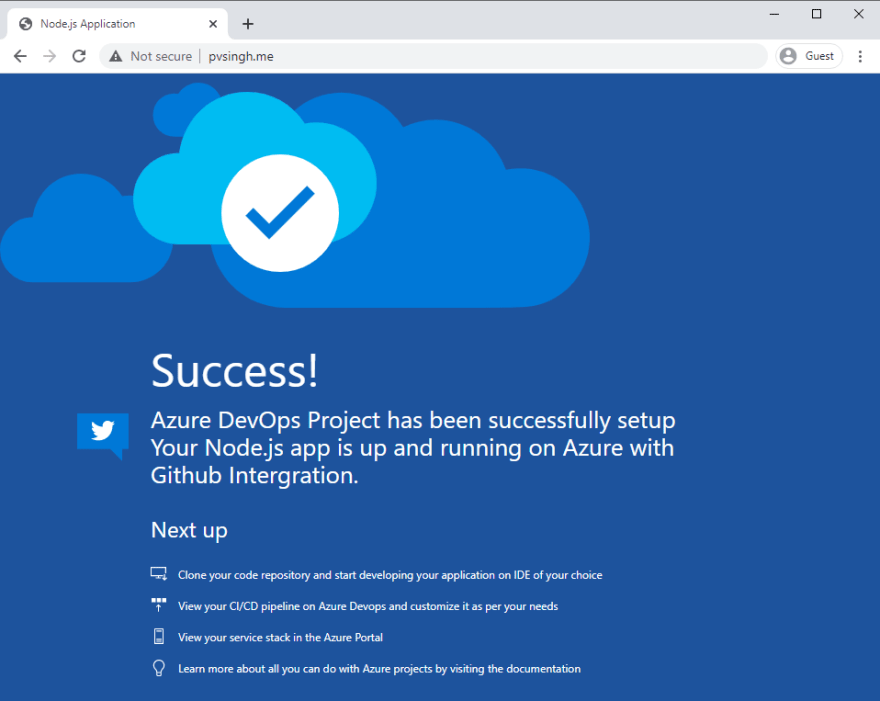
- After adding the custom domain, your web app service will be instantly available on the newly configured domain.
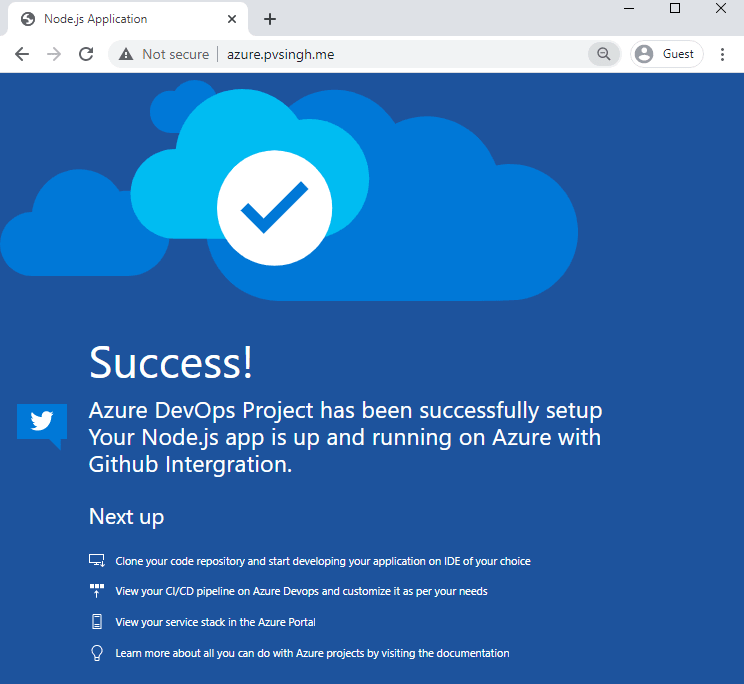
- Navigate to the URL to confirm that your application is running on the newly configured domain.
Adding Subdomain to App Service
If you choose to use a subdomain for your app service, follow the steps below and it'll get you started with using a subdomain for your application.
- Navigate to Azure Portal and locate your App Service resource.
- Click on the "Custom Domains" option on the left blade and click "+ Add Custom Domain"
- This time, enter the subdomain you want to use and click "Validate"
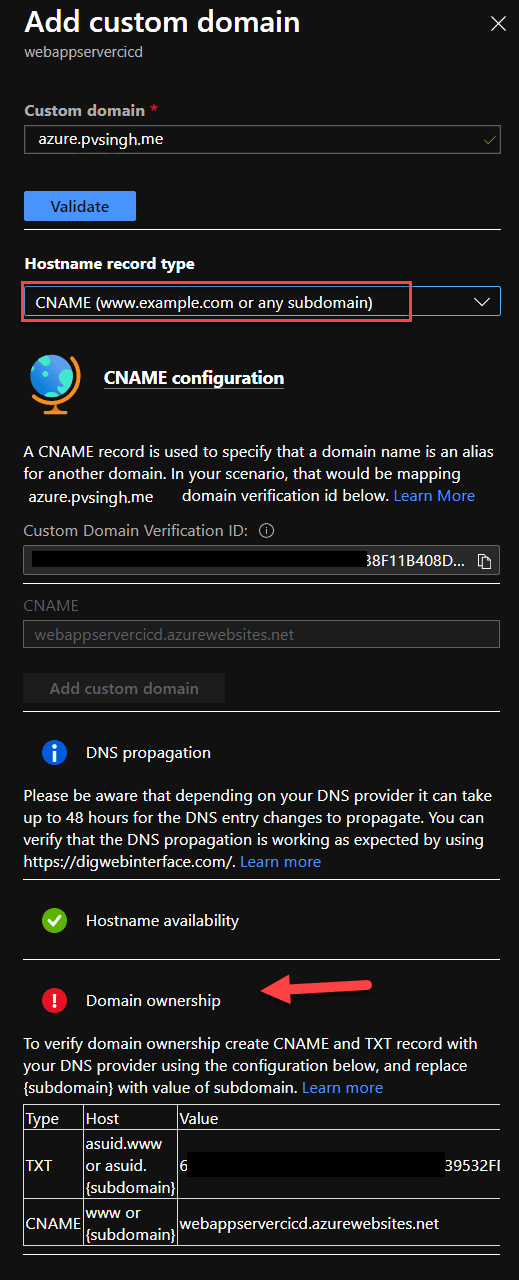
- As you see, you'll be prompted to use CNAME now with some entries below as before.
- Fill out the DNS records on your DNS provider portal which should look something like this:
- Validate the change on the Azure portal after few minutes and Add the subdomain as your custom domain.
- Just like before, use the subdomain URL to validate the changes.
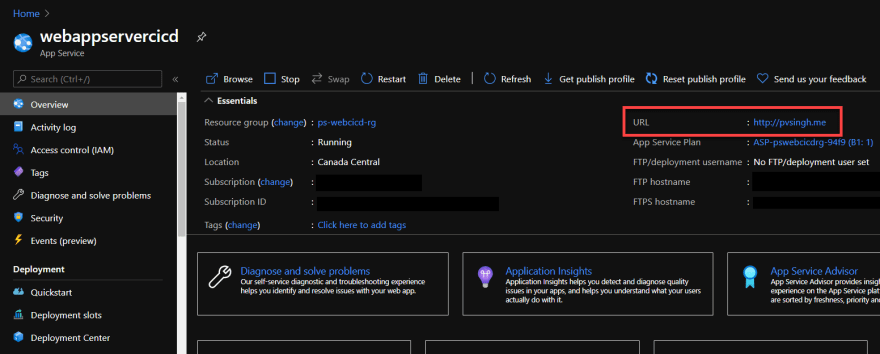
Your domain URL will reflect on your app service overview. This URL point to the default endpoint for your web application.
Conclusion
I hope that helped you set up a custom domain for your app service resource. I'll be writing about more exciting topics on App Service in the coming weeks. Feel free to leave out a comment or suggestions if you gain any useful information from these articles.

Oldest comments (0)