
Performance and speed are crucial to the processing of any application running heavier or light workloads. The most significant impact any service can make on the application is the database queries. The latency to read, write and update the data in real-time can affect how the application performs its operation and how quickly it does that.
While working on an application design, you often seek certain functionality in services to be used by the application, such as high availability, data consistency, strong throughput, scalability, and robust disaster recovery solution. The most important thing is that all of those benefits shouldn't come at the cost of the application's performance.
In this article, you'll understand the concept of partition keys and the key concept involved in choosing the right partition key for your dataset.
Table of Content
- Cosmos DB Partition Keys Overview
- What are Containers in Cosmos DB
- Logical Partitions in Cosmos DB
- Physical Partitions in Cosmos DB
- Replica Sets in Cosmos DB
- Choosing the Right Partition Keys for Cosmos DB Account
- Creating Cosmos DB Container with Partition Key using Azure Portal
- Creating Cosmos DB Container with Partition Key using Azure CLI
- Creating Cosmos DB Container with Partition Key using Azure PowerShell
- Conclusion
Cosmos DB Partition Keys Overview
Azure Cosmos DB is designed to be used and operate for any size of workloads without any special configuration required to adapt to workload changes. That's all possible due to its scalable nature, and most importantly, the scalability is all taken care of under the hood by the Azure team so that you can spend more time writing efficient code and queries to interact with your data.
In terms of writing efficient queries, Cosmos DB allows you to group a set of items or data in your collection by a similar property determined by the partition key. Partition keys are the core element to distributing your data efficiently into different logical and physical sets so that the queries performed against the database are completed as quickly as possible.
It is essential to choose the partition key during the design phase of the applications as you cannot change the partition key once the container is created.
What are Containers in Cosmos DB
Before starting to unwrap the partitions, it is essential to understand what containers are in CosmosDB. As of today, Cosmos DB offers three types of containers: collection, tables, and graphs. If you wish to learn more about these types, check out the first article in the series here.
The containers are logical resources that groups one or more physical partitions of the data and necessary building blocks of Cosmos DB structure.
Logical Partitions in Cosmos DB
Grouping of items or documents with the same partition key forms a logical partition. The partition design is dependent on the partition key as it groups similar items for even distribution. It's worth mentioning that the partition key is a JSON property within the document that Cosmos DB can leverage to distribute the data. The logical partition can only store up to 20 GB of data.
It's easier to understand it using an example of a dataset: students' exam results for different subjects in class. Each student has exam scores for one or more exams. One of the possible logic partitions for this kind of dataset could be the subject name.
[{
    "userId":"Singh",
    "subjectName":"Maths",
    "score":"80"
},
{
    "userId":"Singh",
    "subjectName":"Physics",
    "score":"70"
},
{
    "userId":"Max",
    "subjectName":"Maths",
    "score":"90"
},
{
    "userId":"Max",
    "subjectName":"Chemistry",
    "score":"80"
}]
All the data with exam scores for every subject will be stored in its own partitions. Hence, grouping the data for a particular subject for multiple students in the same partition. Since the partitions are logical, you don't need to worry about deleting them once the associated data is removed or creating new ones for similar data.

Physical Partitions in Cosmos DB
Physical partition in Cosmos DB is Azure managed containers that enabled the scalability and data distribution across the platform by mapping multiple logical partitions to a single physical partition. Unlike logical partitions, the storage space for physical partitions is up to 50 GB for each partition.
The distribution of data across the physical partition depends entirely on throughput provisioned on the Cosmos DB account. Each physical partition is limited to the throughput of up to 10,000 request units (RU) per second. Based on the throughput defined for the account, the Cosmos account will automatically determine the number of physical partitions. In addition to it, the overall size of the account is also considered due to the 50 GB limit on each physical partition.
Replica Sets in Cosmos DB
A replica set in Cosmos DB is referred to as a subset of data within a physical partition set. Each physical partition distributes the data into a set of replicas to make the data durable, highly available, and consistent. Since the replica sets are running on Azure-managed nodes, the replication and global distribution process are handled automatically without any specific configuration.
Read more about the concept of Consistency in Cosmos DB on the article below:
Consistency Levels in Azure Cosmos DB Explained
Choosing the Right Partition Keys for Cosmos DB Account
When considering the exact partition key for your containers, you need to evaluate the dataset you are working with, identify key metrics, and understand how the performance might be impacted based on how the data is accessed. Here are few considerations when planning the right partition keys for your dataset:
- The partition key of your container should distribute the data evenly across the solution. Choose a key that has the possibility of growing and still not overload one set of partitions.
- Designing a partition key with uneven partitions or storing one document on each partition can cause cross-partition transactions in triggers and stored procedures.
- Avoid the keys that can potentially overload one particular partition with excess data on new writes, causing exceeded throughput and partition throttling.
- If your queries are mostly targeting a particular attribute of data, choosing that as a partition key would be an ideal use case to reduce cross-partition queries.
Creating Cosmos DB Container with Partition Key using Azure Portal
Navigate to your Azure Portal and follow the instruction below to create a new Cosmos DB account resource.
- Search cosmos in the Azure Portal search bar and select the Azure Cosmos DB option under Services :

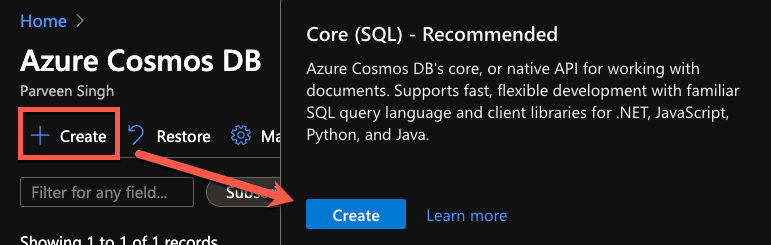
- Click +Create and choose Core(SQL) - Recommended API option:
- Fill out the relevant information on the Create Azure Cosmos DB Account page: Be sure to use the Free Tier Discount if you currently don't use any Cosmos DB account.

- Click Review+Create followed by Create to complete the resource deployment.
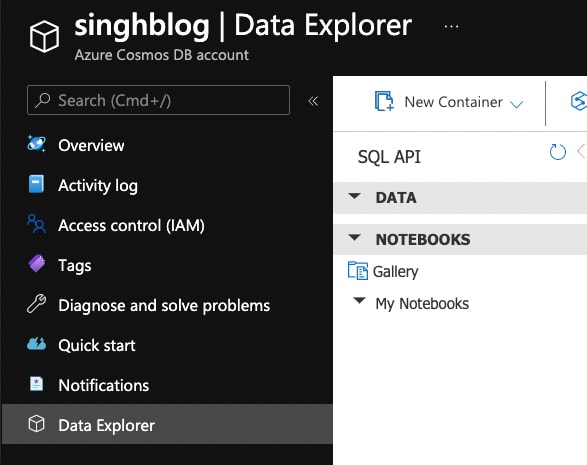
- Once the resource is deployed, navigate to the CosmosDB resource and click Data Explorer from the left blade menu:
- Click New Container on the top left and fill out the following information on the New Container popup window:

The partition key you will be using is subjectName to distribute the data into logical partitions.
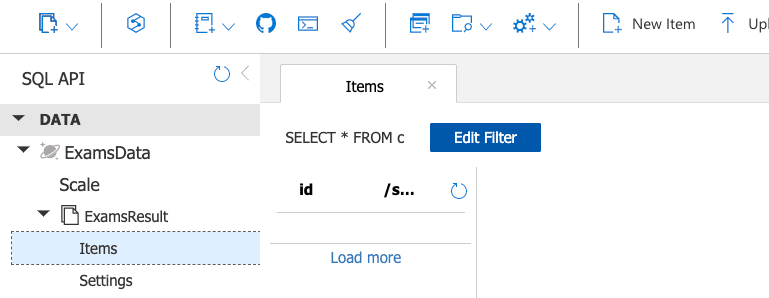
- Expand the Database ExamsData and the Container named ExamsResult and click Items :
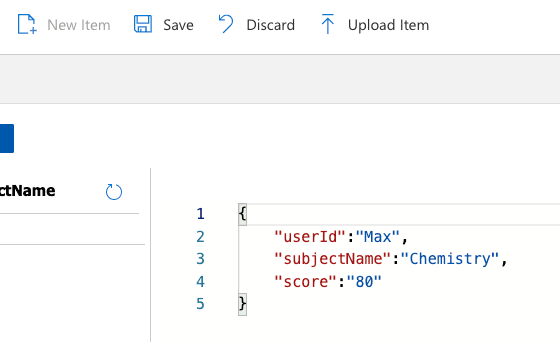
- Click New Item on the top menu and replace the content of the editor with the following JSON data:
{
    "userId":"Singh",
    "subjectName":"Maths",
    "score":"80"
}
- Click Save to complete the document upload:
- Repeat the last step for the following data, entering one JSON object at a time :
{
    "userId":"Singh",
    "subjectName":"Physics",
    "score":"70"
}

{
    "userId":"Max",
    "subjectName":"Maths",
    "score":"90"
}

{
    "userId":"Max",
    "subjectName":"Chemistry",
    "score":"80"
}
- Once uploaded, you should start seeing the data listed in the items view distributed by the subject name:

Creating Cosmos DB Container with Partition Key using Azure CLI
If you prefer using Azure CLI to create the resources, follow the instructions below to create the Cosmos DB resource using Azure CLI.
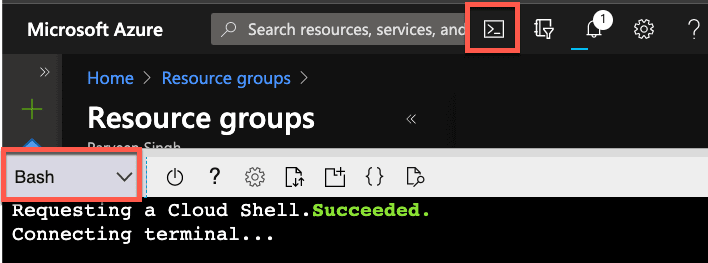
- Launch the CloudShell from the Azure Portal and choose Bash as the environment:
- You will first create a new resource group and cosmos DB resource inside that resource group. If you already have a resource group, feel free to update the name of the
resouceGroupvariable and skip the resource group creation command. Be sure to update thecosmosDBvariable to use a globally unique name for the Cosmos DB account.
resourceGroup="cosmostest"
cosmosDB="cosmosaccount2021"
az group create -n $resourceGroup --location westus
az cosmosdb create -n $cosmosDB -g $resourceGroup --locations regionName=westus
- Create the Cosmos DB Database using the following commands:
dbName="ExamData"
az cosmosdb sql database create --account-name $cosmosDB --name $dbName --resource-group $resourceGroup
- Finally, create the container with a partition key of
subjectName:
containerName="ExamResults"
az cosmosdb sql container create --name $containerName --partition-key-path '/subjectName' --account-name $cosmosDB --data
base-name $dbName --resource-group $resourceGroup
- At this point, the Cosmos DB account, database, and container are ready to use either in any application code or using Data Explorer in Azure Portal. You can follow the step in the previous section to upload the sample data if you wish to add documents to the container.
Creating Cosmos DB Container with Partition Key using Azure PowerShell
If you are familiar with Azure PowerShell and prefer to use it instead of CLI, follow the instructions below to create the CosmosDB resource using Azure PowerShell:
- Launch the Azure Cloud Shell with a PowerShell environment.
- Create the resource group and a Cosmos DB account using the following commands:
$resourceGroup="cosmostest"
$cosmosDB="cosmosaccount2021"
New-AzResourceGroup -Name $resourceGroup -Location WestUS
New-AzCosmosDBAccount -Name $cosmosDB -Location WestUS -ResourceGroupName $resourceGroup
- Once the account is ready, create the database inside the Cosmos DB account using the following commands:
$dbName="ExamData"
New-AzCosmosDBSqlDatabase -AccountName $cosmosDB -Name $dbName -ResourceGroupName $resourceGroup
- Finally, create the container to store documents with a partition key of
subjectNameusing the following commands:
$containerName="ExamsResults"
New-AzCosmosDBSqlContainer -Name $containerName -AccountName $cosmosDB -DatabaseName $dbName -ResourceGroupName $resourceGroup -PartitionKeyPath '/subjectName' -PartitionKeyKind Hash
- Follow the steps in the previous instructions to upload the data inside the container or use alternate methods via application code to add or remove the data.
Conclusion
I hope that helps you understand the concept of partition keys in Cosmos DB since they are crucial to the data queries and impact the performance of your application. In the meantime, check out the following articles if you are looking to read more about Cosmos DB:

Top comments (0)