
My Journey: Purchasing the Orange Pi 5
In the ever-expanding realm of single-board computers (SBCs), the Orange Pi series has carved out its niche, offering an affordable yet feature-rich alternative to the more prominent brands like Raspberry Pi. With the release of the Orange Pi 5, boasting improved performance and versatility, I was intrigued and eager to explore its capabilities.
The Quest Begins
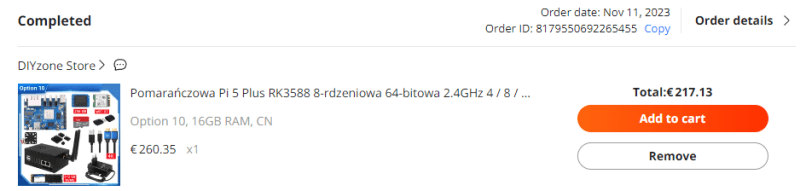
My journey commenced with the realization of a need for a reliable and cost-effective computing solution. Whether it be for tinkering with IoT projects, setting up a home server, or experimenting with various software applications, an SBC seemed like the perfect fit. After extensive research and comparison, the Orange Pi 5 emerged as a strong contender, offering commendable specifications at an attractive price point. I bought mine from AliExpress in 2023–11–11 I saw a great discount and could not resist it. In the end, it cost me an additional 76 EU, because of goods customs in Lithuania if You buy over 150 EU from AliExpress be prepared to pay more.
Specs of Orange Pi5 Plus
CPU — Rockchip RK3588 8-core 64-bit, quad-core A76+quad-core A55.
8 nm design, up to 2.4 GHz
GPU — Integrated ARM Mali-G610
RAM — 16GB LPDDR4
Memory — SD card 32 GB, M2 M key 512GB, M2 E key 256 GB
OS — Debian
 on [Unsplash](https://unsplash.com?utm_source=medium&utm_medium=referral)](https://res.cloudinary.com/practicaldev/image/fetch/s--R6rfEd-p--/c_limit%2Cf_auto%2Cfl_progressive%2Cq_auto%2Cw_800/https://cdn-images-1.medium.com/max/14016/0%2ADVZPoivhYL2SuOWZ)
One crucial aspect of setting up the Orange Pi 5 was selecting the appropriate operating system (OS). Given the diverse range of options available, including Ubuntu, Armbian, and various custom distributions, I carefully weighed the pros and cons of each. Ultimately, I opted for Debian, a popular choice known for its stability, extensive package repository, and widespread community support.
Setting Up
 on [Unsplash](https://unsplash.com?utm_source=medium&utm_medium=referral)](https://res.cloudinary.com/practicaldev/image/fetch/s--er6btu4m--/c_limit%2Cf_auto%2Cfl_progressive%2Cq_auto%2Cw_800/https://cdn-images-1.medium.com/max/6120/0%2AwgKaC4oXkLU679wv)
OS image I took from the official website. Installed on SD card, because had no other solution. For Installation, I used Raspberry Pi Imager. After I found this video and continued the installation process according to the provided steps. At one moment had problems moving OS from SD card to M2 (500 GB). Now it is hard to tell, what I was doing wrong. I solved this problem by moving the Debian image with WinSCP software. After used the command from the video according to my path, it worked. Currently trying to figure out how to set the static IP address. Yes, my journey continues.
Plans
 on [Unsplash](https://unsplash.com?utm_source=medium&utm_medium=referral)](https://res.cloudinary.com/practicaldev/image/fetch/s--2MHcw8GN--/c_limit%2Cf_auto%2Cfl_progressive%2Cq_auto%2Cw_800/https://cdn-images-1.medium.com/max/8512/0%2APVEzyPniFDVH94lP)
After all configurations are finished I plan to host a WordPress blog. Ofcourse it will require SSL, Domain, etc. I choose Orangepi because it has low power consumption and in this way, I could save money if I were doing this on a standard desktop PC, or laptop. Also, for me as for Full-stack dev, this is a great opportunity to extend my existing knowledge.
Conclusion
In conclusion, my experience in purchasing and setting up the Orange Pi 5 is interesting. As I delve deeper into the realm of SBCs and unleash the full potential of the Orange Pi 5 through various projects and experiments, I am confident that this budget-friendly yet powerful computing solution will continue to exceed my expectations.

Top comments (0)