Amazon Web Services (AWS) provides a vast array of services that empower businesses to deploy, manage, and scale their applications with ease. Among these, Amazon RDS (Relational Database Service) offers a convenient solution for creating, operating, and scaling relational databases in the cloud. In this guide, we will walk you through the step-by-step process of creating an Amazon RDS database, utilising MySQL as the engine, and configuring it for optimal performance.
Accessing the AWS Console and Searching for RDS
Log in to your AWS account and navigate to the AWS Management Console. In the search bar, type "RDS" to access the Amazon RDS dashboard.
Creating the Database
a. Once on the Amazon RDS dashboard, locate the option to "Create Database" and click on it.
b. In the "Choose a database creation method" section, select "Standard create."
c. Under "Engine options," choose "MySQL" as the database engine.
d. For "Templates," opt for the "Production" template, which comes with configurations suitable for production workloads.
e. In the "Availability and durability" section, select "Single DB instance" for deployment options.
f. Configure the following settings:
DB cluster identifier: Set it to a descriptive name like "database-1".
Master username: Choose a username, often "admin" for administrative access.
Master password: Enter a strong and secure password for the master account.
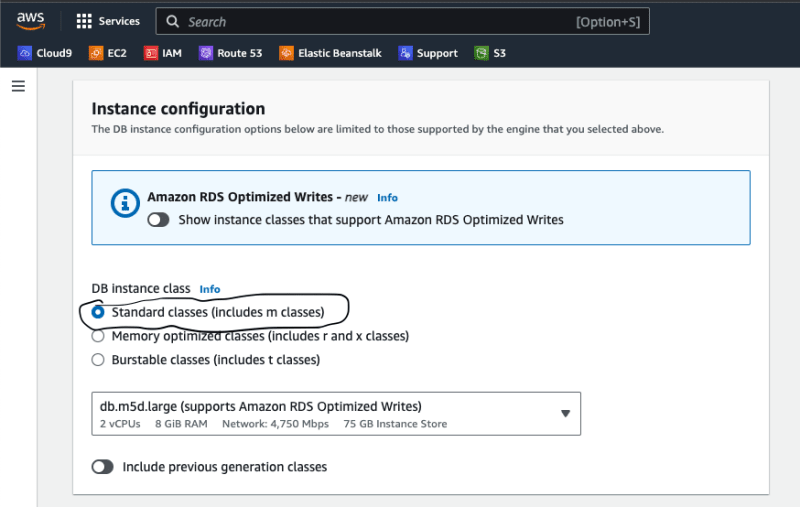
g. Under "Instance configuration," choose the appropriate DB instance class from the Standard class options (including m classes), based on your performance requirements.
h. Configure storage option following these settings:
Storage type: Choose "General Purpose SSD (gp3)" for a balance of performance and cost.
Storage autoscaling: Enable this feature by clicking "Enable storage autoscaling".
Maximum storage threshold: Set the maximum storage threshold to 100 GB.
i. For "Connectivity," leave the default settings as they are. These settings include networking details like VPC, subnet group, and publicly accessible options.
j. Similarly, leave the "Database authentication" settings at their default configuration.
k. In the "Additional configuration" section, provide an initial database name like "MyDB".
l. Once you've configured all the necessary settings, click on the "Create database" button to initiate the creation process.
Verification
After clicking "Create database," AWS will begin provisioning your RDS instance. Once the process is complete, navigate to the RDS dashboard and verify that your newly created database, named "database-1," exists and is available.
Congratulations! You've successfully created an Amazon RDS database using MySQL as the engine. This comprehensive guide has taken you through each step, from selecting engine options to configuring storage and verifying the database's existence. With your newly established RDS database, you're well on your way to managing your data efficiently and securely within the AWS ecosystem.
Feel free to connect with me on Linkedin


Top comments (7)
Interesting read
Nice piece.
Wonderful piece.
Enjoyable to read.
This is an engaging and enlightening piece of literature that captivated my interest and provided valuable insights.
Good One
Nice One