It's difficult to imagine the development of mission-critical software without relying on an event streaming platform such as Apache Kafka®. But perhaps you're new to Apache Kafka® and want to go deeper. You're in the right place! This article will guide your first steps using Apache Kafka® with Java.
If you can't wait to see the final result, this GitHub repository has the producer and consumer we'll write in the step-by-step guidance provided in this article.
Get equipped with what you need
In this blog post you'll learn how to create an Apache Kafka® producer and a consumer in Java. You'll prepare configuration files needed for a secure connection and write some Java to send messages to the cluster and poll them back.
Before you start writing the code, there are several things you'll need to prepare.
Apache Kafka cluster
First, you'll need Apache Kafka cluster itself. To simplify the setup, you can use Aiven for Apache Kafka®. Aiven for Apache Kafka® is a fully managed solution which builds a cluster with the correct configuration in just minutes, takes care of secure authentication, and other essentials. If you don't have an Aiven account yet, register for a free trial.
Once you're in the console, create a new service: in the Create service dialog select Apache Kafka, the cloud of your choice and the nearest to you cloud region. The Startup service plan is sufficient for today. Set a name for your service, for example apache-kafka-playground.
While deploying the service, you can proceed with other tasks.

Java project with dependencies
The second thing you'll need is a JDK installed on your computer and a basic Java project. This article assumes you have basic knowledge of Java. I used the Java 11 JDK when running this code, but Apache Kafka® supports Java 17, so you have plenty of choice.
You'll also need an official low-level Apache Kafka® client library for Java, a reference client, to create a producer and a consumer. Note that if you plan to work with Java APIs for Kafka Streams or Kafka Connect, you'll need an additional set of libraries.
The most convenient way of including kafka-client in your Java project is by either using Maven or Gradle. Select the latest version of the kafka-client from mvnrepository, choose which build tool you use, copy the dependency and add it to your project.

I used Gradle. I pasted the dependency into the build.gradle file and let Intellij Idea load necessary files by selecting Reload All Gradle Projects.
In addition to Apache Kafka® client, you'll also need several other libraries:
- slf4j-simple for logging
- JSON to create and parse JSON objects
Set up configuration and authentication for Apache Kafka®
Before creating the producers and consumers, you need to specify several configuration properties. These ensure that information exchanged by Kafka brokers and clients is kept complete, secure, and confidential.
Aiven offers two authentication approaches: TLS and SASL. In this article we'll use TLS for both authentication and encryption. If you want to use SASL, check out the SASL instructions in Aiven's documentation.
Usually, to perform a TLS handshake, you need to configure both Apache Kafka® brokers and the clients. To simplify things Aiven takes care of TLS configuration for the brokers, so you only need to configure the clients. And, as we'll see, even with the clients Aiven does most of the work for you.
To establish a TLS connection between the client and the server three things need to happen:
- The client needs to verify the identity of the server.
- The server needs to verify the identity of the client.
- All messages in transit between the client and server must be encrypted.
To do this, we'll use Java truststore and keystores.
A truststore in Java is a place where you store the certificates of external systems that you trust. These certificates don't contain sensitive information, but they are important to identify and connect to a third-party system. On the other hand, the keystore contains the private access key and its corresponding access certificate, which are needed to authenticate the client. You shouldn't share keystore data with anyone.
If you're adventurous, you can create these files manually (here is the guide how to do this). However, you can also use a convenient shortcut and let Aiven platform do all the job for us.
Run avn service user-kafka-java-creds using the Aiven CLI with the information about the service and the user:
- YOUR-SERVICE-NAME - the name of your Apache Kafka service as you defined it during creation
-
YOUR-USER-NAME - the name of the user who performs the operation (if you're in doubt, run
avn service user-list --format '{username}' --project YOUR-PROJECT-NAME YOUR-SERVICE-NAMEto see users) - PASSWORD - select a secure password for your keystore and truststore
Now using apply those fields to the command below and run it:
avn service user-kafka-java-creds YOUR-SERVICE-NAME --username YOUR-USER-NAME -d src/main/resources --password PASSWORD
If all goes well you will see six new files appeared in the resources folder. Aiven downloads necessary certificates, creats both keystore and trustore, as well as puts all references into a single file client.properties.

To make it easier to read the settings that are located in client.properties, add a small static method loadProperties into a new class Utils:
package org.example;

import java.io.IOException;
import java.io.InputStream;
import java.util.Properties;

import org.apache.kafka.common.serialization.StringSerializer;
import org.slf4j.Logger;
import org.slf4j.LoggerFactory;

public class Utils {
    public static Properties loadProperties() {
        Properties properties = new Properties();
        try (InputStream input = ProducerOneMessage.class.getClassLoader().getResourceAsStream("client-ssl.properties")) {
            if (input == null) {
                System.out.println("Sorry, unable to find config.properties");
            }
            properties.load(input);
            properties.put("key.serializer", StringSerializer.class.getName());
            properties.put("value.serializer", StringSerializer.class.getName());
        } catch (IOException ex) {
            ex.printStackTrace();
        }
        return properties;
    }
}
Congratulations! You're done with the configuration settings.
Dispatch events to Apache Kafka® cluster
Time to send the data to the Apache Kafka® cluster. For this you need a producer.
In your project create a new Java class called Producer and add the main method there.
To send a message you'll need to do these four steps:
public class Producer {
    public static void main(String[] args) {
        // Step # 1: create a producer and connect to the cluster
        // Step # 2: define the topic name
        // Step # 3: create a message record
        // Step # 4: send the record to the cluster
    }
}
For each of these steps you can rely on the functionality provided by the official Apache Kafka® client library for Java, which you added as a dependency previously.
Here is what you have to import for the Producer class to work:
import org.apache.kafka.clients.producer.KafkaProducer;
import org.apache.kafka.clients.producer.ProducerRecord;
import org.apache.kafka.common.serialization.StringSerializer;
import org.json.JSONObject;
import org.slf4j.Logger;
import org.slf4j.LoggerFactory;
import java.util.Properties;
it's also a good idea to use an instance of Logger to log events later.
Logger logger = LoggerFactory.getLogger(Producer.class.getName());
Step 1: create a producer and connect to the cluster
The constructor of KafkaProducer from Apache Kafka client library expects a list of properties to establish a connection. You already did most of the heavy lifting to define a connection configuration in the previous section. Now, just reference those entries with the helpful utility method Utils.loadProperties() that you added above.
// step # 1: create a producer and connect to the cluster
// get connection data from the configuration file

Properties properties = Utils.loadProperties();
KafkaProducer<String,String> producer =
        new KafkaProducer<>(properties);
One more thing you need to define is the format to serialize data in. In this example we'll send JSON objects as strings usingStringSerializer. You should also add a serializer for the key. Even though you won't need to use the keys explicitly in the first example, specifying key.serializer is mandatory.
properties.put("key.serializer", StringSerializer.class.getName());
properties.put("value.serializer", StringSerializer.class.getName());
Now that you have a set of properties to establish a connection, you can create an instance of KafkaProducer and pass the properties into its constructor:
KafkaProducer<String,String> producer = new KafkaProducer<String, String>(properties);
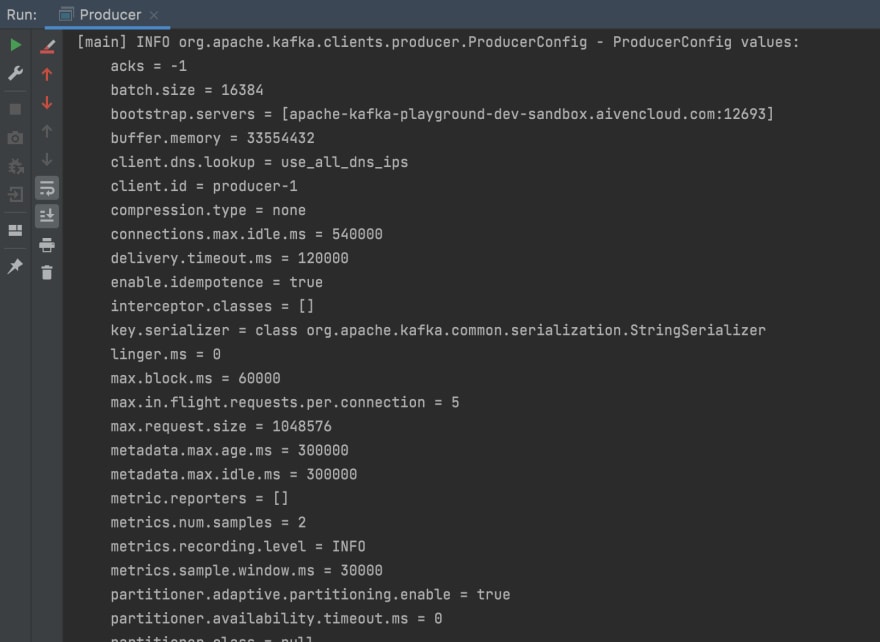
At this point you don't send any data to the cluster. However, it's useful to run the Producer to see how the connection with the server is established and if there are any errors:
Step 2: define the topic name
When sending the data to the cluster, you need to define a topic to send the message to.
I created a topic named customer-activity which records activity of customers in an online shop. You can be more creative and choose a different theme for your messages!
String topicName = "customer-activity";
Note that once you select the name of your topic, you need to create it in your Aiven for Apache Kafka® cluster. Even though you can configure Apache Kafka® to create topics automatically upon message arrival, it's best to keep that option disabled to avoid accidentally creating a bunch of unnecessary topics. You can create a topic in Aiven for Apache Kafka® using the handy CLI shortcut avn-cli-service-topic-create or follow these steps to create a topic through the Aiven console.
Here is the configuration of the topic I used, you can see that it contains three partitions and three replications:

Step # 3: create a message record
Messages can be sent in a variety of formats: String, JSON, Avro, protobuf, etc. In fact, Kafka doesn't have any opinion on the structure of data you want to send, which makes the platform very flexible. At times this gets messy, but Karapace, Aiven's open source schema registry, can help you organize your data better if needed.
For simplicity, use JSON for this example and define an object with three properties: a customer name, an operation that was performed and a product that was affected.
JSONObject message = new JSONObject();
message.put("customer", "Judy Hopps🐰");
message.put("product", "Carrot 🥕");
message.put("operation", "ordered");
Create a new ProductRecord instance by passing the topic name and the message to the constructor:
// package the message in the record
ProducerRecord<String, String> record = new ProducerRecord<>(topicName, message.toString());
logger.info("Record created: " + record);
Note, that using <String, String> indicates that the producer expects both the key and the value in String format.
Step # 4: send the record to the cluster
Finally, to send the message to Apache cluster topic, call the send() method of the producer instance and provide it with the record:
producer.send(record);
producer.flush();
producer.close();
To run the producer, call the main() method of Producer class with the help of the IDE. Alternatively, you can use Gradle and set up the tasks to run the producer, as it's done in the accompanying repository. You should see the output similar to this:

The send() method of the producer also accepts a callback interface, which provides us with metadata and information about exceptions. You can introduce it by doing the following changes:
producer.send(record, new Callback() {
    @Override
    public void onCompletion(RecordMetadata metadata, Exception exception) {
        if(exception == null) {
            logger.info("Sent successfully. Metadata: " + metadata.toString());
        } else {
            exception.printStackTrace();
        }
    }
});
producer.flush();
producer.close();
RecordMetadata and Callback will need extra imports:
import org.apache.kafka.clients.producer.RecordMetadata;
import org.apache.kafka.clients.producer.Callback;
Send multiple messages
Great, you successfully sent a single message to the cluster! However, sending messages one by one is tedious. Before moving to the consumer, transform the code to imitate a continuous (even if overly simplified) flow of data.
To do this, let's separate the method to generate messages:
static final String[] operations = {"searched", "bought"};
static final String[] customers = {"Judy Hopps🐰", "Nick Wilde🦊", "Chief Bogo🐃", "Officer Clawhauser😼", "Mayor Lionheart 🦁", "Mr. Big 🪑", "Fru Fru💐"};
static final String[] products = {"Donut 🍩", "Carrot 🥕", "Tie 👔", "Glasses 👓️️", "Phone ☎️", "Ice cream 🍨", "Dress 👗", "Pineapple pizza 🍕"};

public static JSONObject generateMessage() {
    JSONObject message = new JSONObject();

    // randomly assign values
    Random randomizer = new Random();
    message.put("customer", customers[randomizer.nextInt(7)]);
    message.put("product", products[randomizer.nextInt(7)]);
    message.put("operation", operations[randomizer.nextInt(30) < 25 ? 0 : 1]); // prefer 'search' over 'bought'

    return message;
}
And now combine the steps to generate and send data within an endless while loop. Note that using while(true) and Thread.sleep aren't things you want to do in a production environment, but for our purposes they work well:
try (KafkaProducer<String,String> producer = new KafkaProducer<>(properties)) {
    // step # 2: define the topic name
    String topicName = "customer-activity";

    // step # 3: generate and send message data
    while(true) {
        // generate a new message
        JSONObject message = generateMessage();

        // package the message in a record
        ProducerRecord<String, String> record =
                new ProducerRecord<>(topicName, message.toString());
        logger.info("Record created: " + record);

        // send data
        producer.send(record, new Callback() {
            @Override
            public void onCompletion(RecordMetadata metadata, Exception exception) {
                if(exception == null) {
                    logger.info("Sent successfully. Metadata: " + metadata.toString());
                } else {
                    exception.printStackTrace();
                }
            }
        });
        Thread.sleep(1000);
    }
}
}
Now while running the producer, you continuously send records into the cluster:

Consume the data from Apache Kafka topic
Now that the messages are generated and sent by the producer into the cluster, you can create a consumer to poll and process those messages.
Creation of a simple consumer can be divided into three steps:
public class Consumer {
    public static void main(String[] args) {
        // Step # 1: create a consumer and connect to the cluster
        // Step # 2: subscribe consumer to the topics
        // Step # 3: poll and process new data
    }
}
Here are the imports for the code below:
import org.apache.kafka.clients.consumer.ConsumerRecord;
import org.apache.kafka.clients.consumer.ConsumerRecords;
import org.apache.kafka.clients.consumer.KafkaConsumer;
import org.apache.kafka.common.serialization.StringDeserializer;
import org.slf4j.Logger;
import org.slf4j.LoggerFactory;

import java.time.Duration;
import java.util.Collections;
import java.util.Properties;
Step 1: create a consumer and connect to the cluster
Similar to how you configured the producer's properties, you need to specify connection information for the consumer.
// step # 1: create a consumer and connect to the cluster
// get connection data from the configuration file
Properties properties = Utils.loadProperties();
properties.put("key.deserializer", StringDeserializer.class.getName());
properties.put("value.deserializer", StringDeserializer.class.getName());
properties.put("group.id", "first");
properties.put("auto.offset.reset", "earliest"); //choose from earliest/latest/none
In addition to the properties that you used for producer, the consumer has a couple of new ones. First, the consumer needs to be able to deserialize the data that it reads from the cluster, so instead of serialization properties you define deserialization ones:
properties.put("key.deserializer", StringDeserializer.class.getName());
properties.put("value.deserializer", StringDeserializer.class.getName());
You also need to assign the consumer to a consumer group. Do this by specifying a group.id:
properties.put("group.id", "first");
The last thing you should define is the point from which the consumer should start reading the data when it first connects to a topic. You can define a specific offset, or, alternatively, point to either the earliest or the latest message currently present in the topic. Set auto.offset.reset to earliest to read the messages from the start.
properties.put("auto.offset.reset", "earliest");
Using the connection properties that you defined, you're ready to create the consumer:
KafkaConsumer<String,String> consumer = new KafkaConsumer<String, String>(properties);
Step 2: subscribe consumer to the topic
Subscribe the consumer to one or more topics:
String topicName = "customer-activity";
consumer.subscribe(Collections.singleton(topicName));
Step 3: poll and process new data
The last step is to poll data on a regular basis from the Apache Kafka® topic. For this use the poll() method and specify how long the consumer should wait for new messages to arrive.
// step # 3 poll andprocess new data
while (true) {
    // poll new data
    ConsumerRecords<String, String> records = consumer.poll(Duration.ofMillis(100));
    // process new data
    for (ConsumerRecord<String, String> record : records) {
        logger.info("message: " + record.value());
    }
}
Finally, it's time to start the consumer to read all the data sent by the producer. Again, you can either use the help of your IDE to run themain() method, or use the powers of Gradle – see how it's done in the accompanying repository.

Maintain the ordering of messages for every customer
With the producer and consumer created, you can now send and read the data from the Kafka cluster.
However, if you look at the records closely, you might notice that the order of the records as read by consumer is different from when they were sent by producer.
Even though it's a natural side effect of a distributed system, you often want to maintain the order across the messages. This challenge is discussed in detail in a separate blog post, ways to balance your data across Apache Kafka® partitions. In this post, we'll use one of the strategies suggested in that article: preserving the order of messages with the help of a key.
In an online shop, the order of operations performed by the customers is important. A customer first adds the product into the basket, then pays for it and only then you dispatch the item. To maintain the sequence of messages related to each individual customer when balancing data across partitions you can use id of the customer as the key.
For this on the producer side when creating a record, specify the record's key:
// create a producer record
String key = message.get("customer").toString();
String value = message.toString();
ProducerRecord<String, String> record = new ProducerRecord<>(topicName, key, value);
To see the effect of this change on the consumer side, print out the partition and offset of each record when coming from the brokers when you process data:
for (ConsumerRecord<String,String> record : records) {
    logger.info("partition " + record.partition() +
            "| offset " + record.offset() +
            "| " + record.value() );
}
Now you can run the updated producer and consumer. In the consumer output, notice that the data for each individual customer is always added into the same partition. With this, even though messages about customers can be reshuffled, messages related to the same customer maintain their original order.
You can further improve this setup by using each separate shopping trip performed by the customer as a key. Customers perform multiple shopping trips, but each trip is unique and contains the sequence of events that must stay in exactly same order when consumed. A shopping trip contains fewer records than overall activity of a customer and therefore has less probability to lead to unbalanced partitions.
Final thoughts and next steps
In this article we covered the first steps to start using Apache Kafka with the official Java client library. You can find the code used for this article in a github repository.
There is still a lot to uncover when using Apache Kafka, so if you'd like to learn more, check out these articles:
Apache Kafka® simply explained
Apache Kafka® key concepts, A glossary of terms related to Apache Kafka
Ways to balance your data across Apache Kafka® partitions
What is Karapace? Find out more about the magic that is the schema registry!
Or poke around our Apache Kafka documentation and try out Aiven for Apache Kafka.

Top comments (0)