
Preview environments serve an important role when performing code reviews for an incoming change or addition to an application's codebase. It is a fantastic way for technical and non-technical members of your team to assess and give feedback on the changes made to your application.
In previous posts of our series on FastAPI you have learned how to build a FastAPI application, deploy the application to Okteto and add a database to it using Okteto stacks. In this article, you will learn how to automatically create a preview environment for your pull requests, using Github Actions and Okteto.
What Are Github Actions
GitHub Actions are event-driven task automation tools that runs a series of command after an event has occurred. These events and commands are contained in a workflow file. The workflow file is responsible for the orderly execution by GitHub Actions.
Creating A GitHub Action Workflow
GitHub Actions are created and managed from the Actions tab in a repository. Create a new workflow from the Actions tab:

There are a number of available templates on the GitHub Actions page. However, click on the set up a workflow yourself link. This opens a new page with a default workflow, let's rewrite the workflow file:
Start by defining the name of the workflow, and the event which should trigger the execution of the workflow file:
name: CRUD App Preview Deployment

on:
  pull_request:
    branches:
      - main
In the code block above, we have set the name of the workflow, and the event to trigger the workflow. The workflow file is executed when a pull request is made to the main branch. Next, let's define the series of tasks to be executed. These tasks are called jobs in GitHub Actions.
Add the instructions below to the existing code in the workflow file:
jobs:
  preview:
    runs-on: ubuntu-latest
    steps:
    - name: checkout
      uses: actions/checkout@master

    - name: Login
      uses: okteto/login@master
      with:
        token: ${{ secrets.OKTETO_TOKEN }}

    - name: Create namespace
      uses: okteto/create-namespace@master
      with:
        namespace: pr-${{ github.event.number }}-namespace

    - name: Deploy application
      uses: okteto/deploy-stack@master
      with:
        build: "true"
        namespace: pr-${{ github.event.number }}-namespace

    - name: add comment to PR
      uses: okteto/notify-pr@master
      env:
        GITHUB_TOKEN: ${{ secrets.GITHUB_TOKEN }}
      with:
        message: "Preview environment available at https://fastapi-pr-${{ github.event.number }}-namespace.cloud.okteto.net"
In the code block above, we defined the job preview which runs on the ubuntu-latest environment. The steps to be executed under this job is defined under the steps heading. Let's go over these steps.
Replace namespace in the code block above with your Okteto default namespace.
Steps
In our preview job, we have five tasks to be executed.
checkout: This step checks out the repository using theactions/checkout@masteractions, so that the repository is accessible by the entire workflow.Login: This step logs into your Okteto account. This task makes use ofsecrets.OKTETO_TOKEN, which holds the value of your Okteto token. You'll learn how to create the secret in the next section.Create Namespace: This step creates a new namespace using theokteto/create-namespace@masteraction.Deploy Application: This step uses the actionokteto/deploy-stack@masterto deploy the application using the okteto stack file defined in the repository. Once again, we have witnessed the adaptability of Okteto stacks.add comment to PR: This step adds a comment on the pull request discussion indicating a link to the deployed application. It makes use of theokteto/notify-pr@masteraction.
Adding Your Okteto Token To GitHub
Before adding your Okteto token to GitHub, retrieve your Okteto token from your dashboard settings:
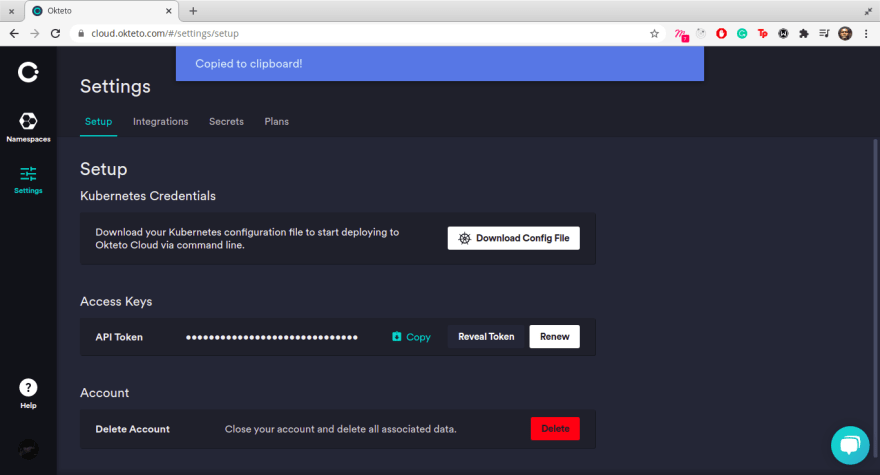
The workflow file needs your Okteto account token to function properly. Follow the steps below to add your okteto token to your GitHub repository:
i. In your repository, navigate to the Settings tab and click on the Secrets link on the menu by the left:

ii. Click on New Repository Secret

iii. Create a new secret OKTETO_TOKEN and set the value to the token you copied from your dashboard.

You can learn more on how to store and manage GitHub secrets on their official documentation.
Building The Preview Environment
With the secret in place, let's go on to create a pull request from the mongodb-crud branch into the main branch to see the workflow in action:

Immediately the pull request is created, the workflow kicks into action:

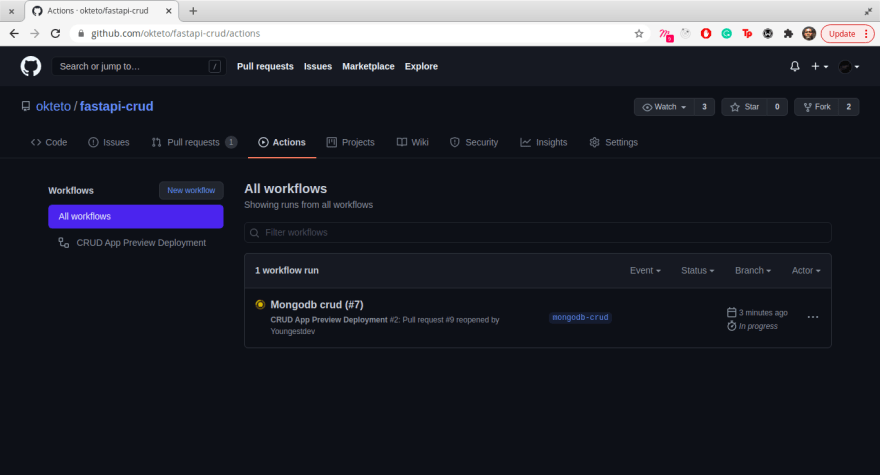
To monitor the progress of the workflow in action, navigate to the Actions tab. The current workflow is listed like in the image below:
Click on the workflow currently under execution. In the workflow page, click on the preview job to view the execution and logs of each step:

The tasks undergoing execution are listed:

With all the necessary details put in place, the execution completes successfully:

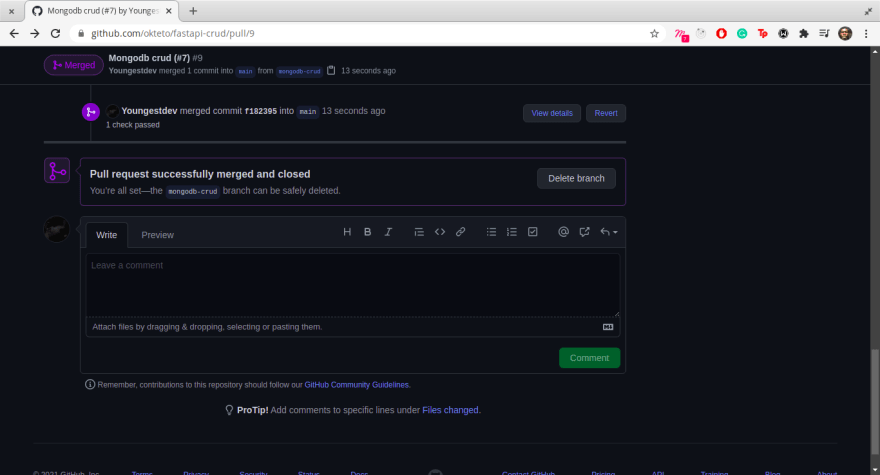
Return to the pull request thread to view the comment made by github-actions bot:

Deleting Preview Environment Namespace
The preview environment ceases to be of use after the pull request has been merged. As such, there is no point in keeping the namespace created by the workflow earlier as newer pull requests will create new namespaces. Okteto provides an action to automatically delete a namespace.
Repeating the steps followed in creating a workflow above, create a new workflow preview-close to automatically destroy the namespace after the pull request has either been merged or close:
name: Delete Preview Namespace

on:
  pull_request:
    types:
      - closed

jobs:
  build:
    runs-on: ubuntu-latest
    steps:
      - name: checkout
        uses: actions/checkout@master

      - name: Login
        uses: okteto/login@master
        with:
          token: ${{ secrets.OKTETO_TOKEN }}

      - name: Delete namespace
        uses: okteto/delete-namespace@master
        with:
          namespace: pr-${{ github.event.number }}-namespace
Remember to change namespace to your Okteto namespace.
With the workflow in place, let's merge the pull request and verify that the Delete Preview Namespace workflow was executed:
Navigate to the Actions tab and click on the workflow undergoing execution:

The namespace has been deleted successfully:
Conclusion
In this article, you built a workflow for creating a preview environment when a pull request is made to the main branch and another workflow to delete the namespace containing the preview environment after the pull request has either been closed or merged.
Once again, the deployment of the preview environment was made possible by the stack manifest we have been using from the first post in the series. This way, you are reusing the same manifest for development, deployment, and preview environments.
The complete code used in this article can be found in our GitHub repository

Top comments (0)