Wouldn't be great if your App users can generate contents and store them securely?

AWS Amplify is here to help.

Today I am going to show you how to use AWS Amplify storage to upload and view photos on your Android App. We will add this feature to the MyAuthApplication App we created on the first post of the series

- Update build.gradle (Project: MyAuthApplication) as below
// Top-level build file where you can add configuration options common to all sub-projects/modules.
buildscript {
    repositories {
        google()
        jcenter()

        maven { url '<https://jitpack.io>' }
    }
    dependencies {
        classpath "com.android.tools.build:gradle:4.0.1"

        // NOTE: Do not place your application dependencies here; they belong
        // in the individual module build.gradle files
    }
}

allprojects {
    repositories {
        google()
        jcenter()


        maven { url '<https://jitpack.io>' }

    }
}

task clean(type: Delete) {
    delete rootProject.buildDir
}
- Update build.gradle (Module:app) as below
apply plugin: 'com.android.application'

android {
    compileSdkVersion 29

    defaultConfig {
        applicationId "com.offlineprogrammer.myauthapplication"
        minSdkVersion 23
        targetSdkVersion 29
        versionCode 1
        versionName "1.0"

        testInstrumentationRunner "androidx.test.runner.AndroidJUnitRunner"
    }

    buildTypes {
        release {
            minifyEnabled false
            proguardFiles getDefaultProguardFile('proguard-android-optimize.txt'), 'proguard-rules.pro'
        }
    }

    compileOptions {
        sourceCompatibility JavaVersion.VERSION_1_8
        targetCompatibility JavaVersion.VERSION_1_8
    }
}

dependencies {
    implementation fileTree(dir: "libs", include: ["*.jar"])
    implementation 'androidx.appcompat:appcompat:1.2.0'
    implementation 'androidx.constraintlayout:constraintlayout:2.0.1'
    testImplementation 'junit:junit:4.12'
    androidTestImplementation 'androidx.test.ext:junit:1.1.2'
    androidTestImplementation 'androidx.test.espresso:espresso-core:3.3.0'

    implementation 'com.google.android.material:material:1.2.1'
    implementation 'androidx.recyclerview:recyclerview:1.1.0'

    implementation 'com.amplifyframework:core:1.1.2'
    implementation 'com.amplifyframework:aws-storage-s3:1.1.2'
    implementation 'com.amplifyframework:aws-auth-cognito:1.1.2'

    implementation 'com.github.esafirm.android-image-picker:imagepicker:2.3.0'
    implementation 'com.github.esafirm.android-image-picker:rximagepicker:2.3.0'
    implementation 'com.github.bumptech.glide:glide:4.11.0'
    annotationProcessor 'com.github.bumptech.glide:compiler:4.11.0'

}
- Make sure to run Gradle Sync
- Update the MyAuthApplication class to add the Storage Plugin as below
public class MyAuthApplication  extends Application {
    private static final String TAG = "MyAuthApplication";

    @Override
    public void onCreate() {
        super.onCreate();

        try {
            Amplify.addPlugin(new AWSCognitoAuthPlugin());
            Amplify.addPlugin(new AWSS3StoragePlugin());

            Amplify.configure(getApplicationContext());

            Log.i(TAG, "Initialized Amplify");
        } catch (AmplifyException error) {
            Log.e(TAG, "Could not initialize Amplify", error);
        }

    }
}
- Run the command below to configure the Storage Category
amplify add storage
- Set the details below when prompted
Please select from one of the below mentioned services: Content (Images, audio, video, etc.)
? Please provide a friendly name for your resource that will be used to label this category in the project: s34b23f393
? Please provide bucket name: myauthapplication00496853c7404e93a752634a073f09
? Who should have access: Auth users only
? What kind of access do you want for Authenticated users? create/update, read, delete
? Do you want to add a Lambda Trigger for your S3 Bucket? No
Successfully added resource s34b23f393 locally

If a user is part of a user pool group, run "amplify update storage" to enable IAM group policies for CRUD operations
Some next steps:
"amplify push" builds all of your local backend resources and provisions them in the cloud
"amplify publish" builds all of your local backend and front-end resources (if you added hosting category) and provisions them in the cloud
- Publish those changes by running the command below
amplify push
- Once complete it will display a confirmation as below
✔ All resources are updated in the cloud
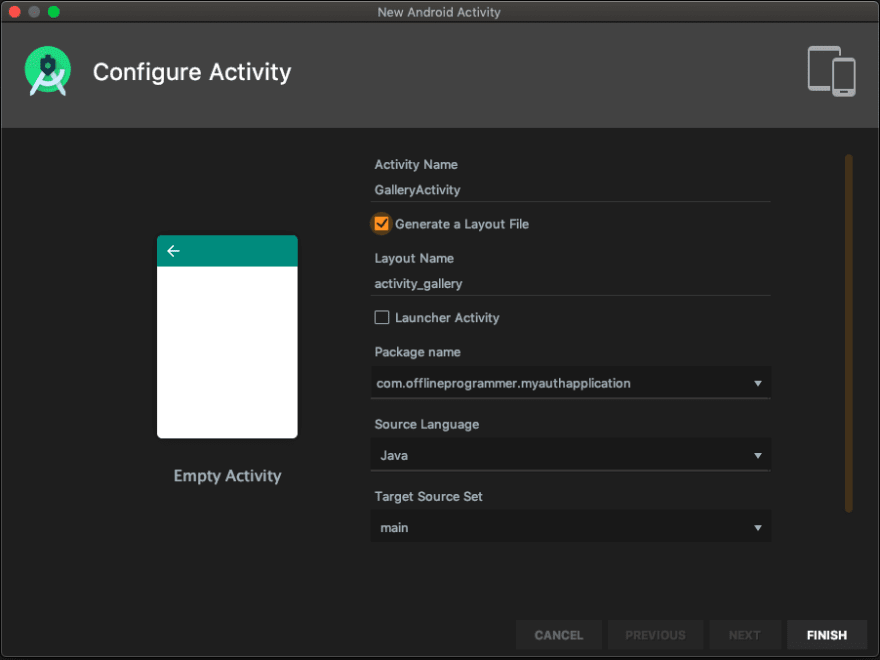
- Add a new Empty Activity. we will name it GalleryActivity
- Create ImageUrl class as below
public class ImageUrl {
    String imageUrl;

    public String getImageUrl() {
        return imageUrl;
    }

    public void setImageUrl(String imageUrl) {
        this.imageUrl = imageUrl;
    }
}
- Create the ImageUrlsAdapter class
public class ImageUrlsAdapter extends RecyclerView.Adapter<ImageUrlsAdapter.ViewHolder> {
    private static final String TAG = "ImageUrlsAdapter";
    private ArrayList<ImageUrl> imageUrls;
    private Context context;

    public ImageUrlsAdapter(Context context, ArrayList<ImageUrl> imageUrls) {
        this.context = context;
        this.imageUrls = imageUrls;

    }

    @Override
    public ImageUrlsAdapter.ViewHolder onCreateViewHolder(ViewGroup viewGroup, int i) {
        View view = LayoutInflater.from(viewGroup.getContext()).inflate(R.layout.image_itemview, viewGroup, false);
        return new ViewHolder(view);
    }

    public void add(ImageUrl item, int position) {
        imageUrls.add(position, item);
        Log.i(TAG, "add: " + item.toString());
        notifyItemInserted(position);
        //notifyDataSetChanged();
        //notifyItemRangeChanged(0, getItemCount());
    }

    /**
     * gets the image url from adapter and passes to Glide API to load the image
     *
     * @param viewHolder
     * @param i
     */
    @Override
    public void onBindViewHolder(ViewHolder viewHolder, int i) {
        Glide.with(context).load(imageUrls.get(i).getImageUrl()).into(viewHolder.img);
    }

    @Override
    public int getItemCount() {
        return imageUrls.size();
    }

    public class ViewHolder extends RecyclerView.ViewHolder {

        ImageView img;

        public ViewHolder(View view) {
            super(view);
            img = view.findViewById(R.id.imageView);
        }
    }
}
- Add a new layout file image_itemview.xml. we will use it for the imageVew as below
<?xml version="1.0" encoding="utf-8"?>
<LinearLayout xmlns:android="http://schemas.android.com/apk/res/android"
    android:layout_width="180dp"
    android:layout_height="180dp"
    android:orientation="vertical">

    <ImageView
        android:id="@+id/imageView"
        android:layout_width="match_parent"
        android:layout_height="match_parent"
        android:scaleType="fitXY" />
</LinearLayout>
- Update the activity_gallery.xml as below to add a Button and RecyclerView
<?xml version="1.0" encoding="utf-8"?>
<androidx.constraintlayout.widget.ConstraintLayout xmlns:android="http://schemas.android.com/apk/res/android"
    xmlns:app="http://schemas.android.com/apk/res-auto"
    xmlns:tools="http://schemas.android.com/tools"
    android:layout_width="match_parent"
    android:layout_height="match_parent"
    tools:context=".GalleryActivity">

    <androidx.appcompat.widget.AppCompatButton
        android:id="@+id/camera_button"
        android:layout_width="wrap_content"
        android:layout_height="50dp"
        android:layout_marginTop="10dp"
        android:text="Select Photo"
        app:layout_constraintLeft_toLeftOf="parent"
        app:layout_constraintRight_toRightOf="parent"
        app:layout_constraintTop_toTopOf="parent" />

    <androidx.recyclerview.widget.RecyclerView
        android:id="@+id/recyclerView"
        android:layout_width="match_parent"
        android:layout_height="0dp"
        android:layout_alignParentBottom="true"
        android:scrollbars="vertical"
        app:layout_constraintBottom_toBottomOf="parent"
        app:layout_constraintHorizontal_bias="0.0"
        app:layout_constraintLeft_toLeftOf="parent"
        app:layout_constraintRight_toRightOf="parent"
        app:layout_constraintTop_toBottomOf="@id/camera_button"
        app:layout_constraintVertical_bias="0.0" />

</androidx.constraintlayout.widget.ConstraintLayout>
- Update MainActivity to open the GalleryActivity when the user login successfully
public class MainActivity extends AppCompatActivity {
    private static final String TAG = "MainActivity";
    ImageButton login_with_amazon;
    TextView login_textView;
    ProgressBar log_in_progress;

    @Override
    protected void onCreate(Bundle savedInstanceState) {
        super.onCreate(savedInstanceState);
        setContentView(R.layout.activity_main);

        login_with_amazon = findViewById(R.id.login_with_amazon);
        login_textView = findViewById(R.id.login_textView);
        log_in_progress = findViewById(R.id.log_in_progress);

        login_with_amazon.setOnClickListener(new View.OnClickListener() {
            @Override
            public void onClick(View view) {
                log_in_progress.setVisibility(View.VISIBLE);
                login_with_amazon.setVisibility(View.GONE);
                login();
            }
        });

    }

    private void login() {
        Amplify.Auth.signInWithSocialWebUI(
                AuthProvider.amazon(),
                this,
                result -> {
                    Log.i(TAG, " RESULT " + result.toString());
                    runOnUiThread(new Runnable() {
                        @Override
                        public void run() {
                            login_textView.setText("Login is successfull");
                            login_with_amazon.setVisibility(View.GONE);
                            log_in_progress.setVisibility(View.GONE);
                            startActivity(new Intent(MainActivity.this, GalleryActivity.class));
                            finish();
                        }
                    });
                },
                error -> {
                    Log.e(TAG, " ERROR " + error.toString());
                }
        );

    }

    @Override
    protected void onNewIntent(Intent intent) {
        super.onNewIntent(intent);

        if(intent.getData() != null && "myauthapp".equals(intent.getData().getScheme())) {
            Amplify.Auth.handleWebUISignInResponse(intent);
        }
    }

}
- On GalleryActivity we will create a function to upload the image and another one to list the images from the Storage. See below for the GalleryActivity
public class GalleryActivity extends AppCompatActivity {
    private static final String TAG = "GalleryActivity";
    RecyclerView recyclerView;
    GridLayoutManager gridLayoutManager;
    AWSCognitoAuthSession cognitoAuthSession;
    ImageUrlsAdapter dataAdapter;
    private Button camera_button;

    @Override
    protected void onCreate(Bundle savedInstanceState) {
        super.onCreate(savedInstanceState);
        setContentView(R.layout.activity_gallery);
        recyclerView = findViewById(R.id.recyclerView);
        camera_button = findViewById(R.id.camera_button);
        gridLayoutManager = new GridLayoutManager(getApplicationContext(), 2);
        recyclerView.setLayoutManager(gridLayoutManager);

        camera_button.setOnClickListener(new View.OnClickListener() {
            @Override
            public void onClick(View view) {
                ImagePicker.create(GalleryActivity.this).returnMode(ReturnMode.ALL)
                        .folderMode(true).includeVideo(false).limit(1).theme(R.style.AppTheme_NoActionBar).single().start();
            }
        });

        Amplify.Auth.fetchAuthSession(
                result -> {
                    cognitoAuthSession = (AWSCognitoAuthSession) result;
                    switch (cognitoAuthSession.getIdentityId().getType()) {
                        case SUCCESS:
                            ArrayList imageUrlList = new ArrayList<>();
                            dataAdapter = new ImageUrlsAdapter(getApplicationContext(), imageUrlList);
                            runOnUiThread(new Runnable() {
                                @Override
                                public void run() {
                                    recyclerView.setAdapter(dataAdapter);
                                }
                            });
                            prepareData();
                            break;
                        case FAILURE:
                            Log.i(TAG, "IdentityId not present because: " + cognitoAuthSession.getIdentityId().getError().toString());
                    }
                },
                error -> Log.e(TAG, error.toString())
        );
    }

    public void onActivityResult(int i, int i2, Intent intent) {
        super.onActivityResult(i, i2, intent);
        if (ImagePicker.shouldHandle(i, i2, intent)) {
            Image firstImageOrNull = ImagePicker.getFirstImageOrNull(intent);
            if (firstImageOrNull != null) {
                uploadImage(firstImageOrNull.getPath());
            }
        }
    }

    private void uploadImage(String path) {
        if (path != null) {
            StorageUploadFileOptions options =
                    StorageUploadFileOptions.builder()
                            .accessLevel(StorageAccessLevel.PROTECTED)
                            .targetIdentityId(cognitoAuthSession.getIdentityId().getValue())
                            .build();
            File exampleFile = new File(path);
            Amplify.Storage.uploadFile(
                    UUID.randomUUID().toString(),
                    exampleFile,
                    result -> {
                        Log.i(TAG, "Successfully uploaded: " + result.getKey());
                        Amplify.Storage.getUrl(result.getKey(),
                                getUrlResult -> {

                                    Log.i(TAG, "Url: " + getUrlResult.getUrl());

                                    ImageUrl imageUrl = new ImageUrl();
                                    imageUrl.setImageUrl(getUrlResult.getUrl().toString());
                                    runOnUiThread(new Runnable() {
                                        @Override
                                        public void run() {
                                            dataAdapter.add(imageUrl, 0);
                                        }
                                    });
                                },
                                getUrlError -> Log.e(TAG, "prepareData: ", getUrlError));
                    },
                    storageFailure -> Log.e(TAG, "Upload failed", storageFailure)
            );
        }
    }

    private void prepareData() {
        Amplify.Storage.list(
                "",
                result -> {
                    for (StorageItem item : result.getItems()) {
                        Log.i(TAG, "Item: " + item.getKey());
                        Amplify.Storage.getUrl(item.getKey(),
                                getUrlResult -> {
                                    Log.i(TAG, "Url: " + getUrlResult.getUrl());
                                    ImageUrl imageUrl = new ImageUrl();
                                    imageUrl.setImageUrl(getUrlResult.getUrl().toString());
                                    runOnUiThread(new Runnable() {
                                        @Override
                                        public void run() {
                                            dataAdapter.add(imageUrl, 0);
                                        }
                                    });
                                },
                                getUrlError -> Log.e(TAG, "prepareData: ", getUrlError));
                    }
                },
                error -> Log.e(TAG, "List failure", error)
        );
    }
}
- Run the App. After a successful login you can upload a photo as below
Check the full code on github
Follow me on Twitter for more tips about #coding, #learning, #technology, #Java, #JavaScript, #Autism, #Parenting...etc.
Check my Apps on Google Play

Top comments (0)